Aah - you mean on the gear shaft end of the rod that will then accept a clamp!
Gotcha.
Hello Guest User,
Please feel free to have a look around the forum but be aware that as an unregistered guest you can't see all of it and you can't post.
To access these 'Registered Users Only' areas simply register and login.
Please feel free to have a look around the forum but be aware that as an unregistered guest you can't see all of it and you can't post.
To access these 'Registered Users Only' areas simply register and login.
Z800 Cafe Chopper Fighter thing...
Moderators: KeithZ1R, chrisu, paul doran, Taffus
-
Royalratch
- 100Club

- Posts: 366
- Joined: 3rd Jul 2009
- Location: London
Last edited by Royalratch on Fri Jan 06, 2012 12:30 pm, edited 1 time in total.


-
Royalratch
- 100Club
- Posts: 366
- Joined: 3rd Jul 2009
- Location: London
Yes! you are correct if the threaded portion is part of the link rod.
Is the link rod steel then ? as it looks like aluminium in the pic.
If it's ally i wouldn't trust the 6mm threaded portion to be strong enough.
On closer inspection of your pic though it appears to be a shouldered steel insert pressed or screwed in to the rod ?
Should be removable with little trouble if need be.
-
Royalratch
- 100Club
- Posts: 366
- Joined: 3rd Jul 2009
- Location: London
Plenty on ebay, left or right hand thread.
I've bought quite a few from this seller.
Right hand
http://www.ebay.co.uk/itm/6mm-FEMALE-ro ... 3f122a4462
Left hand
http://www.ebay.co.uk/itm/6mm-FEMALE-ro ... 4160a23e16
P.S. Just been in the workshop and noticed that the alloy clamp from an 05 ZX10R has a rose joint attached with female threads as you require,
It has to be from an 05 model though as it appeares they switched to a male thread after that.
-
Royalratch
- 100Club
- Posts: 366
- Joined: 3rd Jul 2009
- Location: London


-
Royalratch
- 100Club
- Posts: 366
- Joined: 3rd Jul 2009
- Location: London
-
Royalratch
- 100Club
- Posts: 366
- Joined: 3rd Jul 2009
- Location: London
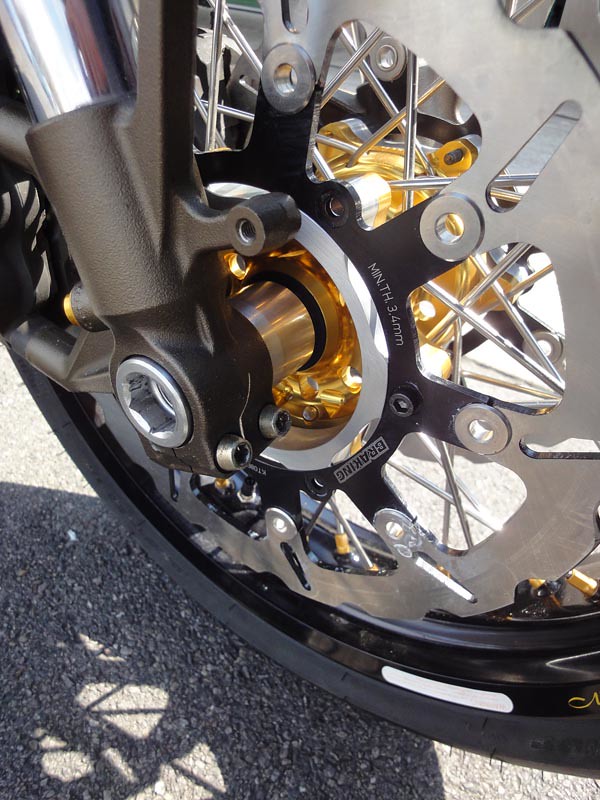
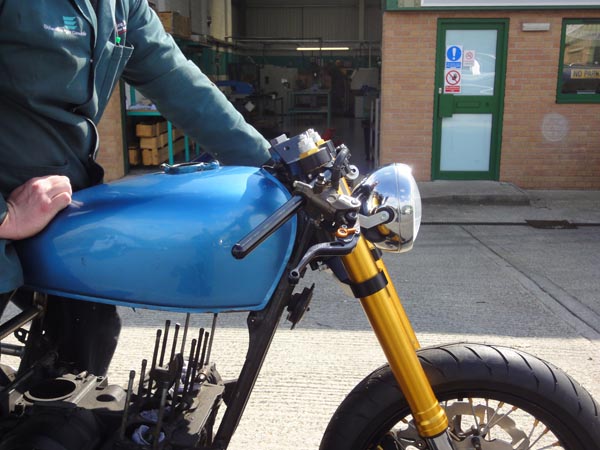
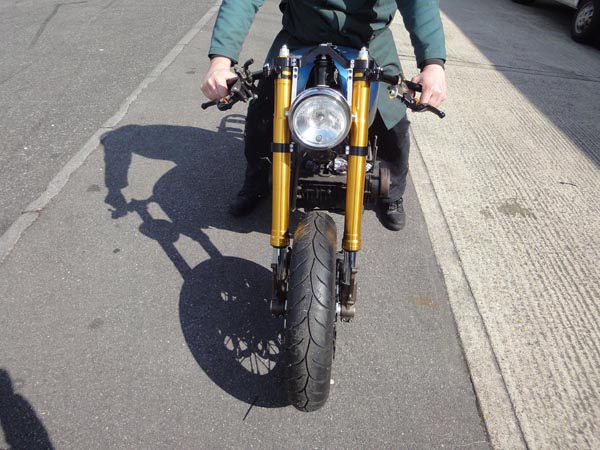
Bit of progress made but the right kind as I now have a full on rolling bike with all the trimmings.
Disk spacers have been done so can bolt on the discs.
Headlight brackets done, intreated into the clips on - will be anodised black so they are even more incognito.
The steering lock is also on, basically it;s two screws mounted onto the bottom yoke and depending on how long
they are you can tweak the steering lock.
Gear lever linkage sorted.
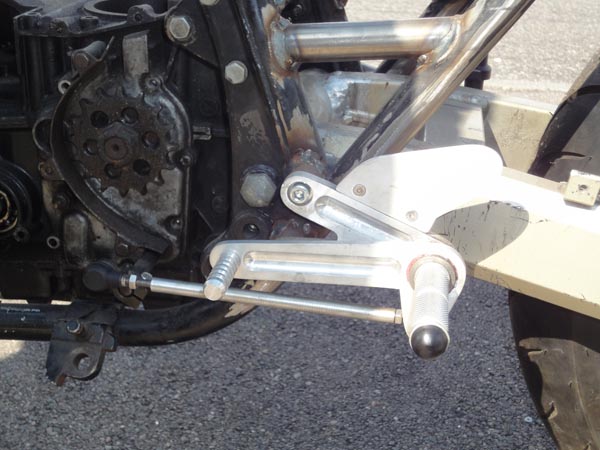
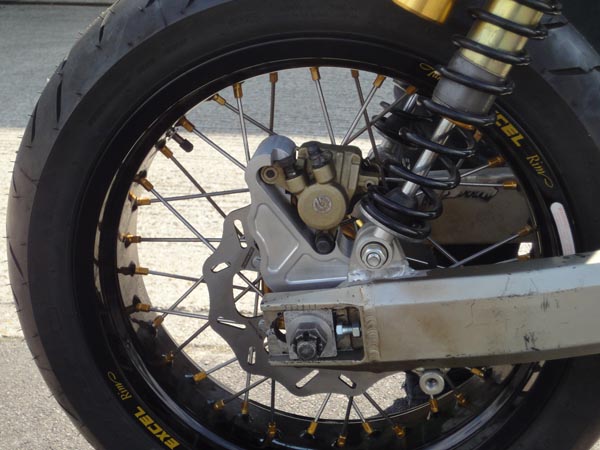
And the I had the rear calliper hanger machined from scratch. I'm not sure about this as I specified a design that was
simpler and less bulky and this looks kind of okay but way chunky. Maybe it will look better in black.

Now I basically plumb it up, throw motor in and wire it up and it's ready to go. I won't do a full build and fire up,
I'll do a full dry build and no wiring to check it's all good and everything I need is done - then disassemble and
get everything off for coating / painting.
Disk spacers have been done so can bolt on the discs.
Headlight brackets done, intreated into the clips on - will be anodised black so they are even more incognito.
The steering lock is also on, basically it;s two screws mounted onto the bottom yoke and depending on how long
they are you can tweak the steering lock.
Gear lever linkage sorted.
And the I had the rear calliper hanger machined from scratch. I'm not sure about this as I specified a design that was
simpler and less bulky and this looks kind of okay but way chunky. Maybe it will look better in black.
Now I basically plumb it up, throw motor in and wire it up and it's ready to go. I won't do a full build and fire up,
I'll do a full dry build and no wiring to check it's all good and everything I need is done - then disassemble and
get everything off for coating / painting.


-
Royalratch
- 100Club
- Posts: 366
- Joined: 3rd Jul 2009
- Location: London
Who is online
Users browsing this forum: No registered users and 12 guests