Hello Guest User,

Please feel free to have a look around the forum but be aware that as an unregistered guest you can't see all of it and you can't post.

To access these 'Registered Users Only' areas simply register and login.

project "T103"

Work in Progress

Moderators: KeithZ1R, chrisu, paul doran, Taffus

Message
Author
bondy
Regular Poster
Posts: 80
Joined: 25th Jun 2011

#46 PostAuthor: bondy » Sun Jun 26, 2011 8:59 pm

here`s a view of the clearance between the frame and air filter.

Image

another problem i have is the fuel tap. it also fowls the air filters. i`m wondering if changing the filters to single pod filters may be easier. have heard that bandit 1200 engines run shite on them though. anyone know?

Image

bondy
Regular Poster
Posts: 80
Joined: 25th Jun 2011

#47 PostAuthor: bondy » Sun Jun 26, 2011 9:00 pm

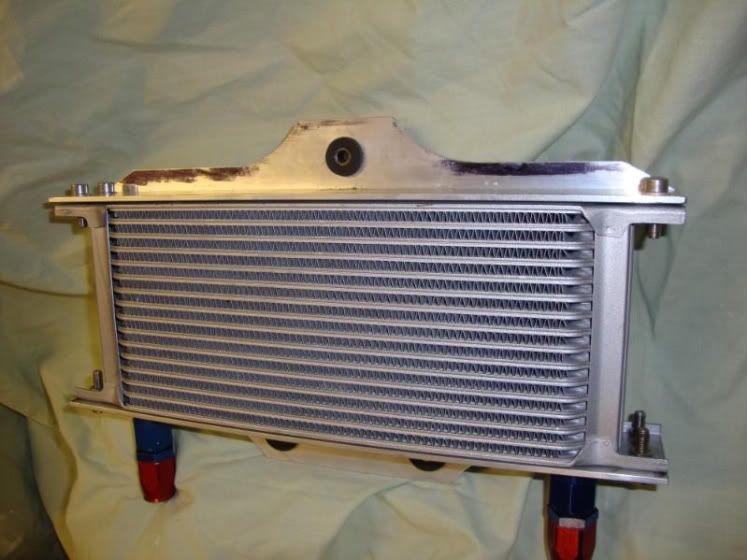
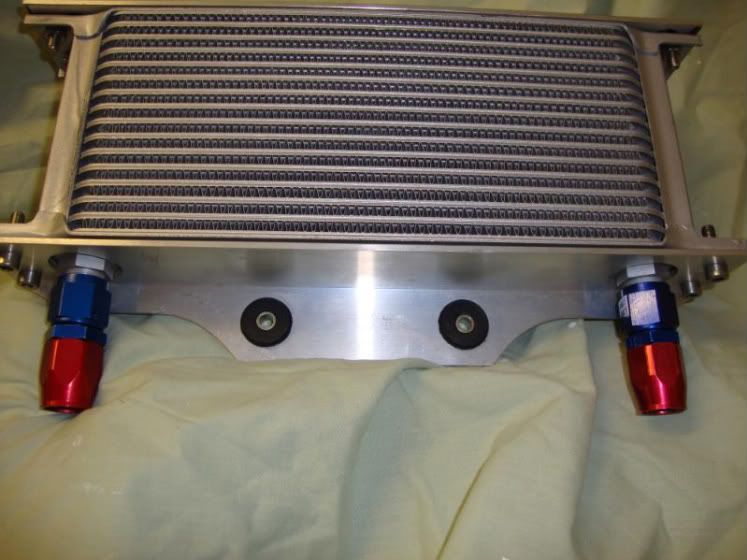
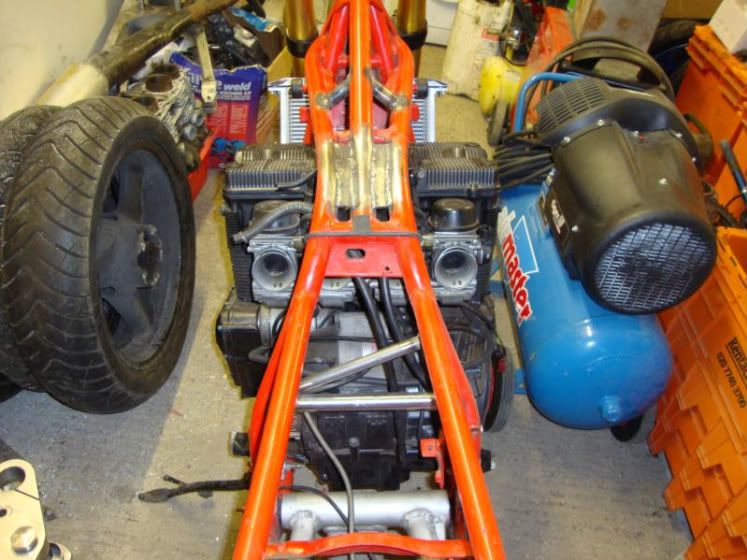
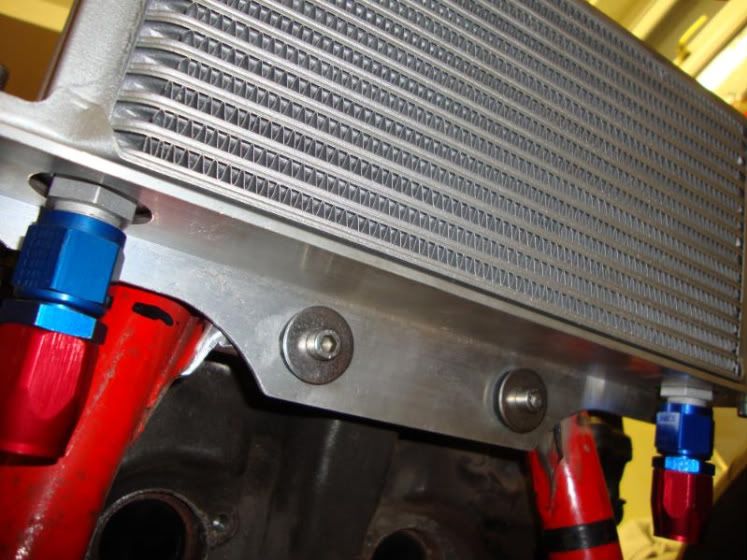
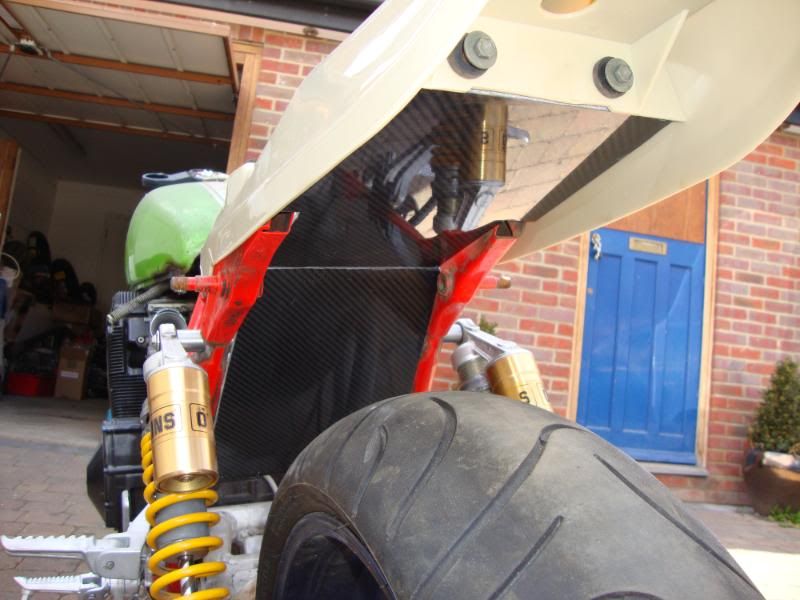
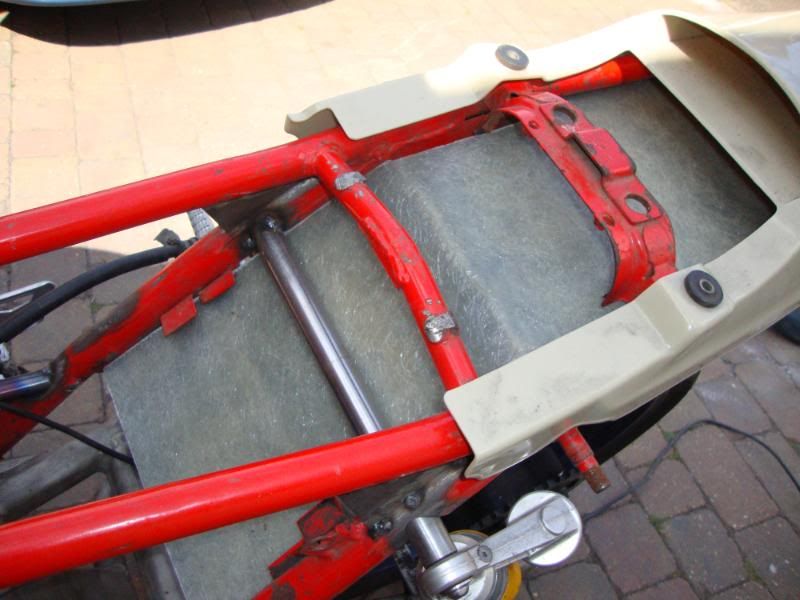
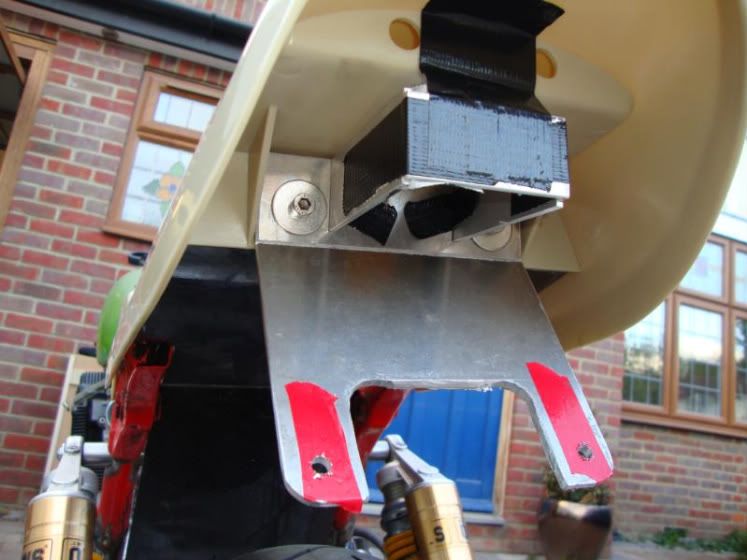
i`ve eventually received the log book through the post for the frame now. happy days. i can go hammer and tongs at the frame now not having to think about getting it re registered. i`ve been making the cooler mounts over the weekend. they have come out ok. time they are coated, they will look good. i want to make some spacer tubes to fit between the top and bottom flanges, but this can wait until i get a motor for my lathe. no rush there. i have used the rubber mounts from the bandit oil coolers. the same as i did for my bandit. i haven`t had any problems with them at all.

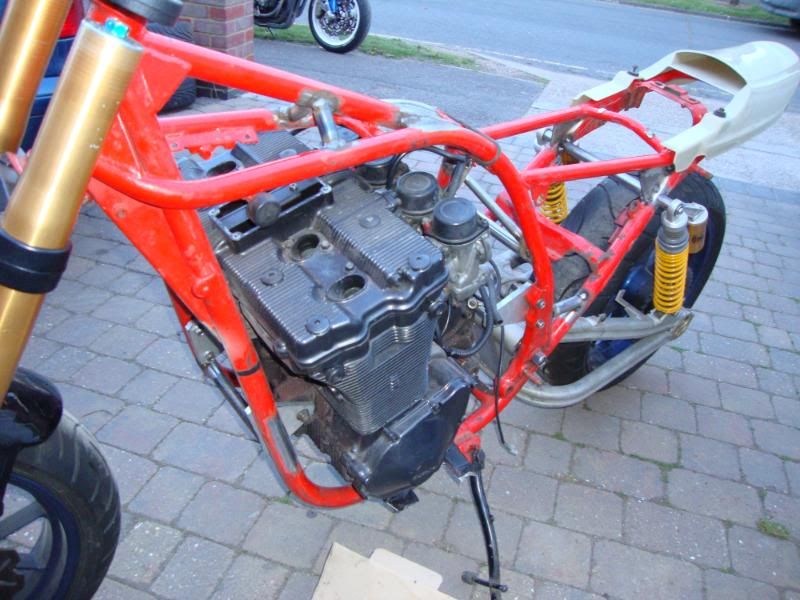
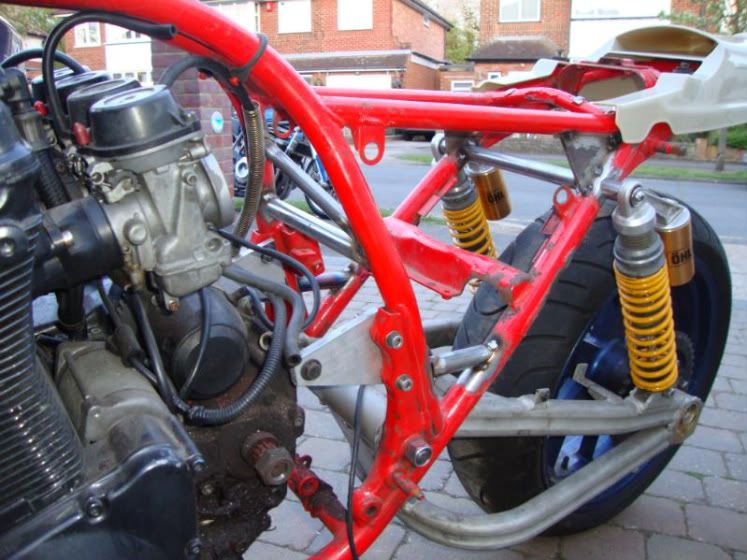
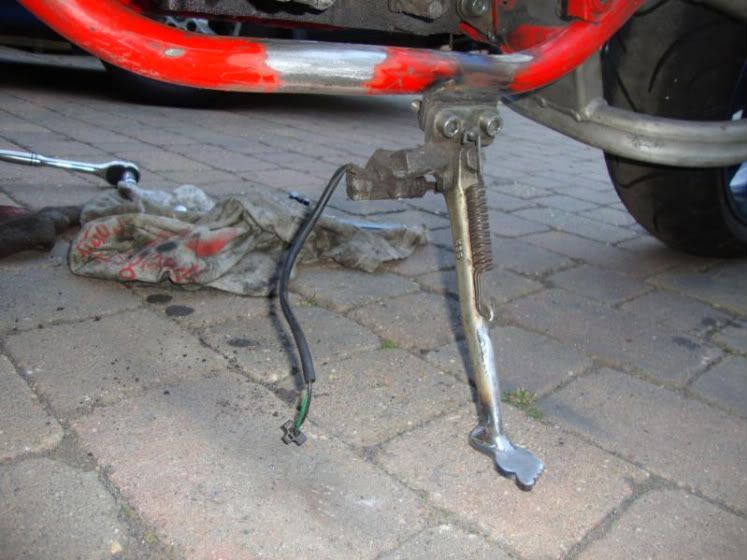
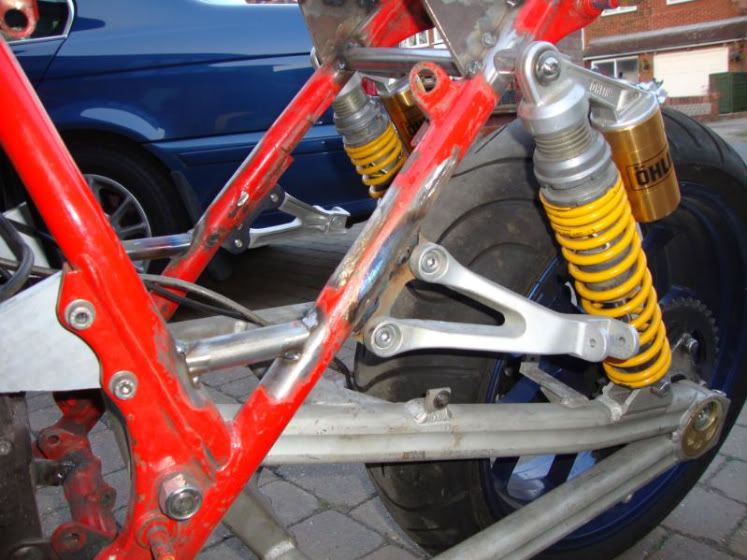
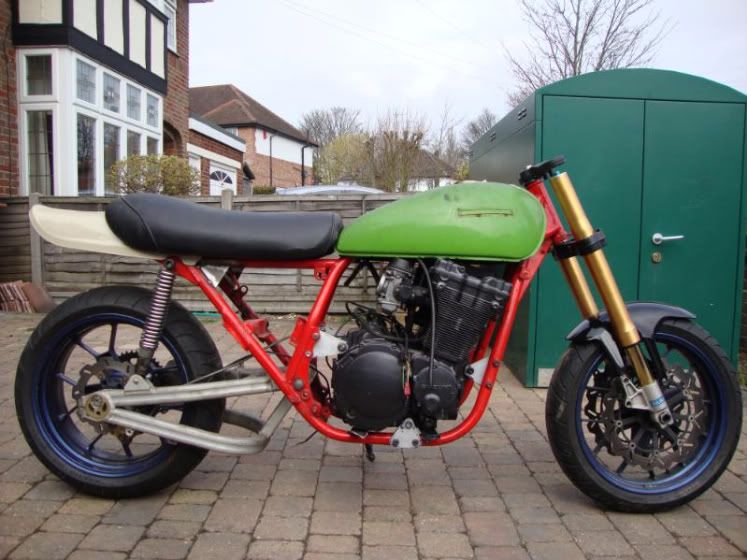
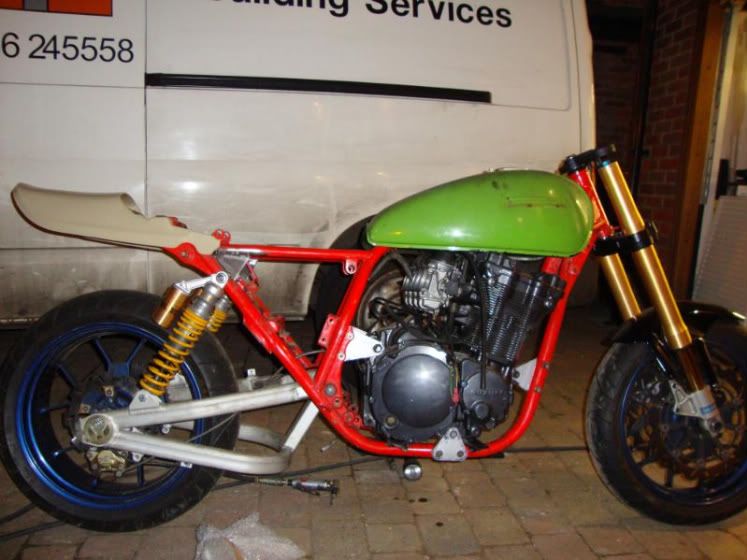
so, getting back to setting up the rake, trail, ride height, etc, etc. i have been trying to get the bike sitting so it looks right. because the aprilia forks are alot lower than the standard zed ones, to get the rake angle right, i need to drop the back of the bike down and it looks shite. i am over six feet tall, and it needs to not feel as if i`m riding a fizzy. so, i have slid the forks through the botom yoke by about 60mm. raised the rear so the swing arm angle is about 8 degrees and the rake is 25 degrees. all is looking good now. so, i need to sort out the short fork problem.

as i see it, i have 3 options.

1. massive stepped yoke.
2. extension slugs screwed into the tops of the forks.
3. longer stanchions.

the problem with 1 is the yoke will look shite against the standard bottom yoke. i am trying to keep the look "factory".

the problem with 2 is a lack of strength (possibly) by adding an extra "screwed in" part to the top of the forks. and the problems with extending the adjusters, etc.

so, now for 3. there is a company called all bike engineering. they make after market stanchions, discs, etc. they can also make stanchions that are a bit longer than standard. maybe this is the way to go. here are their web site.

http://www.allbikeengineering.co.uk/index.html

have any of you lads had any experience of getting round this problem. i am looking forward to hearing your views and opinions on this.............

bondy
Regular Poster
Posts: 80
Joined: 25th Jun 2011

#48 PostAuthor: bondy » Sun Jun 26, 2011 9:01 pm

i think i have sorted the tap issue. i picked up a pingel tap last week off the bay. nice and low on the height. i searched on ebay.com and found a top hat spacer which has the 3/8 npt thread which can be welded onto the tank. it will give me the clearance i need. i will wait for the bit to arrive from the states and take a look. it was only a fiver, so if it dont work then back on the bay it goes.

i`ve heard many people slate the extensions. i`d rather pay a bit more for the stanchions knowing they will be as strong as what was removed. a top yoke is going to cost a couple of hundred anyway.

i have all the tubes still from when i salvaged the cooler mounts.

spoke to russ at all bike engineering today. turn around service with new stanchions and cartridges fitted. £450. its gonna take a while for me to digest that.

bondy
Regular Poster
Posts: 80
Joined: 25th Jun 2011

#49 PostAuthor: bondy » Sun Jun 26, 2011 9:03 pm

a little bit of an update. nothing much though. i`ve had a bad week with the dog. in hospital for 6 days bleeding through the lining of her stomach. not good.

i picked up a cheap oil cooler off ebay a while ago, so knocked up a couple of mounts.

Image

Image

a few more spacers and mounting tubes from mike. these will get the engine mounted.

Image

bondy
Regular Poster
Posts: 80
Joined: 25th Jun 2011

#50 PostAuthor: bondy » Sun Jun 26, 2011 9:03 pm

a chance to see it in the daylight. it will be a little bit higher on the rear.

Image

i have still got to fit the new top mounts. i can just fit them into the frame where the ride height is good. i`m cutting out the old ones. just need to get motivated to do a bit more.

bondy
Regular Poster
Posts: 80
Joined: 25th Jun 2011

#51 PostAuthor: bondy » Sun Jun 26, 2011 9:05 pm

i have raised it maybe 20mm. it gives it a slight tail up look, but not too much. i have cut the holes tonight and tack welded the mounts into position. this will still give me good steering geometry.

this is before.

Image

and after.

Image

Image

Image

nice fat arse.

Image

bondy
Regular Poster
Posts: 80
Joined: 25th Jun 2011

#52 PostAuthor: bondy » Sun Jun 26, 2011 9:09 pm

the mrs and daughter went to lakeside on sunday, so my boy and me managed to get a good few hours on the build. i had him sand blasting my rear pegs and rearsets. just getting them ready for powder coating. he made a good job of them. it`s funny what the promise of a ps3 game does.

Image

Image

i popped down to my mate brians factory on saturday to pick up a couple of motors. i`m still trying to get my lathe up and running. the one he gave me nearly caught fire. fuck knows what was wrong with it. anyway, i scored some tubing ready to make the frame reinforcing parts. they are tacked ready to weld up properly once the dry build has been done.

Image

Image

Image

i started to do a little bit more to the frame tonight. the old front engine mount was chopped off and it`s ready for the new tubes to be fitted.

the cooler has now been fitted. i still need to cut away a bit of the frame behind the cooler to allow free flow of air.

Image

bondy
Regular Poster
Posts: 80
Joined: 25th Jun 2011

#53 PostAuthor: bondy » Sun Jun 26, 2011 9:12 pm

i had another day on it on saturday and a few hours tonight. i have removed the standard z1000 stand and fitted one from a zzr600. i think it just looks a bit more modern. plus, it has the stand switch. it was a bit too long, so an inch off and a new foot and it`s sorted.

Image

i promised the mrs that i would make sure this bike would be comfortable for her. the 636 rear mounts have been fitted now. these won`t normally be on the bike. only when she wants to come with.

Image

i did the last engine mount tonight, but didn`t manage to get it completely finished. a few jobs to do now are mount the seat, battery box, rear sets and exhaust mount. its then ready for the strip down. then the fun begins.

bondy
Regular Poster
Posts: 80
Joined: 25th Jun 2011

#54 PostAuthor: bondy » Sun Jun 26, 2011 9:13 pm

a bit more work done tonight. i roughed out some adapter plates for the gixer thou rearsets. they will look a lot better when i am finished with them. alot of the excess material will be removed to follow the shape of the castings.

Image

Image

the last engine mount was tacked up ready to be welded once the dry build is complete. i`m going to look at fitting the seat pan and rear brake reservoir bracket next. may be a few days though. the mrs is getting the ache with me working on "that stupid bike" for a few hours after work every day.

bondy
Regular Poster
Posts: 80
Joined: 25th Jun 2011

#55 PostAuthor: bondy » Sun Jun 26, 2011 9:17 pm

i had a go at making the undertray last saturday. i bought one of those kits off the net. it came with all that was needed to do it. i went for the kit with a clear top coat as the first layer was going to be carbon fibre. it didn`t work out perfect, but it is plenty good enough. the top coat is slightly milky in patches where it has covered slightly thicker than other places. good thing is, it can`t be seen when fitted to the bike. i measured the angle of the frame and layed the glass sheets on a piece of wood to match the angle. the slight gap between was filled and sanded back to give a good joint. this didn`t work perfectly as the filler stuck to the top coat and had to be scraped off and rubbed back. live and learn.

Image

the first layer was done with carbon fibre with 3 more layers of chopped strand matting. the overall thickness is about 5mm.

Image

out came the cereal boxes and a template was made. the bracket that supports the rear of the seat had to be adjusted slightly with an angle grinder.

Image

Image

the shape was transferred onto the carbon and it was cut to shape. it still needs the final shaping as it is touching the frame in a few places. i am aiming for a fairly uniform gap to stop chaffing. the mounts have been made but still need to be welded to the frame.

Image

Image

it gives me enough room still under the seat to fit the cdi unit, relays, etc.

Image

i will probably give the surface a quick coat of clear lacquer.

bondy
Regular Poster
Posts: 80
Joined: 25th Jun 2011

#56 PostAuthor: bondy » Sun Jun 26, 2011 9:18 pm

i better add, my young`un helped me too. he was rolling the air out as i was laying the matting and resin down. it was his work that ensured a good quality structure. err hmmm.

bondy
Regular Poster
Posts: 80
Joined: 25th Jun 2011

#57 PostAuthor: bondy » Sun Jun 26, 2011 9:20 pm

a bit more done tonight. i fabbed up the light/plate bracket. just need to finish shaping it up and get it welded.

Image

Image

bondy
Regular Poster
Posts: 80
Joined: 25th Jun 2011

#58 PostAuthor: bondy » Sun Jun 26, 2011 9:21 pm

the rear shocks are a bit soft. i can push the back down very easily. i have had a search for different ones. hagon do `em. not sure how hard the springs will be though. is it possible for me to upgrade the ohlins springs? it would be nice to keep the ohlins shocks. the undertray is now mounted. not much more to do before the strip down. i still need to make a bracket for the rear brake ressy. the battery box needs to be sorted out and the exhaust too.

still not too sure on what colours yet. i reckon the frame will be a kind of textured finish in satin black. the wheels will be high gloss black. shiny powder coated brackets, forks, shock springs, engine mounts, footrest assemblies, etc in erm, black. and the body bits in maybe either vw solid red, a crystal metallic white or maybe in er, well black. not sure yet. i do like the lambo pearl green but it might be a bit too ott.

just had a sit on it and measured the sag. it drops about 20mm with my weight on it. that aint much. but with both myself and the mrs on it, it will feel a bit soft. my bandit is rock solid though. it`s like a hard tail.

bondy
Regular Poster
Posts: 80
Joined: 25th Jun 2011

#59 PostAuthor: bondy » Sun Jun 26, 2011 9:23 pm

i picked the light bracket up from mark the welder today. that`s fitted. i`m happy with how that came out. i have chopped the shite off the top yoke and de seamed it ready for the risers to be welded to it. i cut about an inch off the length of the risers. they look better now.

Image

i have retained the 2 small lugs to fix the speedo plate to. a bit more carbon i think. :)

bondy
Regular Poster
Posts: 80
Joined: 25th Jun 2011

#60 PostAuthor: bondy » Sun Jun 26, 2011 9:24 pm

been a bit slow the last week or so. i have had the risers welded. they have been smoothed down and the square edges taken off. i`m happy with the outcome. the rear light is now fitted. i have made an alloy battery box too which mark welded up for me. i`ve been getting a few new bits too. bar end blinkers, chain and sprockets, carbon can and link pipe plus some other minor bits. still not too sure on the colours yet. was gonna go all black. a bit like this.

Image


Return to “Projects”

Who is online

Users browsing this forum: No registered users and 9 guests