Hello Guest User,
Please feel free to have a look around the forum but be aware that as an unregistered guest you can't see all of it and you can't post.
To access these 'Registered Users Only' areas simply register and login.
Please feel free to have a look around the forum but be aware that as an unregistered guest you can't see all of it and you can't post.
To access these 'Registered Users Only' areas simply register and login.
Z1000 Money Muncher
Moderators: KeithZ1R, chrisu, paul doran, Taffus


vduk wrote:I have a notion that I have seen breathers fed back to the engine via a pipe running into the filler cap - that appeals to my sense of meanness
The filler cap is usually used to vent the crankcase pressure.
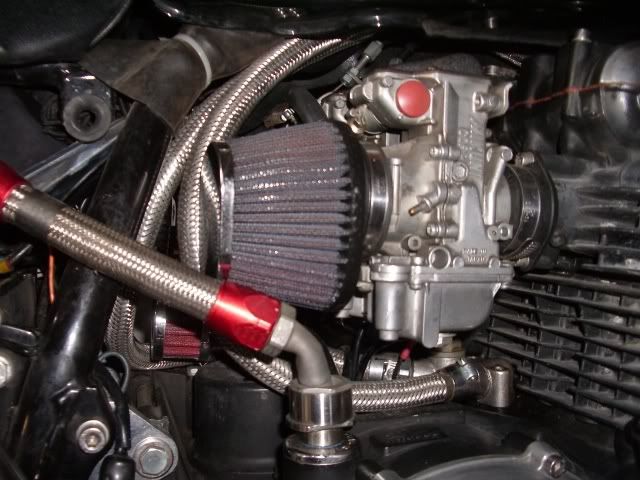
I run mine to the catch tank and have a small K&N on the breather unit (which has no internals)....

Then its time to rumble................

And on the 7th day... Zeds were created!

Ginger Bear wrote:I synchronised the slides on the bench. I used a small drill bit as a gauge & adjusted all the slides so that the drill bit was a light sliding fit beneath the slide & the carb body. Previously I had used some vacuum gauges, but the slides seemed to be miles out.
Using a (good quality) vacuum gauge is the most accurate way to balance as you are ensuring each cylinder is doing the same work as the next. i.e pumping the same amount of air as its neighbour regardless of whether the slides are in line or not. Although in perfect conditions the slides should be in line after balancing other factors such as wear in the slides / uneven compression ratios /poor valve seal /intake air leaks etc will make this hard to achieve.
-
Ginger Bear

- Hardcore

- Posts: 6850
- Joined: 16th Dec 2008
- Location: In the Dark.
- Contact:
Cheers zed1015, once I have sorted my 'rich' idle problem, I will try & sync the carbs with vacuum guages again.
I have some real problems with a very rich mixture at tickover. I have a dynojet needle & jet fitted. I changed this for a standard set up, but things still seem a little sooty. I have read allsorts on this problem, and it seems the needle jets could be the cause. Hpoefully a new set will drop through the door today. I have also had a set of air corrector jets donated by Z1000ELR (many thanks), but I am a little confused as to which air hole to fit them into. The picture that came with them suggests the air passage that feeds the main jet, but my thoughts are to fit them to the passage that feeds the pilot jet, the idea behind them, I think, is that they reduce the vacuum, so therefore reduce the amount of fuel being sucked through the pilot jet Anyhow, I have tapped both sets of holes, so I can easily experiment once I have the new neddle jets fitted, as the air correctors can be fitted without removing the carbs........ something I can now do with my eyes shut!!
I have some real problems with a very rich mixture at tickover. I have a dynojet needle & jet fitted. I changed this for a standard set up, but things still seem a little sooty. I have read allsorts on this problem, and it seems the needle jets could be the cause. Hpoefully a new set will drop through the door today. I have also had a set of air corrector jets donated by Z1000ELR (many thanks), but I am a little confused as to which air hole to fit them into. The picture that came with them suggests the air passage that feeds the main jet, but my thoughts are to fit them to the passage that feeds the pilot jet, the idea behind them, I think, is that they reduce the vacuum, so therefore reduce the amount of fuel being sucked through the pilot jet
Anyhow, I have tapped both sets of holes, so I can easily experiment once I have the new neddle jets fitted, as the air correctors can be fitted without removing the carbs........ something I can now do with my eyes shut!!Air corrector kits are usually a smaller air jet which work on the main jet system. They reduce the airflow and increase the fuel to air ratio.
You would be better looking to reducing the pilot jet size to give a less rich tickover. Check the fuel heights (not the float heights) and make sure that they are within spec. It does pay to spend a little time to make sure they are all the same.
You would be better looking to reducing the pilot jet size to give a less rich tickover. Check the fuel heights (not the float heights) and make sure that they are within spec. It does pay to spend a little time to make sure they are all the same.
Rich
diplomacy is a form of art - I was never any good at art
diplomacy is a form of art - I was never any good at art
-
Ginger Bear
- Hardcore
- Posts: 6850
- Joined: 16th Dec 2008
- Location: In the Dark.
- Contact:
Cheers Rich,
I have re-read the air restrictor instructions & it is meant to fit into the main jet air supply, so I'm sure that won't do much for the 'rich' tickover.
The pilot jets are 17.5, I have had 15's in, but didn't seem to make a lot of difference. Carbs are 28mm with K&N filters & not much exhaust! Engine is bored to 1105cc.
Fuel levels are spot on. I used an old drain plug, drilled & fitted with some clear tube to measure levels, carbs have recently been ultrasonically cleaned.
I will try the 15 pilot's again when I fit the new needle jets...... Fingers crossed.
Check what voltage you have at the coils on tickover as that will also cause it to look too rich.
4mm for the fuel height should be fine, 140 main jet will probably be too big, I think I was running 120 to 130 with that spec on the Rickman.
Open up the airscrew to 1 1/2 turns out, if still too rich a smaller pilot jet.
Look for some 29mm smoothbores (or 34mm CVs) you will notice the difference
4mm for the fuel height should be fine, 140 main jet will probably be too big, I think I was running 120 to 130 with that spec on the Rickman.
Open up the airscrew to 1 1/2 turns out, if still too rich a smaller pilot jet.
Look for some 29mm smoothbores (or 34mm CVs) you will notice the difference
Rich
diplomacy is a form of art - I was never any good at art
diplomacy is a form of art - I was never any good at art
-
Ginger Bear
- Hardcore
- Posts: 6850
- Joined: 16th Dec 2008
- Location: In the Dark.
- Contact:
Made a bit of progress today..... I think.
Waited all week for my needle jets to arrive & to be honest, they're not worth a wonk! They wont even stay in on their own!
Having stripped the carbs I decided to make a couple of changes (I know, people will say only change one thing at a time, so you know what has made the difference )
)
I refitted the dynojet needles, albeit half a notch (washer) lower, as the bike pulls fairly cleanly once you've got over the sooty tickover.
I fitted 15 pilot jets in place of 17.5's
I fitted an 'o' ring where the emulsion tube fits into the carb body, as I noticed fuel blowing out of there (& the main jet) when I had an airline connected. My thoughts are this could allow unwanted fuel to be drawn up at tickover.
I fitted a new set of plugs even though the old ones had done less than 200 miles. After reading that nobody uses porcelain any more & the replacement material will allow the spark to leak to earth if it has been contaminated.
I did my own test & compared the spark on the used plug to a brand new spanker. The spanker was a lot fatter
Any way, the bike ran really well, it was even happy to tickover for more than 30 seconds, so I whipped the plugs out to find No. 4 was quite sooty, the rest were pretty good. I thought fuel level! So I checked No. 4 & it was spot on
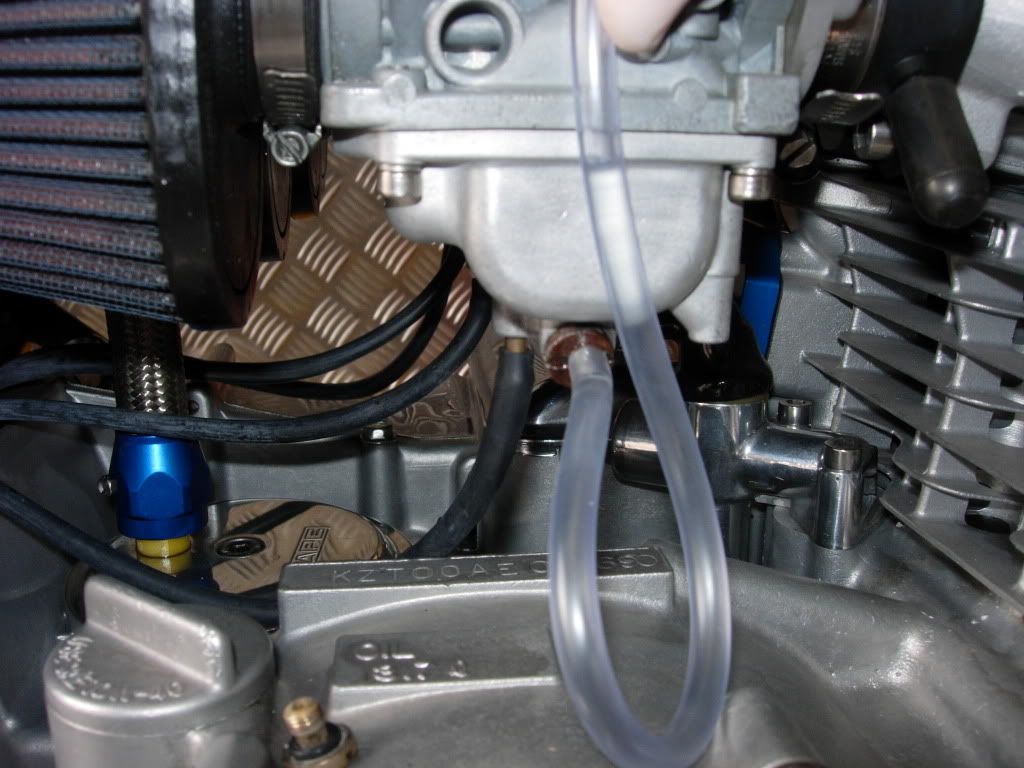
4mm below the main body.
I am a bit puzzled still, but maybe a few more miles will help
Rich thanks for your input. Coil voltage is good. I fitted a relay earlier this year, so coils are powered direct from the battery.
Waited all week for my needle jets to arrive & to be honest, they're not worth a wonk! They wont even stay in on their own!
Having stripped the carbs I decided to make a couple of changes (I know, people will say only change one thing at a time, so you know what has made the difference
)
I refitted the dynojet needles, albeit half a notch (washer) lower, as the bike pulls fairly cleanly once you've got over the sooty tickover.
I fitted 15 pilot jets in place of 17.5's
I fitted an 'o' ring where the emulsion tube fits into the carb body, as I noticed fuel blowing out of there (& the main jet) when I had an airline connected. My thoughts are this could allow unwanted fuel to be drawn up at tickover.
I fitted a new set of plugs even though the old ones had done less than 200 miles. After reading that nobody uses porcelain any more & the replacement material will allow the spark to leak to earth if it has been contaminated.
I did my own test & compared the spark on the used plug to a brand new spanker. The spanker was a lot fatter
Any way, the bike ran really well, it was even happy to tickover for more than 30 seconds, so I whipped the plugs out to find No. 4 was quite sooty, the rest were pretty good. I thought fuel level! So I checked No. 4 & it was spot on
4mm below the main body.
I am a bit puzzled still, but maybe a few more miles will help
Rich thanks for your input. Coil voltage is good. I fitted a relay earlier this year, so coils are powered direct from the battery.
-
Ginger Bear
- Hardcore
- Posts: 6850
- Joined: 16th Dec 2008
- Location: In the Dark.
- Contact:
Tried a couple of Rich's tips yesterday. Coils are new Dyna fitted with new Taylor leads. I did substitute leads, but it didn't improve the spark. I did earth the coils directly to the battery, but again no obvious improvement with the spark.
The spark is better with new plugs, but I'm sure it could be better still.
Should have a set of Davida vacuum guages arriving tomorrow (thanks Ade) so will synchronise carbs properly. I also spoke to Allens today who say they can sort me out some replacement needle jets.
Have done another couple of mods recently. I have removed my beautiful, but bulky headlight brackets.
And fitted a Ltd bracket that bolts to the underside of the top yoke using the clock mounts.
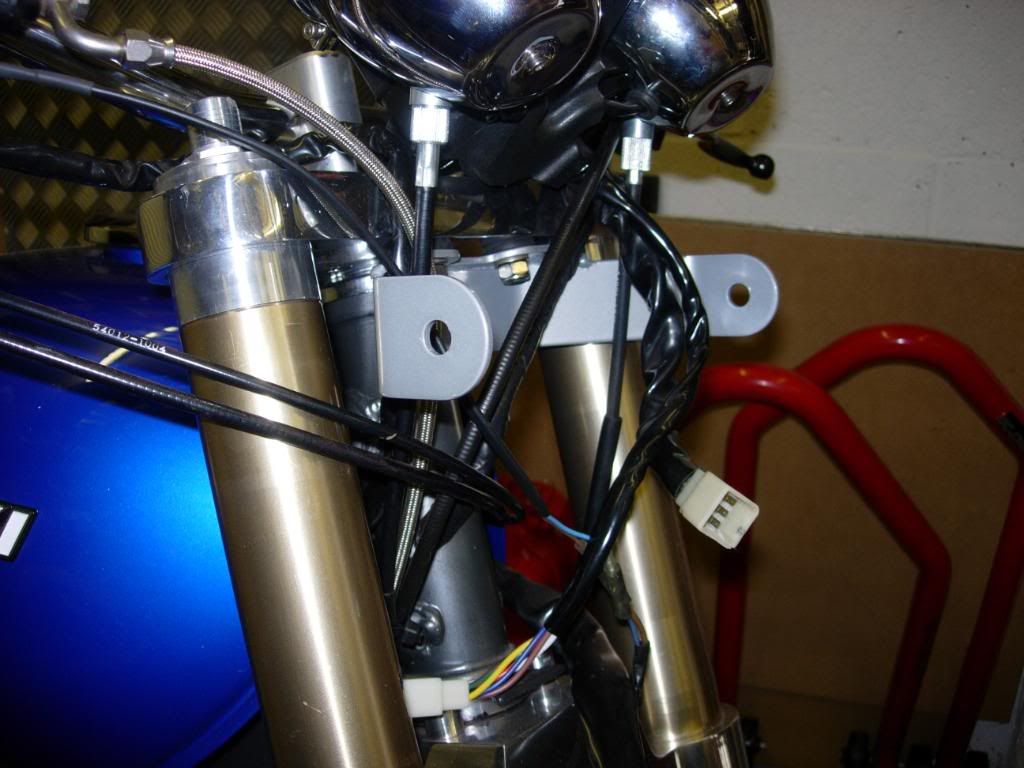
Thanks for the tip Steve R!
Bracket was originally painted black, but I had it powdercoated in silver, something I am not sure about. It may come off during the winter & be chromed.
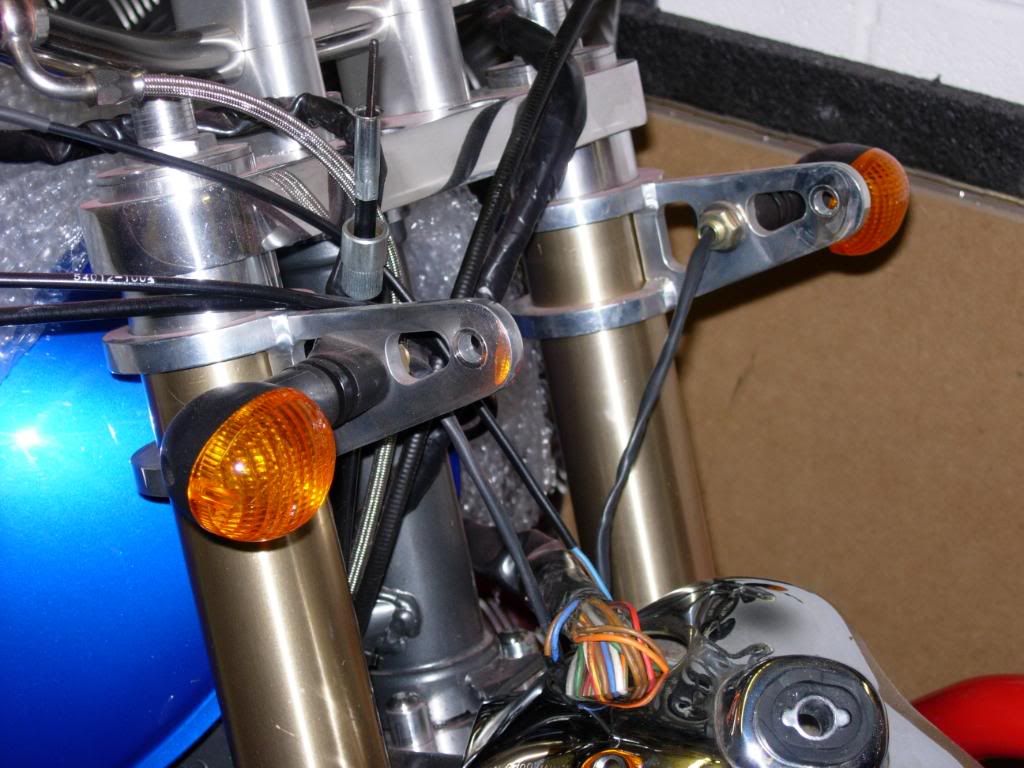
Had some trouble re-fitting the indicators, as the thread was a little short. after a couple of efforts to resolve the problem, I came up with these.
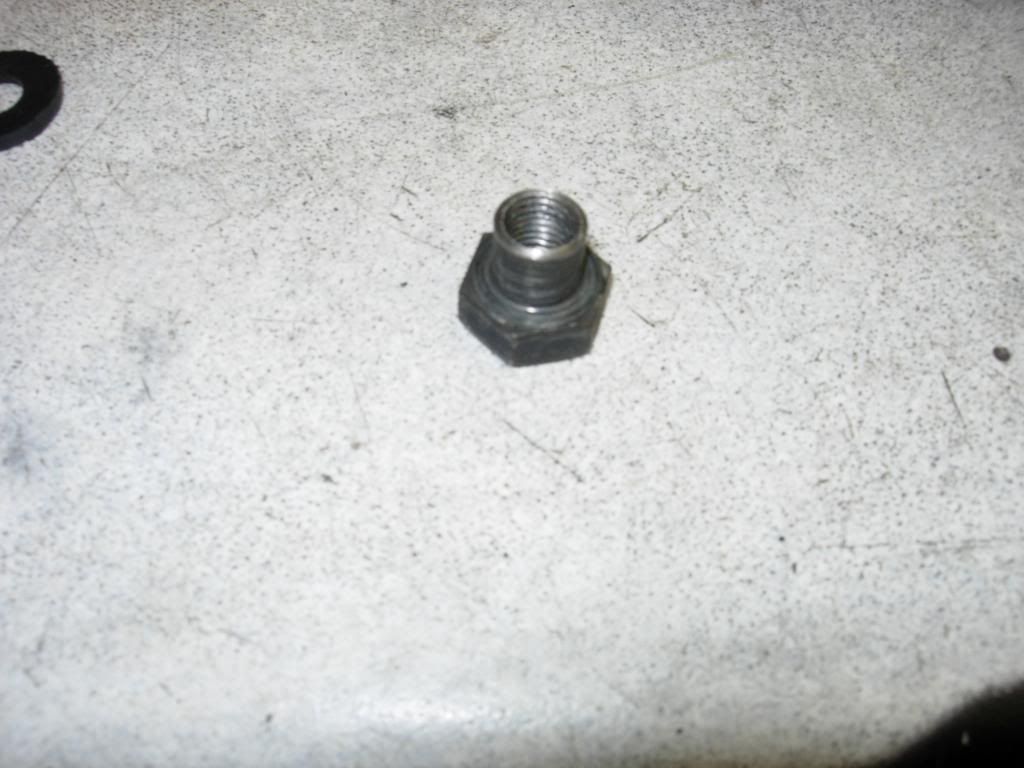
They are M12 bolts, cut down, drilled & tapped to fit the short indicator stems.
The spark is better with new plugs, but I'm sure it could be better still.
Should have a set of Davida vacuum guages arriving tomorrow (thanks Ade) so will synchronise carbs properly. I also spoke to Allens today who say they can sort me out some replacement needle jets.
Have done another couple of mods recently. I have removed my beautiful, but bulky headlight brackets.
And fitted a Ltd bracket that bolts to the underside of the top yoke using the clock mounts.
Thanks for the tip Steve R!
Bracket was originally painted black, but I had it powdercoated in silver, something I am not sure about. It may come off during the winter & be chromed.
Had some trouble re-fitting the indicators, as the thread was a little short. after a couple of efforts to resolve the problem, I came up with these.
They are M12 bolts, cut down, drilled & tapped to fit the short indicator stems.
wheels and swinging arm
hi gb. lovely zed. wot are the wheels and swinging arm off...cheers brian
-
Ginger Bear
- Hardcore
- Posts: 6850
- Joined: 16th Dec 2008
- Location: In the Dark.
- Contact:
In the pic above are you taking a reading for fuel level with engine running on static?
I've been doing mine whilst running and it does appear to make a difference.
Is it running rich all across the range or just at idle.
If 'all across the range' you can lower the dynamic fuel height by a mm to make the fuel level fractionally less accessible to the pilot system in particular but it will effect the whole setup so a little care needed here.
Are the carbs bouncing at idle? Now that they are not supported at the rear i mean. When i had the pod filters on i had to make a little bracket for the top of the carbs to stop them rattling the fuel out of the float bowls.
Have you succumbed to the temptation to reduce the gap on the spark plugs in order to get a fatter spark?
Had done this and when i put the coil relay on and the taylor leads it pretty much wouldnt fire then i remembered what i had been doing a week before!!!
I had them down at 20 thou thinking that the sparks were going senile and needed a little helping hand to find their way home. Opened the gaps up (as per Dyna high output greens) and hey presto; enough to light a bucket of pi55 as zed1015 would say.
Final question; are you're pilot adjusting screws air bypass screws or fuel en richening screws.
Cross examination over
AL
Off to the scrap yard to pick up some old spark plugs!!
-
coldsummer

- Hardcore
- Posts: 3211
- Joined: 29th Jun 2009
- Location: Berkeley
Who is online
Users browsing this forum: No registered users and 9 guests