Steve,
You can't beat a Starrett hole saw.
I am following your thread with ever increasing interest, well done.
Regards
Steve
Hello Guest User,
Please feel free to have a look around the forum but be aware that as an unregistered guest you can't see all of it and you can't post.
To access these 'Registered Users Only' areas simply register and login.
Please feel free to have a look around the forum but be aware that as an unregistered guest you can't see all of it and you can't post.
To access these 'Registered Users Only' areas simply register and login.
GB's Modded Z900 now on a runaway budget!
Moderators: KeithZ1R, chrisu, paul doran, Taffus
-
Ginger Bear

- Hardcore

- Posts: 6850
- Joined: 16th Dec 2008
- Location: In the Dark.
- Contact:
Didn't find too much spare time this week. 
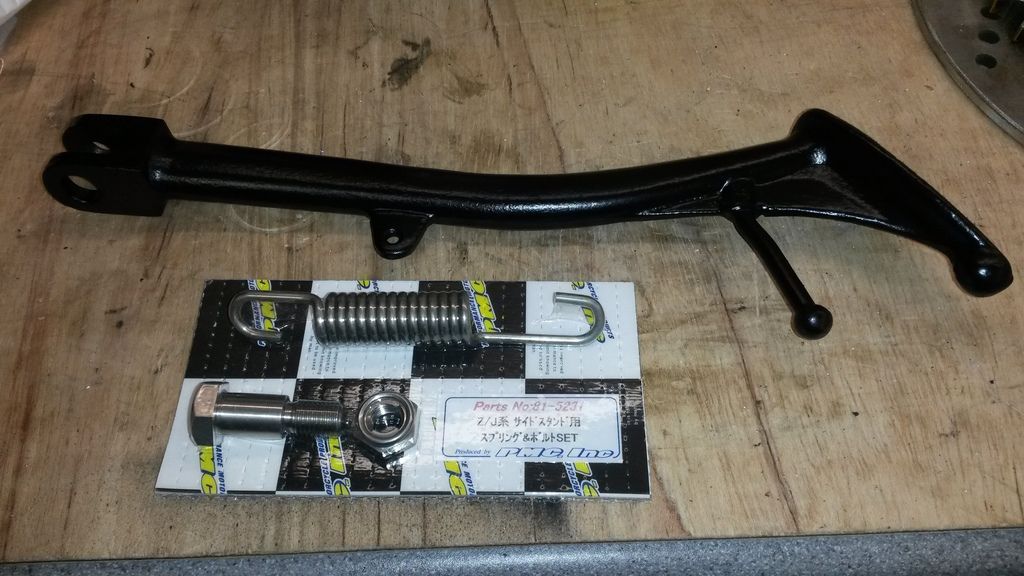
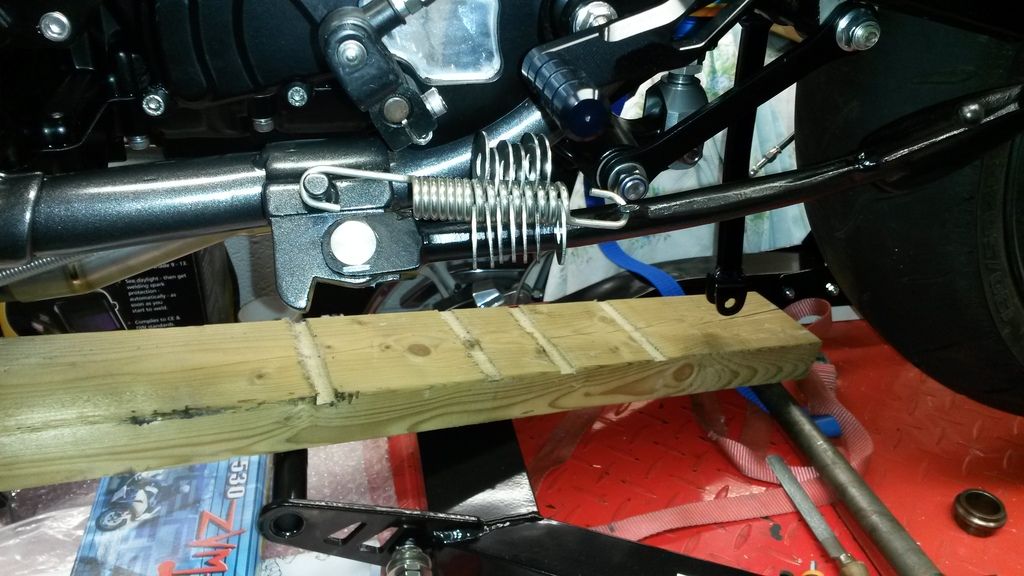
Having completely non standard running gear on this, it's possible a standard side stand will be too long, hopefully not, but I need to start somewhere, until I get the bike off of the lift.
Gave this std stand a good scrub & a few coats of Hammerite satin black, fitted it with a new stainless bolt & spring, using the 'washer trick' I picked up from this forum.


# 104
Phil Churchett Award Winner 2011 & 2016
Buzzworkz Best Modified Zed 2016
-
Ginger Bear
- Hardcore
- Posts: 6850
- Joined: 16th Dec 2008
- Location: In the Dark.
- Contact:
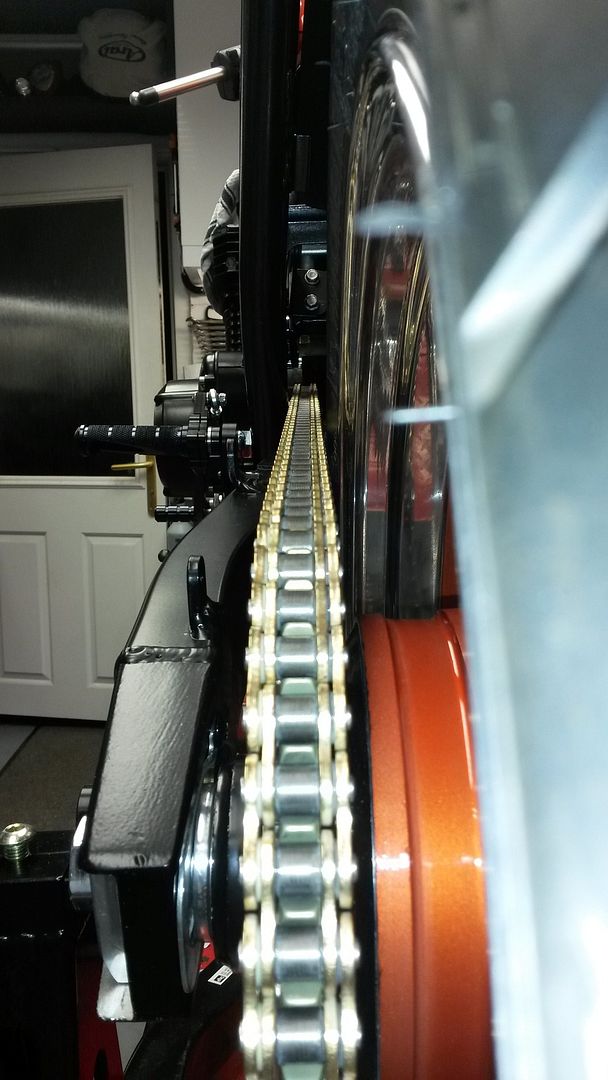
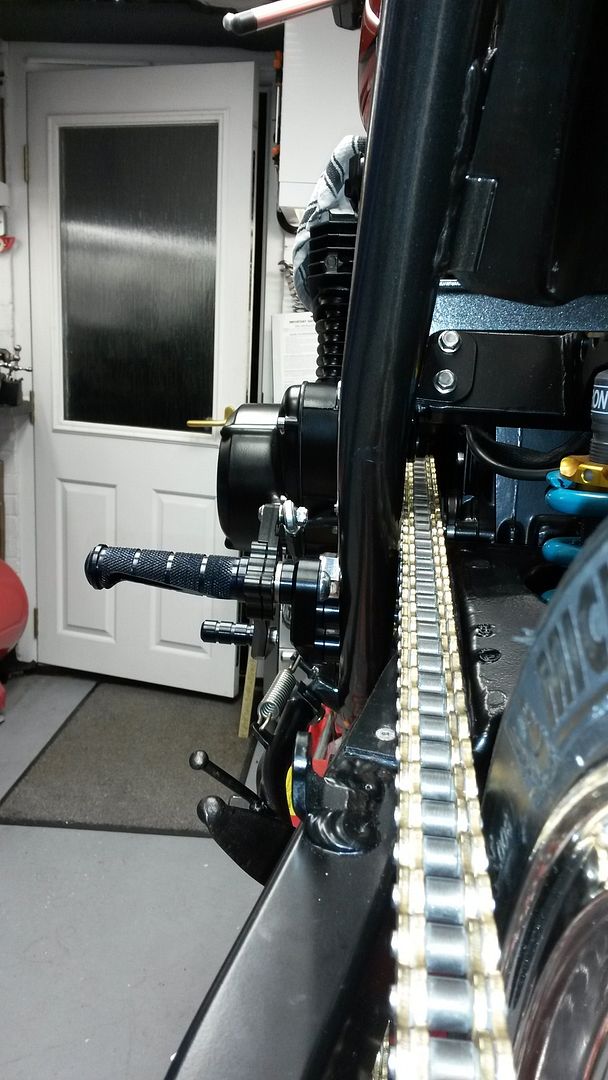
I've also dealt with the chain. 
Sprocket carrier needed to be machined down to bring the rear sprocket in-line with the front.
First job was to bolt the already factory machined face of the carrier to the face plate & trim off the bottoms of the drive lugs which were cast & wouldn't have let the carrier sit true on the face plate.
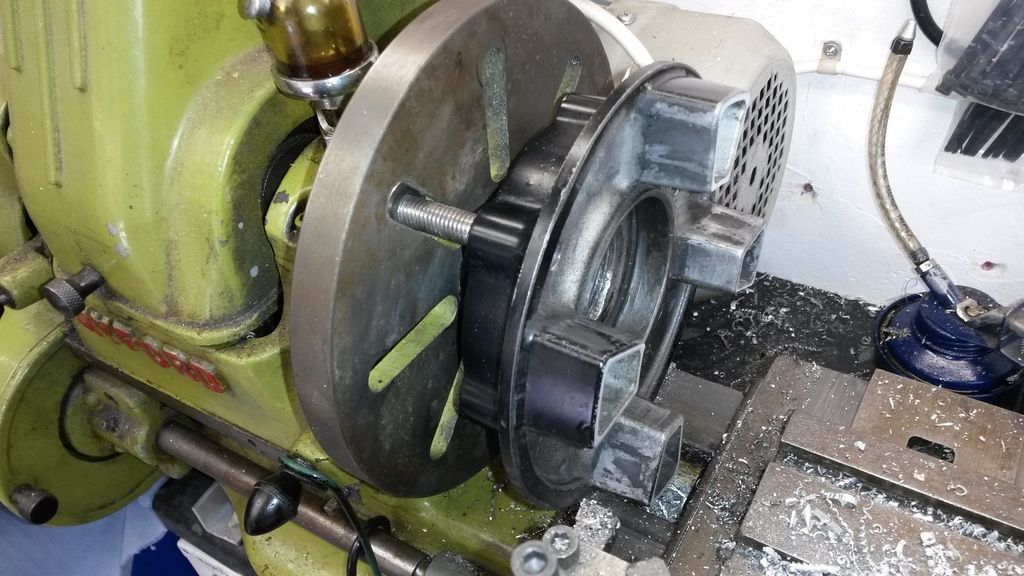
Next was to flip it over and machine off enough material so that the sprockets line up.
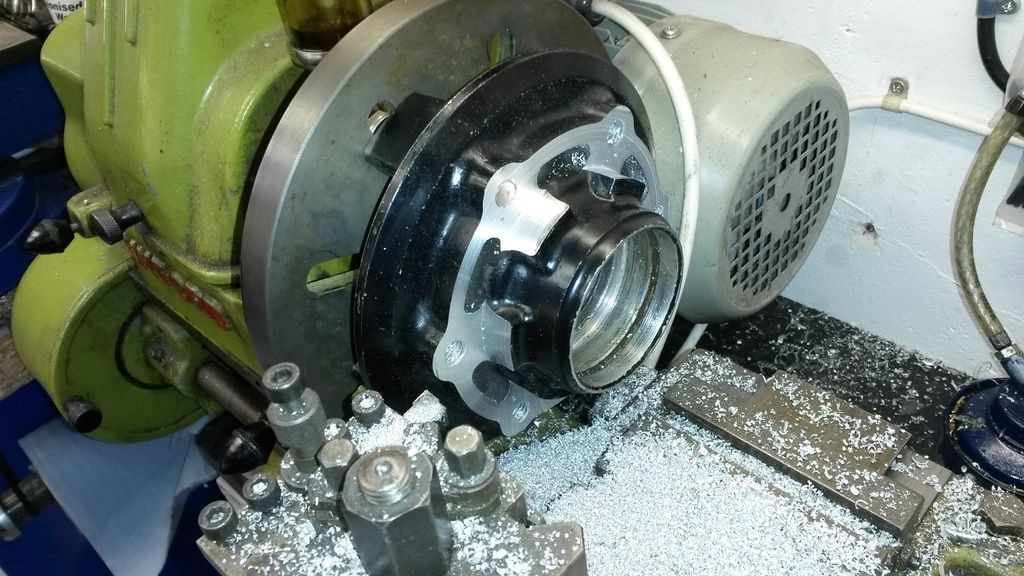
Got it all back together, I've never had one as close as this & I've done this mod twice before.


# 104
Phil Churchett Award Winner 2011 & 2016
Buzzworkz Best Modified Zed 2016
-
Is Vic There
- Hardcore
- Posts: 1460
- Joined: 8th Nov 2011
- Location: Brisbane, Australia.
-
Ginger Bear
- Hardcore
- Posts: 6850
- Joined: 16th Dec 2008
- Location: In the Dark.
- Contact:
-
Ginger Bear
- Hardcore
- Posts: 6850
- Joined: 16th Dec 2008
- Location: In the Dark.
- Contact:
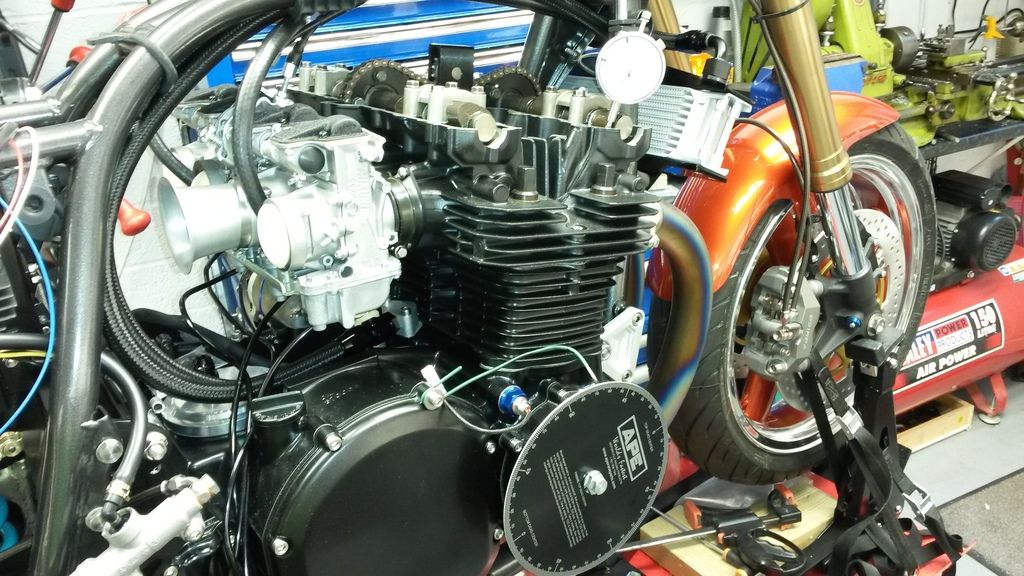
Just finished fitting & degreeing my Andrews/PSP 3X cams.
A job I've been putting off for long enough.

I can now report all went well & I don't know what the feck I was worried about.
One thing I have discovered is that the cam cover will require a little modification/machining to fit over the APE sprocket tower.
A job I've been putting off for long enough.
I can now report all went well & I don't know what the feck I was worried about.
One thing I have discovered is that the cam cover will require a little modification/machining to fit over the APE sprocket tower.

# 104
Phil Churchett Award Winner 2011 & 2016
Buzzworkz Best Modified Zed 2016

-
Ginger Bear
- Hardcore
- Posts: 6850
- Joined: 16th Dec 2008
- Location: In the Dark.
- Contact:
-
Ginger Bear
- Hardcore
- Posts: 6850
- Joined: 16th Dec 2008
- Location: In the Dark.
- Contact:
Okey Dokey....... A few more steps forward.
I managed to machine (then finish with a bastard file) clearance in the cam cover to clear the APE cam chain idler adaptor (proper name )
)
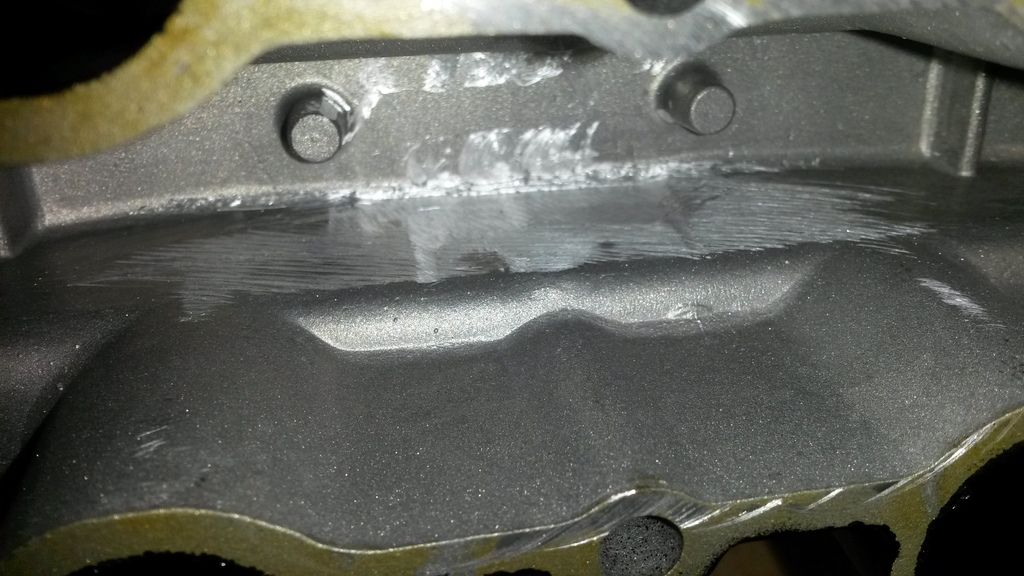
Sorry I didn't take any before pics.
It appears the cam cover won't clear the top idler & can only be fitted by removing the carbs & installing it from behind the block.
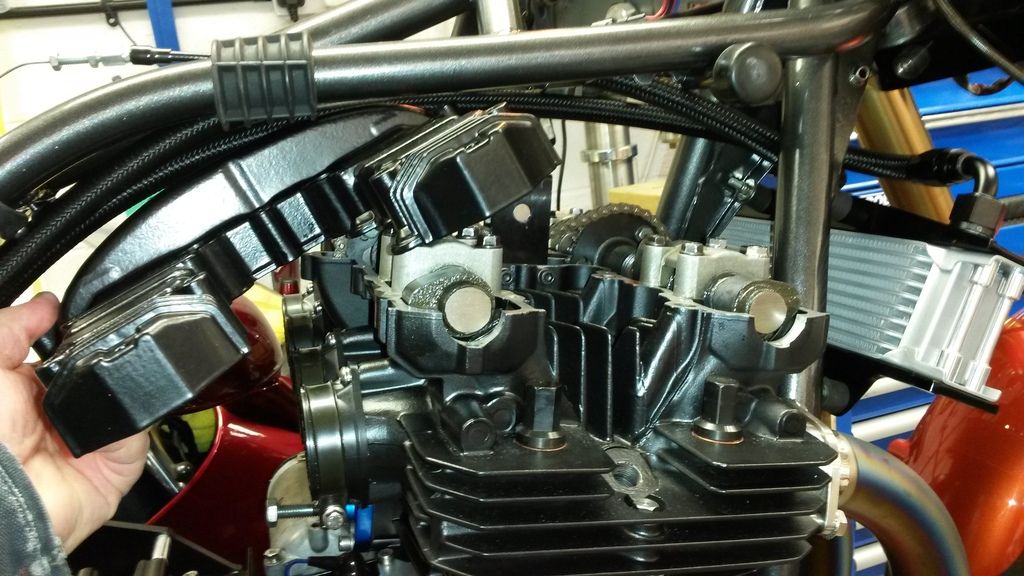
I wasn't 'over the moon' with this, but after seeing Mikey earlier today & discovering that removal of a GPz900 starter motor requires dismantling of most of the bike, I thought better of it & decided to count my lucky stars.
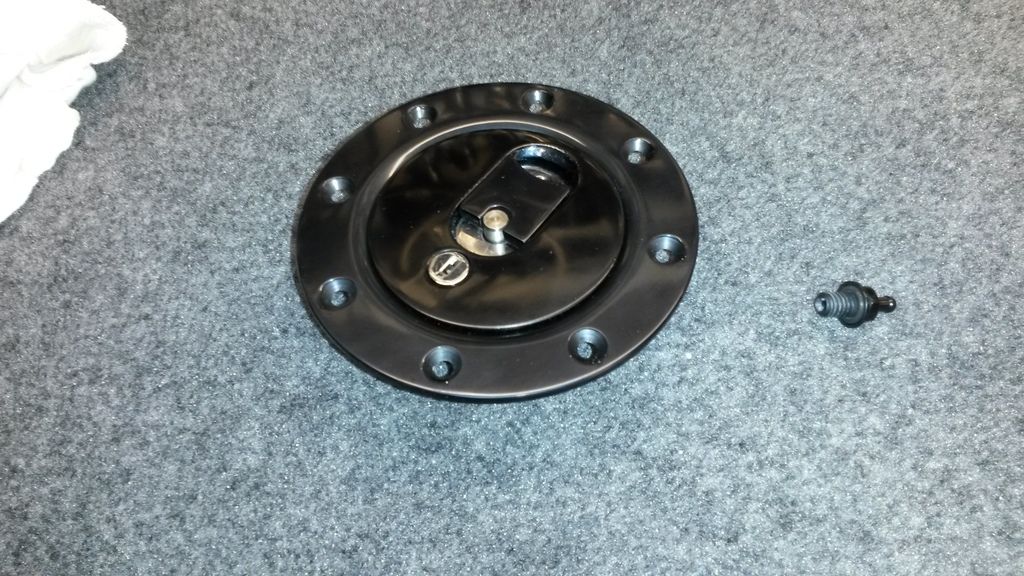
Whilst at Mikey's I collected my freshly black anodised fuel filler parts.

After 10 minutes puzzling, I had it all back together.
I managed to machine (then finish with a bastard file) clearance in the cam cover to clear the APE cam chain idler adaptor (proper name

Sorry I didn't take any before pics.
It appears the cam cover won't clear the top idler & can only be fitted by removing the carbs & installing it from behind the block.

I wasn't 'over the moon' with this, but after seeing Mikey earlier today & discovering that removal of a GPz900 starter motor requires dismantling of most of the bike, I thought better of it & decided to count my lucky stars.
Whilst at Mikey's I collected my freshly black anodised fuel filler parts.

After 10 minutes puzzling, I had it all back together.

# 104
Phil Churchett Award Winner 2011 & 2016
Buzzworkz Best Modified Zed 2016
Little Sub-Note for MkII cam cover swap.
The top cam idler has an off-set bracket holding the sprocket, this (I assume) is to aid removing the cam cover. When I swapped the Square cam cover for a Rounded one (on me project Z1000MkII) I had to fit an older style "top idler". These have a symmetrical bracket which fits with the cam cover - but makes it harder to remove the cam cover .... so a similar senario with removing carbs was necessary
Anyhow - great work GB
And on the 7th day... Zeds were created!
-
Zomerset Zed

- 100Club

- Posts: 129
- Joined: 30th May 2014
- Location: Somerset
Who is online
Users browsing this forum: No registered users and 27 guests