
I'm really enjoying the attention to detail here.
One question though is your master cylinder clamps which have mirror bosses on them. Did you buy the whole cylinders complete or are the clamps available seperately.
Hello Guest User,
Please feel free to have a look around the forum but be aware that as an unregistered guest you can't see all of it and you can't post.
To access these 'Registered Users Only' areas simply register and login.
Please feel free to have a look around the forum but be aware that as an unregistered guest you can't see all of it and you can't post.
To access these 'Registered Users Only' areas simply register and login.
new member with Z900 project
Moderators: KeithZ1R, chrisu, paul doran, Taffus

Mr P: thanks, I'll order some K&N oil. I wanted to keep the red but it didn't occur to me that there was an easy solution.
tlc: the master cylinders came with two pairs of clamps, one with mirror bosses, and one without. I bought them from Talon, who are the Braking importers. They had to order them specially from Italy but were a lot cheaper than Brembo ones and came complete with fluid reservoirs. Beware the bolt spacing if you buy clamps on their own, they have to align perfectly with the rest of the assembly.
tlc: the master cylinders came with two pairs of clamps, one with mirror bosses, and one without. I bought them from Talon, who are the Braking importers. They had to order them specially from Italy but were a lot cheaper than Brembo ones and came complete with fluid reservoirs. Beware the bolt spacing if you buy clamps on their own, they have to align perfectly with the rest of the assembly.
The K&N oil arrived and Mr P was right. The filters are now a nice deep red colour. I've never used K&N oil before and had no idea it was red. That's the fantastic thing about this site, there's always someone out there who can help.
So, I wired up the ignition system, set the timing about right using a multimeter and jury-rigged a basic electrical system. I put some new fuel in the tank, connected the hose to the carbs, turned the fuel on, opened the choke and pressed the starter button.
It started first time! I was absolutely amazed. I have never built an engine before (although I was an engineer in a previous life) and I thought the likelihood of success first time was close to zero. It ticked over very nicely with no nasty noises and sounded perfect. It has taken me 13 months to get here and I reckon that the bike hadn't run for at least 10 years and probably more than 20. Very chuffed indeed. I didn't run it for long as the alternator isn't connected yet and I want to check the oil level. I filled it to the top of the sight glass but it only took 3 litres so I guess it will need some more now that the oil circuit and filter are fully primed.
Tomorrow I'm going to start putting a proper wiring harness together. I decided to go with factory-made Venhill hoses in the end and they arrive next week (as should a vacuum bleeder from Ralph) so I can then get on with the finishing off the clutch and brakes.
The plan is to get it on the road by Easter. There's a Kawasaki day at the Ace Cafe on 28th April which gives me a good date to aim for.
-
zmaxmotorsports
- Regular Poster
- Posts: 96
- Joined: 9th Jan 2013
- Location: louisville ne
Thats a beautiful swingarm youve got there!LondonZ1 wrote:slow progress....
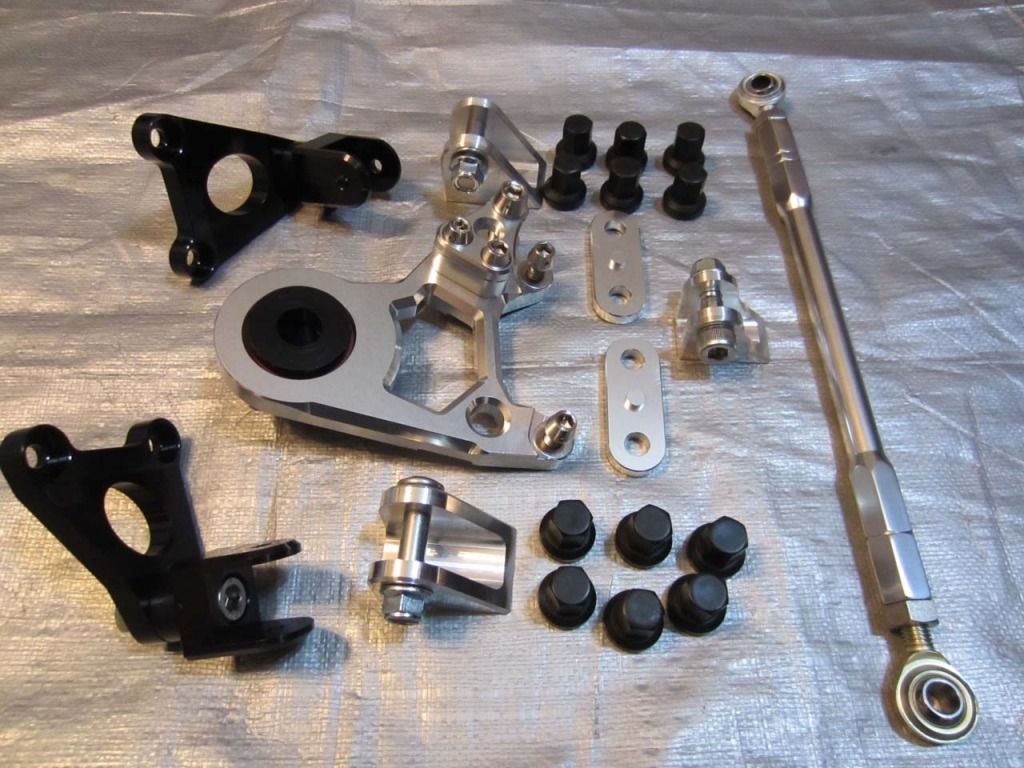
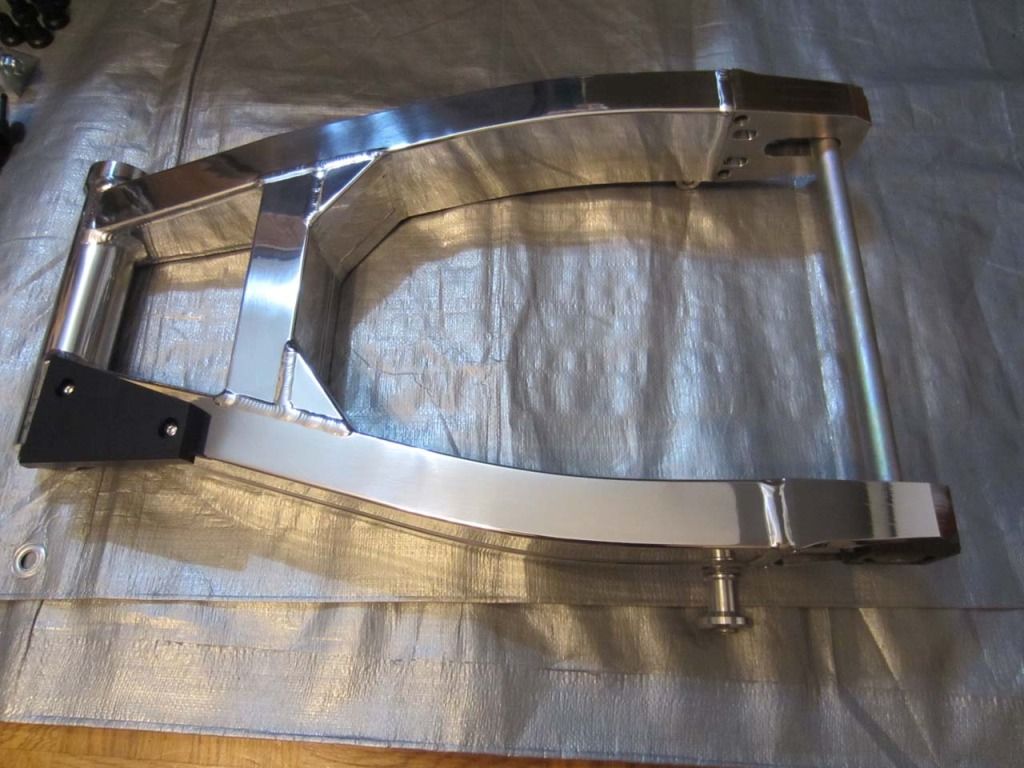
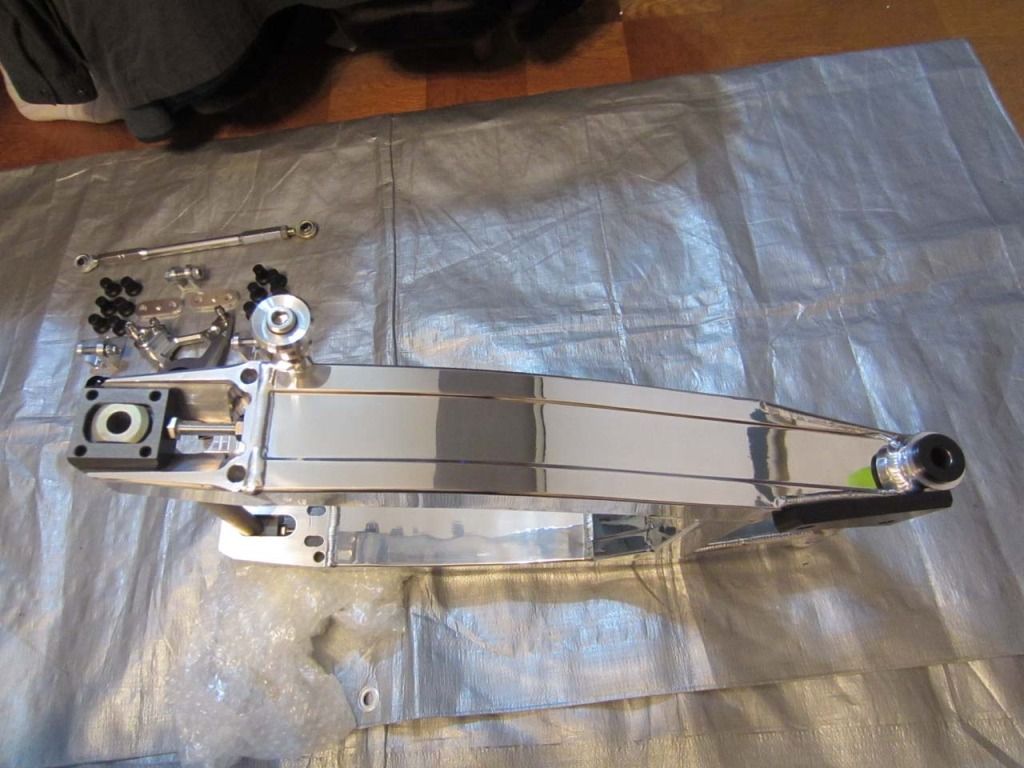
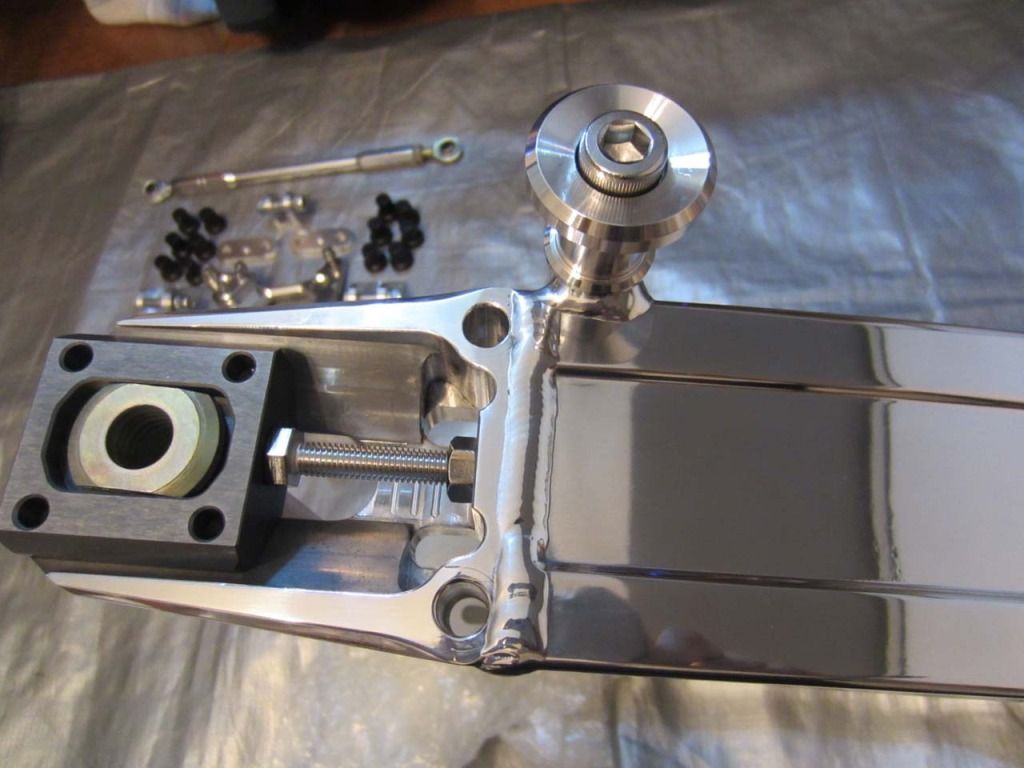
Sanctuary have now made the arm and the other bits I ordered: rear caliper bracket, pillion peg hangers, torque arm etc. The arm looks great IMHO and will go off to Harris to get the brackets welded on as soon as it arrives in the UK. The engine is off being powdercoated at Triple S and assembly is scheduled for August. The tank will soon be en route to flying tiger so it's all finally coming together.
Well now that Ive read through the whole thing,the whole bike is totally insane!

Kent Cam Lube - pour it all over when you put the buckets and cams in and then forget about it.
http://www.rimmerbros.co.uk/Item--i-RX1358
http://www.rimmerbros.co.uk/Item--i-RX1358
Rich
diplomacy is a form of art - I was never any good at art
diplomacy is a form of art - I was never any good at art

Rich wrote:Kent Cam Lube - pour it all over when you put the buckets and cams in and then forget about it.
http://www.rimmerbros.co.uk/Item--i-RX1358
That looks good stuff - you buy a lot of stuff off of the RIMMER BROTHERS then Rich
And on the 7th day... Zeds were created!
After a bit of thought, the seat definitely had to go so I have bought a replacement via Drew in Japan. I think the shape is much better, quite similar to the Bulldock one. I'm not mad about the cover so I'll probably get Steve Adams to recover with a simpler matt black material. The seat looks to be really good quality and surprisingly inexpensive. Even with recovering, it will be half the price of a Bulldock seat. Should land in the UK in 10 days or so.

 [/img]
Have sorted out all the hydraulic hoses for brake and clutch, which I plan to fit this weekend. Have also wired up the regulator/rectifier (which works) and made up the throttle cables. The air filters foul the side panels so I have to either trim the side panels or change the filter type. I am minded to trim the panels but haven't finally decided yet. The front guard is back from Si at Flying Tiger and looks lovely. It's a Bulldock guard which is specially designed for Ohlins forks with 210mm spacing. There was a choice of plastic or carbon and my bling instinct took over, so it's carbon. Si has painted the underside black and the top now has a lovely deep clear lacquer. It will be the only carbon fibre on the bike so I hope it works with the rest of the bike OK. Will post some pics (weather permitting) this weekend.
[/img]
Have sorted out all the hydraulic hoses for brake and clutch, which I plan to fit this weekend. Have also wired up the regulator/rectifier (which works) and made up the throttle cables. The air filters foul the side panels so I have to either trim the side panels or change the filter type. I am minded to trim the panels but haven't finally decided yet. The front guard is back from Si at Flying Tiger and looks lovely. It's a Bulldock guard which is specially designed for Ohlins forks with 210mm spacing. There was a choice of plastic or carbon and my bling instinct took over, so it's carbon. Si has painted the underside black and the top now has a lovely deep clear lacquer. It will be the only carbon fibre on the bike so I hope it works with the rest of the bike OK. Will post some pics (weather permitting) this weekend.
-
z1000puddin

- Custard Cream

- Posts: 918
- Joined: 23rd Jul 2011
- Location: Aberdeen,Dyce
-
RALPHARAMA

- Area Rep.

- Posts: 3407
- Joined: 19th May 2007
- Location: Pensford, Somerset
- Contact:
That swinging arm is to die for 
This is going to be one very high spec bike. I particularly love the paint.
Bleeding your lines should be a piece of cake with your new MityVac - just remember to wrap a bit o PTFE around your nipples (cue Jimmock
  ) Thanks for the order
This is going to be one very high spec bike. I particularly love the paint.
Bleeding your lines should be a piece of cake with your new MityVac
- just remember to wrap a bit o PTFE around your nipples (cue Jimmock Ralph Ferrand
Z1000A1 (1977), Z1300A5 (1983), Z900A4 (1976) GPZ1100 Unitrak (1983)(project), RD250B (1975)(project), ZRX1200R (2005) DT175MX (1981) YZF R6 (1999)
http://www.bikerstoolbox.co.uk
Z1000A1 (1977), Z1300A5 (1983), Z900A4 (1976) GPZ1100 Unitrak (1983)(project), RD250B (1975)(project), ZRX1200R (2005) DT175MX (1981) YZF R6 (1999)
http://www.bikerstoolbox.co.uk
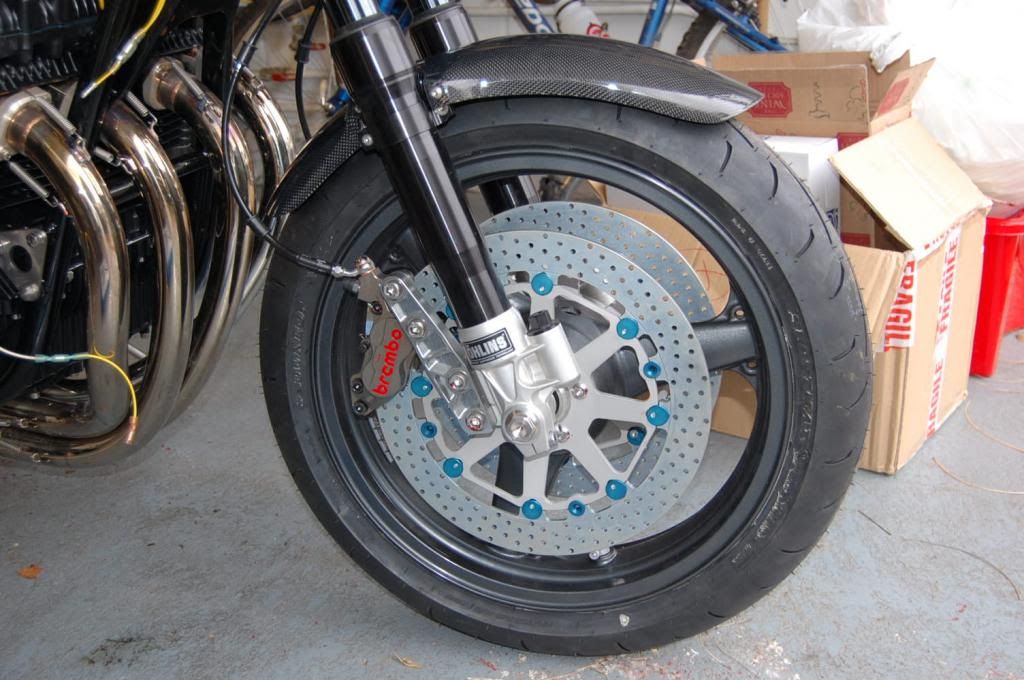
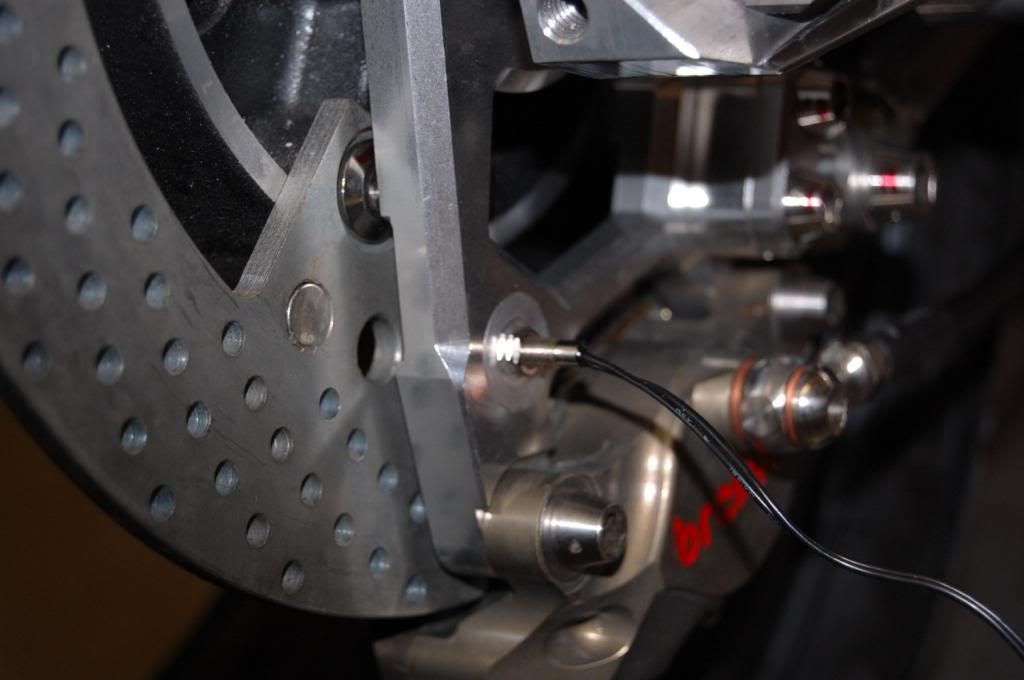
I've been focussing on the wiring this weekend but I started by fitting the front mudguard. Lacking the skills to make my own out of an unsuspecting roadsign, I eventually found one for sale in Japan which is a perfect fit. I went for carbon fibre as the whole front end is modern and the rest of the bike is very black, so I thought it would make a nice contrast. I can always paint it black later but I think it looks OK. I also got the rear wheel speedo sensor sorted. Harris had fitted a bush in the handy hole in the caliper carrier, and I glued 2 rare earth magnets into the 10mm holes in the disc. I tapped a thread in the bush (it was a very fine M3 thread so I had to buy a special tap) and then screwed in the motogadget sensor. I think it looks quite neat. I'll fit some heatshrink over the sensor and cable for protection and then run the cable along torque arm with the brake hose.
I've also fitted all the hydraulic hoses, although I am going wait until the electrics are done before filling with brake fluid. I also want to change the Brembo bleed nipples for stainless ones. I managed to get the length of the simplest hose wrong - I didn't allow for enough front fork extension - but then got the length of the most complex run (the 1.4m clutch hose) spot on. Bizarre.
I've also fitted all the hydraulic hoses, although I am going wait until the electrics are done before filling with brake fluid. I also want to change the Brembo bleed nipples for stainless ones. I managed to get the length of the simplest hose wrong - I didn't allow for enough front fork extension - but then got the length of the most complex run (the 1.4m clutch hose) spot on. Bizarre.
Last edited by LondonZ1 on Sun Feb 10, 2013 5:12 pm, edited 1 time in total.
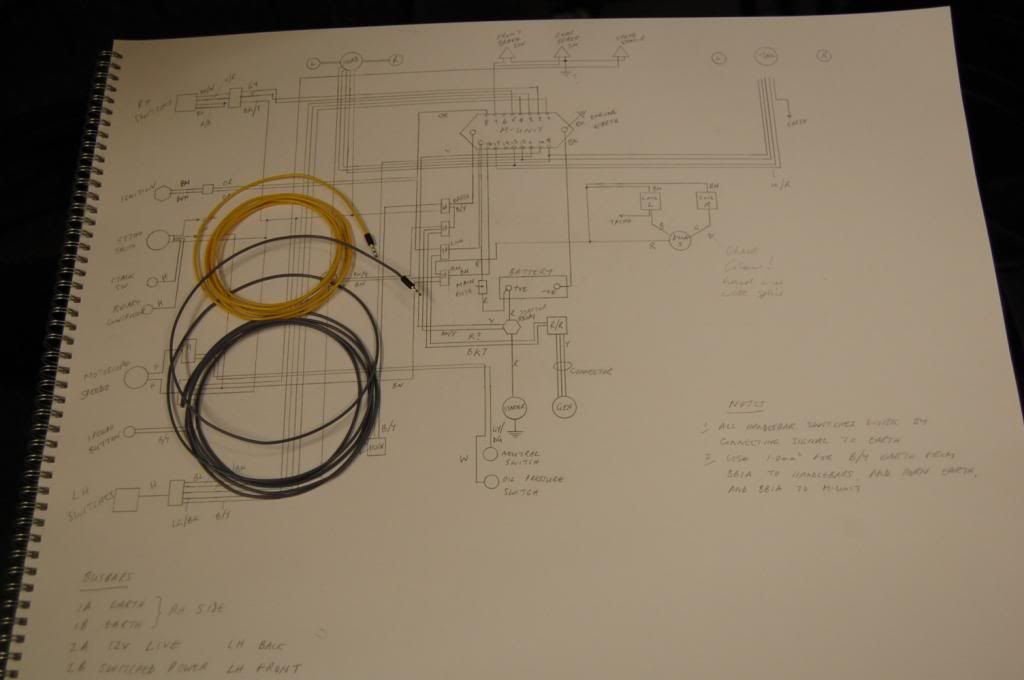
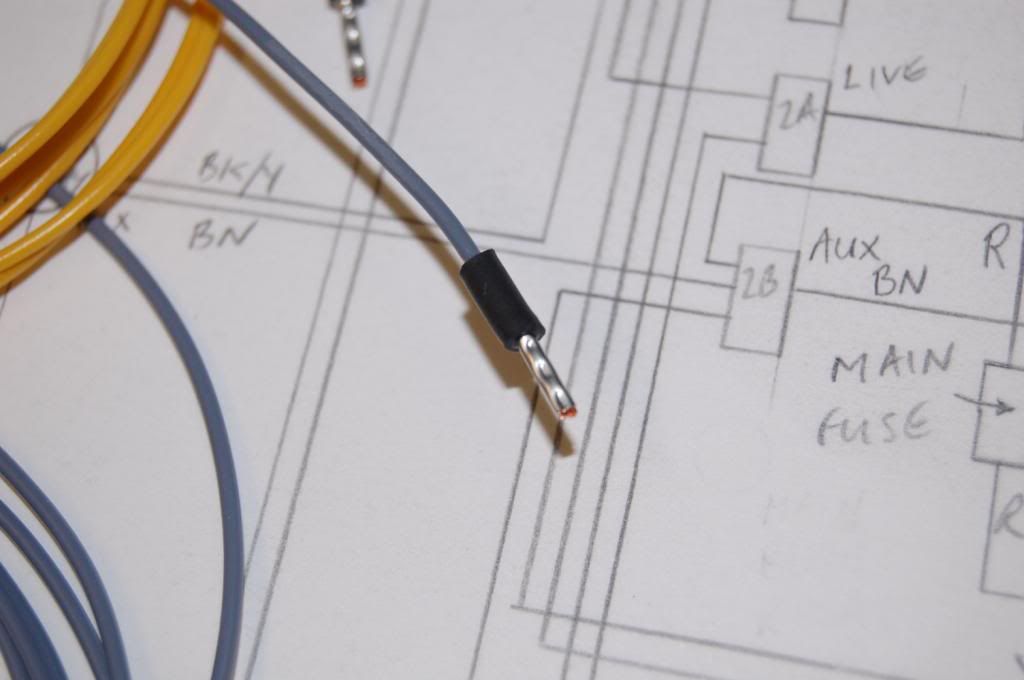
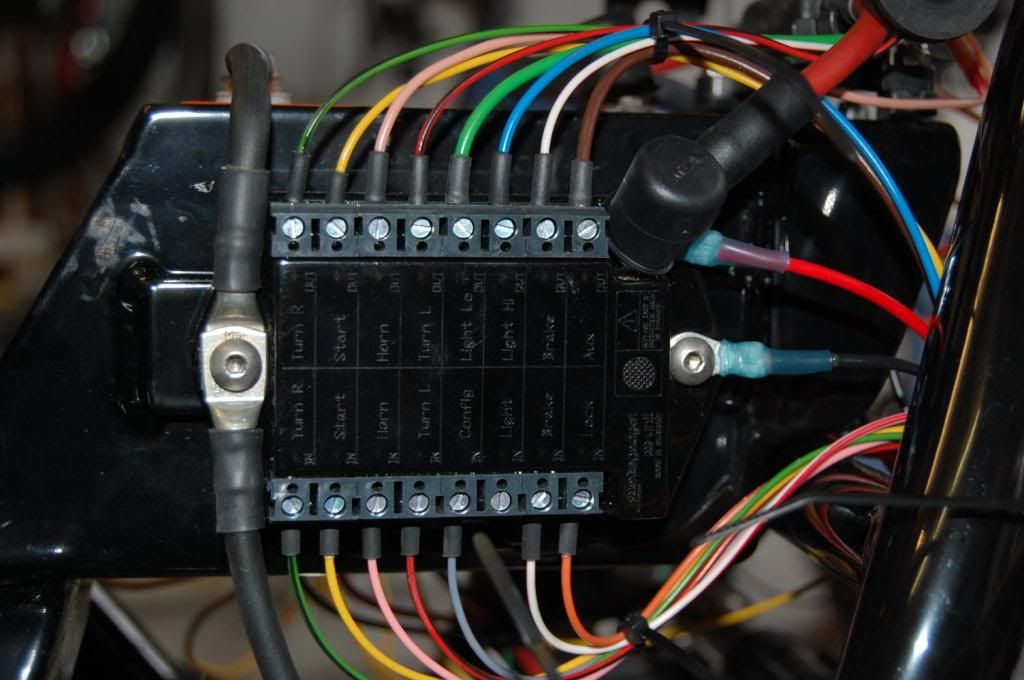
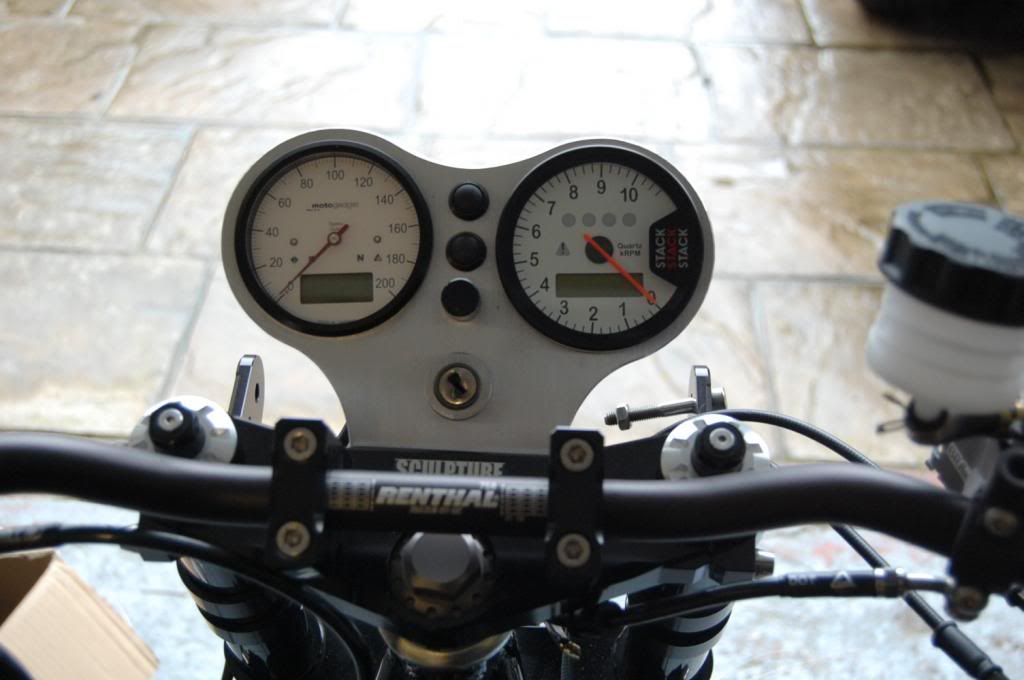
I've designed a complete wiring harness from scratch as you can see from the sketch. It wasn't that hard, just very time-consuming. The m-unit is a fantastic piece of kit but it works in a slightly odd way - all the control circuits work by connecting to earth - but the end result is a simple loom which only needs small cables to connect to the handlebar controls. The terminals are screw-type so I have used bootlace ferrules with a bit of adhesive heatshrink for strain relief. Couldn't resist fitting the gauges to see how they would look. I haven't tackled the front half of the loom yet, which is going to be a bit painful. The switchgear is new H**** Fireblade from 2004/2005 which is simple and good quality but has far too many wires. I will probably remove the surplus wires and run lighter cables to reduce the bulk of the harness. There's not much room at the front of the bike for running the cables between the tank and frame.
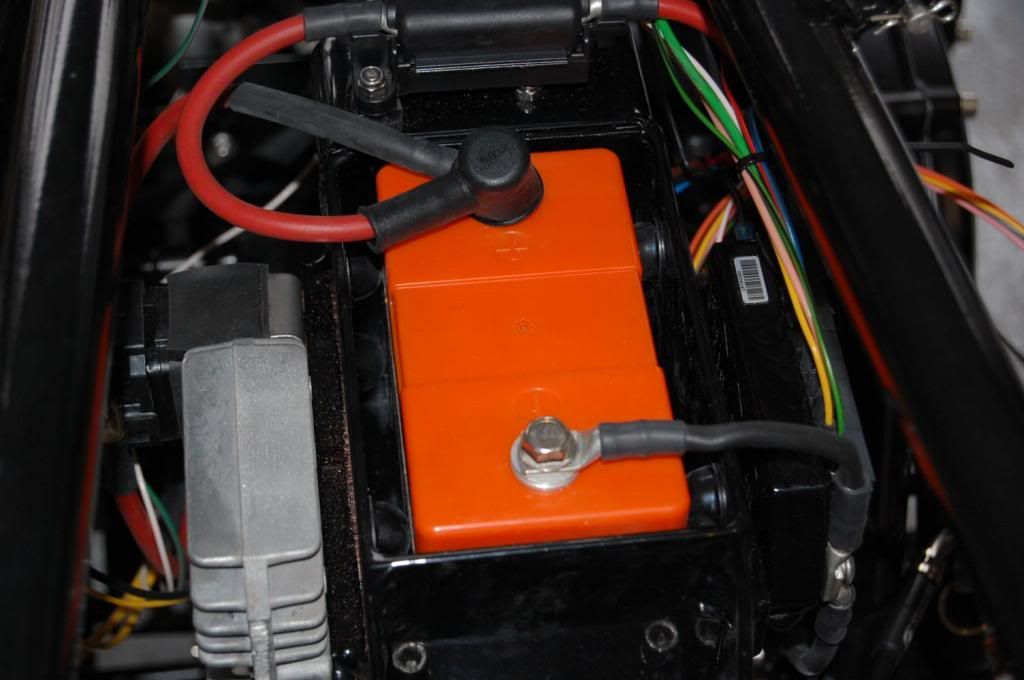
...and lastly I've worked out how to stop the battery rattling around in the box Harris made. I bought some self-adhesive polyurethane hemispherical buttons which are exactly the right height for the gap between battery and box. The battery now slides in with a small amount of pressure, has an air gap for cooling and won't put any strain on the cables.
Who is online
Users browsing this forum: No registered users and 8 guests