Hello Guest User,
Please feel free to have a look around the forum but be aware that as an unregistered guest you can't see all of it and you can't post.
To access these 'Registered Users Only' areas simply register and login.
Please feel free to have a look around the forum but be aware that as an unregistered guest you can't see all of it and you can't post.
To access these 'Registered Users Only' areas simply register and login.
Z1100ST Resto +
Moderators: KeithZ1R, chrisu, paul doran, Taffus

-
paul doran

- Area Rep.

- Posts: 15910
- Joined: 24th Sep 2004
- Location: near Dublin Ireland


Excellant build - most of which i wouldn't even attempt!
Are the pattern side panels you picked up at Stafford from LPM in Coventry?
Looked at them when i was there - seemed very good quality.
Like that quote
Are the pattern side panels you picked up at Stafford from LPM in Coventry?
Looked at them when i was there - seemed very good quality.
vduk wrote:GUYZED wrote:Looking good there Ralphbut wouldn't it have been quicker to buy a new fork top
Anyone can buy stuff
Like that quote
Wots up DOHC
-
RALPHARAMA

- Area Rep.
- Posts: 3407
- Joined: 19th May 2007
- Location: Pensford, Somerset
- Contact:
Still can't work out where the frigging seat is 
Spent a happy day playing with the shafter. Last night I took one look at the wiring diagram and thought feck that !!! and scanned it, cleaned it up a bit and printed it on PET vinyl 600mm wide which is normally used for roll up banners

Although I flogged the large format laminator I still had a roll of the laminate used for roll ups, so hand laminated the drawing. Much easier to read now and a bit less vulnerable to dirty fingers It might seem a bit OTT, but as I have little work for the printer now, it's good to run it to keep the heads clean so it still works properly when it is required. Also as I am to make a new loom for the bike it will get a lot of looking at
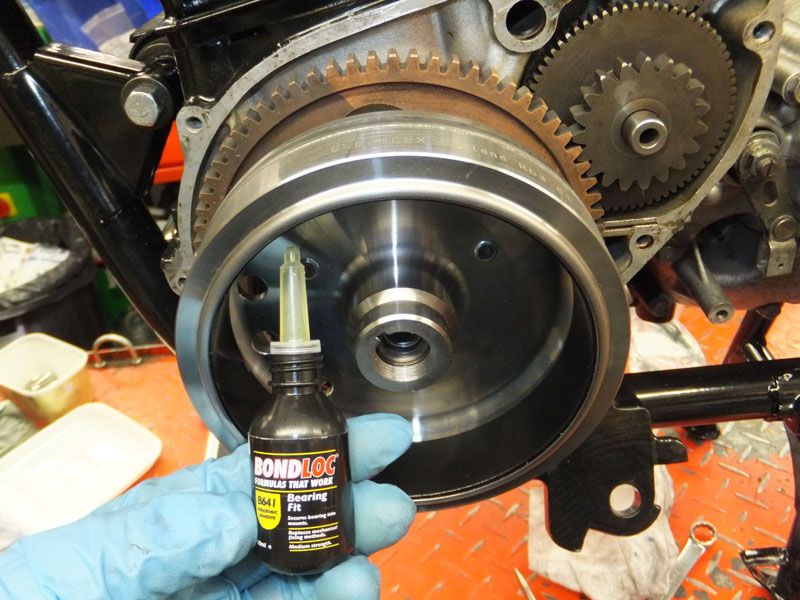
First job was to attach the new rotor and I decided to use belt and braces and used some bearing fit on the taper - don't want the fecker letting go
As mentioned earlier the ignition pick ups weren't in few good shape, though the bike was still running .... just !
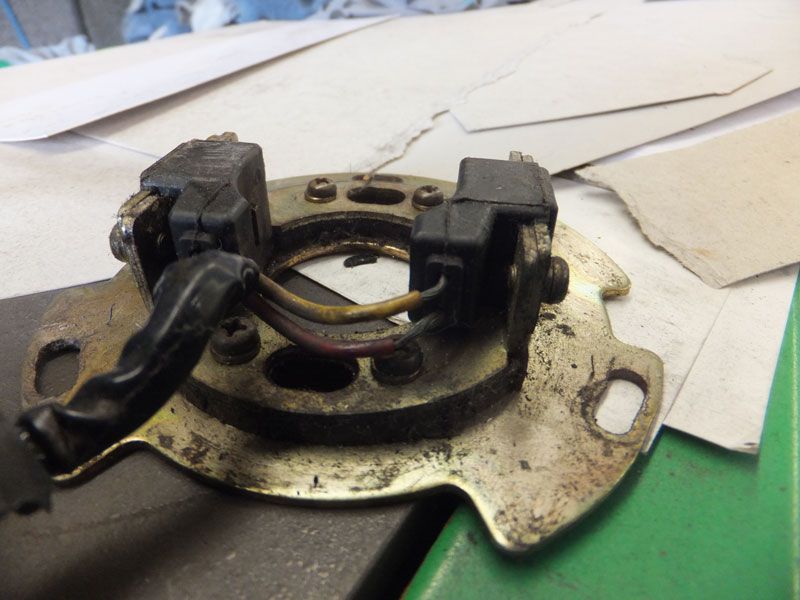
I removed the flaky wire and using ferules joined new wire to the pickups and then a series of heat shrink sleeves . To complete the insulation I buttered it all in clear RTV, which is reet good stuff
I made a new pos battery cable and starter cable and installed them. I also stripped all the battery box cables and installed all the black boxes. I remade all the connectors from the multi blocks to be on the safe side. I couldn't replace the wires as they are moulded in, but I could at least replace the actual latching brass lucar connectors with new. I also bead blasted, primed and painted the starter solenoid and installed that. The sharp sighted will notice that I have taken to squirting "Corrosion Block"
grease into all the connectors now. This will help protect them from ... er ... corrosion
No major catastrophies today
Spent a happy day playing with the shafter. Last night I took one look at the wiring diagram and thought feck that !!! and scanned it, cleaned it up a bit and printed it on PET vinyl 600mm wide which is normally used for roll up banners
Although I flogged the large format laminator I still had a roll of the laminate used for roll ups, so hand laminated the drawing. Much easier to read now and a bit less vulnerable to dirty fingers
First job was to attach the new rotor and I decided to use belt and braces and used some bearing fit on the taper - don't want the fecker letting go
As mentioned earlier the ignition pick ups weren't in few good shape, though the bike was still running .... just !
I removed the flaky wire and using ferules joined new wire to the pickups and then a series of heat shrink sleeves . To complete the insulation I buttered it all in clear RTV, which is reet good stuff
I made a new pos battery cable and starter cable and installed them. I also stripped all the battery box cables and installed all the black boxes. I remade all the connectors from the multi blocks to be on the safe side. I couldn't replace the wires as they are moulded in, but I could at least replace the actual latching brass lucar connectors with new. I also bead blasted, primed and painted the starter solenoid and installed that. The sharp sighted will notice that I have taken to squirting "Corrosion Block"
grease into all the connectors now. This will help protect them from ... er ... corrosion
No major catastrophies today
Ralph Ferrand
Z1000A1 (1977), Z1300A5 (1983), Z900A4 (1976) GPZ1100 Unitrak (1983)(project), RD250B (1975)(project), ZRX1200R (2005) DT175MX (1981) YZF R6 (1999)
http://www.bikerstoolbox.co.uk
Z1000A1 (1977), Z1300A5 (1983), Z900A4 (1976) GPZ1100 Unitrak (1983)(project), RD250B (1975)(project), ZRX1200R (2005) DT175MX (1981) YZF R6 (1999)
http://www.bikerstoolbox.co.uk


I am with rob on this one. I use some super fine lapping compound for mating them and only stop, when I realise, that the roter sits on the taper so snuggly, that I can't pull it off anymore w.o. force.
Then I clean it with brake cleaner and it has been a pain of getting it off ever since.
Then I clean it with brake cleaner and it has been a pain of getting it off ever since.
There's no replacement for displacement!
-
RALPHARAMA
- Area Rep.
- Posts: 3407
- Joined: 19th May 2007
- Location: Pensford, Somerset
- Contact:
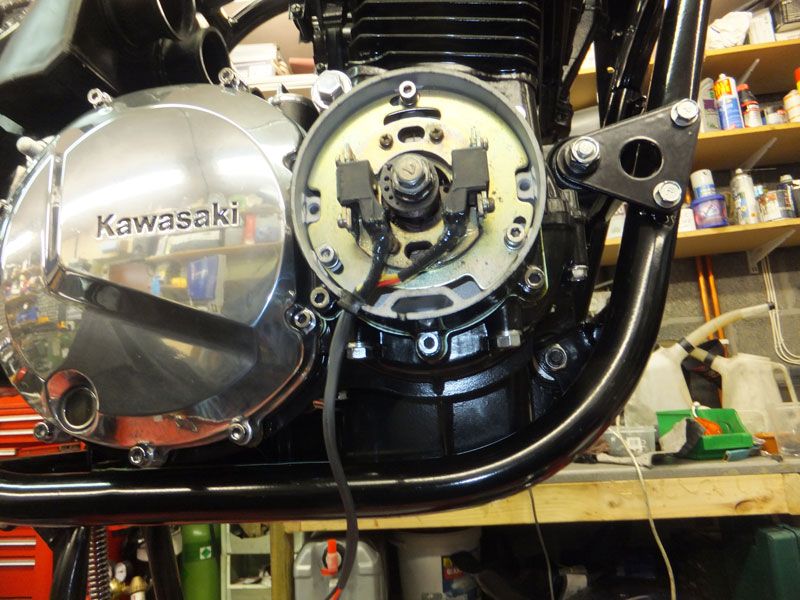
Paranoia set in after the last two comments yesterday morning and I took the alternator casing off again and decided to remove the rotor and lap it in, as I hadn't actually checked the taper in any real sense. I installed my special "Z rotor removal aid"
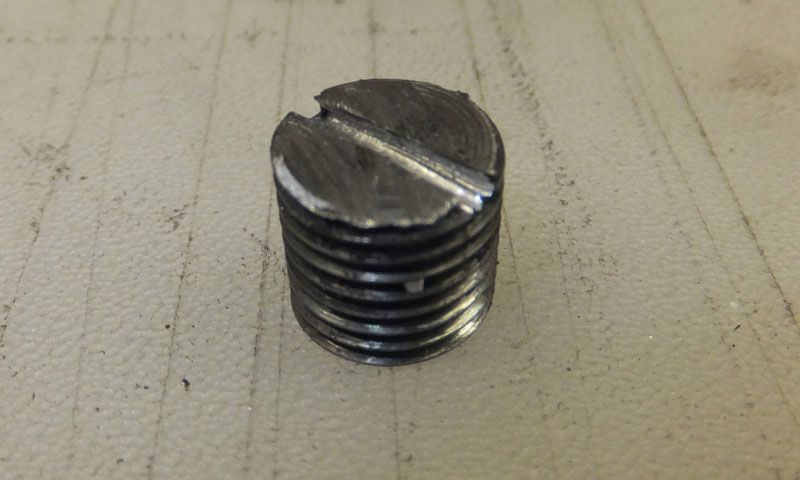
and then installed the rotor removal tool. Short of physical violence with mechanical aid that rotor wasn't coming off
I refitted the alternator and went back to plan A "the loom". It's always a bit of a difficult one as the electrics were mostly working and the loom is only tattered at the ends. Building a new loom is extremely hard work and not inexpensive.
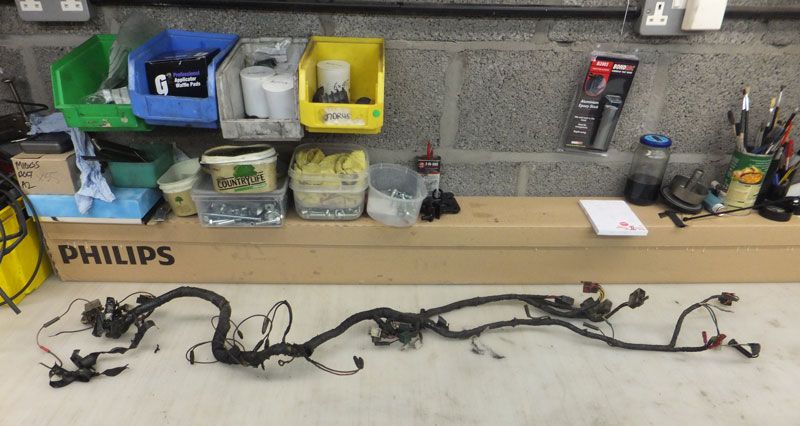
Opening up a loom that has been 'got at' over the years is always unpleasant. There were years worth of layers of insulating tape to be removed which just ends up as a sticky mess. You have to wear gloves but they end up adhering the the wiring and it is a frustrating mess. The tape never just unwinds as it's been damaged over the years and keeps breaking and when you do get a significant amount of you can't throw it in the bin cos it's stuck to your gloves
Once the loom's open, it all looks really nice underneath and seems a shame to bin, but in reality it's the bits that aren't protected that are knackered and all the wire that moves on the loom will have work hardened and become brittle. I put my reels up and made a start:
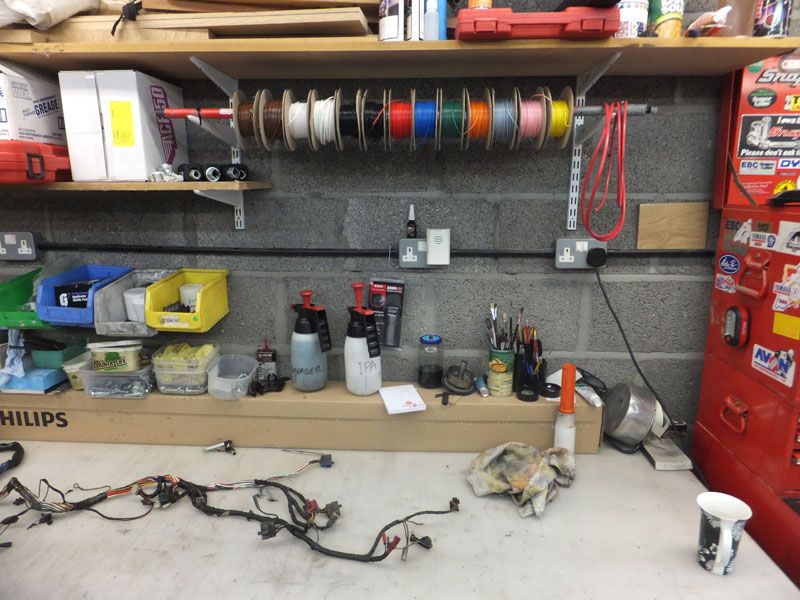
They changed a lot of colours since the earlier zeds - no idea why, but it's a pain as I have enough wire to build a new loom for an early Zed
I made a good start yesterday, but now have to buy some more wire
and then installed the rotor removal tool. Short of physical violence with mechanical aid that rotor wasn't coming off
I refitted the alternator and went back to plan A "the loom". It's always a bit of a difficult one as the electrics were mostly working and the loom is only tattered at the ends. Building a new loom is extremely hard work and not inexpensive.
Opening up a loom that has been 'got at' over the years is always unpleasant. There were years worth of layers of insulating tape to be removed which just ends up as a sticky mess. You have to wear gloves but they end up adhering the the wiring and it is a frustrating mess. The tape never just unwinds as it's been damaged over the years and keeps breaking and when you do get a significant amount of you can't throw it in the bin cos it's stuck to your gloves
Once the loom's open, it all looks really nice underneath and seems a shame to bin, but in reality it's the bits that aren't protected that are knackered and all the wire that moves on the loom will have work hardened and become brittle. I put my reels up and made a start:
They changed a lot of colours since the earlier zeds - no idea why, but it's a pain as I have enough wire to build a new loom for an early Zed
I made a good start yesterday, but now have to buy some more wire
Ralph Ferrand
Z1000A1 (1977), Z1300A5 (1983), Z900A4 (1976) GPZ1100 Unitrak (1983)(project), RD250B (1975)(project), ZRX1200R (2005) DT175MX (1981) YZF R6 (1999)
http://www.bikerstoolbox.co.uk
Z1000A1 (1977), Z1300A5 (1983), Z900A4 (1976) GPZ1100 Unitrak (1983)(project), RD250B (1975)(project), ZRX1200R (2005) DT175MX (1981) YZF R6 (1999)
http://www.bikerstoolbox.co.uk

-
RALPHARAMA
- Area Rep.
- Posts: 3407
- Joined: 19th May 2007
- Location: Pensford, Somerset
- Contact:
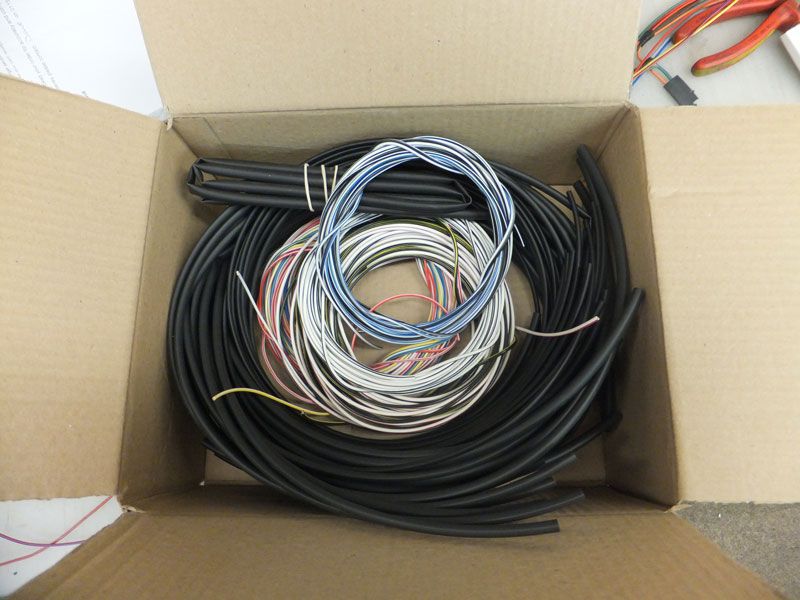
Back again I've been hard at it all week working on the loom and spending money I don't have. It seems that Kawasaki changed their minds about quite a few colours since the earlier bikes. There seem to be quite a lot of white wires with tracer colours, which are easy to confuse, especially when they're dirty - so more hard earned to Vehicle Wiring Products
Whilst the wheel type terminal tools work well, they are cumbersome to use and after a while sensitive hands start to feel as though one had entered a hedgehog juggling contest I coughed up and bought a new set with nice soft handles
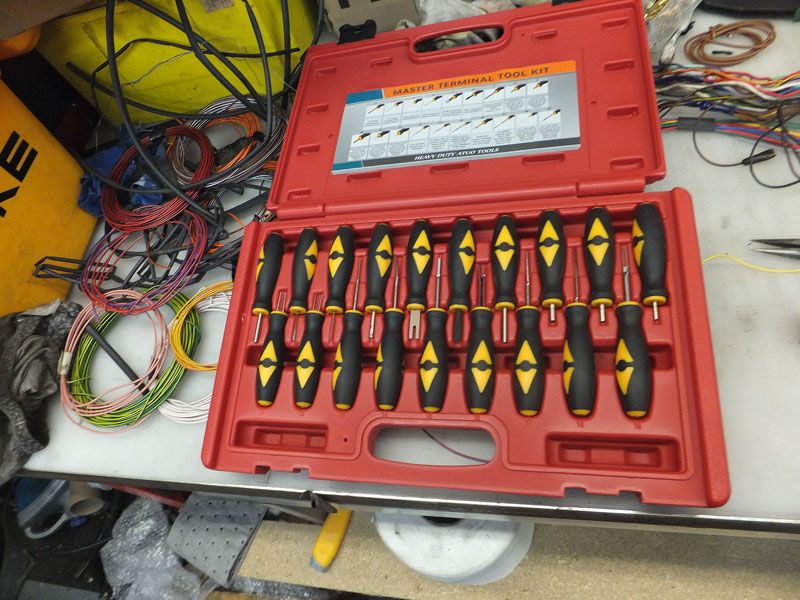
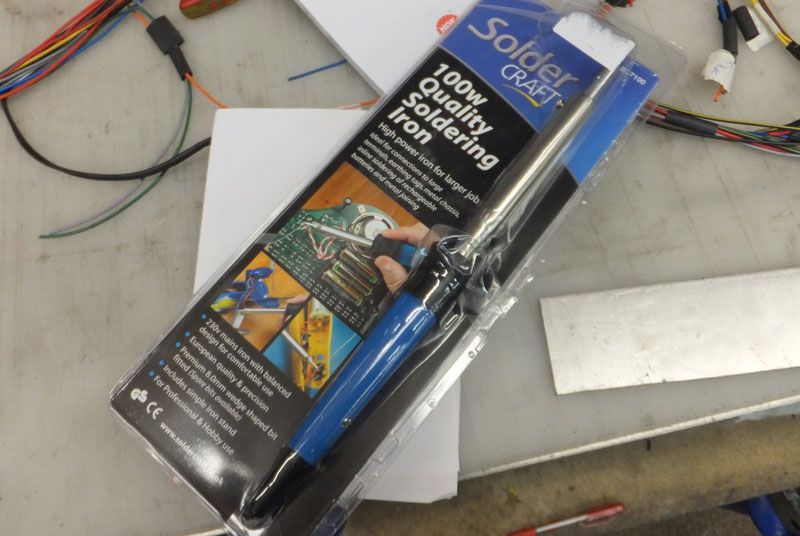
When soldering up the "in-loom" joints I have in the past used a tinman's gas iron as my standard 25w iron simply doesn't have the heat capacity, but this is a real pain to use so I bought a new 100watt job I will put these on BTB eventually. Made a big difference.
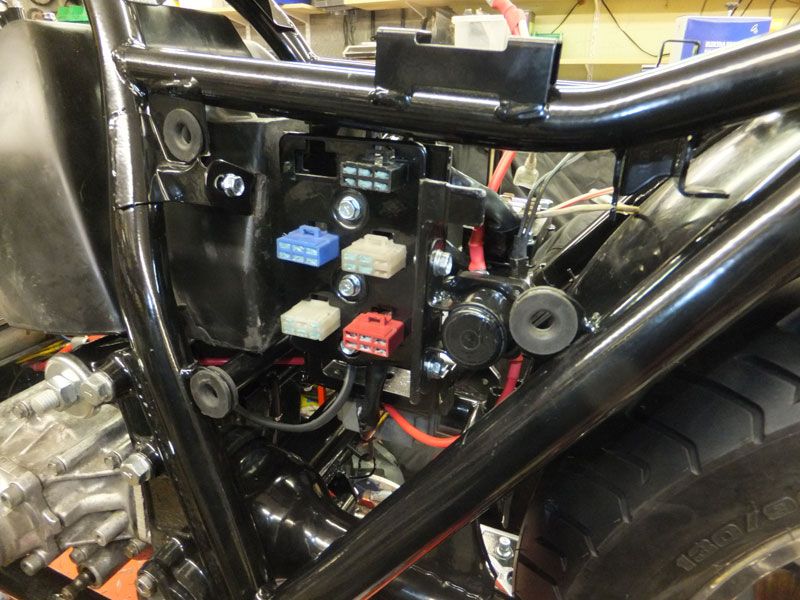
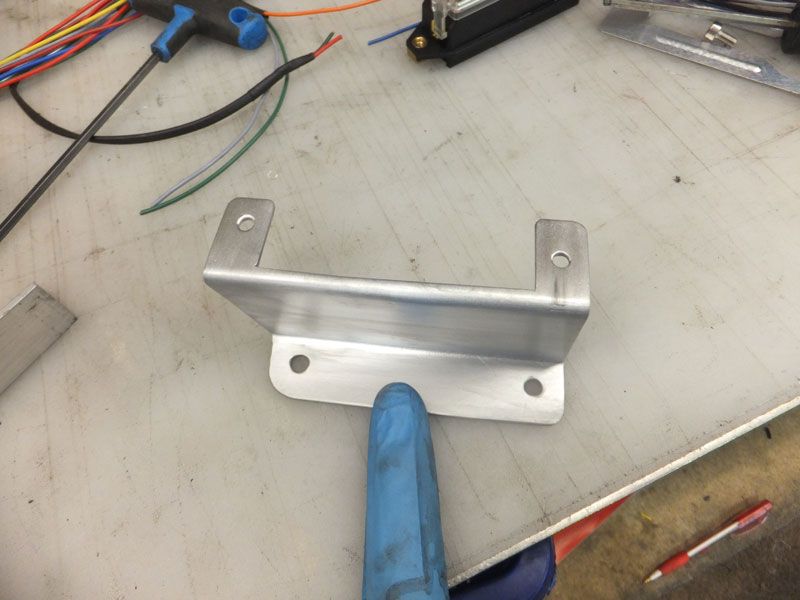
Having re-made the terminals on the fuse block I decided that those fuses have always been a bit shit, and are never readily available when you desperately need one so I bought a nice new 8 way blade fuse block. I then fabricated an aluminium bracket to take it.
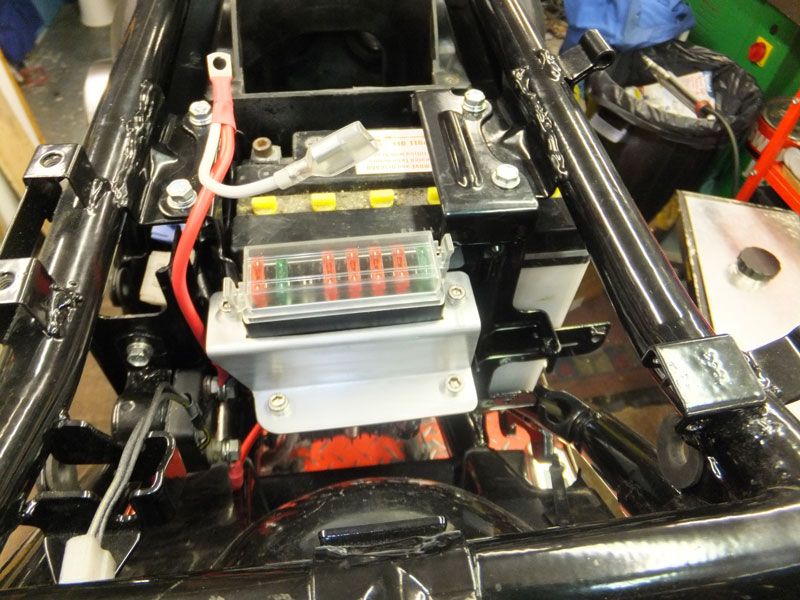
This is what it looks like in situ
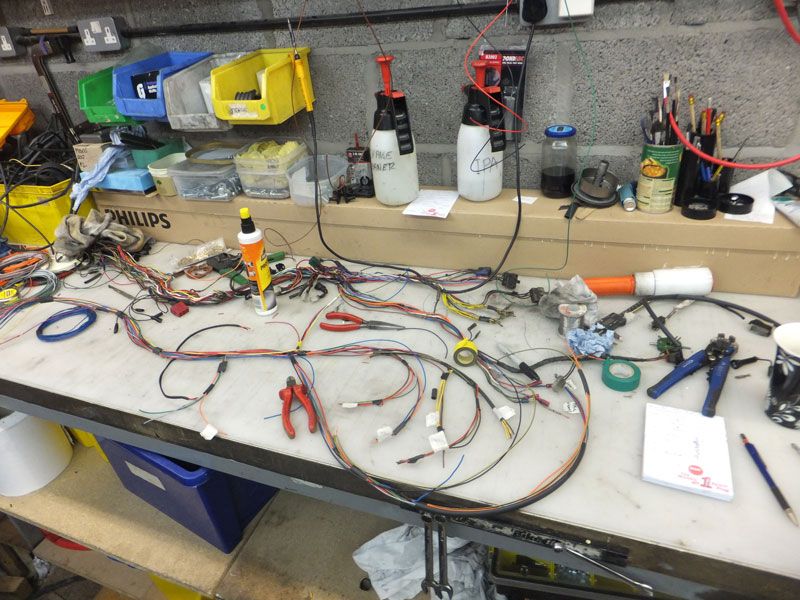
The loom building is a long process and always seems very intimidating initially, but is quite rewarding as the loom builds

Dirty shitty, corroded electrics are nasty to look at and unreliable so it's well worth the effort. Here's the new loom draped roughly over the frame. At some point I will have to figure out where it's supposed to run
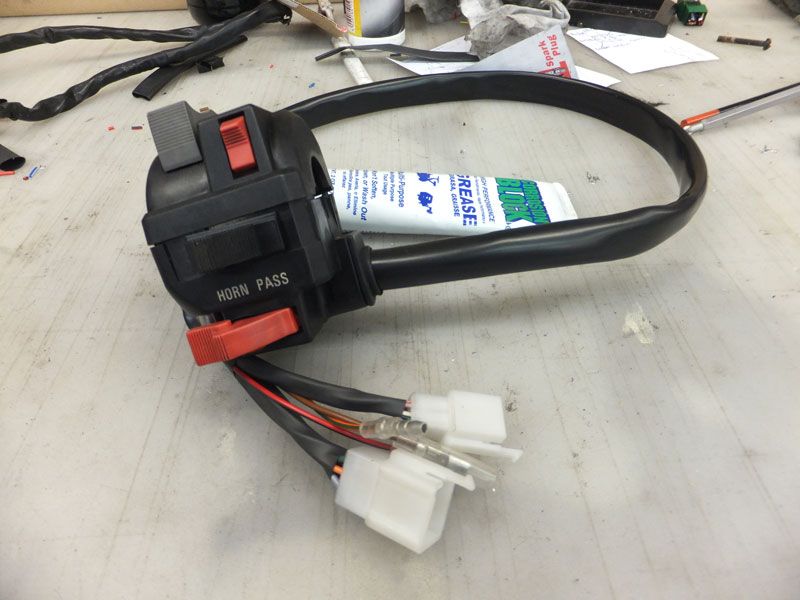
I completely rebuilt the right hand switch gear with new wire etc
The left however is not so nice
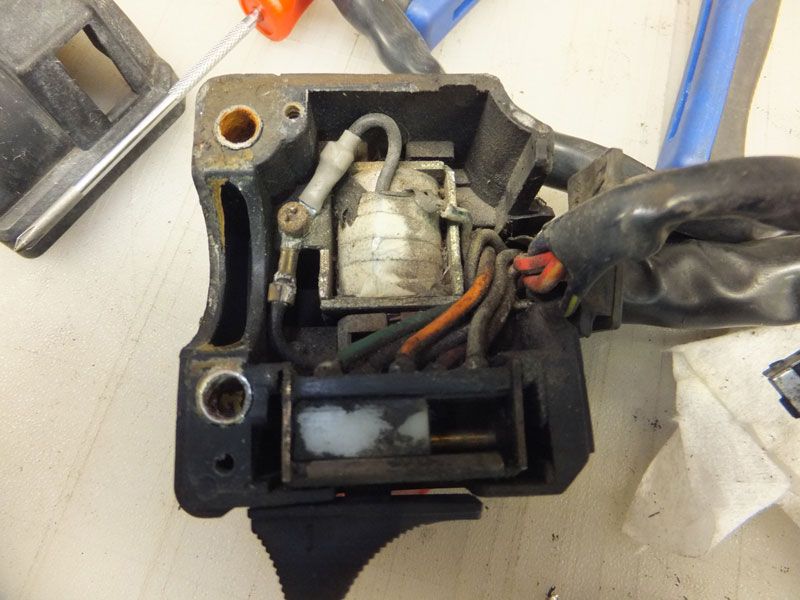
It's in bad shape and I have never seen such a complex switch in all my life. It has a solenoid and some complex and worn mechanism for the self cancelling indicators

There are no pattern ones to be had so I suppose I'll have to try and do something with this.
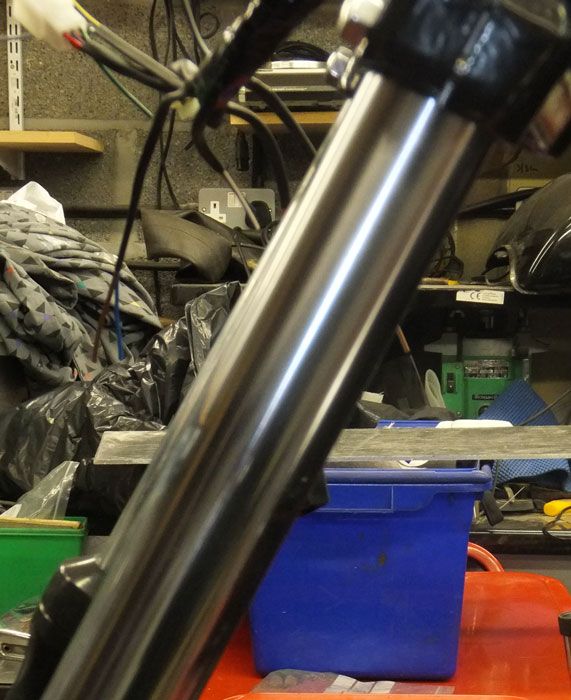
More disasters The fecking bottom yoke is bent!!!!!!
Whilst the wheel type terminal tools work well, they are cumbersome to use and after a while sensitive hands start to feel as though one had entered a hedgehog juggling contest
When soldering up the "in-loom" joints I have in the past used a tinman's gas iron as my standard 25w iron simply doesn't have the heat capacity, but this is a real pain to use so I bought a new 100watt job
Having re-made the terminals on the fuse block I decided that those fuses have always been a bit shit, and are never readily available when you desperately need one so I bought a nice new 8 way blade fuse block. I then fabricated an aluminium bracket to take it.
This is what it looks like in situ
The loom building is a long process and always seems very intimidating initially, but is quite rewarding as the loom builds
Dirty shitty, corroded electrics are nasty to look at and unreliable so it's well worth the effort. Here's the new loom draped roughly over the frame. At some point I will have to figure out where it's supposed to run
I completely rebuilt the right hand switch gear with new wire etc
The left however is not so nice
It's in bad shape and I have never seen such a complex switch in all my life. It has a solenoid and some complex and worn mechanism for the self cancelling indicators
There are no pattern ones to be had so I suppose I'll have to try and do something with this.
More disasters
Ralph Ferrand
Z1000A1 (1977), Z1300A5 (1983), Z900A4 (1976) GPZ1100 Unitrak (1983)(project), RD250B (1975)(project), ZRX1200R (2005) DT175MX (1981) YZF R6 (1999)
http://www.bikerstoolbox.co.uk
Z1000A1 (1977), Z1300A5 (1983), Z900A4 (1976) GPZ1100 Unitrak (1983)(project), RD250B (1975)(project), ZRX1200R (2005) DT175MX (1981) YZF R6 (1999)
http://www.bikerstoolbox.co.uk
Very neat fuse block fabrication
Shite finding with the yolk. This of any use - bit of a sting but -
http://www.ebay.co.uk/itm/Kawasaki-Z110 ... 3371feb547
Shite finding with the yolk. This of any use - bit of a sting but -
http://www.ebay.co.uk/itm/Kawasaki-Z110 ... 3371feb547
Wots up DOHC
-
RALPHARAMA
- Area Rep.
- Posts: 3407
- Joined: 19th May 2007
- Location: Pensford, Somerset
- Contact:
Got stuck into the left hand switch. Twas complicated but I stripped and cleaned all the working parts and greased them up with corrosion block grease which will not only lubricate the bits, but will also protect against further corrosion. As always, I used thin wall wire which make the looms a bit thinner and fitted the wiring with a nice new PVC condom from Vehicle Wiring Products - they do well out of me
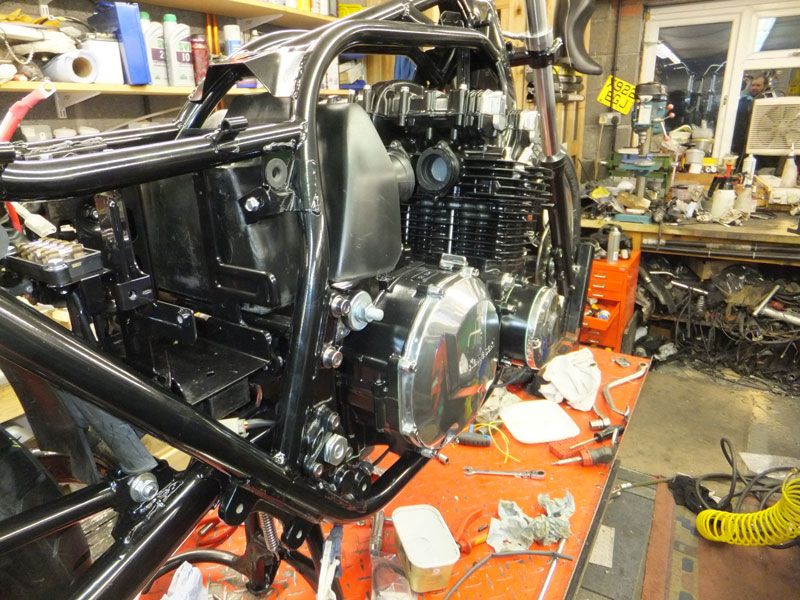
The next job was to strip the paint from the tank. Had I realised before I started the quality of the paint I should not have bothered trying to remove it, I'd have just flatted it back
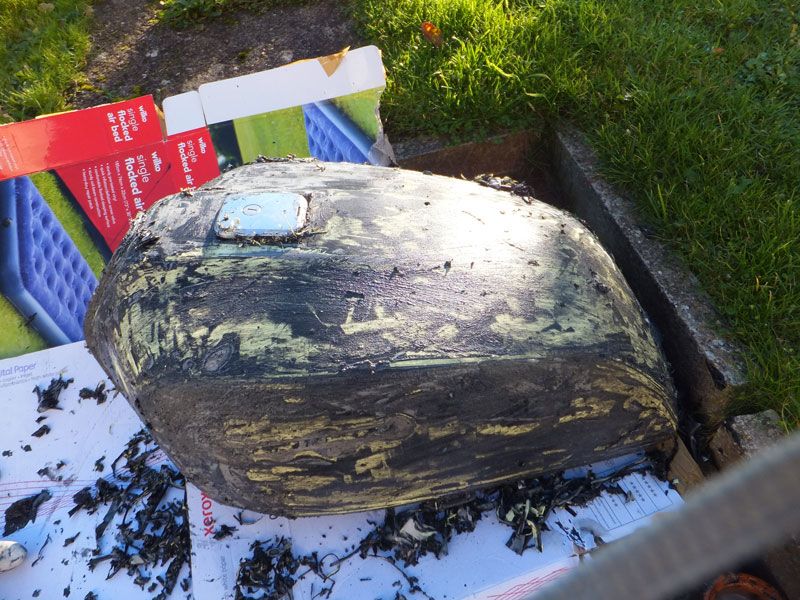
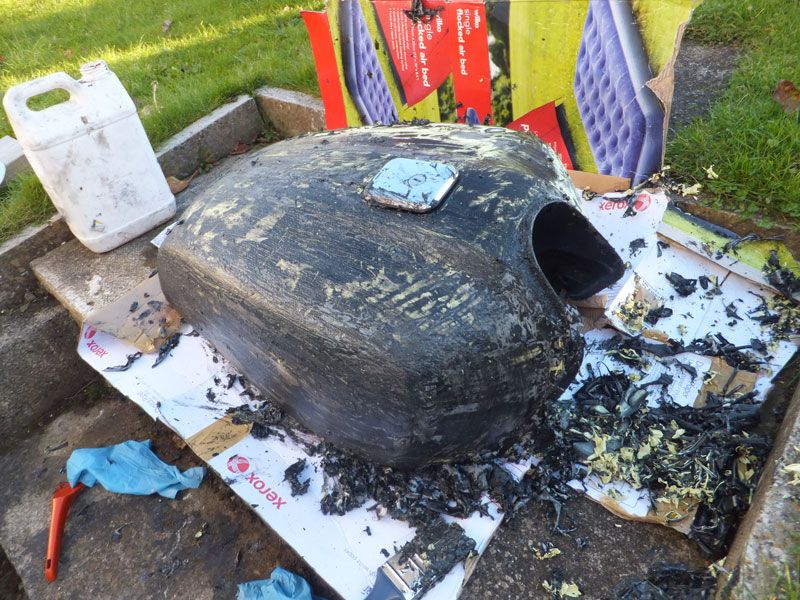
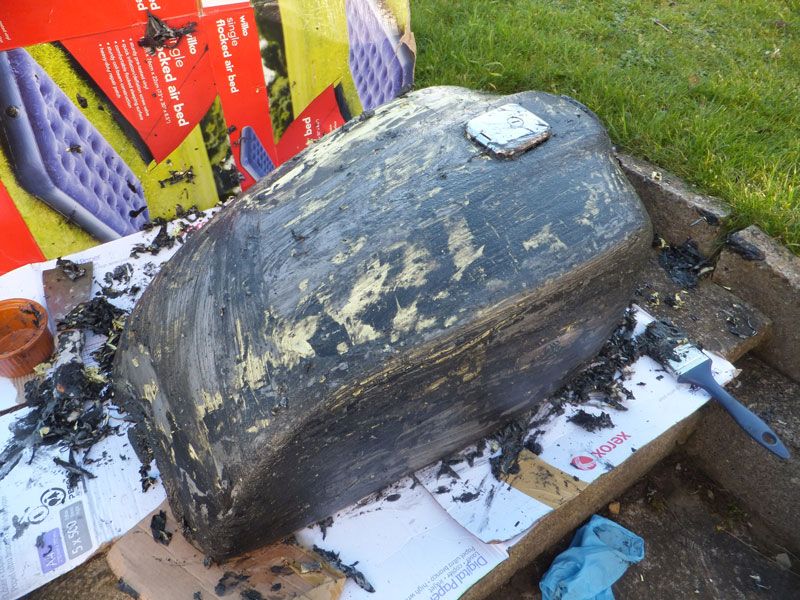
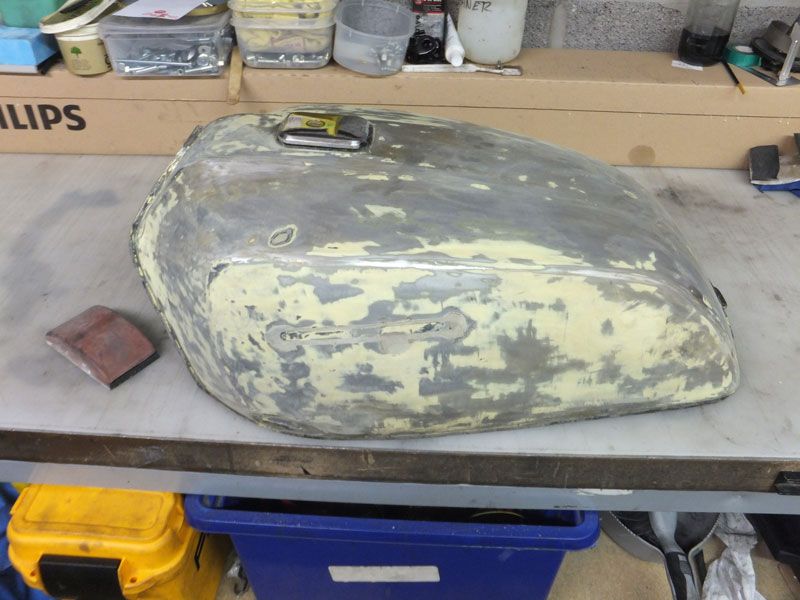
I'm reasonably certain this tank has found it's was into an aircraft spray booth at some point in it's life. The top coats bowed down and submitted to the industrial paint stripper as the dichloromethane bit, but the lower coats were very reluctant to shift. I am pretty sure that the yellow primer is the zinc chromate stuff we used at British Aerospace when I was a lad. I say we, I wasn't a painter But everything that went on an aircraft was plastered in the stuff before anything else. I wish I still had contacts there; I'd really love to get some of that primer, I reckon it would be perfect for engine painting
Anyway I finally got most of it off and am now ready to start filling the myriad dings in the tank. I will need to make some aluminium blanks for the petrol gauge sender and the fuel tap and remove the filler cap.
Next I have to go and buy some more paintstripper for the mudguards and carry on agonising over the paint colours
The next job was to strip the paint from the tank. Had I realised before I started the quality of the paint I should not have bothered trying to remove it, I'd have just flatted it back
I'm reasonably certain this tank has found it's was into an aircraft spray booth at some point in it's life. The top coats bowed down and submitted to the industrial paint stripper as the dichloromethane bit, but the lower coats were very reluctant to shift. I am pretty sure that the yellow primer is the zinc chromate stuff we used at British Aerospace when I was a lad. I say we, I wasn't a painter
Anyway I finally got most of it off and am now ready to start filling the myriad dings in the tank. I will need to make some aluminium blanks for the petrol gauge sender and the fuel tap and remove the filler cap.
Next I have to go and buy some more paintstripper for the mudguards
Ralph Ferrand
Z1000A1 (1977), Z1300A5 (1983), Z900A4 (1976) GPZ1100 Unitrak (1983)(project), RD250B (1975)(project), ZRX1200R (2005) DT175MX (1981) YZF R6 (1999)
http://www.bikerstoolbox.co.uk
Z1000A1 (1977), Z1300A5 (1983), Z900A4 (1976) GPZ1100 Unitrak (1983)(project), RD250B (1975)(project), ZRX1200R (2005) DT175MX (1981) YZF R6 (1999)
http://www.bikerstoolbox.co.uk
-
Is Vic There
- Hardcore

- Posts: 1460
- Joined: 8th Nov 2011
- Location: Brisbane, Australia.
Love it Ralph, got some great tips and insight on the wiring loom, which is a job I have on my list.
Thank you taking the time to post the pictures.
Thank you taking the time to post the pictures.
Z1000R ELR, Z1100R ELR, GPz900R A1, GPz750 Turbo, Norton F1, Harris Mag 2, Harris Mag 5, Yamaha YZR750SP, Triumph Steve McQueen, Suzuki RGV250 Sheene Rep, Suzuki RG500 Walter Wolf, Suzuki RG250 Walter Wolf, Aprilia RS250, Yamaha YL1, RG500. H**** NS400.
-
paul doran
- Area Rep.
- Posts: 15910
- Joined: 24th Sep 2004
- Location: near Dublin Ireland

Excellent idea switching to blade fuse box, the glass ones can be a pain to get hold of when you need them. I hope you find another bottom yoke without to much delay
+ one on the complex switch If you need any switch parts let me know and i will send you mine, the housing is smashed from the crash but the internals look ok. On the septic im wiring in "Normal" J switches without all the self cancelling technology
vduk wrote:
It's in bad shape and I have never seen such a complex switch in all my life. It has a solenoid and some complex and worn mechanism for the self cancelling indicators
+ one on the complex switch
Who is online
Users browsing this forum: No registered users and 8 guests