Hello Guest User,
Please feel free to have a look around the forum but be aware that as an unregistered guest you can't see all of it and you can't post.
To access these 'Registered Users Only' areas simply register and login.
Please feel free to have a look around the forum but be aware that as an unregistered guest you can't see all of it and you can't post.
To access these 'Registered Users Only' areas simply register and login.
Limited Rebuild
Moderators: KeithZ1R, chrisu, paul doran, Taffus


-
steve bowdler

- Area Rep.

- Posts: 1793
- Joined: 20th Apr 2005
- Location: swansea s.wales
 [/quote]
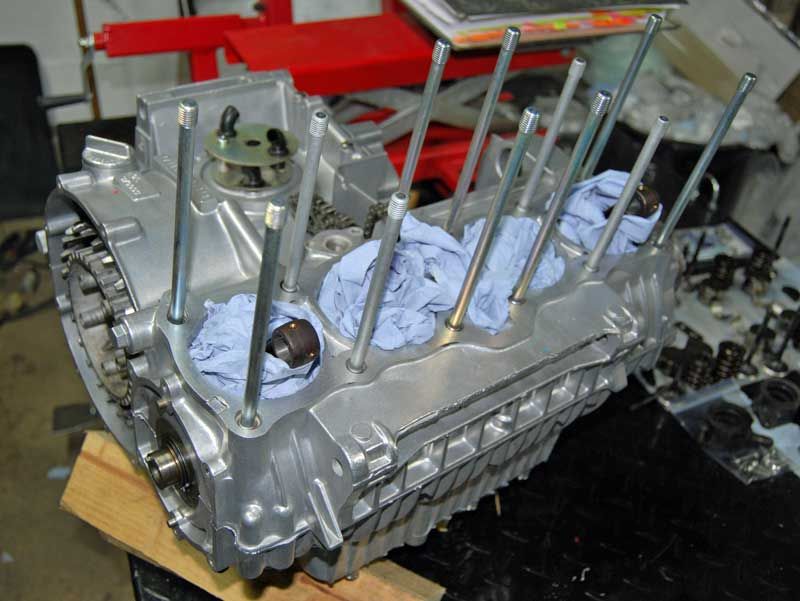
Lots of learning going on, collected the crankcases from Steve Smethurst on Sat, spent Sunday cleaning out the galleries and preparing for re-assembly.
Started re-assembly by dropping in the crank with its new cam chain, fitted its centre cage, dropped in the gear cluster, kick start shaft and funny shaped o-ring, all good so far.
Made some new tab washers and assembled the other crankcase, all good.
Applied the jollop and bolted the cases together, oil pump, sump, filter and spring, housing, centre bolt, this was going way too easy - washer what washer? The one that goes under the oil filter spring! - one more thing to order!
Flipped the motor over and fitted the kickstart spring and cover - first mistake.
Fitted the gear selector mech from memory - second mistake.
Wouldn't select any gears and the kickstart ratchet clacked like a goodun when rotating the main shaft
Re-read the manual -
Corrected the mistake with the selector mech, woohoo! First gear - get in there!
Neutral - oh yes!
Second gear - nope - bugger!
Re-read the manual
4th gear bearings - output shaft has to rotate - shit - that means the bike has to be moving to get the other gears - hope I've assembled the rest ok - EEK!
Kickstart cover back off - dam forgot the gasket - good job I had to take it apart again - nope all looks good In there
Re-read the manual
Rotate shaft to the right - install spring into shaft - yeah - right - did that?
Penny drops
I see - the spring holds the cammy bit against the bent bracket to hold the toothed faces apart - got it!
Pre-tension the dam thing - why doesn't it say Pre-tension!! DOH!
Lessons of the day - 'Read the Manual' 'Look at the pretty pictures' 'Don't assemble engines when your tired!'
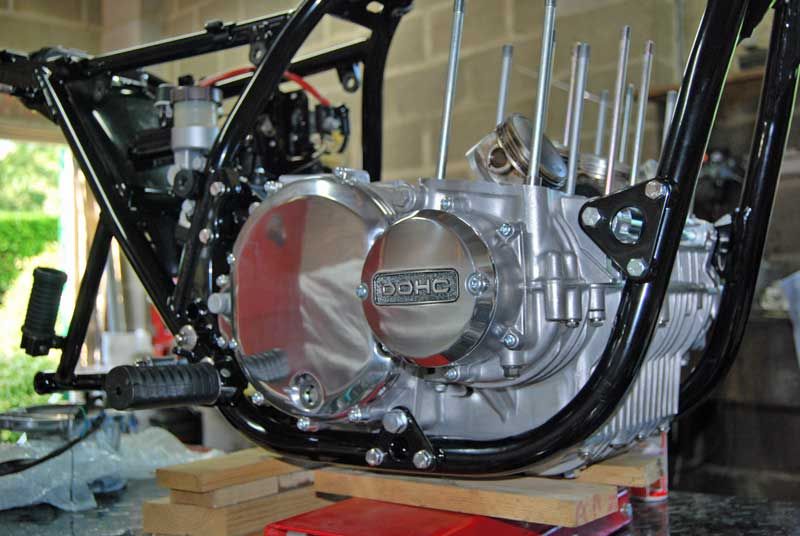
Motor now ready for installing in the frame.
The finish the ceramic cleaning gives is outstanding.

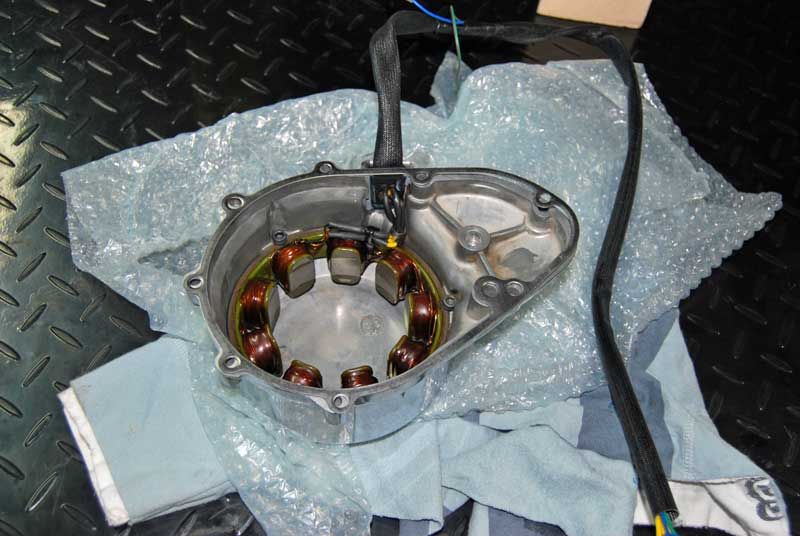
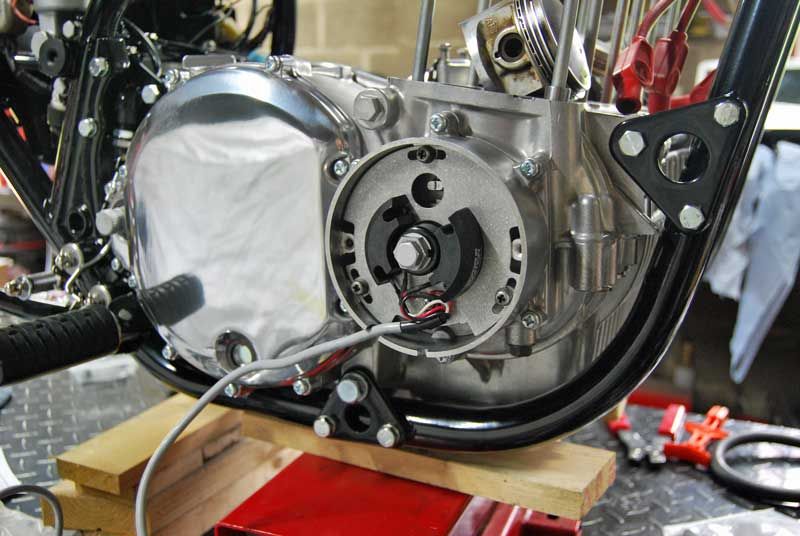
The wires from the generator were in pretty bad shape and the blue plug was 'Iffy' to say the least.
A replacement lead from Z Power was a doddle to solder in - a quick Ohms test showed the generator to be in excellent shape.

You need instant heat to solder the connectors, unless you've got a very large soldering iron, nick the wifes gas torch out the kitchen
The finish the ceramic cleaning gives is outstanding.
The wires from the generator were in pretty bad shape and the blue plug was 'Iffy' to say the least.
A replacement lead from Z Power was a doddle to solder in - a quick Ohms test showed the generator to be in excellent shape.
You need instant heat to solder the connectors, unless you've got a very large soldering iron, nick the wifes gas torch out the kitchen

Yes I agree,
It is coming along a treat.
I like the engine finish. VERY clean and smart.
As previously pointed out.....I too like a "freshly polished bottom" !!
Seeing all that work makes me want to get home and rip one of my bikes to bits.
It is coming along a treat.
I like the engine finish. VERY clean and smart.
As previously pointed out.....I too like a "freshly polished bottom" !!
Seeing all that work makes me want to get home and rip one of my bikes to bits.
Jimmock. 
SPEED IS JUST A QUESTION OF MONEY...HOW FAST DO 'YOU' WANT TO GO?
I hate people I don't like !
SPEED IS JUST A QUESTION OF MONEY...HOW FAST DO 'YOU' WANT TO GO?
I hate people I don't like !
jimmock wrote:Yes I agree,
It is coming along a treat.
I like the engine finish. VERY clean and smart.
As previously pointed out.....I too like a "freshly polished bottom" !!
Seeing all that work makes me want to get home and rip one of my bikes to bits.
Thanks.
Get ripping, after a stressy week at work it's kinda therapeutic.
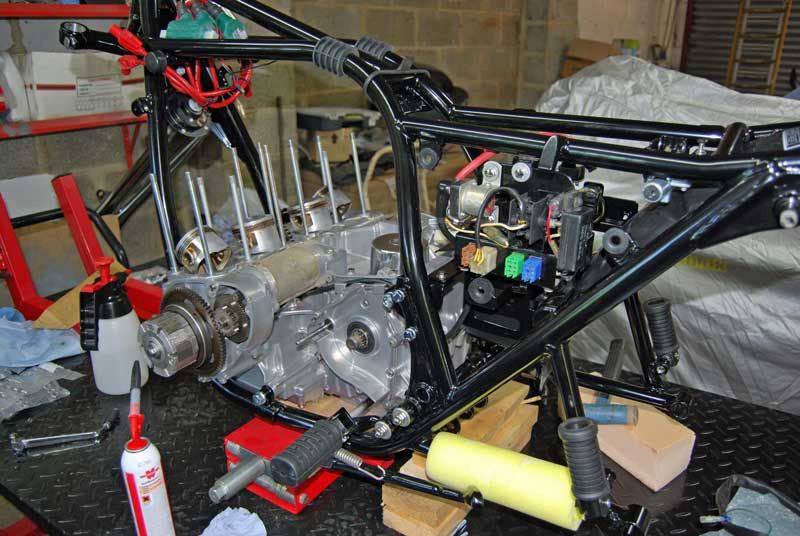
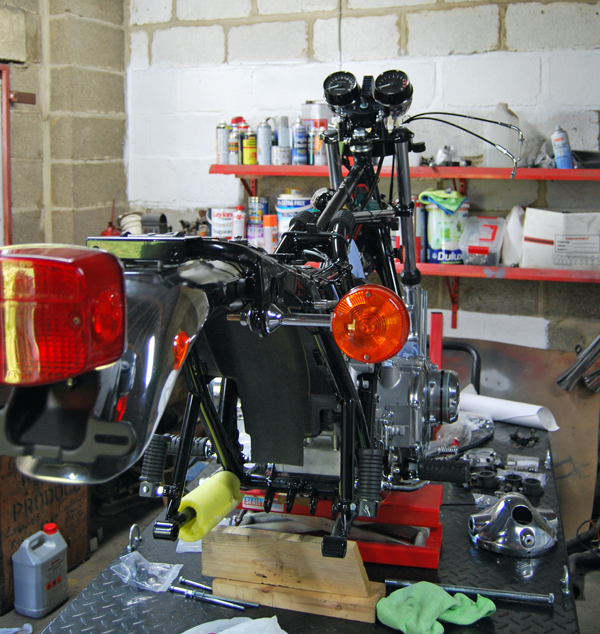
Bank holiday weekends have their uses, spent some of the weekend fitting more bits to the bike.
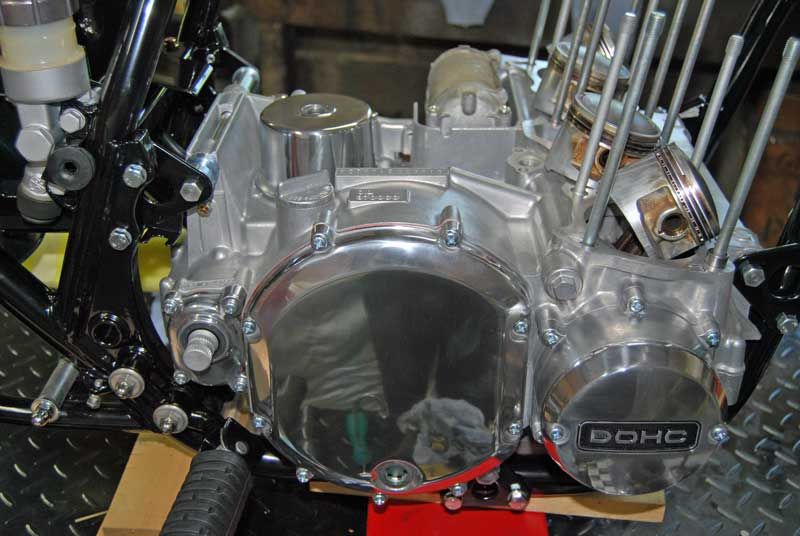
Fitted the frame onto the engine - which is a real treat!
Fitted the generator in the housing and double checked everything before installing on the bike and tightening the pan head screws up.
Tested the starter motor on the bench before installing, had to take the generator cover back off as the starter motor wouldn't fit without the reduction gear being fitted - last!!
Wired up the new pattern starter lead to the solenoid, tested the solenoid - one less thing to worry about!
Fitted the old pistons and slipped the cylinders on to check the cylinder deck height, old rings had gaps up to 1.5mm! - and the bores were way over tolerance - done a few miles I guess!
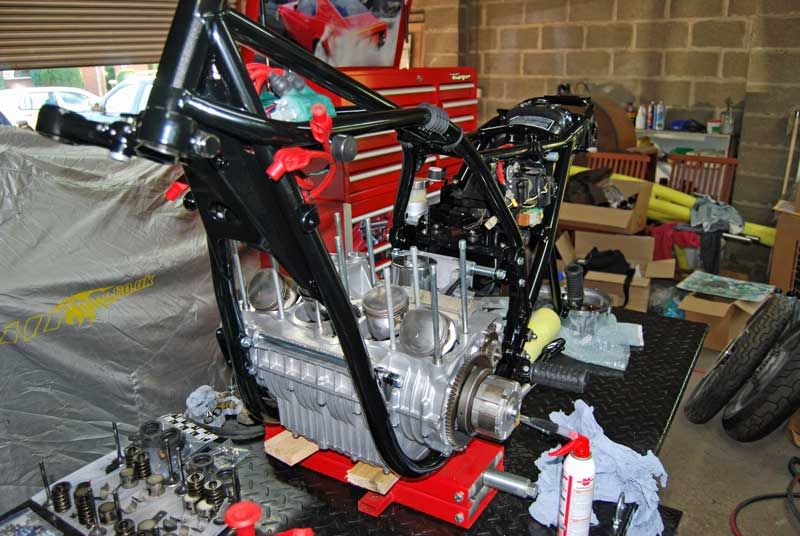
Had to replace the Igniton housing as the original was cracked, fitted the clutch and cover - test fitted the pattern points cover - looks very smart.
Fitted the DynaS plate - for those doing this job remove the shim washer behind the cam sleeve before fitting the dyna sleeve - makes life easier if the sleeve rotates freely on the shaft when you tighten up the bolt.
Mikey does a great job - the clutch cover used to have a deep gouge in it!
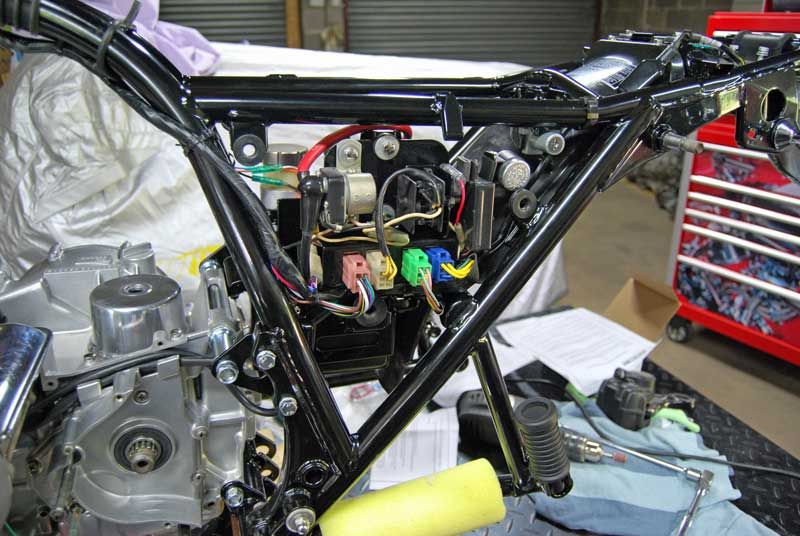
The old wiring loom was messed about too much to salvage, new pattern one is identical to the original - and has nice shiney connectors.
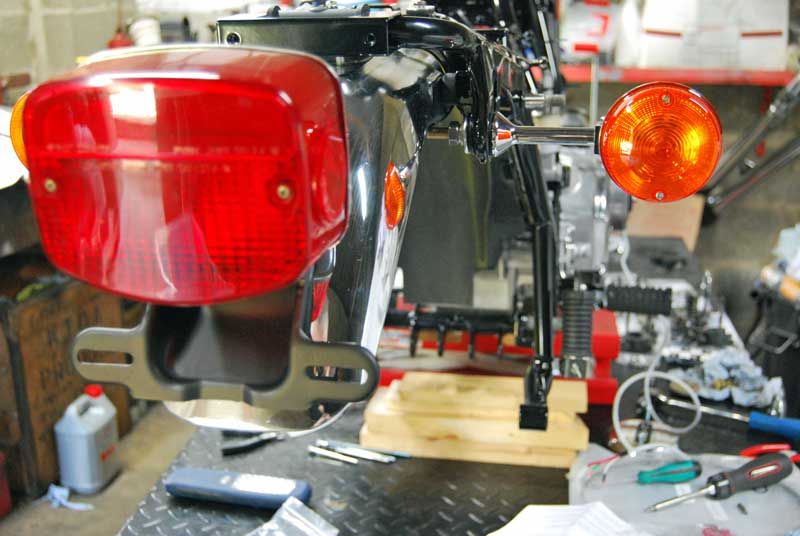
Fitted up the rear mudguard, indicators and tail light.
Had to use a new fitting kit for the tail light bracket as the original fell to bits when I removed the bracket for painting.
Indicator wiring came with straight pin connectors instead of bullet terminals, being a dab hand with the crimp pliers new non insulated bullets and clear covers makes the job look pukka.
The pattern indicators came from Z1 Enterprises and appear good quality, the pattern stems are a tad thin on the chrome plate - but a dam sight better than the bent rusty ones I took off.
Wiesco piston kit arrived this morning - never ending spending!
Fitted the frame onto the engine - which is a real treat!
Fitted the generator in the housing and double checked everything before installing on the bike and tightening the pan head screws up.
Tested the starter motor on the bench before installing, had to take the generator cover back off as the starter motor wouldn't fit without the reduction gear being fitted - last!!
Wired up the new pattern starter lead to the solenoid, tested the solenoid - one less thing to worry about!
Fitted the old pistons and slipped the cylinders on to check the cylinder deck height, old rings had gaps up to 1.5mm! - and the bores were way over tolerance - done a few miles I guess!
Had to replace the Igniton housing as the original was cracked, fitted the clutch and cover - test fitted the pattern points cover - looks very smart.
Fitted the DynaS plate - for those doing this job remove the shim washer behind the cam sleeve before fitting the dyna sleeve - makes life easier if the sleeve rotates freely on the shaft when you tighten up the bolt.
Mikey does a great job - the clutch cover used to have a deep gouge in it!
The old wiring loom was messed about too much to salvage, new pattern one is identical to the original - and has nice shiney connectors.
Fitted up the rear mudguard, indicators and tail light.
Had to use a new fitting kit for the tail light bracket as the original fell to bits when I removed the bracket for painting.
Indicator wiring came with straight pin connectors instead of bullet terminals, being a dab hand with the crimp pliers new non insulated bullets and clear covers makes the job look pukka.
The pattern indicators came from Z1 Enterprises and appear good quality, the pattern stems are a tad thin on the chrome plate - but a dam sight better than the bent rusty ones I took off.
Wiesco piston kit arrived this morning - never ending spending!
-
paul doran

- Area Rep.
- Posts: 15910
- Joined: 24th Sep 2004
- Location: near Dublin Ireland
LondonZ1 wrote:Great thread and very useful. I'm going to be attempting my first ever engine assembly in a month or so and this is really helpful, especially with the high quality photos. I'll be fitting Dyna ignition as well but I've had all the parts powder coated satin black.
Thanks, I've built a few motors in my time but was still a tad daunted about tackling the Z motor - I'm pleased it's gone so well - so far!
Reading about the DynaS set up is interesting, the instructions are not as clear as I'd like.
Powder coat is great until you have to remove a bit, it adds thickness, usually acting like a thick washer reducing affective thread length or fouling something that requires to be an interference fit - like the motor in the frame!
Good luck with your motor build - have you set up a build thread?
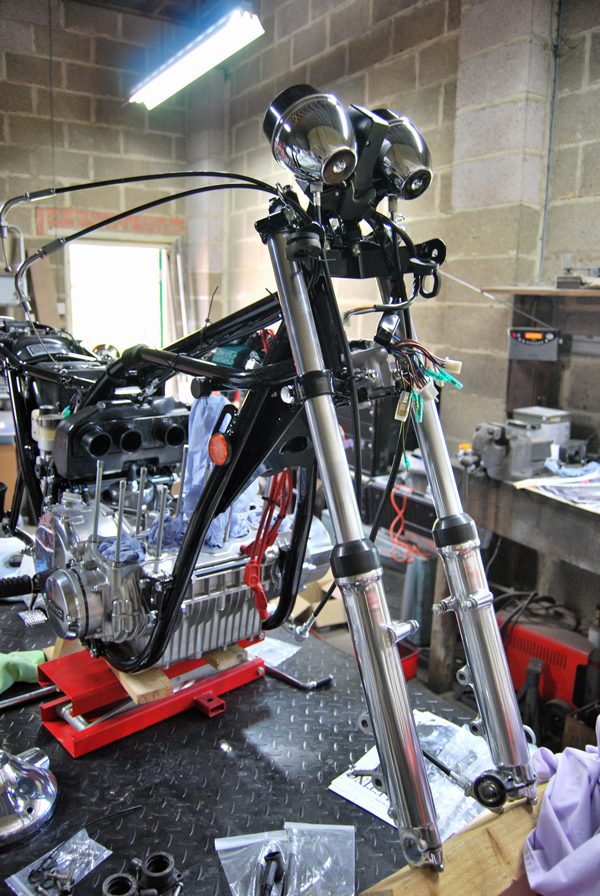
Had a busy few evenings playing bike.
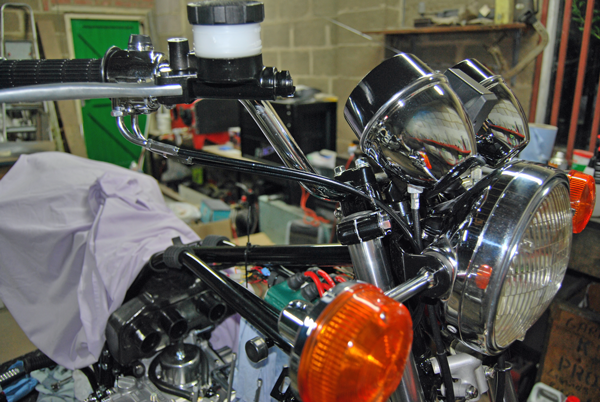
Mounted up the clocks after fitting the new dust cover and nut, slid in the forks, new main nut and tightened everything up.
Looking a bit more like a bike now!
Made the trip to Bristol on Saturday to meet Mikey and pick up the Chroming, Zinc plating and the polished wheels, outstanding job Mikey!
Couldn't wait to get started so while the missus was cooking tea I trial fitted the super shiny rear brake lever.

Sunday was a fab day weather wise so got sod all done on the bike as we were out all day on the Tuono.
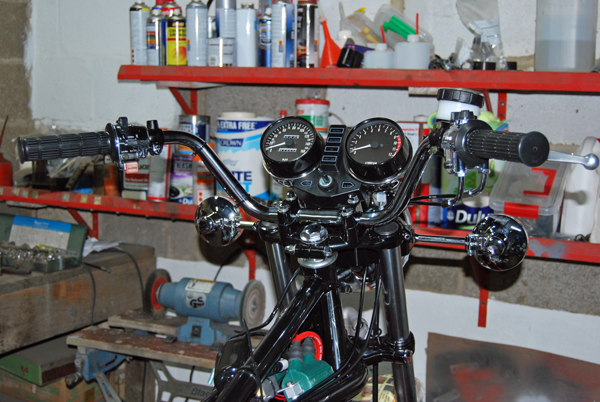
Spent Monday night feeding the switchgear cables through the bars - pig of a job!
Test and final fitted the headlamp and pattern indicators, had to take the n/s switchgear back off to get the clutch lever on!
Fitted up the bars, twist grip, glued on the n/s grip and routed the wiring.
Final fitted the rear brake lever, with the re-zinc'd master cylinder push rod.
Pattern mastercylinder got fitted, not that happy with the fit as the adjusting screw fouled the o/s switchgear - shortened the screw 6mm to give sufficient clearance.
Gave the re-chromed front mudguard a coat of primer on the underside then some underseal - fitted it up and left it covered to protect it whilst I finish the build - fitted the re-chromed hose/cable supports.
Fitted the swingarm with it's freshly re-zinc'd bolt 100lbft has never felt so scarey!
Fitted the re-zinc'd breather bolt and cut some new hose for the oil cooler take off, must get round to sourcing a cooler!
Trial fitted the airbox after giving it a dam good clean and fitting the new rubbers, just need to put some little filters in the drain holes and another job is done.
Mounted up the clocks after fitting the new dust cover and nut, slid in the forks, new main nut and tightened everything up.
Looking a bit more like a bike now!
Made the trip to Bristol on Saturday to meet Mikey and pick up the Chroming, Zinc plating and the polished wheels, outstanding job Mikey!
Couldn't wait to get started so while the missus was cooking tea I trial fitted the super shiny rear brake lever.
Sunday was a fab day weather wise so got sod all done on the bike as we were out all day on the Tuono.
Spent Monday night feeding the switchgear cables through the bars - pig of a job!
Test and final fitted the headlamp and pattern indicators, had to take the n/s switchgear back off to get the clutch lever on!
Fitted up the bars, twist grip, glued on the n/s grip and routed the wiring.
Final fitted the rear brake lever, with the re-zinc'd master cylinder push rod.
Pattern mastercylinder got fitted, not that happy with the fit as the adjusting screw fouled the o/s switchgear - shortened the screw 6mm to give sufficient clearance.
Gave the re-chromed front mudguard a coat of primer on the underside then some underseal - fitted it up and left it covered to protect it whilst I finish the build - fitted the re-chromed hose/cable supports.
Fitted the swingarm with it's freshly re-zinc'd bolt 100lbft has never felt so scarey!
Fitted the re-zinc'd breather bolt and cut some new hose for the oil cooler take off, must get round to sourcing a cooler!
Trial fitted the airbox after giving it a dam good clean and fitting the new rubbers, just need to put some little filters in the drain holes and another job is done.
Who is online
Users browsing this forum: No registered users and 11 guests