Hello Guest User,

Please feel free to have a look around the forum but be aware that as an unregistered guest you can't see all of it and you can't post.

To access these 'Registered Users Only' areas simply register and login.

Limited Rebuild

Work in Progress

Moderators: KeithZ1R, chrisu, paul doran, Taffus

Message
Author
User avatar
Hinckley
100Club
100Club
Posts: 263
Joined: 21st Jun 2012
Location: UK

Limited Rebuild

#1 PostAuthor: Hinckley » Tue Jun 26, 2012 11:49 am

After gaining inspiration from your awesome projects - it's my turn for some mechanical therapy!

The bike - '1977 KZ1000 B1 Limited'.

My aim - make a usable tidy bike for high days and holidays.

Imported from California it has faired better than most UK bikes, surface rust in places, more spider nests than a few, but overall not bad at all.

Most parts were accounted for, original exhausts and mirrors were the only missing items, some non standard parts, cheapo side panels, ugly exhaust, coils, leads, indicators, etc...

It was a runner, of a fashion, I gave it a compression test - carb flush - took the plugs out and cranked it over and got oil pressure - added some fuel - first prod of the starter it sparked into life - settling to a nice tickover, wasn't keen on revving and made a startling mechanical rattling above 3k rpm.

I would suspect the bike hasn't seen action for many a good year - every joint was dry and caked in dry grease - I was surprised when I hooked up to a slave battery - most electrics worked - when running a charge was being put into the slave battery, sadly both master cylinders were shot and brake fluid had leaked out many years ago causing some interesting corrosion.

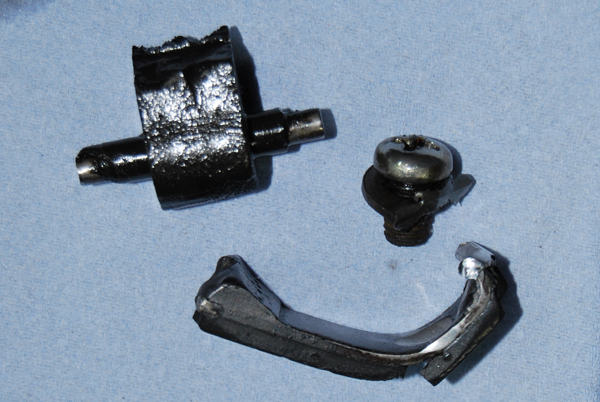
After tearing down the bike the culprit for the rattling soon appeared!

Image

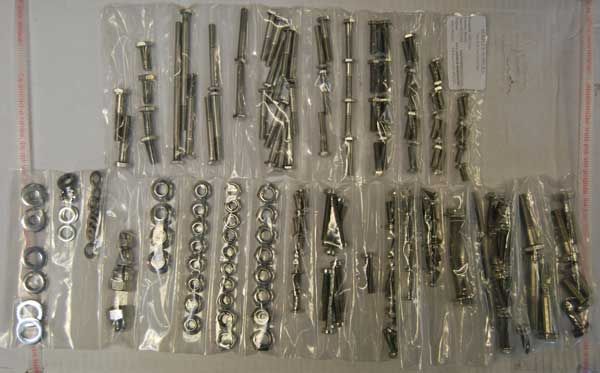
I've spent the last couple of weeks trawling forums gaining insight into who does what and where, which suppliers for which parts, so most of the parts have been sourced and even though expensive little parcels keep arriving - my wife still likes me!!

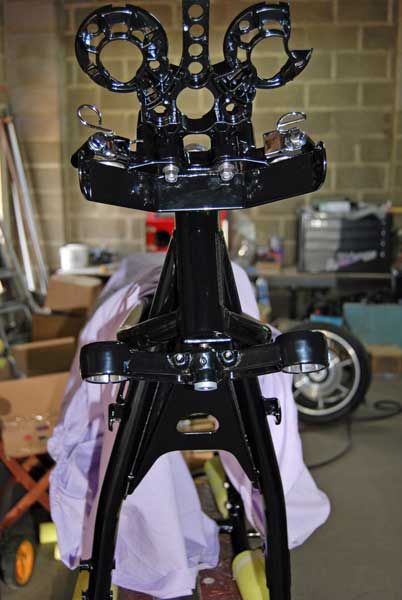
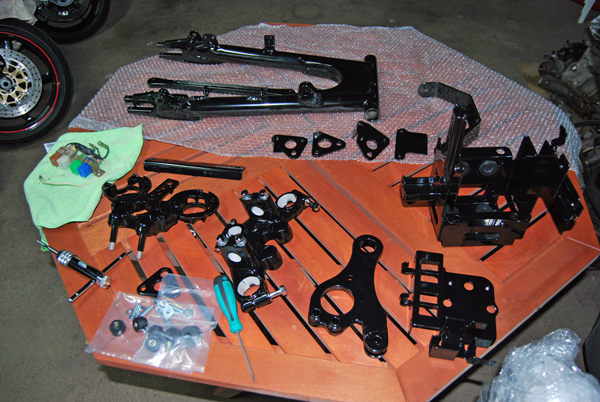
First to be done was the black stuff.

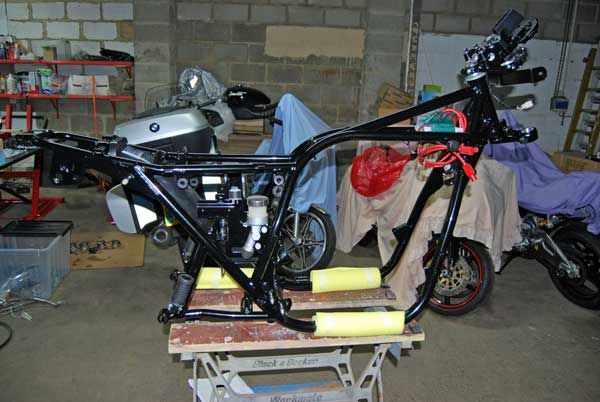
Frame jigged - all the black stuff went off for powder coat - now I could have gone for two pack - but - I'm fitted with two left hands - powder coat was the safe option.

How my usually tidy garage looked yesterday...

Image

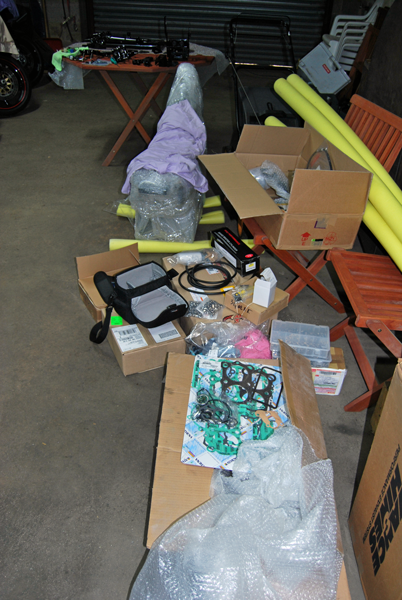
Thanks to the rather wet weather - the outdoor table came in handy..

Image

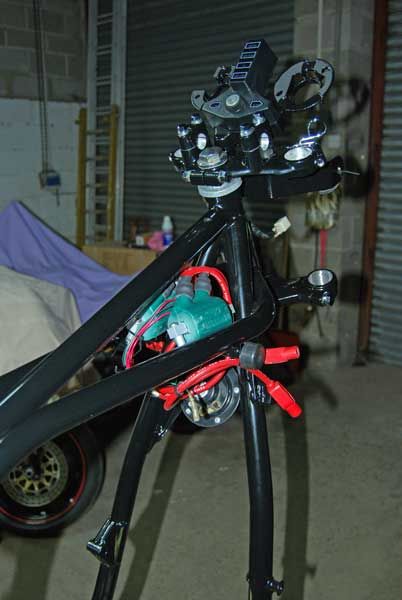
On the ramp - work in progress.

Image

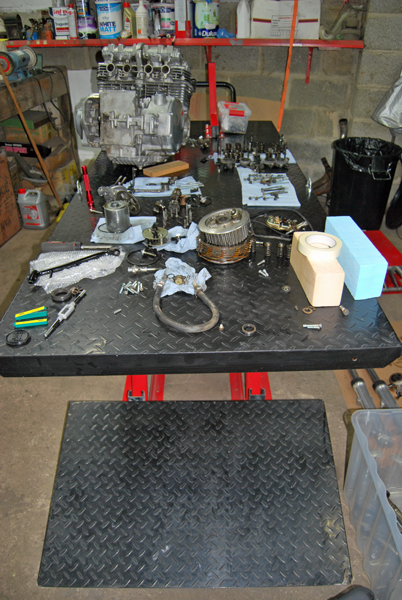
Two engine bolts were missing, one on the cam cover - one on the starter motor - both previously broken off many years ago - 10 mins with a drill, some patience and some easy outs sorted the problem.

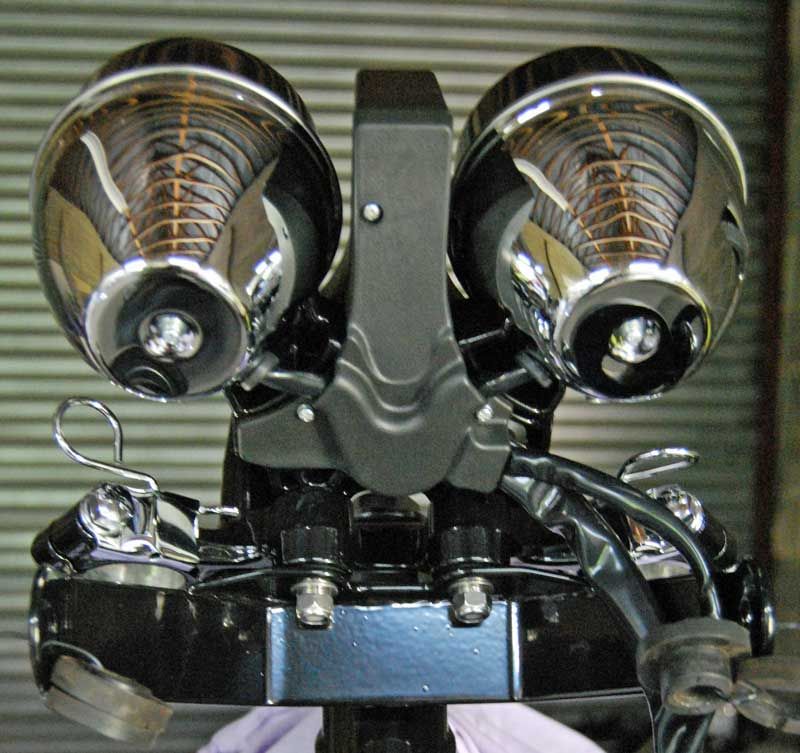
Close examination revealed the points housing and cover were both cracked - as the o/s frame down tube wasn't quite straight I suspect crash bars were once fitted and mostly did they're job!

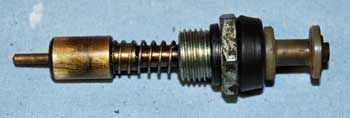
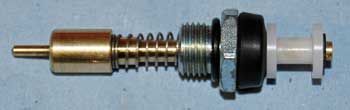
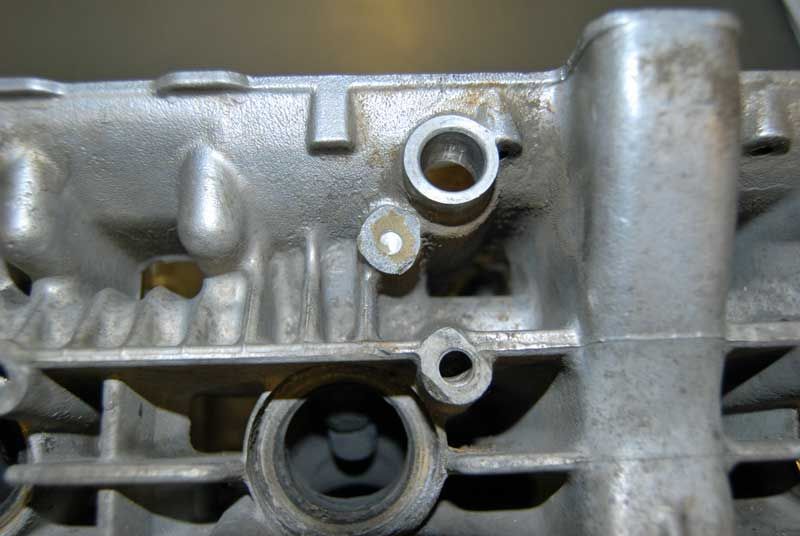
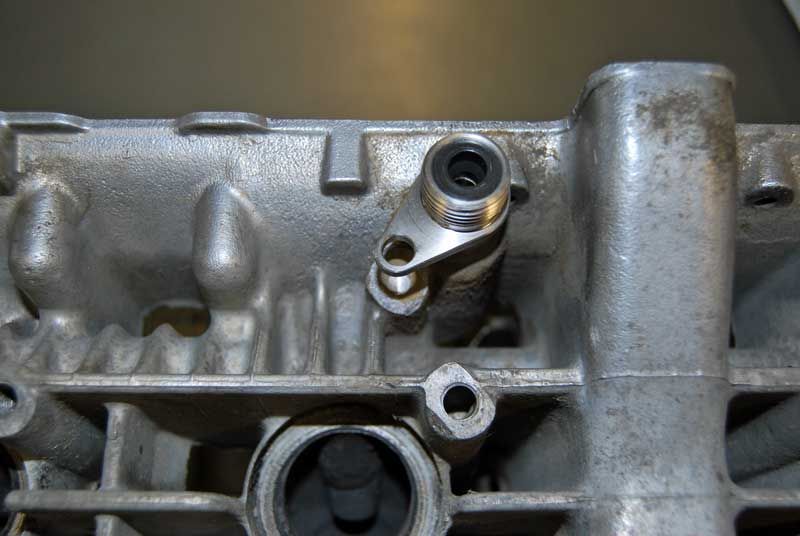
I snapped off the boss on the head trying to undo the rev counter drive holder bolt - dammit! the worm drive sleeve was also corroded in place - plenty of patience was required to extract it without damaging the head.

I'll make up a top hat to replace the boss and bond it in - Z power do a replacement drive sleeve that'll get used in place of the somewhat 2nd had original. Then Mr Smethurst can work his magic..

Now if I can only find how and where it all goes :lol:

H

User avatar
Ginger Bear
Hardcore
Hardcore
Posts: 6850
Joined: 16th Dec 2008
Location: In the Dark.
Contact:

#2 PostAuthor: Ginger Bear » Tue Jun 26, 2012 6:08 pm

That's a good start. Looking forward to seeing this progress. :up
Image

# 104

Phil Churchett Award Winner 2011 & 2016 :D
Buzzworkz Best Modified Zed 2016

User avatar
ADRIAN H
Hardcore
Hardcore
Posts: 4174
Joined: 21st Mar 2009
Location: The Brunswick, Charminster. Bmth

#3 PostAuthor: ADRIAN H » Tue Jun 26, 2012 7:12 pm

Keep it up, wish my garage was as spacious and tidy as that. :D
👀 👀 👀
email - adrianhorsfield@live.co.uk

User avatar
coldsummer
Hardcore
Hardcore
Posts: 3211
Joined: 29th Jun 2009
Location: Berkeley

#4 PostAuthor: coldsummer » Tue Jun 26, 2012 7:38 pm

This is the nicer part of the rebuild process, all parts shiny clean and ready for reassembly. Just need the time and motivation to complete the job now! Good luck.

User avatar
Hinckley
100Club
100Club
Posts: 263
Joined: 21st Jun 2012
Location: UK

#5 PostAuthor: Hinckley » Tue Jun 26, 2012 8:55 pm

Cheers, could do with some advice though.

I've still not worked out what to do with the standard alum wheels, polish then paint or paint then polish? There's a bit of curb marking on the front edges I'm hoping they can be polished out.

Some of you guys use progressive springs, I presume they would be available for the Ltd? Any chance of votes for and against?

Could do with some chroming and zinc plating, anyone fancy the job?

User avatar
coldsummer
Hardcore
Hardcore
Posts: 3211
Joined: 29th Jun 2009
Location: Berkeley

#6 PostAuthor: coldsummer » Tue Jun 26, 2012 9:28 pm

Mikey's the man for your polishing and plating. His contact details are in the services section (click on 'links' at the top right of the page). I asked him whether to polish or paint first and he recommended polishing first.

sanderz
Custard Cream
Custard Cream
Posts: 967
Joined: 2nd Mar 2010
Location: Manchester

#7 PostAuthor: sanderz » Tue Jun 26, 2012 10:27 pm

Great start there, having parts powder coat makes sense.

Look forward to seeing this progress, stick at it :up
Wots up DOHC

User avatar
PAULJAC47
Hardcore
Hardcore
Posts: 3266
Joined: 31st Aug 2008
Location: WOLVO WEST MIDS ENGLAND

#8 PostAuthor: PAULJAC47 » Tue Jun 26, 2012 10:40 pm

Good project though a word of warning(from experience)if thats one of those pattern gasket sets do yourself a huge favour and deposit it in the nearest bin,most of them are poor at least specially the base,head gasket and valve stems seals and cam tunnel o ring, works out cheaper in the long run to use gen ones at least for the gaskets i have mentioned reckon most on here will agree with me after we have all been down this path,,Good luck..Paul J
PAULJAC47,,,,,"She may not look like much, but she's got it where it counts, kid."
-Han Solo

You can't polish a turd, but you can roll it in glitter

Salad is what real food eats.
Anon

PUM 673

User avatar
Bill Newman
100Club
100Club
Posts: 459
Joined: 27th May 2007
Location: Ipswich

#9 PostAuthor: Bill Newman » Tue Jun 26, 2012 11:08 pm

Best of luck with it. I will look forward to seeing it completed.

I know the stage you are at and the best bit is about to start...

User avatar
Hinckley
100Club
100Club
Posts: 263
Joined: 21st Jun 2012
Location: UK

#10 PostAuthor: Hinckley » Tue Jul 03, 2012 12:16 pm

Thanks for the tip on the gaskets Paul, I have genuine rocker, head, base gaskets already - major seals are genuine - any others that need to be genuine?

Managed to make some progress with the carbs on Sunday.

Choke plungers got treated to new cotton reels and seals.
ImageImage

Carb re-assembly was fun, Mr Smethurst does a fine job, not much fun getting the media out of the threads and galleries though!
Image

Onto stripping the head, time to attend to the broken mount for the tacho drive holder.

Image

Replacement Z Power holder is the finest Taiwan machining I've seen.
Head now at the machine shop to mill back the broken mount and tap in a bush.

Image

Hoping to get the cases and covers off for cleaning next week.

The engine was running mega rich! bike was running the standard airbox/filter set up - good float height - no flooding - standard pilots - carb mains were 95's instead of standard 105's - exhaust was aftermarket 4>1 - wouldn't have thought it would be so rich :?? barrels are + 20 thou pistons + rings are very low mileage - I imagine the cam timing would have been a tad variable due to the broken slipper - any expert opinions?

User avatar
scott
Junior Section leader
Posts: 1217
Joined: 19th Sep 2007
Location: PORTSMOUTH

#11 PostAuthor: scott » Tue Jul 03, 2012 2:06 pm

Well, well, strangely enough my carbs came back from Smethursts full of the media/shite that he uses.....pilot air passages have the media in them, can't get it out after 10 sonic baths.....idles shite....another set of carbs fitted......not shiney but functional now

User avatar
PAULJAC47
Hardcore
Hardcore
Posts: 3266
Joined: 31st Aug 2008
Location: WOLVO WEST MIDS ENGLAND

#12 PostAuthor: PAULJAC47 » Tue Jul 03, 2012 4:07 pm

Hinckley wrote:Thanks for the tip on the gaskets Paul, I have genuine rocker, head, base gaskets already - major seals are genuine - any others that need to be genuine?

Managed to make some progress with the carbs on Sunday.

Choke plungers got treated to new cotton reels and seals.
ImageImage

Carb re-assembly was fun, Mr Smethurst does a fine job, not much fun getting the media out of the threads and galleries though!
Image

Onto stripping the head, time to attend to the broken mount for the tacho drive holder.

Image

Replacement Z Power holder is the finest Taiwan machining I've seen.
Head now at the machine shop to mill back the broken mount and tap in a bush.

Image

Hoping to get the cases and covers off for cleaning next week.

The engine was running mega rich! bike was running the standard airbox/filter set up - good float height - no flooding - standard pilots - carb mains were 95's instead of standard 105's - exhaust was aftermarket 4>1 - wouldn't have thought it would be so rich :?? barrels are + 20 thou pistons + rings are very low mileage - I imagine the cam timing would have been a tad variable due to the broken slipper - any expert opinions?


Glad you are using gen gaskets,make sure the valve stem seals are gen as well,notice you have choke plungers out make sure the seals on the bottoms are in good shape as this is a common cause for richness,reset cam amd ignition timing,check needle clips are set on midposition..Good luck Paul J
PAULJAC47,,,,,"She may not look like much, but she's got it where it counts, kid."

-Han Solo


You can't polish a turd, but you can roll it in glitter


Salad is what real food eats.

Anon


PUM 673

User avatar
Hinckley
100Club
100Club
Posts: 263
Joined: 21st Jun 2012
Location: UK

#13 PostAuthor: Hinckley » Tue Jul 03, 2012 7:11 pm

PAULJAC47 wrote:Glad you are using gen gaskets,make sure the valve stem seals are gen as well,notice you have choke plungers out make sure the seals on the bottoms are in good shape as this is a common cause for richness,reset cam amd ignition timing,check needle clips are set on midposition..Good luck Paul J


Thanks Paul.

I've ordered the steel outer Suzuki stem seals from Z1Enterprises, they say they're an upgrade over standard, do you think they'll be ok?

User avatar
Hinckley
100Club
100Club
Posts: 263
Joined: 21st Jun 2012
Location: UK

#14 PostAuthor: Hinckley » Thu Jul 19, 2012 9:09 am

Sorted some of the cases and zinc plating for sending off to Mikey.

Spent most of the weekend trial fitting the headstock, battery case and coils etc, powdercoat can be a real pain when it ads thickness to mount surfaces!

Polished stainless stuff arrived from Surplus Supplies :D
Shame the 6mm washers were 1/4" ID!
Image

ImageImage

Shame most of it's coming off again to fit the motor but progress is being made.
Image

User avatar
Hinckley
100Club
100Club
Posts: 263
Joined: 21st Jun 2012
Location: UK

#15 PostAuthor: Hinckley » Tue Aug 07, 2012 3:56 pm

Got the clocks back from Al after referb, mighty nice job too!
Off on the Monday - back by the Friday - great service.

Fitted up the new lower Z Power covers and Idiot light covers.

Image

Had to make a trip to Warminster on Sat - made it worth while by calling in on Mikey on the way back to collect the polishing, and view his bikes.
Many thanks mate top job! :up

Built the forks up using new seals etc.
170ml of 10w oil gave the 426mm air gap the Clymer manual suggests, going to be a while before I'll know if that's the right amount/weight.

Image

Looking the business with the freshly polished bottoms :vcool


Return to “Projects”

Who is online

Users browsing this forum: No registered users and 7 guests