Hello Guest User,
Please feel free to have a look around the forum but be aware that as an unregistered guest you can't see all of it and you can't post.
To access these 'Registered Users Only' areas simply register and login.
Please feel free to have a look around the forum but be aware that as an unregistered guest you can't see all of it and you can't post.
To access these 'Registered Users Only' areas simply register and login.
Michigan to West Sussex-73 Z1 for restoration
Moderators: KeithZ1R, chrisu, paul doran, Taffus


-
DogsbolloxofZ1B

- Hardcore

- Posts: 1592
- Joined: 28th Feb 2006
- Location: Near Chichester
-
Davy Doherty

- Hardcore
- Posts: 3009
- Joined: 28th Oct 2003
- Location: Derry Ireland
tailiftchris wrote:You disappoint me Steve.
I thought you`d bought that sad old nail from Davy to restore !
I was thinking thank god someone has some balls !
Glad you`re doing it proper anyhow
See what i mean about you leaving school early Chrissie,, Steve bought my part's NOT the bike.
Life's too short!
-
Davy Doherty
- Hardcore
- Posts: 3009
- Joined: 28th Oct 2003
- Location: Derry Ireland
-
wilsonsjw11
- Hardcore
- Posts: 1317
- Joined: 18th Jul 2008
- Location: West Sussex/Central London
-
wilsonsjw11
- Hardcore
- Posts: 1317
- Joined: 18th Jul 2008
- Location: West Sussex/Central London
Just a couple of jobs to keep the momentum going.
The bearings being fitted to the headstock are the traditional ball and race type.
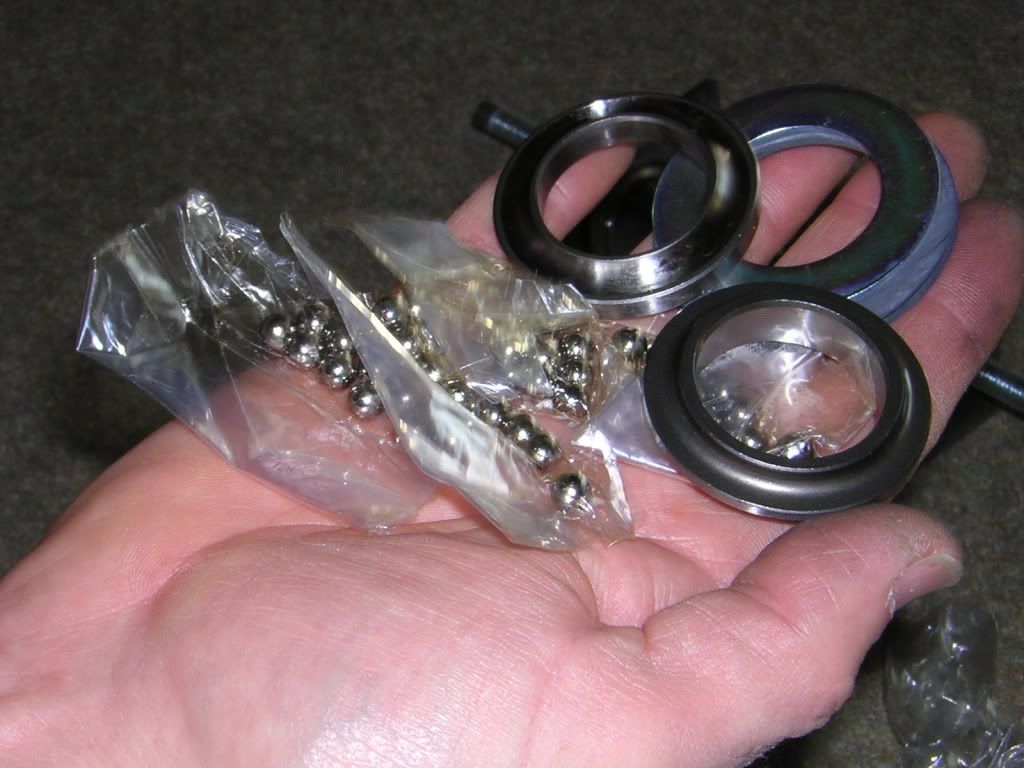
The race cup is pulled into place with a simple puller made up of 2 pieces of flat bar and a length of M10 studding
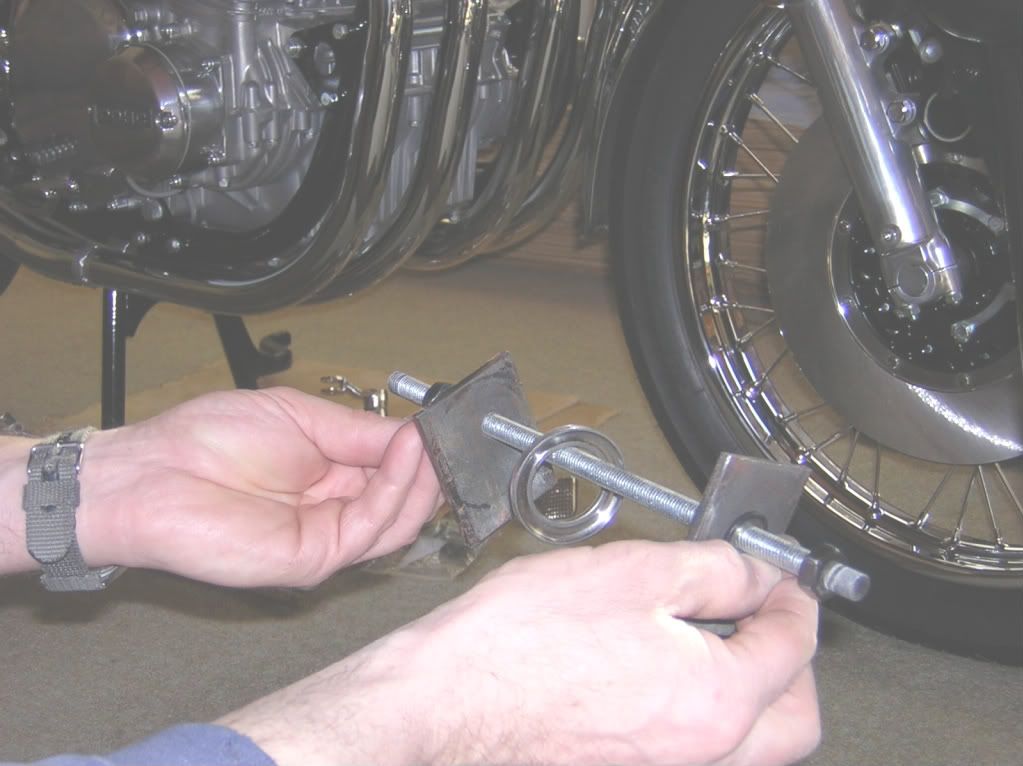
The top race is pulled into the headstock after applying a little smear of grease until it is flush with the top of the headstock then using the old bearing that was removed as a packer, with its outer diameter ground down so its a loose fit to the headstock,pull the new bearing in until it "bottoms".
For the lower race the procedure is the same as the top but both of the removed bearings will have to be used as packers to get the new race pulled fully home.
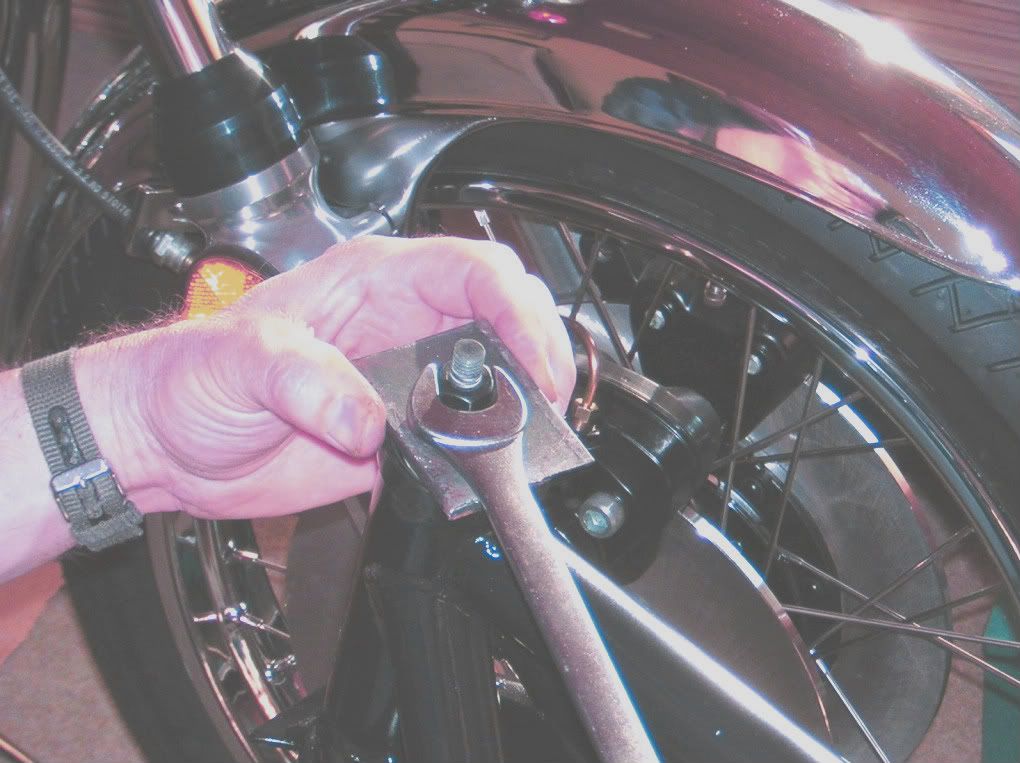
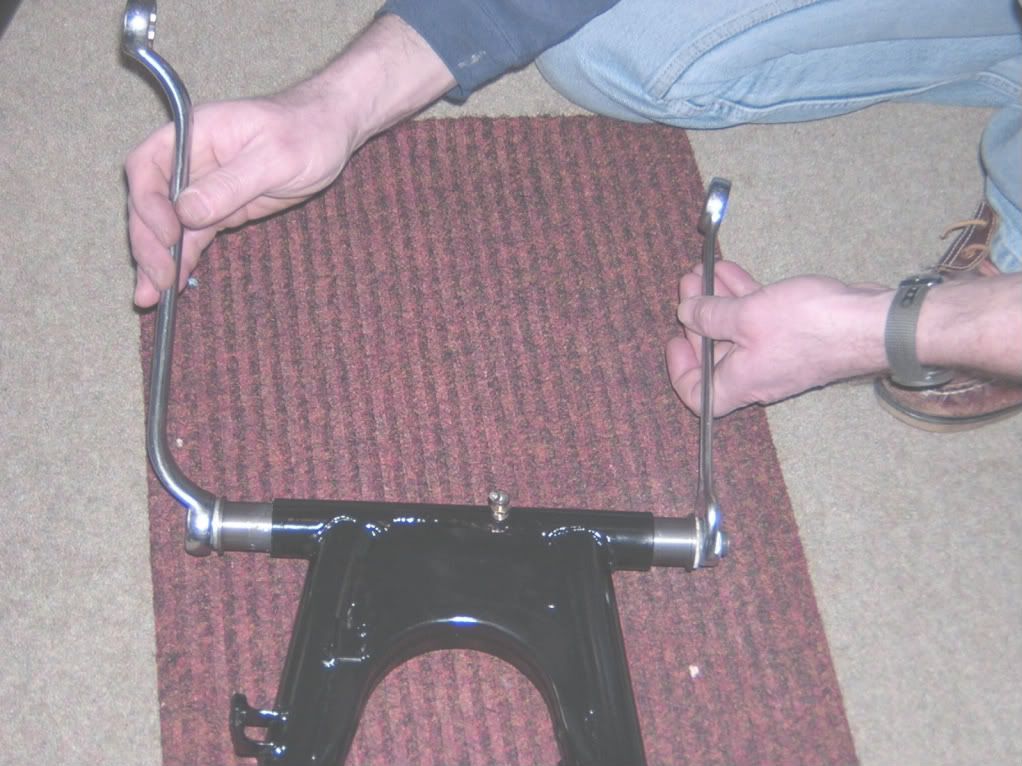
A new set of bushes etc,now also NLA from Kawasaki,were fitted to the swing arm again with the same method.
Regards
Steve
The bearings being fitted to the headstock are the traditional ball and race type.
The race cup is pulled into place with a simple puller made up of 2 pieces of flat bar and a length of M10 studding
The top race is pulled into the headstock after applying a little smear of grease until it is flush with the top of the headstock then using the old bearing that was removed as a packer, with its outer diameter ground down so its a loose fit to the headstock,pull the new bearing in until it "bottoms".
For the lower race the procedure is the same as the top but both of the removed bearings will have to be used as packers to get the new race pulled fully home.
A new set of bushes etc,now also NLA from Kawasaki,were fitted to the swing arm again with the same method.
Regards
Steve
-
wilsonsjw11
- Hardcore
- Posts: 1317
- Joined: 18th Jul 2008
- Location: West Sussex/Central London
On the anorak front when the bike was stripped the airbox support bracket was held in place by 2 M6 No4 upset bolts as per the oil tank bracket is this right?
Sorry about the last images they were shite(i've changed the photographer now)some images to come of the reconditioned starter motor and alternator wiring.
Regards
Steve
Sorry about the last images they were shite(i've changed the photographer now)some images to come of the reconditioned starter motor and alternator wiring.
Regards
Steve
-
Davy Doherty
- Hardcore
- Posts: 3009
- Joined: 28th Oct 2003
- Location: Derry Ireland
-
wilsonsjw11
- Hardcore
- Posts: 1317
- Joined: 18th Jul 2008
- Location: West Sussex/Central London
-
wilsonsjw11
- Hardcore
- Posts: 1317
- Joined: 18th Jul 2008
- Location: West Sussex/Central London
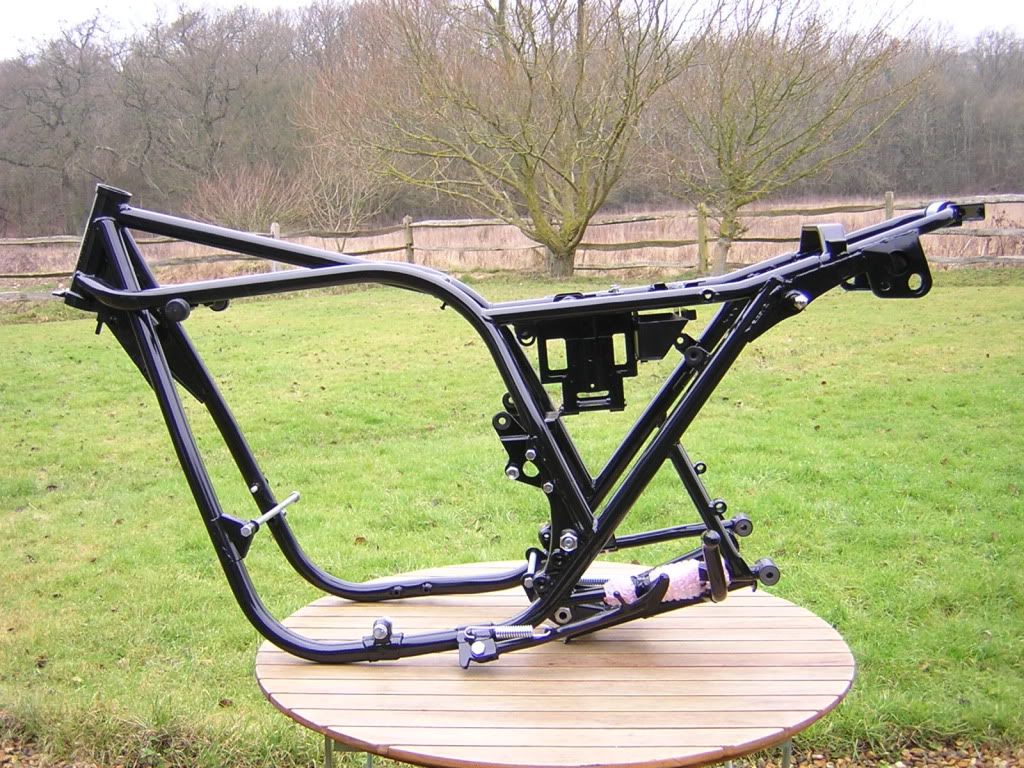
The paint has been allowed to fully harden on the frame along with the other black bitz and are now being put back together along with some
replated items the finish on the paintwork has come in really well and its noticeable how thin the paint is when adding items like the side stand.
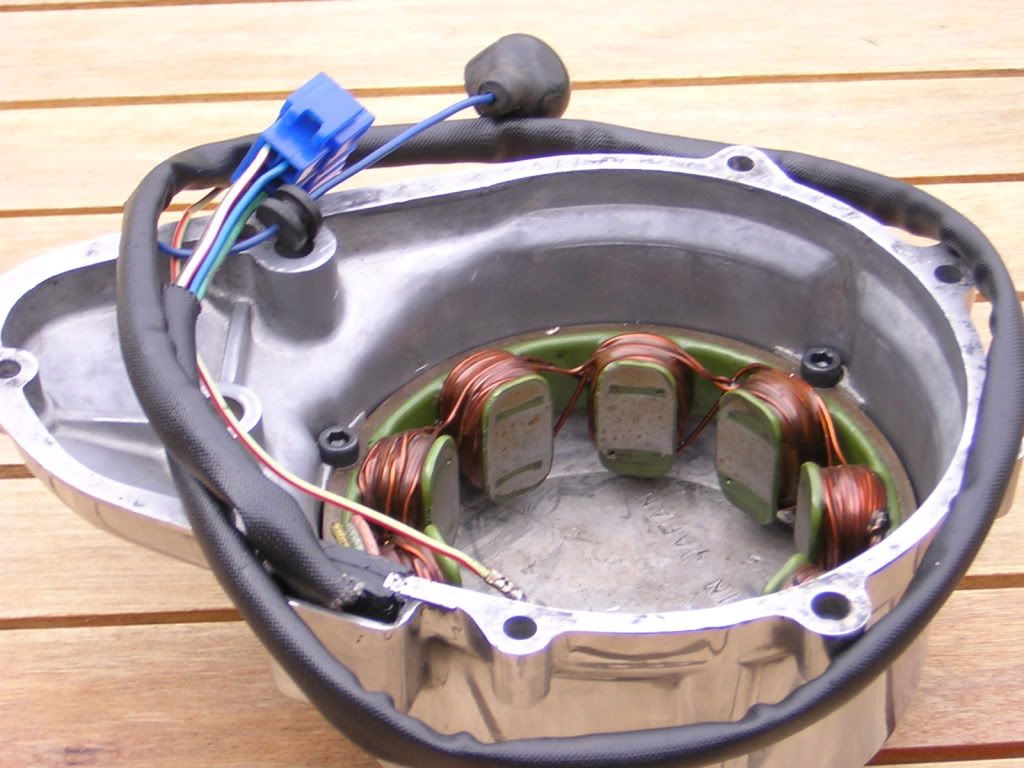
The alternator stator has been refurbed with new wiring and a new outer sleeve.I purchased a A1 condition lead from John Browse and this was stripped down to provide good as new wiring and a perfect oil pressure switch rubber boot this was all added to the existing stator winding via new soldered joints and heat shrink sleeving to finish off the insulated joints.
A new grommet completed the job
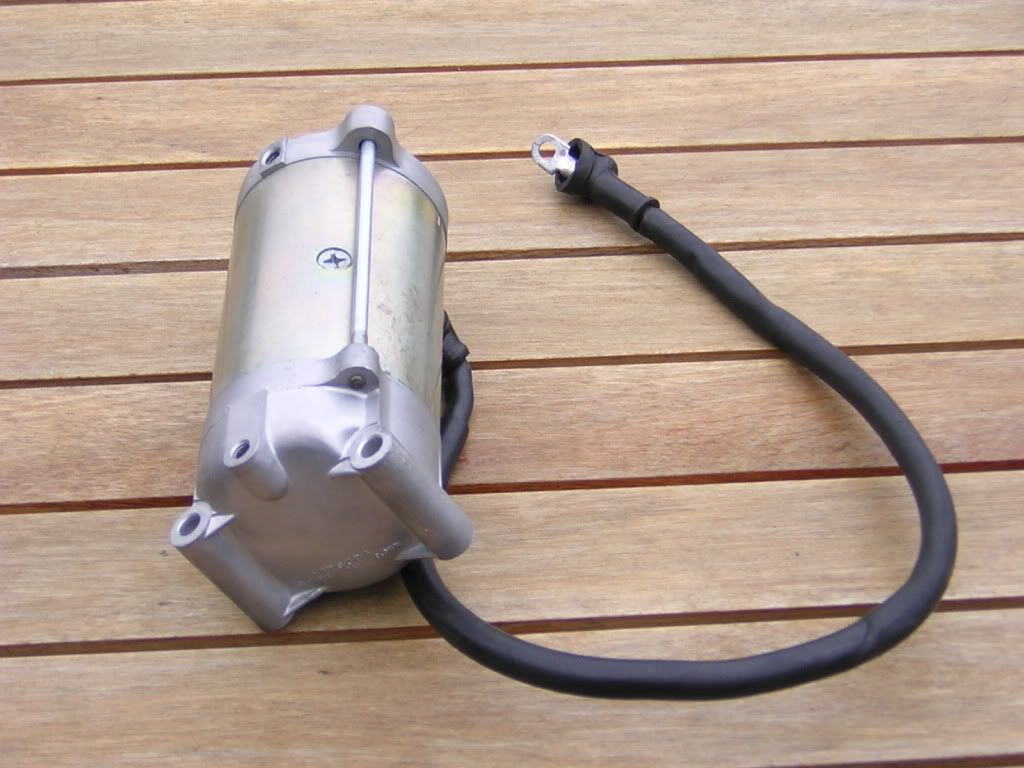
The starter motor was completely stripped down, the end caps were sent to Mikey for vapour cleaning along with the stator case screws for rezincingThe mica slots were cleaned out on the commutator and the whole case cleaned out with a dry air aerosol.The stator case was not replated as I could not find out what the original finish was so it was given a thorough clean and light polish,a new lead was soldered to the stator casing with the aid of a 300w soldering iron.A new set of carbon brushes, brush springs and new O rings completed the job.
Hopefully if all goes to plan the next images displayed will be of the engine rebuild which Mike Hunnisett will be carrying out.
Regards
Steve
replated items the finish on the paintwork has come in really well and its noticeable how thin the paint is when adding items like the side stand.
The alternator stator has been refurbed with new wiring and a new outer sleeve.I purchased a A1 condition lead from John Browse and this was stripped down to provide good as new wiring and a perfect oil pressure switch rubber boot this was all added to the existing stator winding via new soldered joints and heat shrink sleeving to finish off the insulated joints.
A new grommet completed the job
The starter motor was completely stripped down, the end caps were sent to Mikey for vapour cleaning along with the stator case screws for rezincingThe mica slots were cleaned out on the commutator and the whole case cleaned out with a dry air aerosol.The stator case was not replated as I could not find out what the original finish was so it was given a thorough clean and light polish,a new lead was soldered to the stator casing with the aid of a 300w soldering iron.A new set of carbon brushes, brush springs and new O rings completed the job.
Hopefully if all goes to plan the next images displayed will be of the engine rebuild which Mike Hunnisett will be carrying out.
Regards
Steve

-
wilsonsjw11
- Hardcore
- Posts: 1317
- Joined: 18th Jul 2008
- Location: West Sussex/Central London
Piggy
Standby to be corrected;
Pt-Bolt, allen 120Q0635 M6x35
Thats what my gen parts manual says anyway
Steve
Standby to be corrected;
Pt-Bolt, allen 120Q0635 M6x35
Thats what my gen parts manual says anyway
Steve
Last edited by wilsonsjw11 on Mon Feb 15, 2010 10:23 am, edited 1 time in total.

-
wilsonsjw11
- Hardcore
- Posts: 1317
- Joined: 18th Jul 2008
- Location: West Sussex/Central London
Who is online
Users browsing this forum: No registered users and 21 guests