Hello Guest User,

Please feel free to have a look around the forum but be aware that as an unregistered guest you can't see all of it and you can't post.

To access these 'Registered Users Only' areas simply register and login.

Checking Valve shims

Need help restoring, building, or finding then try here.

Moderators: KeithZ1R, chrisu, paul doran, Taffus

Message
Author
User avatar
chrisu
Moderator
Posts: 4367
Joined: 3rd Sep 2005
Location: herts

Checking Valve shims

#1 PostAuthor: chrisu » Sat Dec 20, 2008 1:53 pm

for those who haven't ever tried doing your own valve shims here is an idiots guide (me) to it. hopefully it'll make sense. This is shown on my Z1000H but the principle is the same for all 1980 or earlier Z1, Z900s & Z1000s.

Always do one at a time and be patient.

So to start remove cam cover & spark plugs plus the timing/points cover.

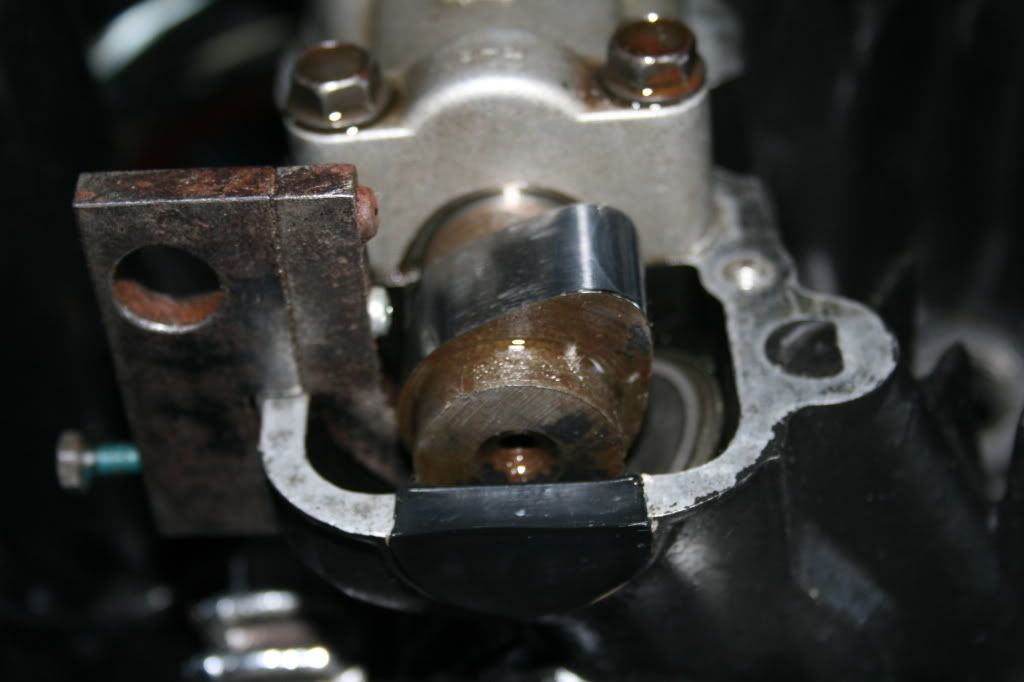
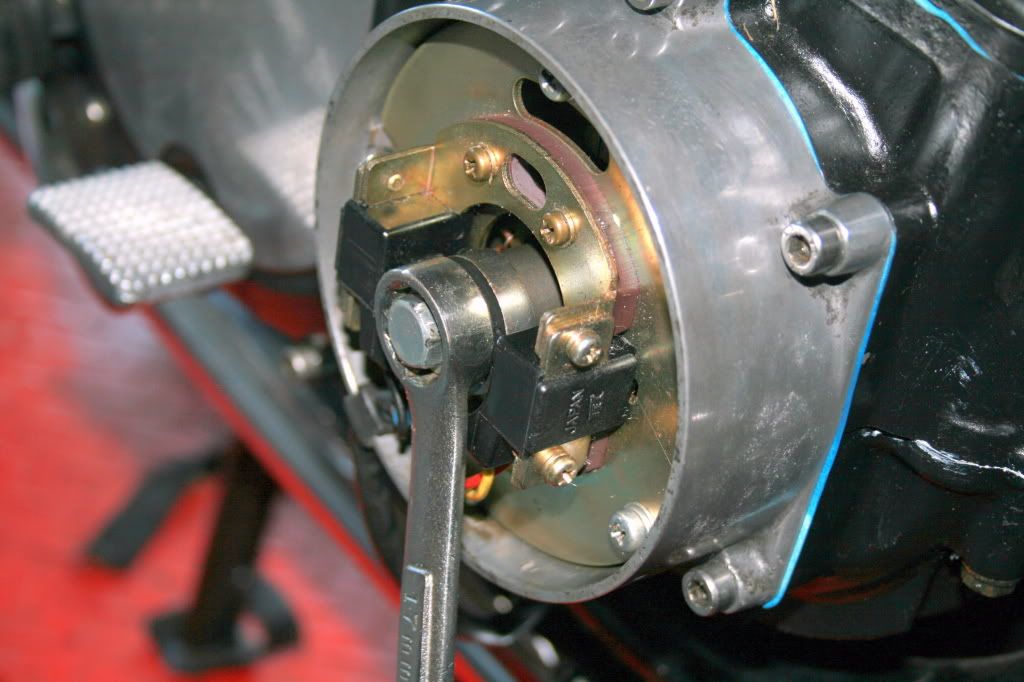
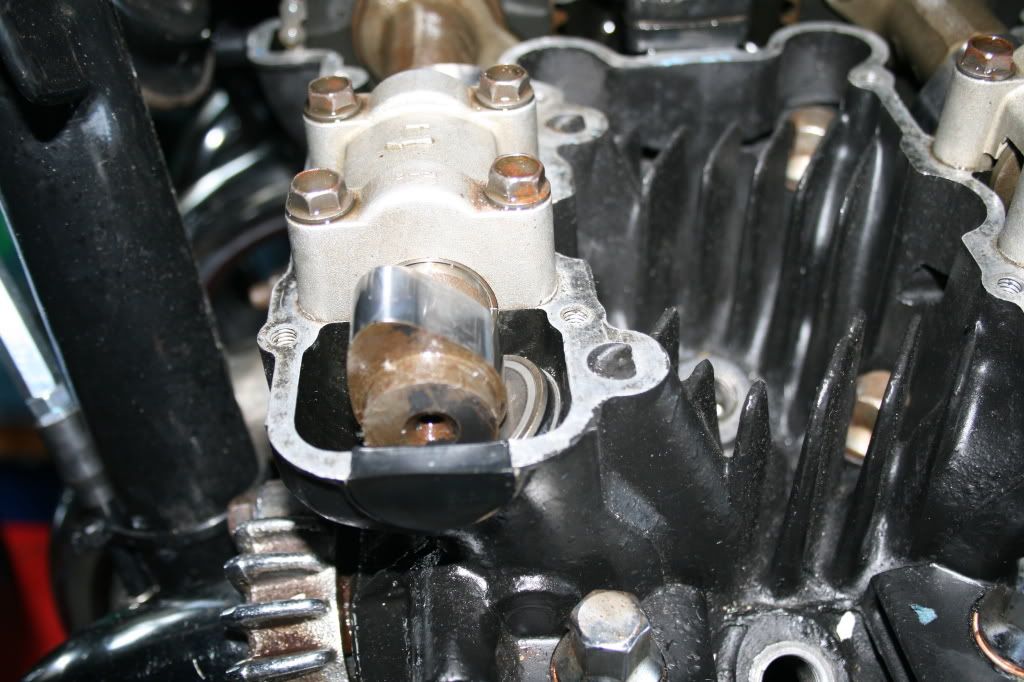
Adjust the cams using a 17mm spanner on the advance/retard nut until the cam lobe is pointing away from the shim/follower.
Image

Image


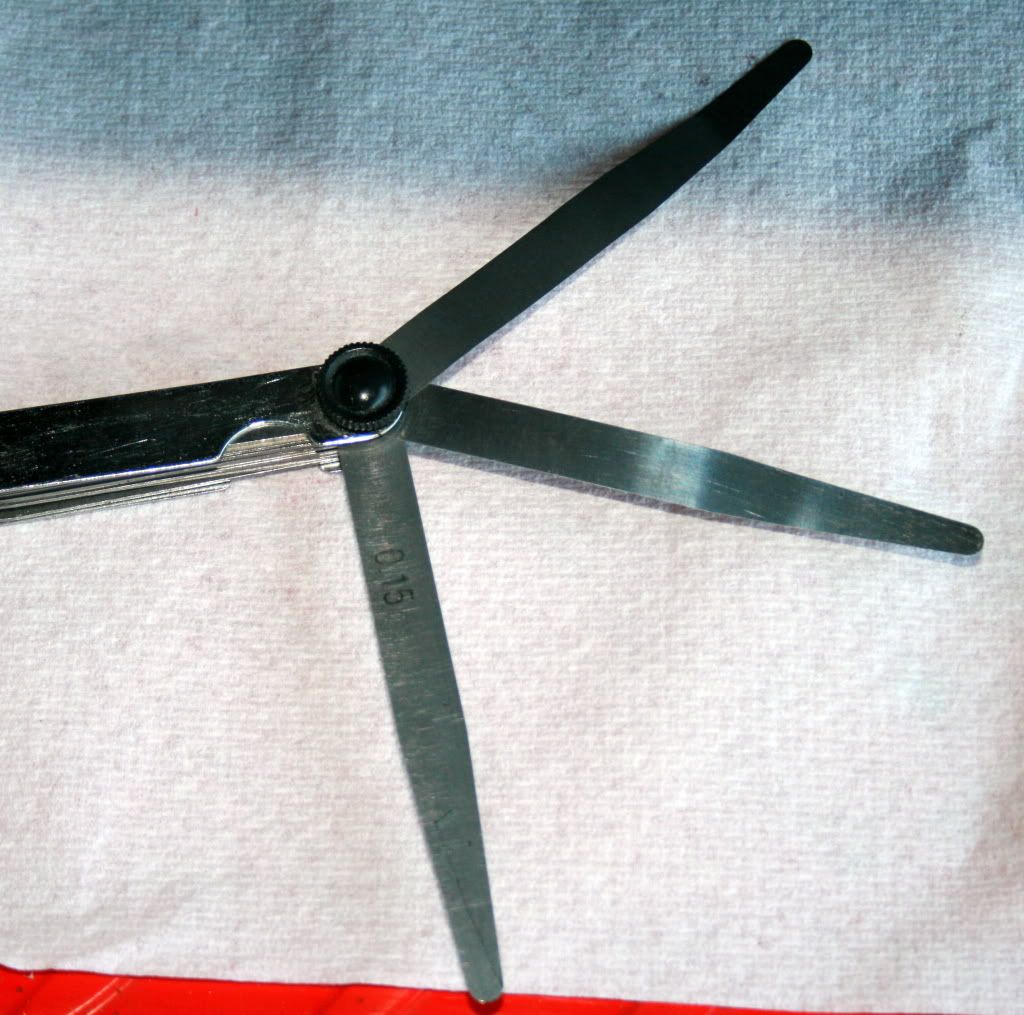
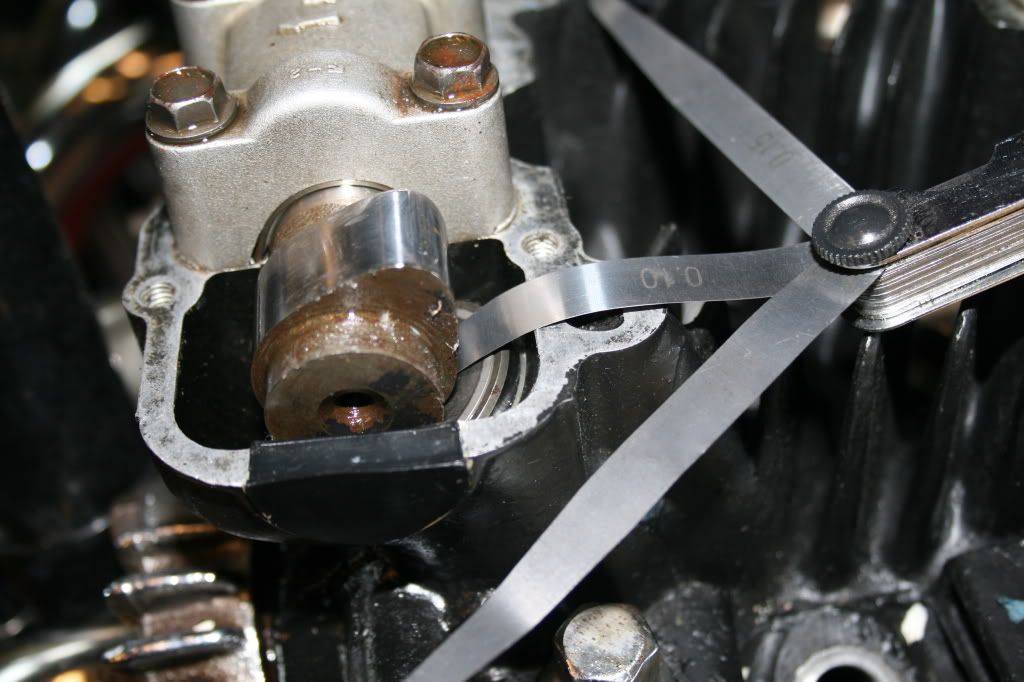
Now check the gap using a feeler gauge - i tend to use 0.05, 0.1 and 0.15mm to see how big the gap is. If 0.1 fits and 0.15 doesn't then i am happy. We'll get to what happens if there is no clearance later.
Image

Image

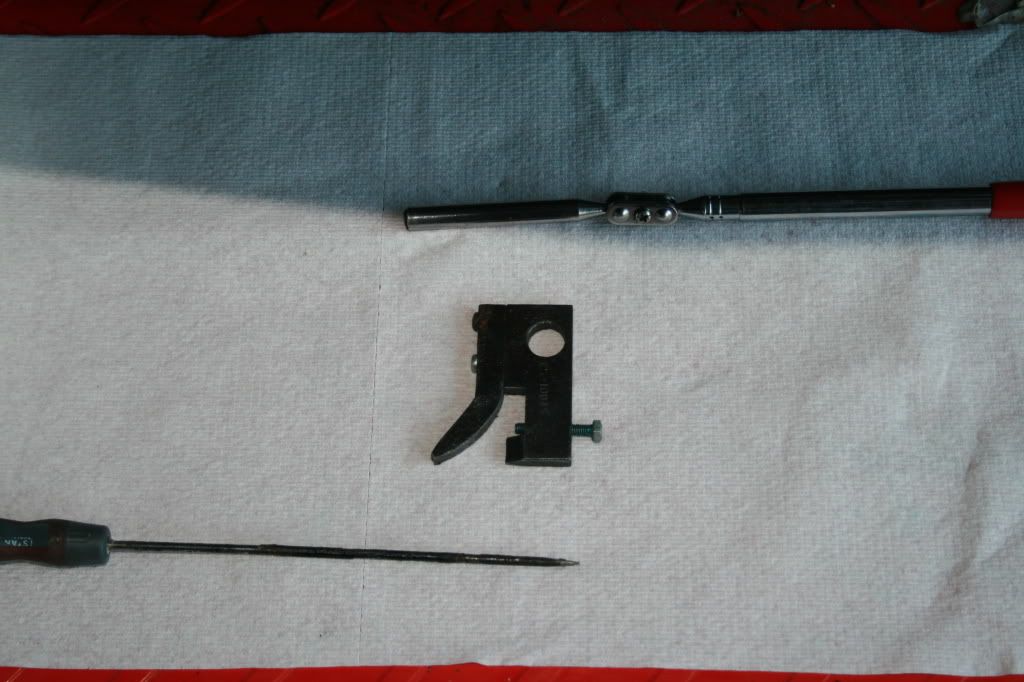
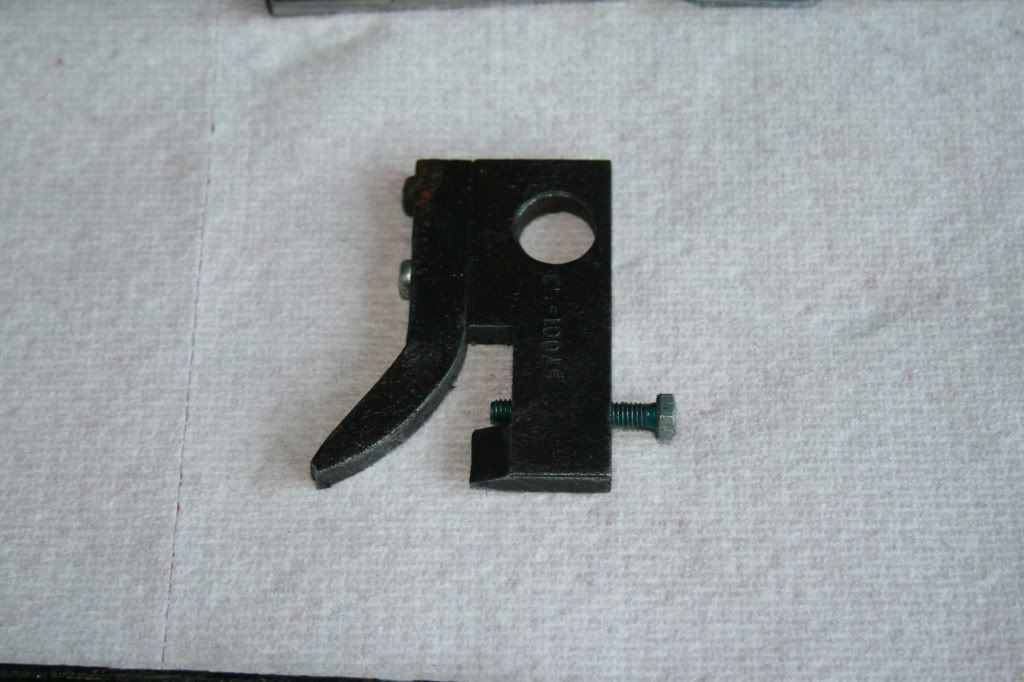
If the gap is incorrect you will now need to remove the shim. You'll need the following tools - a magnet on a stick, a pick and the kawasaki shim tool.
Image
Image

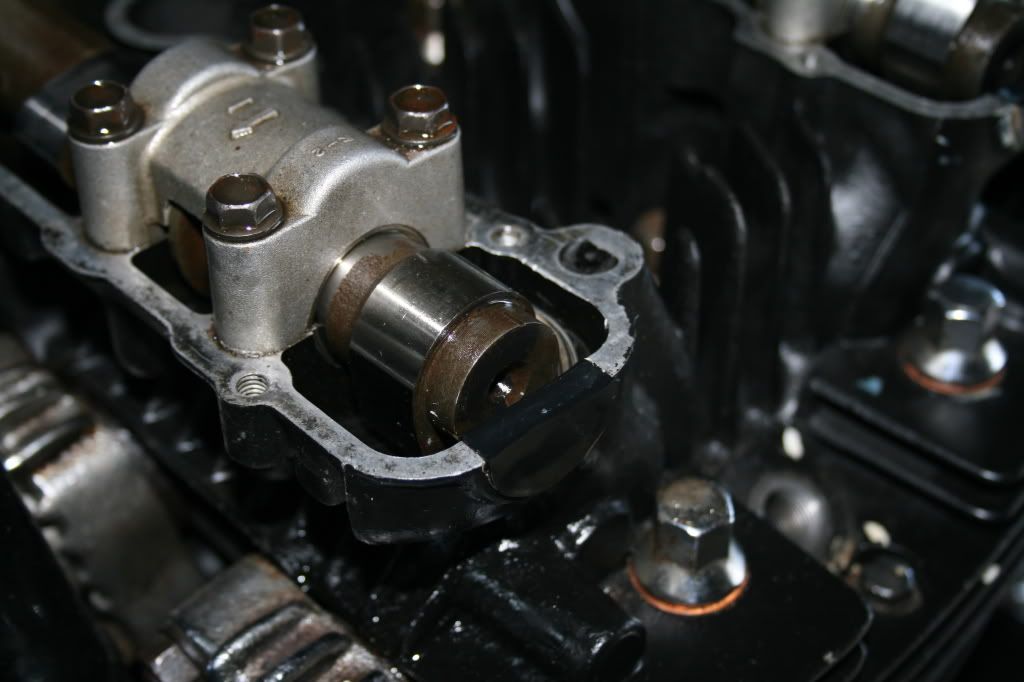
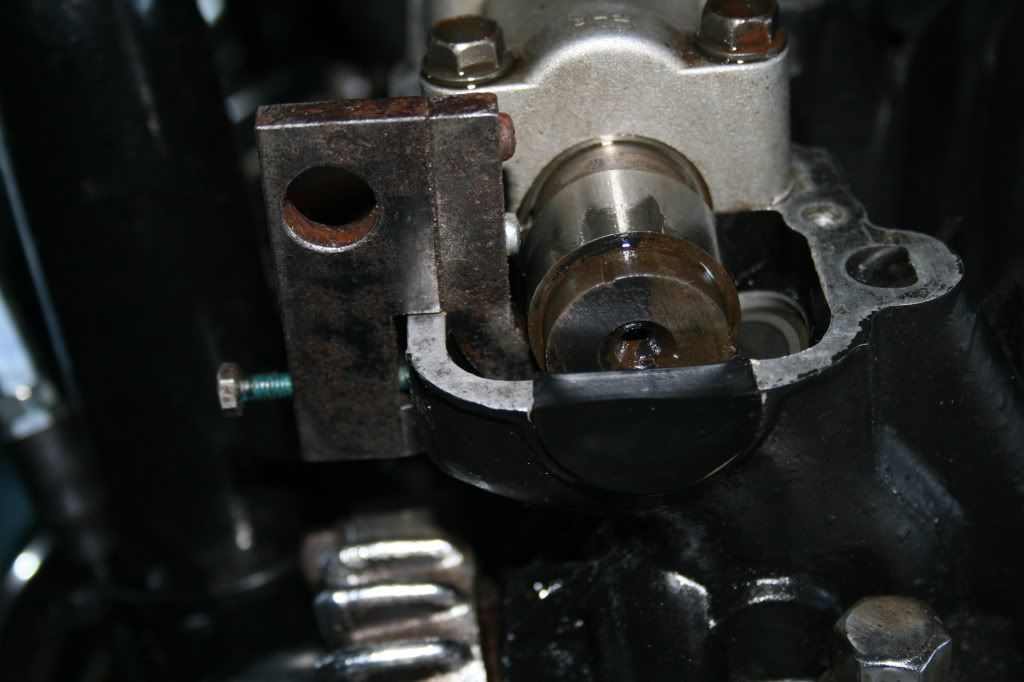
Rotate the cam until the lobe has opened the valve fully. Now insert the tool as per the photo. this holds the bucket open while you then rotate the cam away. This enables you to remove the shim using the pick/magnet.
Image

Image

Image

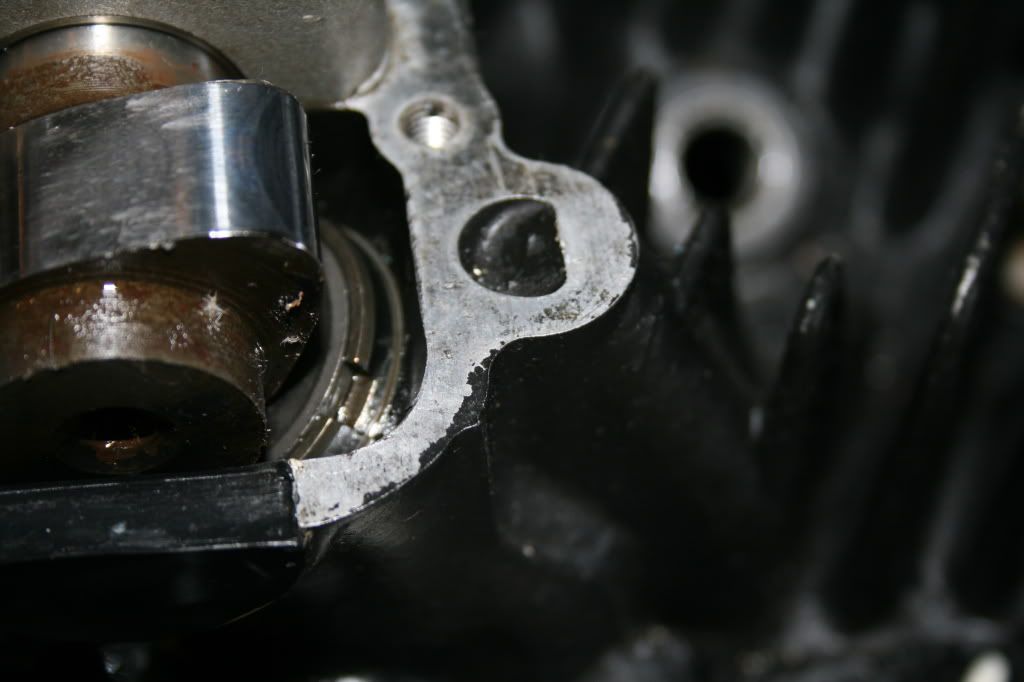
Note before you do this set the bucket so the little notch is visible - this will make it easier to remove the shim with the pick.
Image

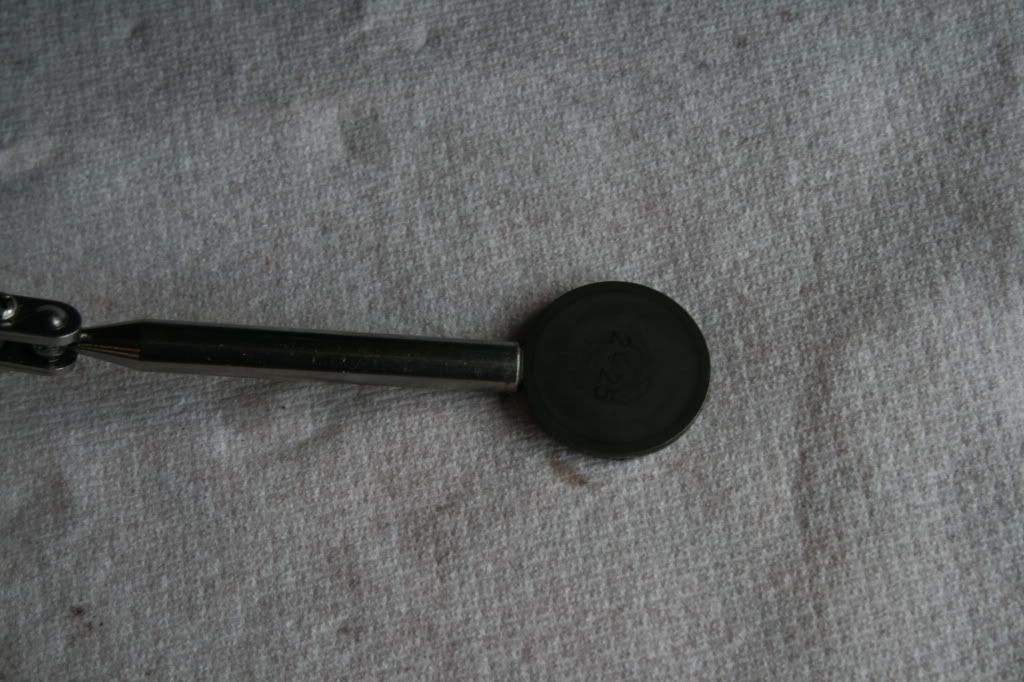
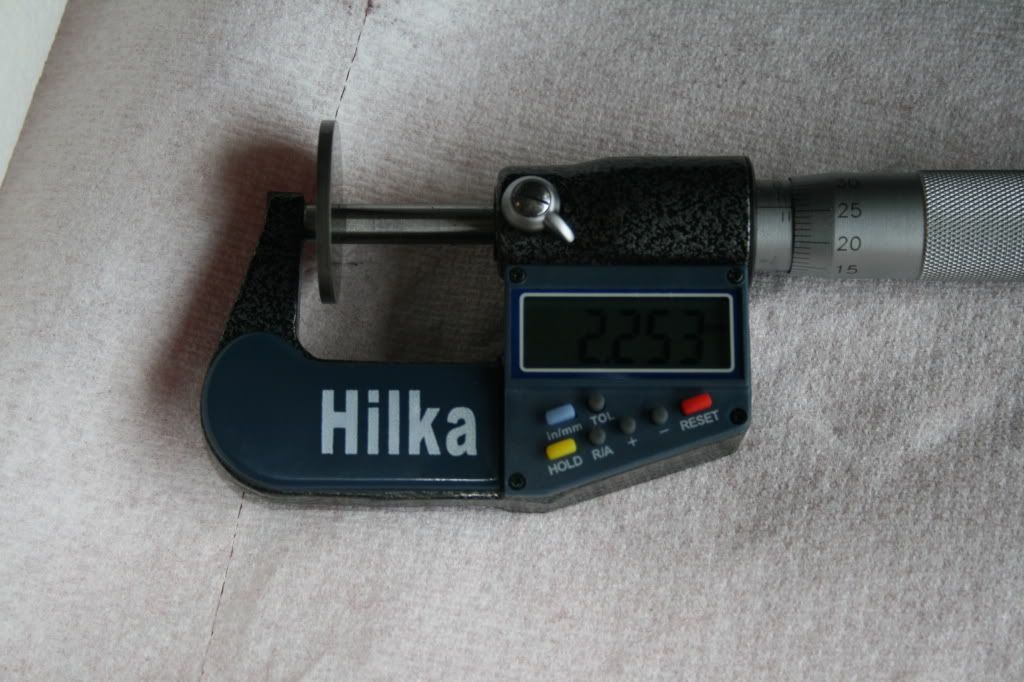
now you've got the shim out you need to measure it. it may be stamped but some are not. If not use a micrometer to check thickness.
Image

Image

Now if you know the gap you have and the shim thickness you can work out what size shim you need. I tend to check all, write them down and work out what i can shuffle around and what needs replacing.

once the replacement shim is obtained then replace it, make sure its seated properly and rotate until the cam lobe is opening the valve. you can now remove the tool and do a full rotation to ensure its all seated properly.

Image

go onto the next one....... easy.

What to do if there is no gap ? Well if there is no measurable gap but you can still rotate the shim bucket then assume it is 0. If you can't rotate the shim bucket then its negative and you'll need to measure again with a smaller shim...... :(

hopefully you'll have measured all and will have a shim smaller from another valve. If the one with negative gap is also the smallest you're really unlucky.......

some useful additional information/pointers from Rich.........


For aftermarket cams Web, Andrews, Kent etc check what clearance you should have with maker, mine run .10 to .20 mm also Mk2s run a slightly bigger clearance than 900s etc.

Write the shim sizes in the back of your workshop manual, then when the next time comes you don't have to take the shim out to measure but can work out if you have the correct ones already.

An offset ring / socket and tommy bar is better as it clears the pickups better.

and you can't emphasise this enough:

Take care when rotating the cam with the bucket holder tool in place, heads have been ruined by rotating the wrong way.
Last edited by chrisu on Sat Dec 20, 2008 6:38 pm, edited 1 time in total.

User avatar
tlc
International Rep
Posts: 5239
Joined: 6th Nov 2007
Location: Aylesbury

#2 PostAuthor: tlc » Sat Dec 20, 2008 2:03 pm

Does this guide work for the round cam cover model Chris ? :lol: :lol:
Asphalt Cowboy

Phil Churchett award winner 2015

User avatar
000zeds
ZedHead
ZedHead
Posts: 1129
Joined: 30th Dec 2005
Location: Kent

#3 PostAuthor: 000zeds » Sat Dec 20, 2008 2:31 pm

Exactly same !
Zeds-R-Us

User avatar
Kev1R
100Club
100Club
Posts: 494
Joined: 7th Apr 2008
Location: Nottingham

#4 PostAuthor: Kev1R » Sun Dec 21, 2008 2:12 pm

This guide is excellent
This is exactly the type of thing we should have in the 'downloads'
section - (maybe as a word document)
Guides like this could build into a useful resource - alot of which is maybe already on the site in one form or another - but not easy to locate quickly.

anyhow - well done
cheers
Kevin

Steve R
ZedHead
ZedHead
Posts: 1040
Joined: 19th Jan 2006
Location: west yorkshire

#5 PostAuthor: Steve R » Sun Dec 21, 2008 10:31 pm

Nice one Chris. The only thing I would add is to allways measure them with a micrometer even if they have the numbers on them still; as I have had them different to the number when I measured them, dont know why?
Only found out after putting the new ones in and rechecking and finding the gap still wrong, thought I had done the sums wrong :roll: then measured the old shim and found it was different :evil:

User avatar
Dodgy Z1B
100Club
100Club
Posts: 401
Joined: 18th Apr 2007
Location: Renfrewshire, Scotland
Contact:

#6 PostAuthor: Dodgy Z1B » Sun Dec 21, 2008 11:58 pm

This may be a stupid question but here goes, is it possible for the piston to hit the valve if it is being held open by the valve tool? I have only adjusted shims a couple of times before on an old gs I measured the clearance and then removed the cams as I didnt have the gs tool which i did try to copy by making one out of mild steel at the time but it didnt work very well.
Image

User avatar
bigmac103
100Club
100Club
Posts: 489
Joined: 17th Sep 2008
Location: Abu Dhabi

Shims

#7 PostAuthor: bigmac103 » Tue Dec 23, 2008 9:41 pm

Chrisu,

This is excellent, well done. Can you do the same for setting up the timing??? The diagram you did in a previous thread is good but this kind of photographic detail is priceless.

Dodgy Z1B brings up a good point about the piston touching the valve with the shim tool in place, surely it would be better to take the tool out to check the clearance.
Lost in the desert somewhere

Steve Cooke
Hardcore
Hardcore
Posts: 1612
Joined: 18th Mar 2007
Location: Southampton

Re: Shims

#8 PostAuthor: Steve Cooke » Wed Dec 24, 2008 2:06 am

bigmac103 wrote:Chrisu,

This is excellent, well done. Can you do the same for setting up the timing??? The diagram you did in a previous thread is good but this kind of photographic detail is priceless.

Dodgy Z1B brings up a good point about the piston touching the valve with the shim tool in place, surely it would be better to take the tool out to check the clearance.


The tool doesn't hold the valve down so far as to make contact and you only rotate the camshaft enough to install the tool then a little further so you can remove the shim. You have to check the clearance prior to installing the tool, the tool is purely for the removal/replacement of the shim.

User avatar
bunnysZ
Granny Magnet
Posts: 1576
Joined: 7th Mar 2006
Location: herts

#9 PostAuthor: bunnysZ » Wed Dec 24, 2008 12:12 pm

nice to know you have the tools and the know-how chris, as I will be booking you in after xmas for mine :D
zed the best ride of your life ...... so far

User avatar
HARRY4448
100Club
100Club
Posts: 370
Joined: 24th Jun 2007
Location: Wokingham

Checking shims.

#10 PostAuthor: HARRY4448 » Wed Dec 24, 2008 1:25 pm

Outstanding.
This is how it should be shown in all those so called expert mechanics books like Haynes do.

You should put a restoration book together Chris
(with lots of photos obviously)

Maybe a video of the procedure?


Merry Christmas to you.

sanderz
Custard Cream
Custard Cream
Posts: 967
Joined: 2nd Mar 2010
Location: Manchester

#11 PostAuthor: sanderz » Mon Sep 12, 2011 8:03 pm

Have just followed this excellant guide to 'size up' the shims :up

Only thing is - seems 7 out of 8 of the shims i've got, look like they've been ground to obtain the clearance. Is this a common practice? Or am i better to play safe and put new ones in?

The 'ground' side was inserted against the bucket not the cam but am i right in thinking the hardness has been lost there?

Any advice appreciated.
Wots up DOHC

User avatar
Pigford
Hardcore
Hardcore
Posts: 13314
Joined: 2nd Jan 2006
Location: North Dorset

#12 PostAuthor: Pigford » Mon Sep 12, 2011 9:27 pm

If they've been ground I'd be a bit warey, even if face down

Minimum thickness should be over 2.00 mm :?? :!:
And on the 7th day... Zeds were created!

sanderz
Custard Cream
Custard Cream
Posts: 967
Joined: 2nd Mar 2010
Location: Manchester

#13 PostAuthor: sanderz » Mon Sep 12, 2011 9:47 pm

Cheers there Pigford, think i'll change em for peace of mind then.

Smallest shim sizes are 2.35 and a 2.40
All the others are between 2.50 - 2.65

Thankfully no nightmare issues with sizes, which was what i'd initially thought when i saw they'd been ground down.
Wots up DOHC

tedsonthezed
100Club
100Club
Posts: 405
Joined: 21st Mar 2008
Location: Bucks

#14 PostAuthor: tedsonthezed » Tue Sep 13, 2011 11:03 am

Well done chrisu - this has been overdue for a long time. Couldn't have been explained better than that. Using a magnet is an obvious thing to use - much better than a pair of tweezers.

This document may, or may not be of help in this. It's one of a pile of service bulletins that Jerry sent me for the archive and is pretty self-explanatory.

Image
Image
Image
You want how much?

User avatar
PAULJAC47
Hardcore
Hardcore
Posts: 3266
Joined: 31st Aug 2008
Location: WOLVO WEST MIDS ENGLAND

#15 PostAuthor: PAULJAC47 » Tue Sep 13, 2011 3:55 pm

Steve R wrote:Nice one Chris. The only thing I would add is to allways measure them with a micrometer even if they have the numbers on them still; as I have had them different to the number when I measured them, dont know why?
Only found out after putting the new ones in and rechecking and finding the gap still wrong, thought I had done the sums wrong :roll: then measured the old shim and found it was different :evil:


Found this seem to remember its something to do with the tolerance written on the shim some are A, seem to recollect,always use a good old fashioned mike to check..Paul J
PAULJAC47,,,,,"She may not look like much, but she's got it where it counts, kid."
-Han Solo

You can't polish a turd, but you can roll it in glitter

Salad is what real food eats.
Anon

PUM 673


Return to “Bike Help”

Who is online

Users browsing this forum: Google [Bot] and 13 guests