Hello Guest User,

Please feel free to have a look around the forum but be aware that as an unregistered guest you can't see all of it and you can't post.

To access these 'Registered Users Only' areas simply register and login.

Z1000R and Z1000J Project - Oven baked paint - carbonfiber

Work in Progress

Moderators: KeithZ1R, chrisu, paul doran, Taffus

Message
Author
User avatar
RoyNorway
100Club
100Club
Posts: 186
Joined: 21st Mar 2008
Location: Bergen - Norway

#181 PostAuthor: RoyNorway » Wed Feb 11, 2009 8:49 pm

Carbon Fiber Cloths.

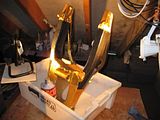
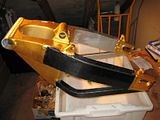
I have for a while thought about using carbon fiber, so I bought some and started on the Busa swing, I thought it was boring with only the gold colour on it.

So first I Gun-Koted the parts on it where I wanted colour on, and then I started with the carbon.

(Press the pictures for bigger size)
Image
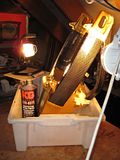
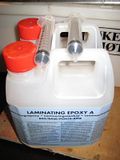
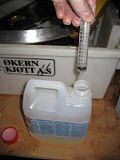
So, here is the resin, I am using the syringes to be sure that I mix the resin in the correct mixture.
Image

Image
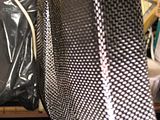
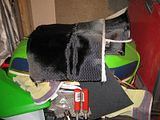
Here is the carbon fiber cloths.

Its very important that you have a really sharp scissor, otherwise the half cut carbon threads will make this carbon project wasted. :twisted:

Well, my scissor was semi sharp so I managed, but I will buy my self a new one.
Image
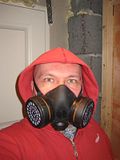
Its no fun sniffing epoxy resin. Better with a few Guinness after the work is done. :P
Image

Image
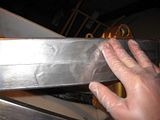
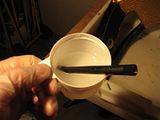
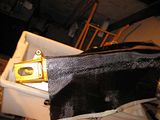
I used my fingers to spread the resin, using gloves.
Image
Its of course important to rub the resin in after the cloth is on.
You need to massage in the resin, and at the same time not put to much on. Just be patient.
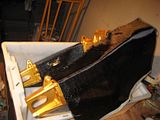
Image

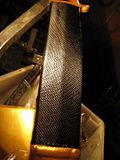
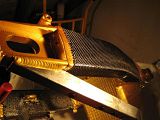
This is of course only for the look, the world wants to be fooled, but it is real carbon fiber, no fUc**** 3M vinyl sticker. :twisted:
I will make some 100% carbon parts later for either this project, or for the glorious great Z1000R project who comes after this, (this 1000J project is only the rehearsal for that project really).
Image

Image

Image

So, when I am done later today with the carbon cloths, I will let it harden and tomorrow do some sanding, and then put on more epoxy, or/and use some other glossy varnish.

I am quite happy with the outcome so far. :lol: :lol:
Z1000J 82 model, and Z1000R 83 model, And The Calfshit-GPZ1100-

User avatar
Pigford
Hardcore
Hardcore
Posts: 13314
Joined: 2nd Jan 2006
Location: North Dorset

#182 PostAuthor: Pigford » Wed Feb 11, 2009 9:07 pm

Roy, that really does look trick. :twisted: Soopa Doopa :!:

Was it expensive stuff? Was it hard to find?

Did you have to prepare the alloy so the carbon will stick?
And on the 7th day... Zeds were created!

User avatar
RoyNorway
100Club
100Club
Posts: 186
Joined: 21st Mar 2008
Location: Bergen - Norway

#183 PostAuthor: RoyNorway » Wed Feb 11, 2009 9:54 pm

Thanks mate :lol:

I bought the carbon locally here, but as always... EVILBAY
And I can see that it is half the price for twice the size on Evilbay. :twisted:

Maybe some car/parts store got it as a set? Carbon and resin together?
But I guess the cheapest have to be Ebay.

That resin stick on almost everything, (not Gladpack :lol: ) I used a steel brush grinder and rubbed the alu a little, and degreased the swing with thinner.

And after its hardened, its bone solid, its the same sound as knocking on the alu.


:lol: :lol:
Z1000J 82 model, and Z1000R 83 model, And The Calfshit-GPZ1100-

User avatar
Pigford
Hardcore
Hardcore
Posts: 13314
Joined: 2nd Jan 2006
Location: North Dorset

#184 PostAuthor: Pigford » Wed Feb 11, 2009 9:56 pm

Good on you Roy...... You seem to enjoy trying out NEW stuff :wink:
And on the 7th day... Zeds were created!

User avatar
RALPHARAMA
Area Rep.
Area Rep.
Posts: 3407
Joined: 19th May 2007
Location: Pensford, Somerset
Contact:

#185 PostAuthor: RALPHARAMA » Wed Feb 11, 2009 10:24 pm

Hi Roy

That's soooo cool. I am very used to working with epoxy resins with regular glass cloths on my (now ex, sniff, sniff) yacht. The resins aren't that expensive - I used to buy West System epoxy five litres at a time. There were various cloths available, but though epoxy is expensive to make a whole hull from it was kinda OK to make repairs with. What sort of cost is carbon fibre sheets? Do you need lots of thickness layers to make a laminate of strength or is it similar to glass mat?
Ralph Ferrand
Z1000A1 (1977), Z1300A5 (1983), Z900A4 (1976) GPZ1100 Unitrak (1983)(project), RD250B (1975)(project), ZRX1200R (2005) DT175MX (1981) YZF R6 (1999)
http://www.bikerstoolbox.co.uk

User avatar
ollie
Custard Cream
Custard Cream
Posts: 836
Joined: 13th Sep 2002
Location: north yorkshire

#186 PostAuthor: ollie » Thu Feb 12, 2009 12:05 am

wow nice one roy ,that does look smart ,i was always under the impression that you needed to bake carbon ,i didn't realise you could use it like glass fibre matting ....nice one fella
guiness sounds good too.... :lol:
zedsrus:"i don't know man ,i just got here myself !!"

User avatar
RoyNorway
100Club
100Club
Posts: 186
Joined: 21st Mar 2008
Location: Bergen - Norway

#187 PostAuthor: RoyNorway » Tue Feb 17, 2009 6:22 pm

Pigford; Thanks, Me like new things. :lol:

vduk, ollie; Thanks boys :lol:
For just this use its only one layer, but I think for a side panel cover, its enough with one.
Next time I will order from some Ebay shop, its quite cool to work with carbon I think.


How much is to much...

Using the epoxy as a coat.
I guess I could spray layer after layer with coat on the carbon, but since this is not any side panel cover, or a little detail I finally stopped.

In order to be able to airbrush the resin it is thinned out with thinner.
You can also use alcohol.
Since its cold where I worked, I had to go around 30% with thinner.

First I mixed the resin and hardener, and then the thinner.
You loose strength when using thinner in the resin, but that is not any big deal, its more then enough strength for this use.

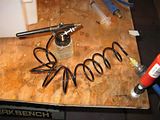
Image
Using airbrush. Also using this for Gun-Kote.

Image
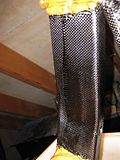
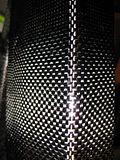
Here is the joint, non visible on the behind. Its a little overlay, 1 cm or something.

Image

Image

Image

Image
I think this is enough clear coat, I could airbrush for hours... :twisted:
Z1000J 82 model, and Z1000R 83 model, And The Calfshit-GPZ1100-

User avatar
ollie
Custard Cream
Custard Cream
Posts: 836
Joined: 13th Sep 2002
Location: north yorkshire

#188 PostAuthor: ollie » Mon Feb 23, 2009 3:37 pm

Hey Roy ,that looks well cool with the clear coat on ,have you now sorted the wheel alignment ok.
zedsrus:"i don't know man ,i just got here myself !!"

User avatar
RoyNorway
100Club
100Club
Posts: 186
Joined: 21st Mar 2008
Location: Bergen - Norway

#189 PostAuthor: RoyNorway » Mon Feb 23, 2009 9:02 pm

Thanks mate! :lol:

Yes, I think i have the alignment under control now, waiting for the sprocket carrier been milled down by 531blackbanshee.
Since I am not willing to heating up the frame and clamp it in, its a little more work involved...

Image
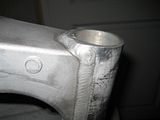
Since I have chopped off the left side of the swing, the old needle bearing is to wide, so I need to go down 5mm, from 25mm to 20mm, but thats not a problem,

>This UK company<

They got all kind of bearings and sleeves.
Z1000J 82 model, and Z1000R 83 model, And The Calfshit-GPZ1100-

User avatar
ollie
Custard Cream
Custard Cream
Posts: 836
Joined: 13th Sep 2002
Location: north yorkshire

#190 PostAuthor: ollie » Tue Feb 24, 2009 6:28 pm

Good glad its starting to come together Roy,its all trial and error ,ive been there myself ,just wish i had a bit more metal work knowledge :D
zedsrus:"i don't know man ,i just got here myself !!"

User avatar
RoyNorway
100Club
100Club
Posts: 186
Joined: 21st Mar 2008
Location: Bergen - Norway

#191 PostAuthor: RoyNorway » Wed Feb 25, 2009 11:16 am

ollie:

Yes, I have the same feeling about metal work, I have been wondering about something like this:

>mini lathe<

Or maybe a bigger used one...
But it all boils down to money... :evil: :evil: :evil:
Z1000J 82 model, and Z1000R 83 model, And The Calfshit-GPZ1100-

rafstopcarryon
100Club
100Club
Posts: 374
Joined: 5th May 2007
Location: clevelandsestershershire

#192 PostAuthor: rafstopcarryon » Wed Feb 25, 2009 9:30 pm

dont touch the small stuff ,went down that route myself and its TURNED out to of been a big mistake......you'll end up having to get other people to do some of the work you cant and there quality...... is pants........ok for model makers and thats it!!!!!!!!!!!!!!!!!!!!!!!!!

buy summet big and english out of a school/college(no not the teacher neither :lol: )

User avatar
london calling
Hardcore
Hardcore
Posts: 3992
Joined: 16th Apr 2004
Location: Loughborough, East Midlands

#193 PostAuthor: london calling » Wed Feb 25, 2009 9:36 pm

Raf,you didn't mention any of your fire prevention procedures whilst metal working :roll: :shock:
Jack

User avatar
RoyNorway
100Club
100Club
Posts: 186
Joined: 21st Mar 2008
Location: Bergen - Norway

#194 PostAuthor: RoyNorway » Thu Feb 26, 2009 2:11 pm

To small?

Ok, maybe I should look for bigger and used, I reckon its impossible to get such small in Norway anyway.
But at this point its just small ( or bigger now :P) dreaming... :lol:
Thanks for warning me. :lol: :lol:

Jack is insinuate some lack of fire prevention, something you want to tell us about? :lol: :lol: :lol:
Z1000J 82 model, and Z1000R 83 model, And The Calfshit-GPZ1100-

User avatar
RoyNorway
100Club
100Club
Posts: 186
Joined: 21st Mar 2008
Location: Bergen - Norway

#195 PostAuthor: RoyNorway » Thu Feb 26, 2009 5:32 pm

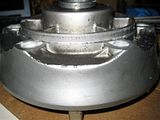
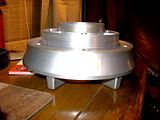
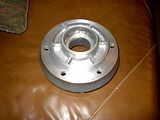
Sprocketcarrier.

531blackbanshee just sent me pictures of my sprocketcarrier, he is just done with it. :lol:
Thanks buddy. :P

Here is before:
Image

And after:
Image

Image :P
Z1000J 82 model, and Z1000R 83 model, And The Calfshit-GPZ1100-


Return to “Projects”

Who is online

Users browsing this forum: No registered users and 6 guests