Page 1 of 1
BARREL/ FIN REPAIRS
Posted: Mon Mar 30, 2009 5:02 pm
Author: maralyn
O.K. Here goes.
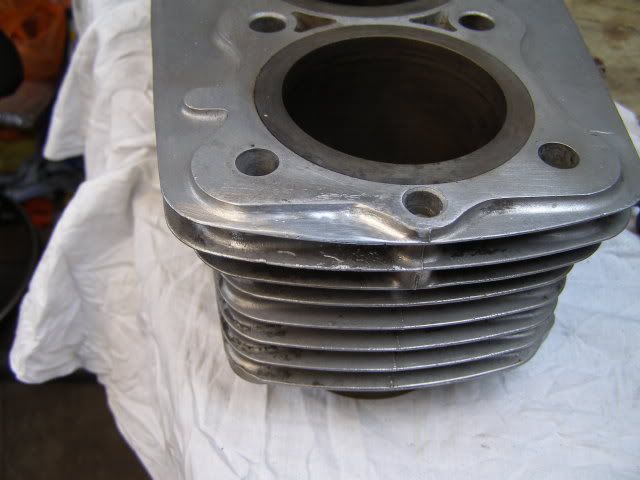
Picked up a set of barrels for repair today.
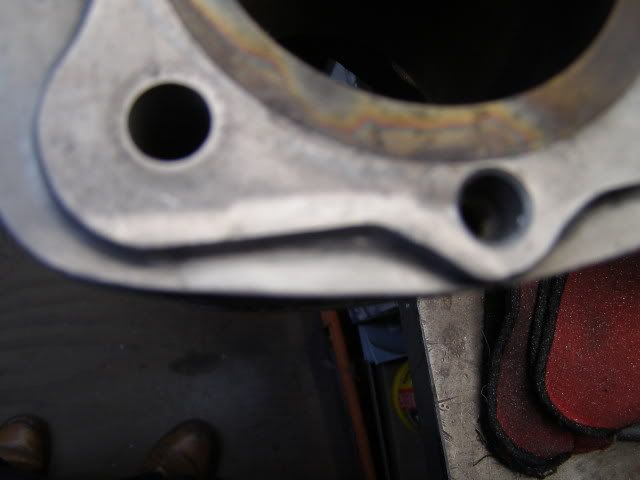
Here are the before photo's, I will add to the post as the repair progresses.
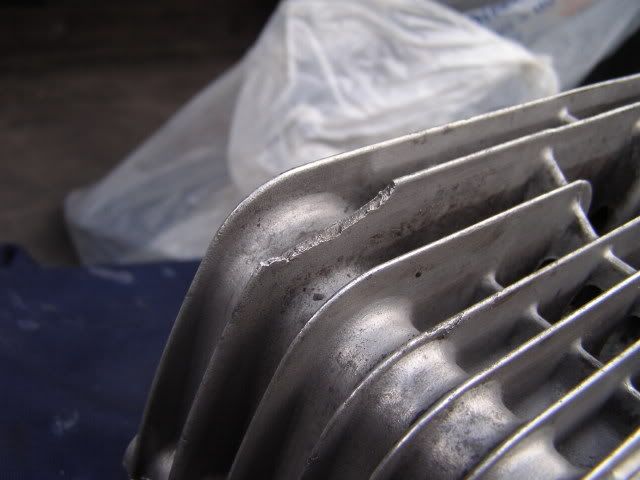

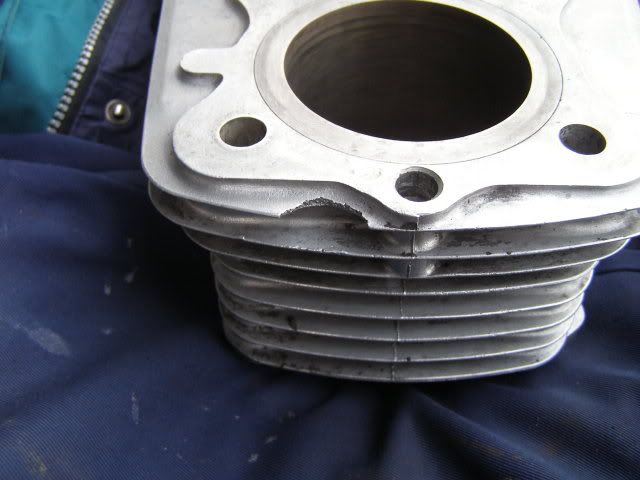
So, if it's of interest.................watch this space.
Paul
Posted: Tue Mar 31, 2009 4:20 pm
Author: maralyn
I had a chance today to make a start on the barrels @ lunchtime.
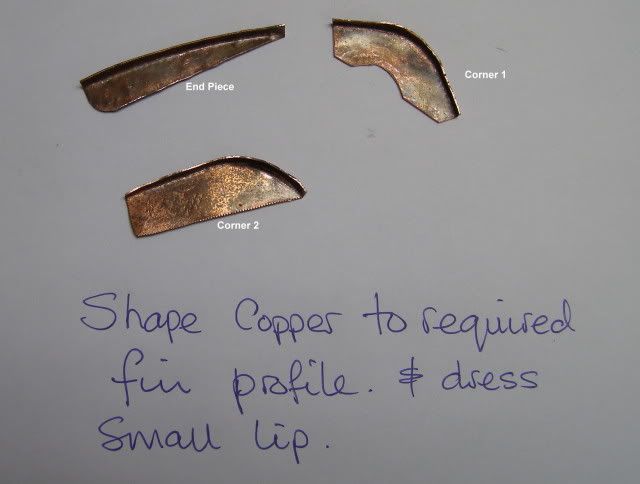
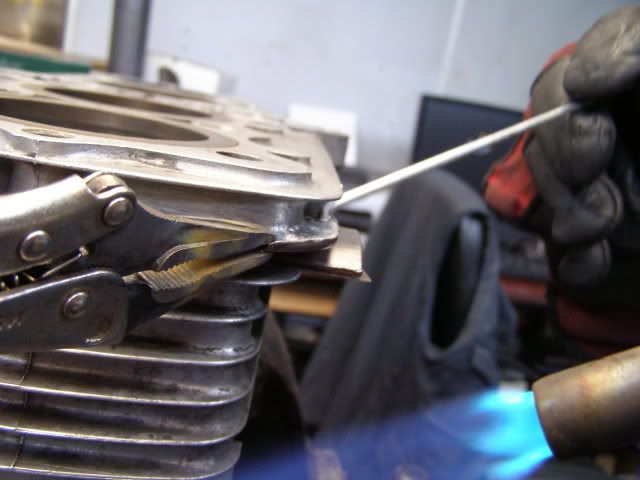
I cut and shaped some copper pieces that I will wedge under the damaged fins and use to build the repair on.
Note: do not clean up copper prior to use or the durafix will bond to it!
Hopefully more tomorrow.
Posted: Wed Apr 01, 2009 5:40 pm
Author: maralyn
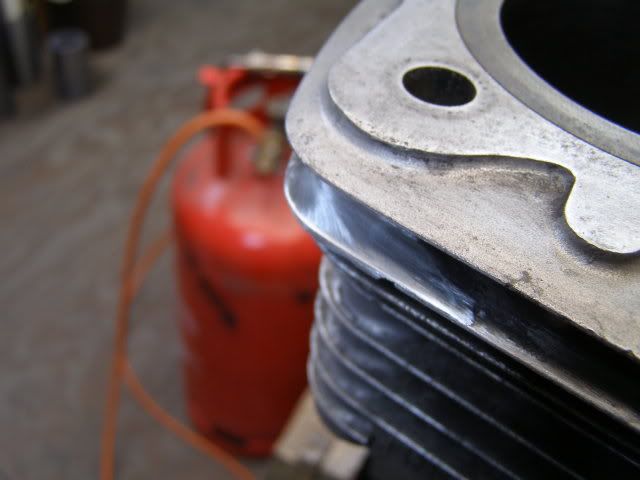
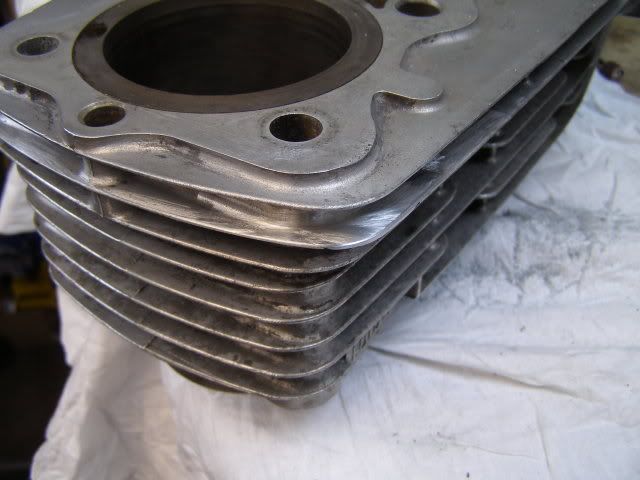
I got the barrels finished off today, so here are the updated photo's:
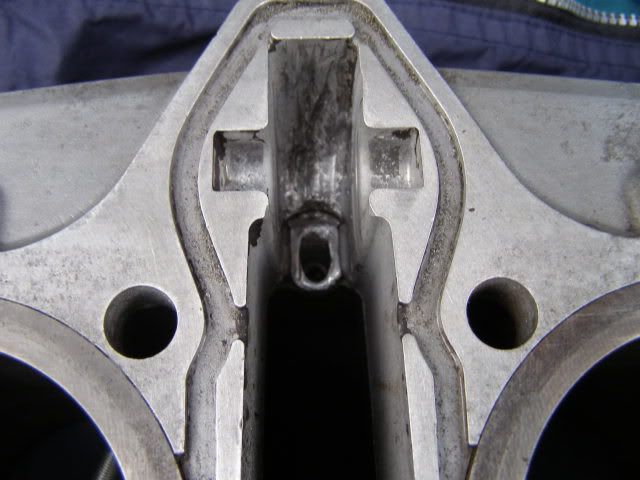
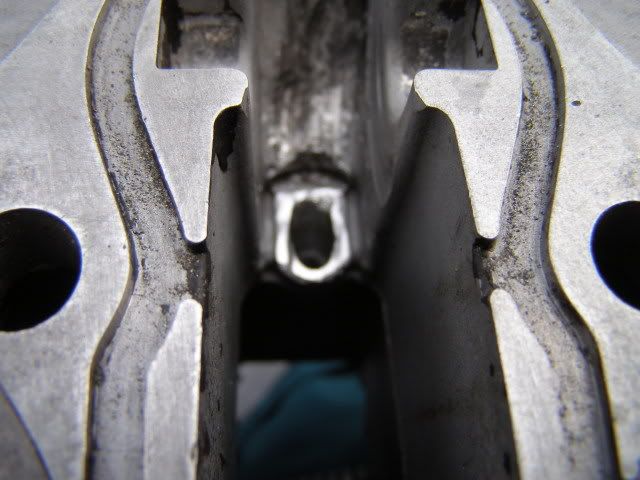
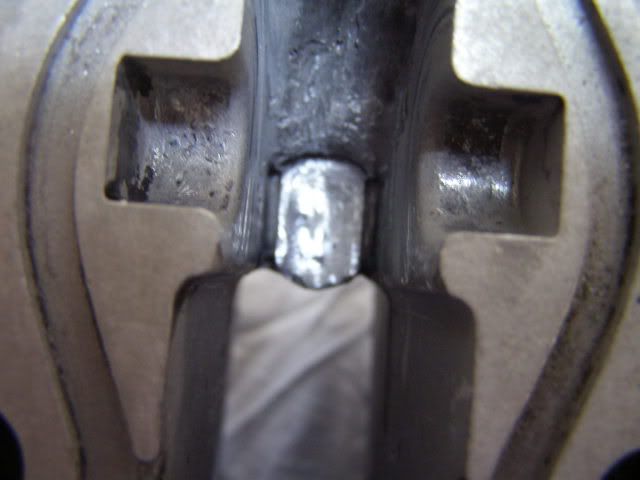
Firstly, I cleaned the elongated/enlarged hole for the cam guide bolt ( should be M5 ) and filled. Once this is properly ground flat it will be ready to re-drill & tap.

 Next I cleaned the areas to be repaired with a stainless steel brush & tinned the edges with durafix (forgot to take a photo)
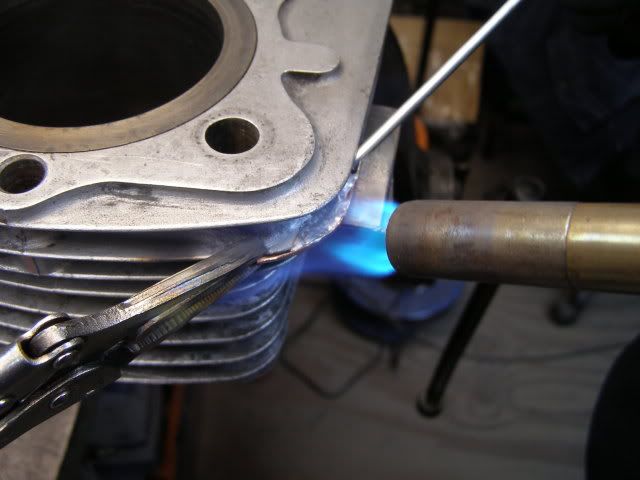
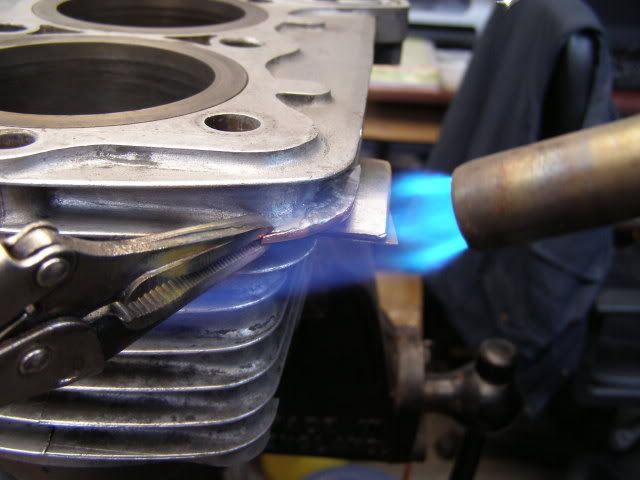
Put the copper former in place and began to heat with the torch.
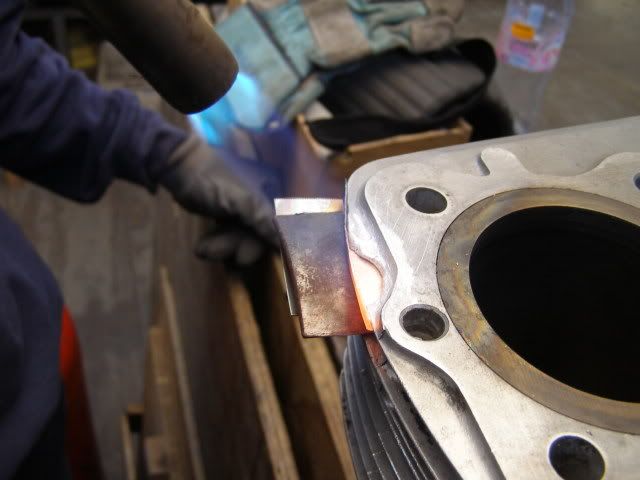 Once there is enough heat in the aluminium to melt the rod, work from the tinned edge of the fin out to the edge of the copper former, in a sort of cresent movement (if that makes sense). Keep apply heat then rod, heat then rod, DO NOT APPLY FLAME DIRECTLY TO THE ROD OR IT WILL JUST BREAK OFF IN CHUNKS.
 Once the area is filled, play the torch over the repair to allow proper distribution & try not to add more Durafix than you need, this will shorten the time you spend filing and sanding the repair flush.
 Let the repaired areas cool down, remove the copper formers (gently) and dress all the fins to shape.
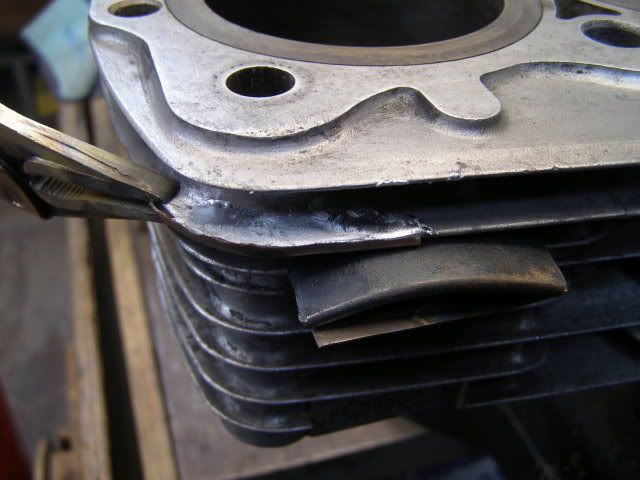
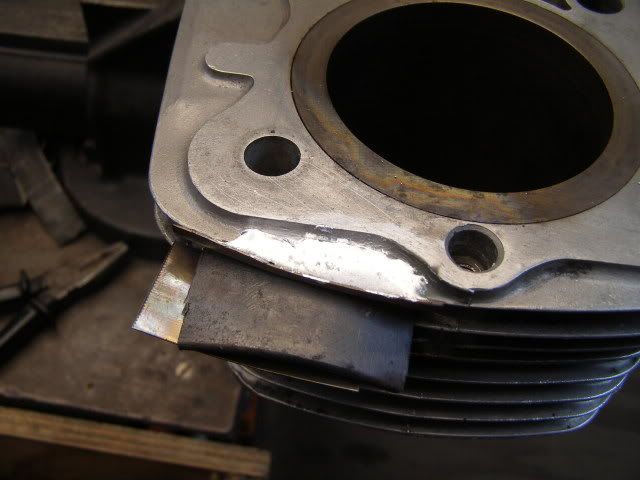
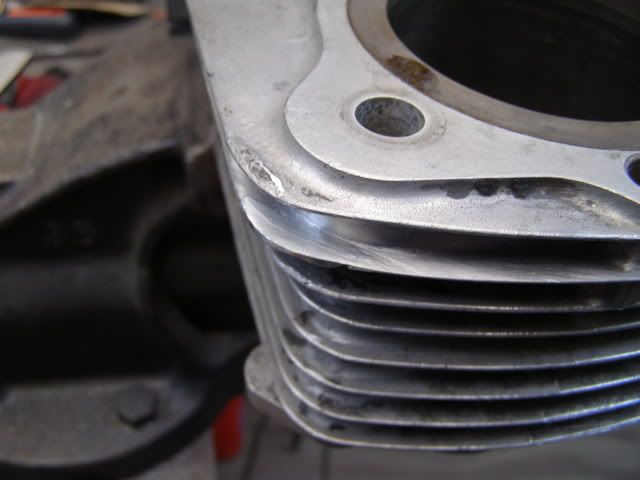
 The repaired edge looks slightly uneven in some of the above photo's, but I assure you its just the way the light was reflecting off the repaired areas, I also spotted a couple of bits of muck on the fin edges (after I took the photo's) which look like there are a couple of little bit's missing from the edges, but again, there ain't.
So, there you go, I hope this is of help.
I would recommend practicing on some aluminium sheet before you start this type of repair, just to get a feel for the way the Durafix works.
Posted: Wed Apr 01, 2009 6:09 pm
Author: mikey
Thats looks realy good paul very impressive.
Posted: Wed Apr 01, 2009 6:16 pm
Author: Rich
Nice job.
Posted: Thu Apr 02, 2009 12:13 am
Author: paul doran
now that is what I call a repair
good commentary too
Posted: Thu Apr 02, 2009 7:05 am
Author: maralyn
mick z1a wrote:it is very clever stuff, does this mean you are going to do this as a business or showing us how to do it for ourselves maralyn

The idea of the post was to enable you to do it for yourselves.
But I do, do repairs for local companies, although this is not my main business. I would be happy to offer the service to any members that need it.
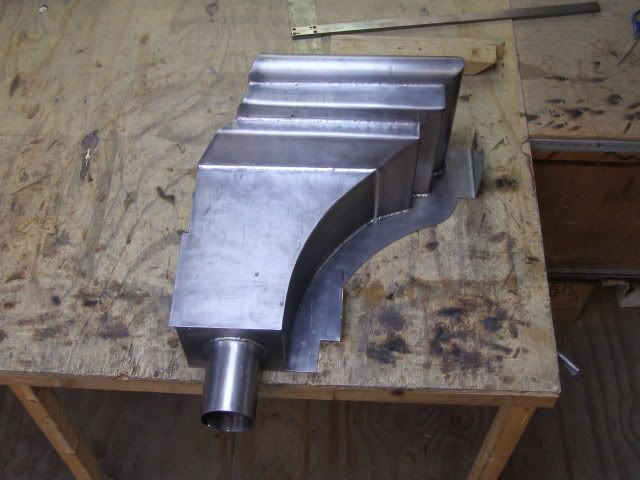
My main Business is Lead Fabrication:
Posted: Thu Apr 02, 2009 7:12 am
Author: mikey
And i have seen his lead work its amazing very skillful guy.
Posted: Thu Apr 02, 2009 10:41 am
Author: Garn 1
Maralyn, regarding those copper form pieces. I presume these are to form the fin sections. Are they left attached, then taken away, once the fin has been formed? If so, why does not the durafix weld to the copper.
Or does the former stay part of the fin and the edge "tinned" to conceal it?
RegardZ ~ Garn
Posted: Thu Apr 02, 2009 12:01 pm
Author: maralyn
Garn 1 wrote:Maralyn, regarding those copper form pieces. I presume these are to form the fin sections. Are they left attached, then taken away, once the fin has been formed? If so, why does not the durafix weld to the copper.
Or does the former stay part of the fin and the edge "tinned" to conceal it?
RegardZ ~ Garn
Garn,
The copper is used as a former to re-build the fin and once the repair has cooled the copper is removed.
You have to prep all surfaces with a stainless steel brush, if you don't, the Durafix won't take. So, by not cleaning up the copper formers when you use them, the repair will not stick to them, allowing them to be removed once the repair has completed.
Posted: Thu Apr 02, 2009 5:47 pm
Author: Ginger Bear
Impressive stuff for sure, I'll be on the phone Paul when I need your services

Posted: Thu Apr 02, 2009 5:54 pm
Author: mick znone
Sorry maralyn, i removed that comment after seeing in another thread on the subject that you would be prepaired to do some for us, thanks, good to keep it in the club

Posted: Thu Apr 02, 2009 6:36 pm
Author: Pigford
Great thread... cheers.....

But when will you be able to FULLY test the repair..... as in HOT engine
Posted: Fri Apr 03, 2009 7:21 am
Author: maralyn
Pigford wrote:Great thread... cheers.....
But when will you be able to FULLY test the repair..... as in HOT engine
I have repaired several fins in the past, all good so far.
This repair system is so strong that, if you repair a damaged thread in aluminium, you will snap the head off a high tensile bolt before you strip the new thread.
As for the heat, as long as your engine temperature does not exceed
732' F you should be o.k.