Page 1 of 10

Project Z900 A4 - Restoration - Pic Heavy

Posted: Tue Aug 12, 2014 12:49 pm
Author: Hinckley
Not content with one Zed it's time for another to keep the Ltd company.

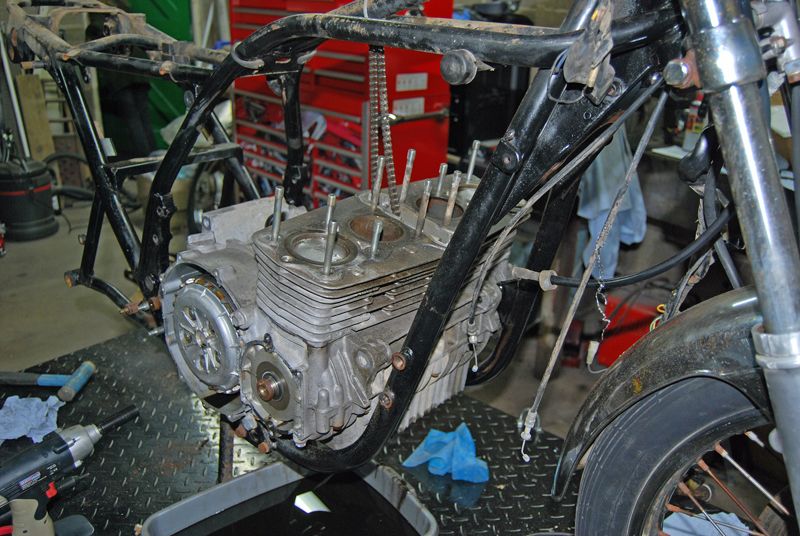
Picked up this little beauty - which does require a little attention.


Image

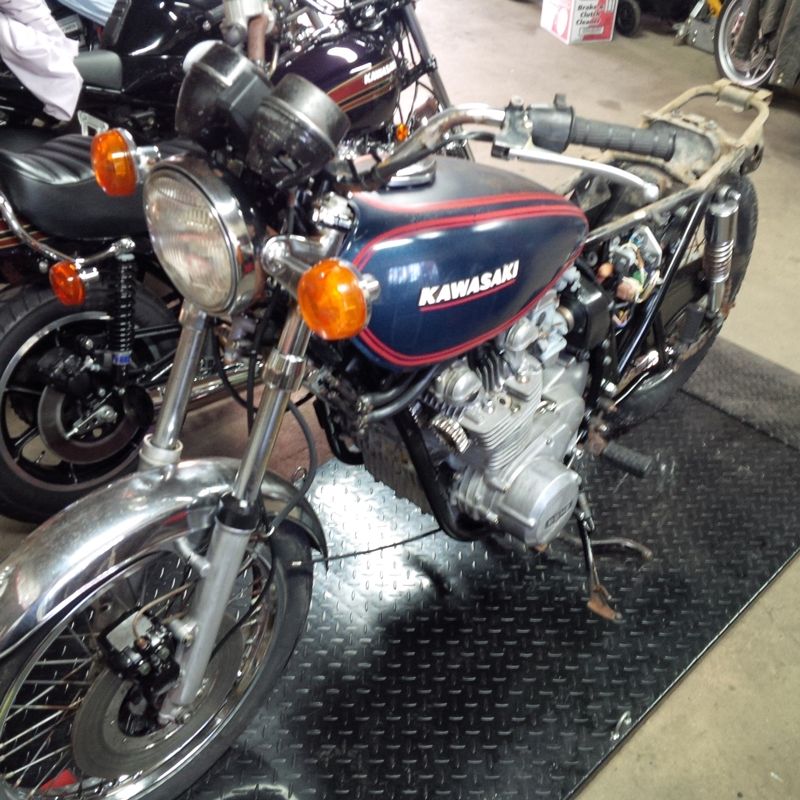
Some investigation shows it's a June 1975 build.

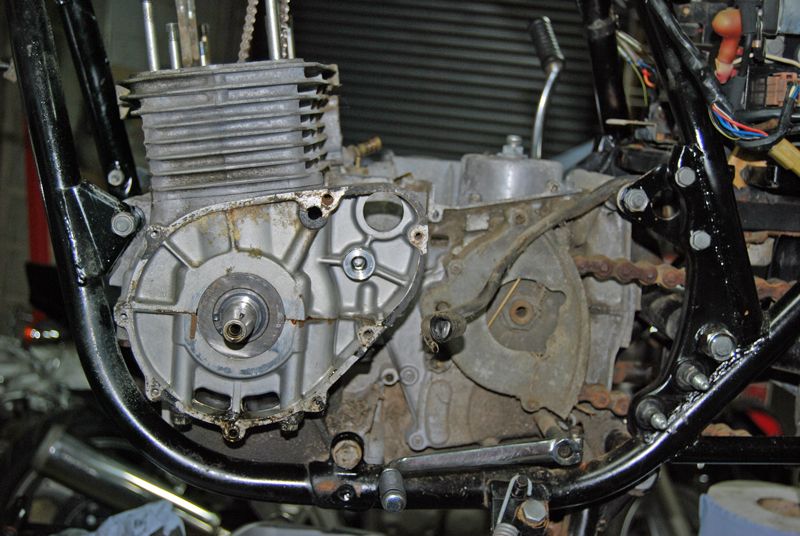
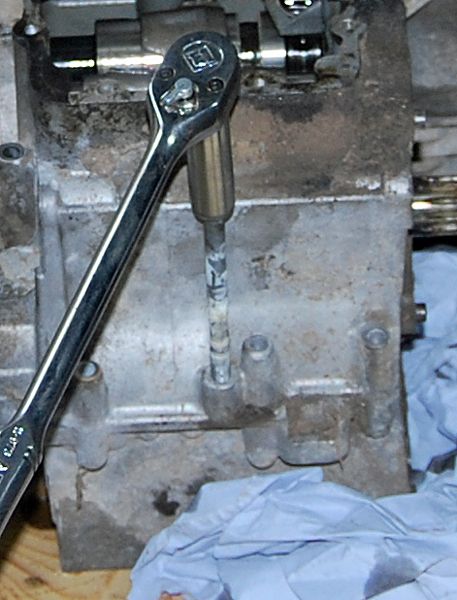
It's always a tad worrying when there are no plugs in a motor that won't turn - but it was cheap.

Image

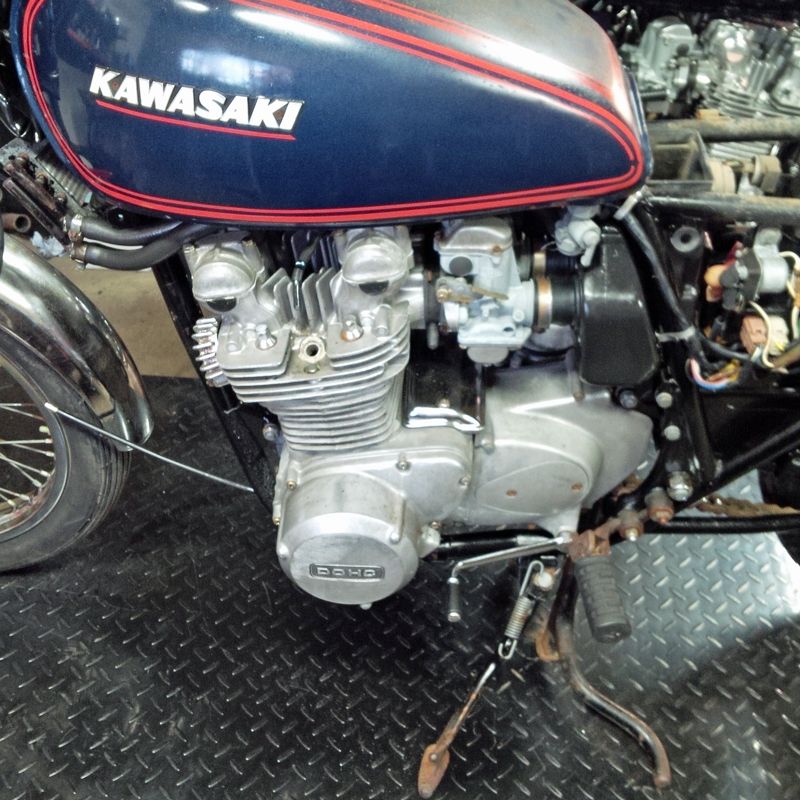
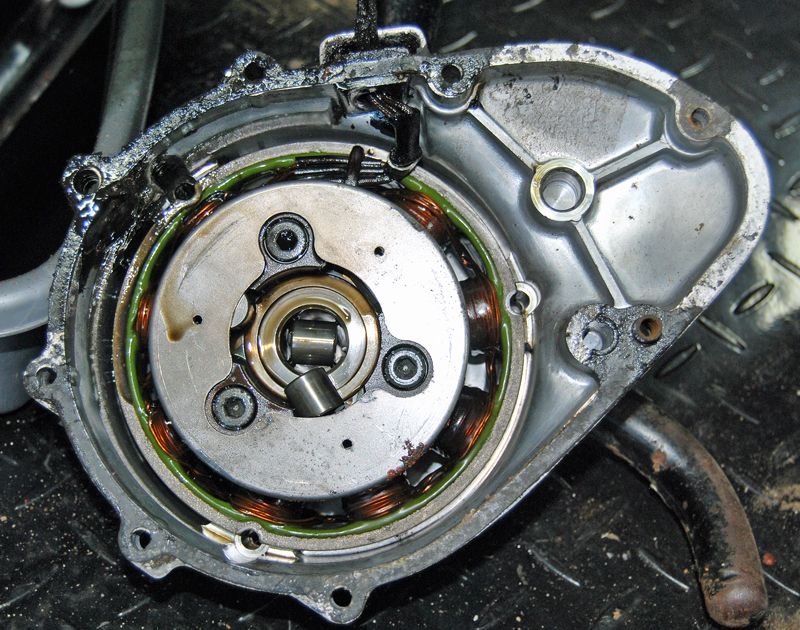
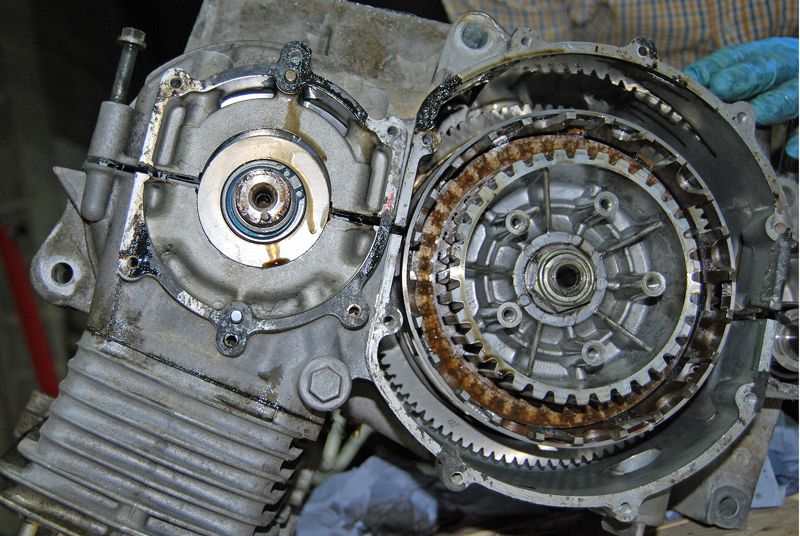
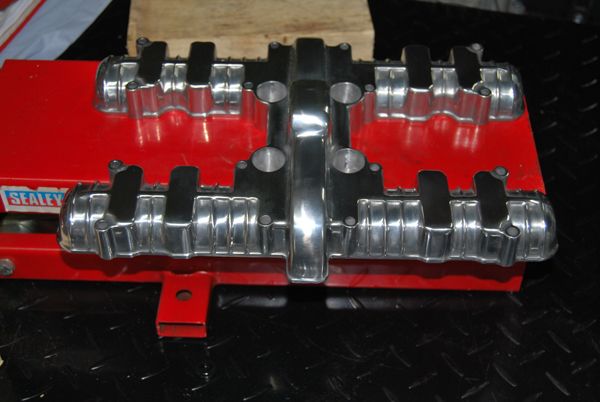
The motor was locked solid, cam cover off and what wasn't covered in corrosion was very clean and showed little sign of wear.
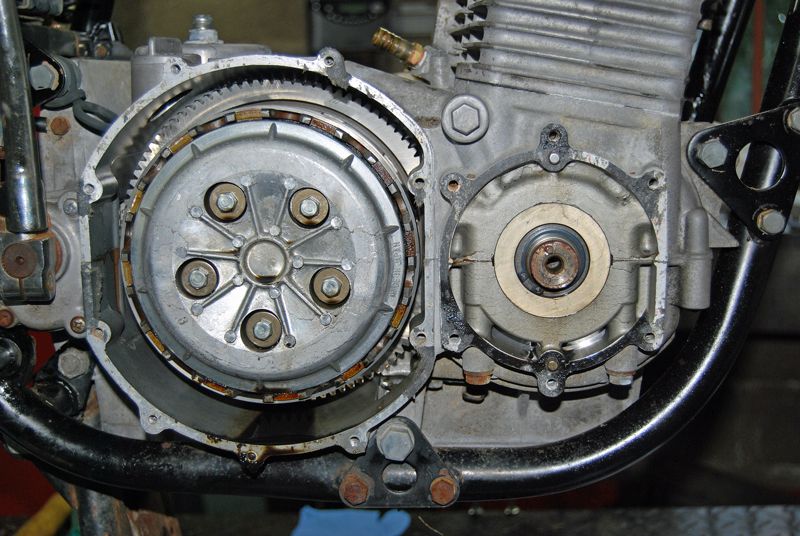
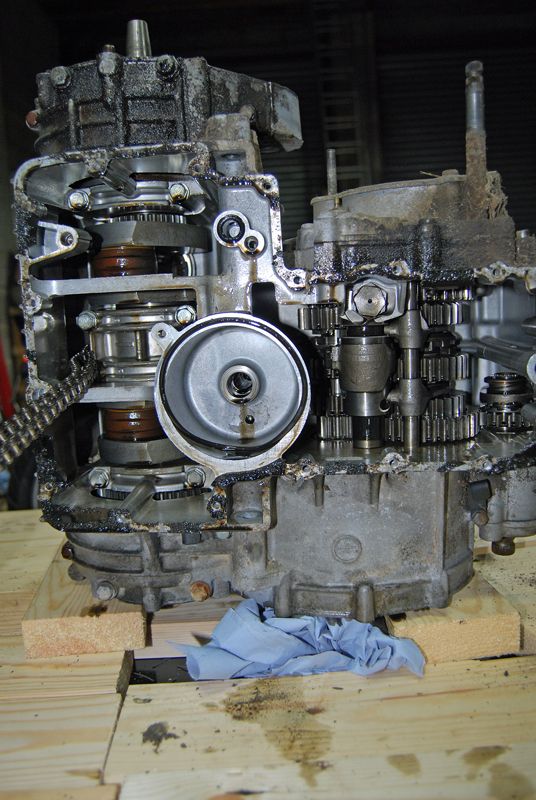
With the centre idler removed the inlet cam would turn - but the exhaust cam and crank were stuck fast.

Image

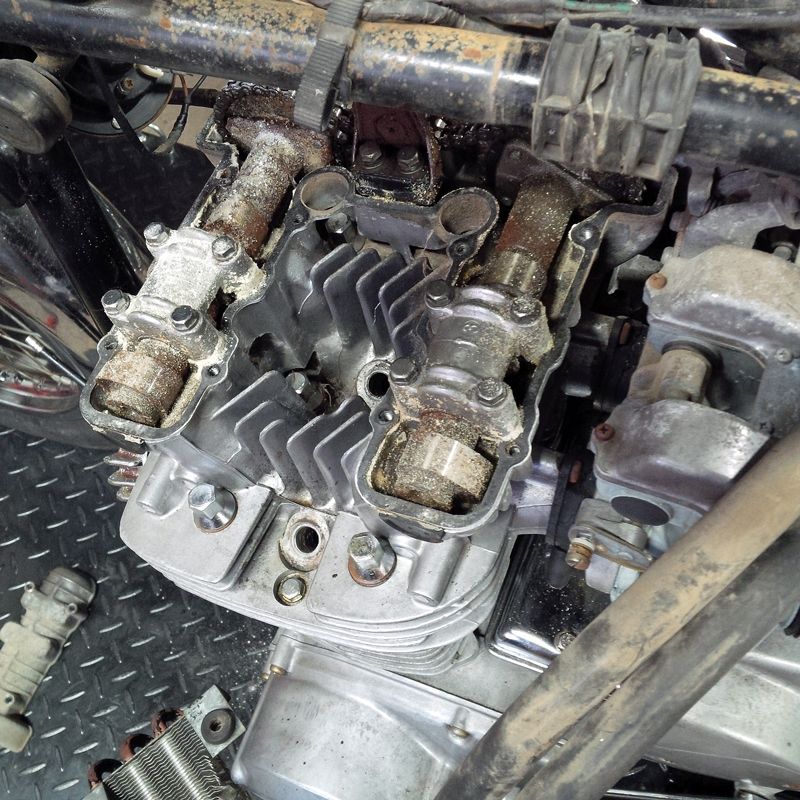
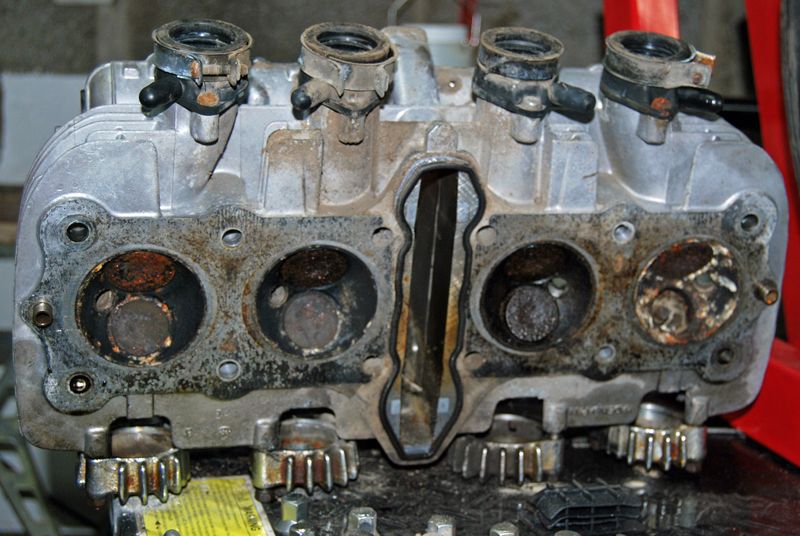
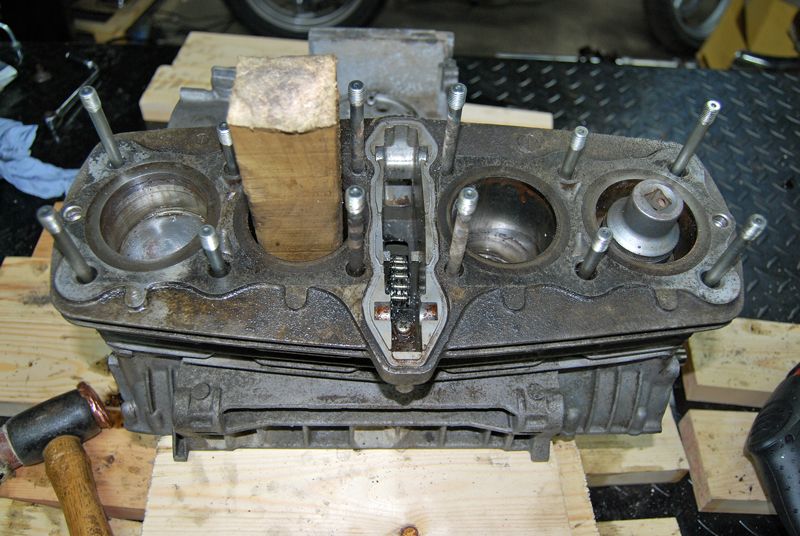
I think this is the reason the bike was retired from use, well you can't really miss it!!!!

Image

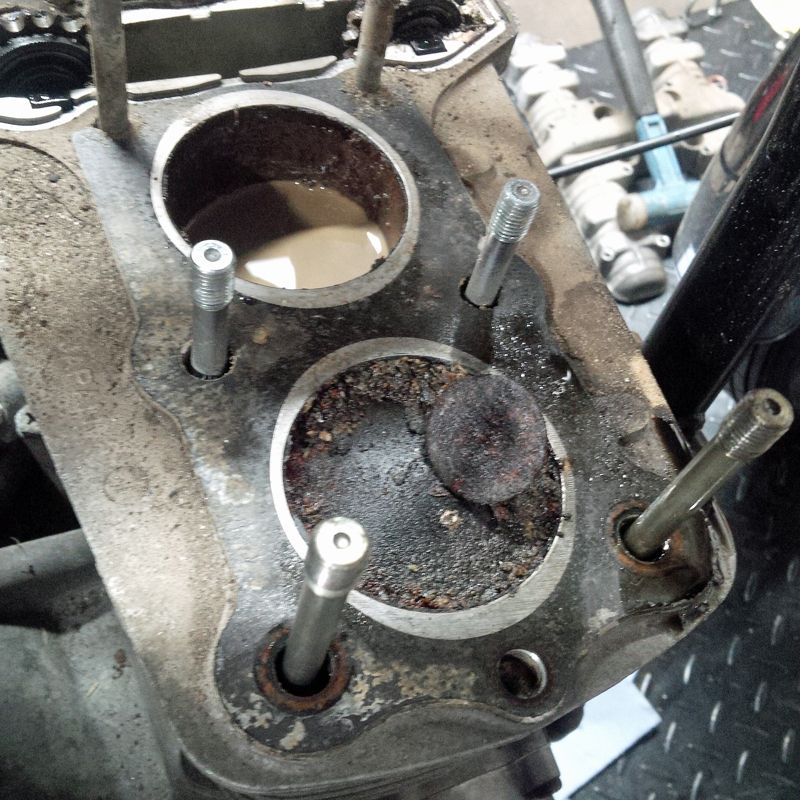
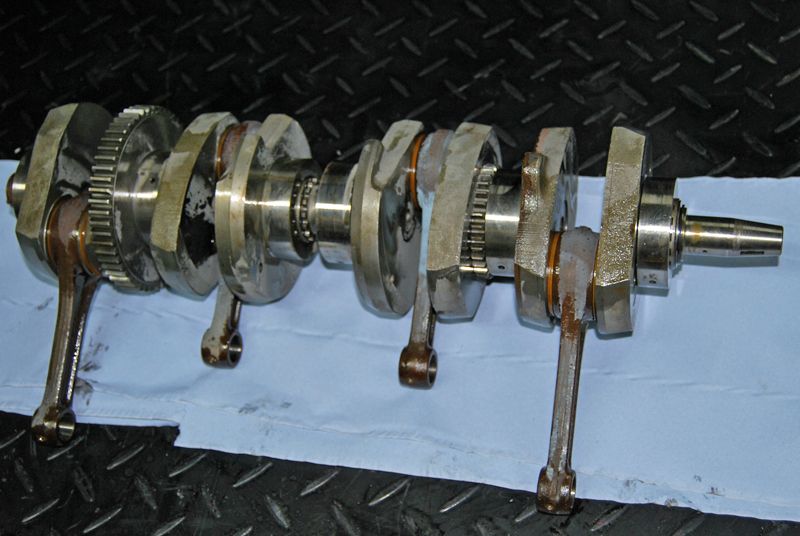
Still won't turn though - Mmmm - pistons are at matched heights, soaking in plus-gas at this time as #3 bore was red rusty.


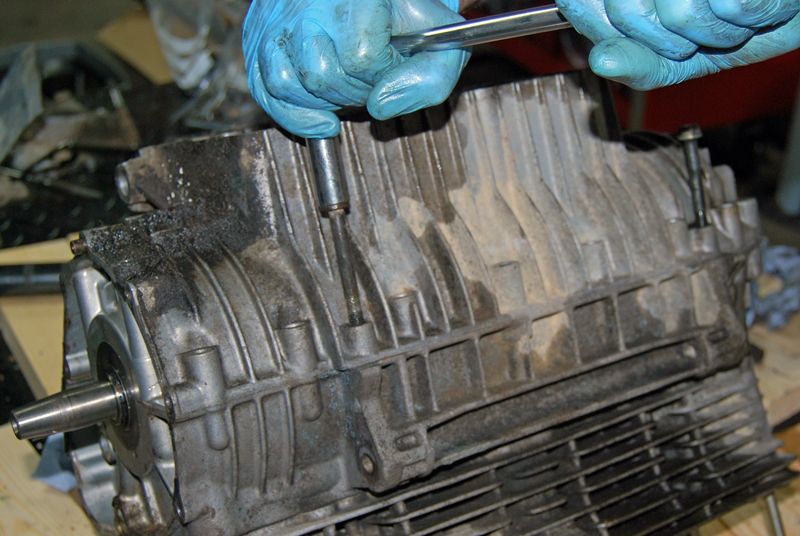
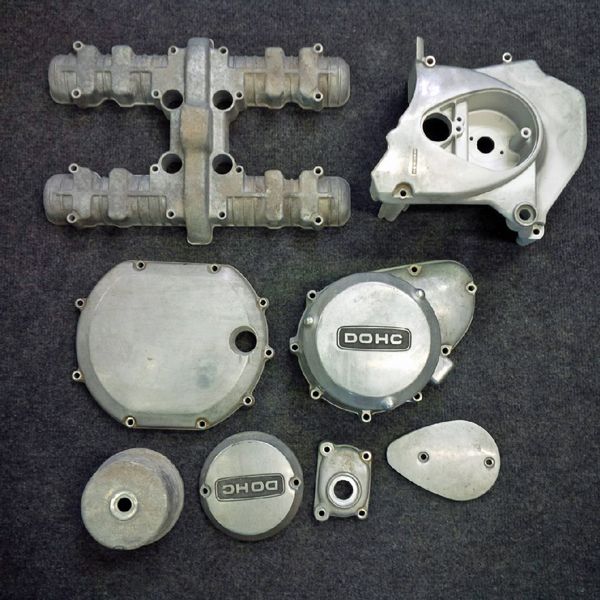
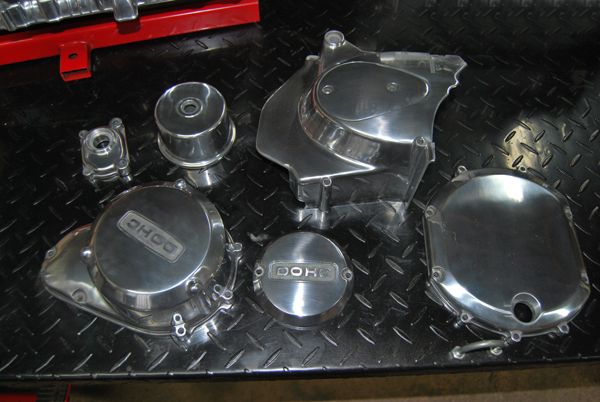
It was nice that every bolt on this motor was original and looked untouched, they all came undone without drama all the threads are clean, no helicoils this time nor any silicone gasket or loctite, even what was left of the oil was clean (ish).

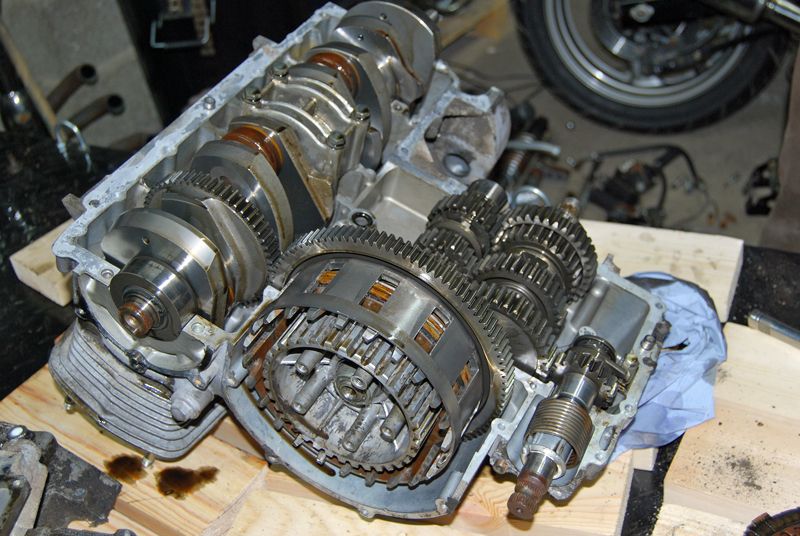
I know these motors have a reputation for being tough - but I'm expecting at best a bent crank, I'm surprised the cam cap wasn't broken.

Going to take a while this one...

Such fun :D

Posted: Tue Aug 12, 2014 1:22 pm
Author: Ginger Bear
Fook Me! I've never seen so much corrosion on the inside of a motor that looks as clean as that on the outside.

Good luck, I'll follow this with interest.

Posted: Tue Aug 12, 2014 7:00 pm
Author: ADRIAN H
You have got your work cut out with this one. Good luck, hope you have deep pockets. :wink:

Posted: Tue Aug 12, 2014 7:11 pm
Author: Pigford
Nice oil cooler :twisted:

Posted: Tue Aug 12, 2014 8:02 pm
Author: chrisu
That'll polish out.. :roll:


If you do need a crank send me a pm

Posted: Tue Aug 12, 2014 8:08 pm
Author: ZedHead
This is going to be interesting. G

Good luck and keep the pictures coming

Posted: Tue Aug 12, 2014 9:28 pm
Author: Hinckley
Yeah I guessed it was going to be a long winded affair - and not cheap.

Truck wash GB, amazing on aluminium, I thought the barrels were painted black.

The coolers in poor condition, should think it'll be repairable.

Thanks for the offer Chris I may take you up on the offer if this one ends up bent.

Motor out of the frame next......

Posted: Wed Aug 13, 2014 9:32 am
Author: Hinckley
Things are going fairly smoothly with the strip down, the generator cover took some determination to remove.

Image

Not a screw head was marked - well they were after I removed them.

Interesting the rotor coming off with the cover – the bolt was loose in the cover - crank woodruff key in place and not broken.
(I removed the screws in the generator ring to get the bolt out before the pic was taken.)

Image

Nothing amiss with the clutch, all looks good - no advance mechanism when I removed the cover - the points plate looked new (ish).

Image

The picture doesn't do the head justice - it should clean up well.
As suggested the valve head must have come off due to a timing issue.
There are no deep gouges from the valve head bouncing around, the seat looks rusty but ok, the guide is not split.
Plenty of surface corrosion in #1 and #4 combustion chambers.
#3 exhaust valve is rusted open - nice!

Image

The strangest wiring set up I've seen - blue crimp connectors - Yuk!

Image

All parts available so far....

Posted: Thu Aug 14, 2014 12:06 am
Author: Jay1969
Looking forward to seeing your new project (very early Z900 A4 - June '75!) in real life next time I visit :)

I'll help out with some spares where I can, as in stuff I'll be replacing for modifying on mine. See you soon :up

Posted: Sat Aug 16, 2014 11:17 am
Author: Hinckley
Cheers Jay :up

Stripped to a bare frame for ease of motor removal.
Unhook the front end and it's ready for flipping on its side.

Image

Frame ready for jigging - offside down tube is bent in and there's a crack on the front oil cooler mount to weld.

Image

With the frame lifted off a quick inspection showed no obvious nasties - nice and clean with no wear on anything, this hasn't done much work.

Image

With the motor flipped on it's back it's time to separate the cases.

TIP! - For those that don't know - the three un-used threaded holes in the lower crankcase have a hidden purpose.
The threaded holes are usually full of crud, this will require cleaning out before you can use them.
Inserting a generously lubricated M8 bolt (I use the ones from the crank case) into each of the threads takes the worry out of splitting the crankcases.
They thread in and push on the upper crank case, take care to tighten them evenly to avoid over-stressing the lower case.
Make sure all the bolts holding the crankcases together have been removed - they are on both upper and lower sides.
Missing one of the M6 bolts of which there are loads - will result in a broken case.

Image

The one at the back.

Image

TIP! - Once the lower case has pulled off the locating dowels the case can be lifted off.

Image

Revealing the very simple internals.
The size of everything is impressive, more akin to a car than a bike.
No wonder the drag boys loved them.


Image

TIP! -The gearbox internals and kick start mechanism can now be lifted out, take care not to loose the bearing C clips that locate the gearbox bearings to the upper case.

With the four M8 bolts removed from the centre crank support it's time to flip it over and remove the seized pistons.

Image

With a large amount of heat and a bit of gentle persuasion - using factory tools :ws

Image

The crank falls out the bottom........

With the pistons removed its ready to be sent off for overhaul.

Image

Tomorrows job is to remove the crud - ready for ceramic cleaning.

Image

Head strip down next - that should be entertaining :mmm

Such fun :fly

Posted: Sat Aug 16, 2014 12:02 pm
Author: A1John
If the internals look that good are you sure the crank needs a rebuild?

Posted: Sat Aug 16, 2014 6:46 pm
Author: Hinckley
No I'm not at all sure, It's going primarily to get checked over to see if it's bent, I'll be surprised if it isn't, if it is and it's not too expensive to fix I'll get it done, else I'll get another and keep this one for a rainy day.

Posted: Sat Aug 16, 2014 7:41 pm
Author: Ginger Bear
Well, I'm happy to see that the insides of the bottom end look in infinitely better condition than the top. :up

Posted: Tue Sep 02, 2014 11:02 am
Author: Hinckley
I'm amazed the bottom end was in such good nic GB, the corrosion inside the cam cover was real bad.
Exhaust valve train has had to be completely replaced, cam, cam chain, idlers, valves, guides, springs, followers etc.. Got away with just valves and guides on the inlet side.

Latest update.

Took some time doing sorting and ordering, from now on it gets exiting.......

1st batch off to Mikey for him to work his magic.

Image

Pulled the starter to bits expecting the worst - but its in pretty good nic, the brushes were hardly worn - just a clean and lube.

Image

Made a start on the wiring, going to include the modified coil wires and Dyna S feed into the harness.

Off to Steve Smethurst soon to drop the cases for ceramic cleaning.....

Crank is bent - as predicted - rods and bearings good - just a straighten and weld then - Gulp!

Long way to go.......

Posted: Sat Sep 20, 2014 11:08 am
Author: Hinckley
September week 3 update.


Popped down to collect the polished covers from Mikey, Jay1969 came along for the ride.

To polish the corroded Cam cover was a tall ask, I'm very happy with the outcome...

Image

Stunning......

Image


Due to being very busy at work I've not got a lot done on the bike this week, off to collect the Ceramic cleaning now :hoo

Next week I'll take the Head and barrels to have the new valves and guides installed, taking the barrels to be checked to see how far oversize they need to go, might end up getting new liners to stay at 900cc - haven't made my mind up yet.

Then on to get the frame etc blasted and powder coated.

Wheel and fork strip coming up.... :D