GB's Snotter! The Sequel: Love and Money
Posted: Fri Jul 06, 2012 10:06 am
GB's Snotter thread ran for 11 pages so I start this one afresh.
http://www.z1ownersclub.co.uk/forum/vie ... &start=150
You may recall that at the end of the thread GB sold the bike to Ted, who claimed to have a love hate relationship with with big GPZs.
Well it didn't take him too long to decide to move it on so that's where I enter the story. I had a GPZ750 when I was younger and always promised myself the "big one" one day. Well I could have just gone and bought a "good one" but where would the fun be in that.
To be honest I was hankering after Daveltd's ZRX but my Vmax won't sell so I had to rein in my aspirations and as I said I had always wanted one of these.
Both Ted and GB were very open and honest in what they perceived the bike's faults to be before I handed over my readies.
The main ones were:
1. It burns more oil than petrol
2. It is low on compression
3. It is running rich
4. It has one or more warped brake discs
So this is the list as I know it and hope that it ends there. My aim is to get the bike to a "well sorted" stage before I decide what else I might want to do with it.
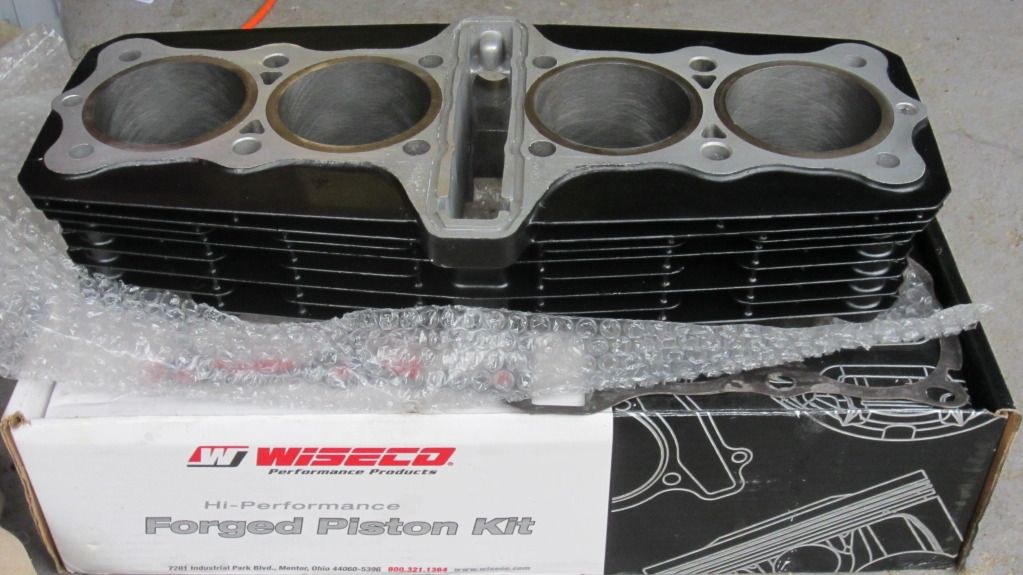
So to start with items 1 and 2. Top off and delivered to S.E.P. at Kegworth where they fitted new valve guides and re-cut the valve seats. also a re-bore to accommodate a 1170 Wiseco kit. Hopefully these should address the low compression and oil burning feature.
On strip down I have noticed that there seems to be and oil film all over the engine and wondered how so much oil got out. Is the engine not breathing right, poor gasket seals... I am sure I will find out.
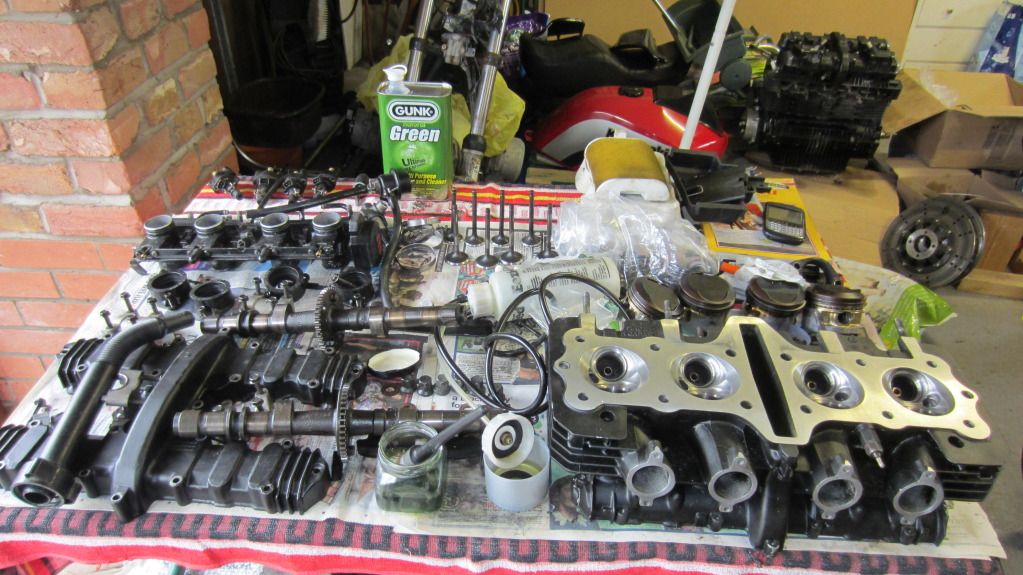
Anyway that takes me to the point that I am at now. Parts back from S.E.P. and looking to re-assemble. Slowly slowly is the order of the day here. I want to throw it back together, but there are tiresome jobs like removal of gaskets and sh_te from mating surfaces and general "fettling" along the way to ensure a clean and presentable end result.
This is the fiddliest surface to clean up, just cyl 1 to finish....
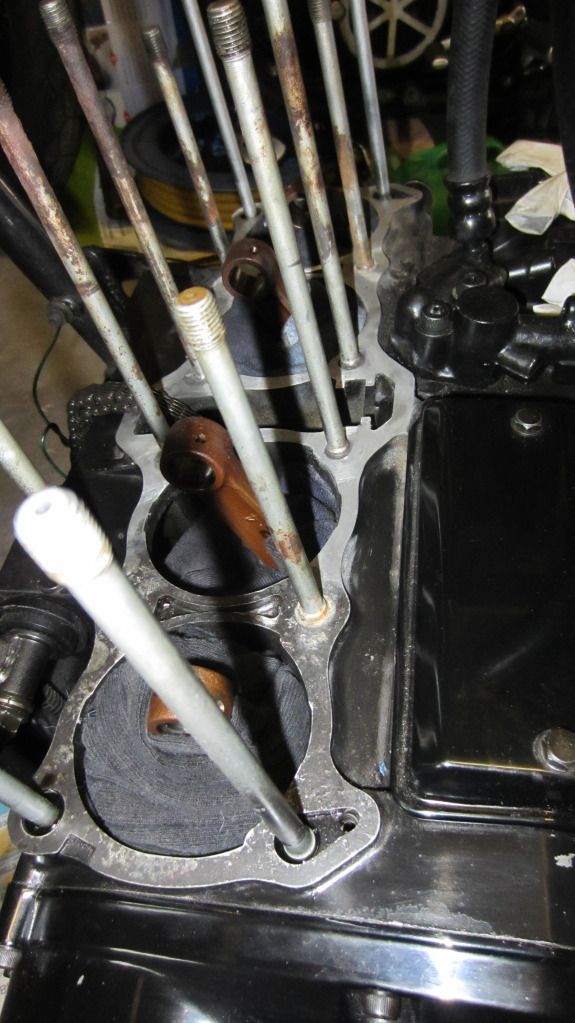
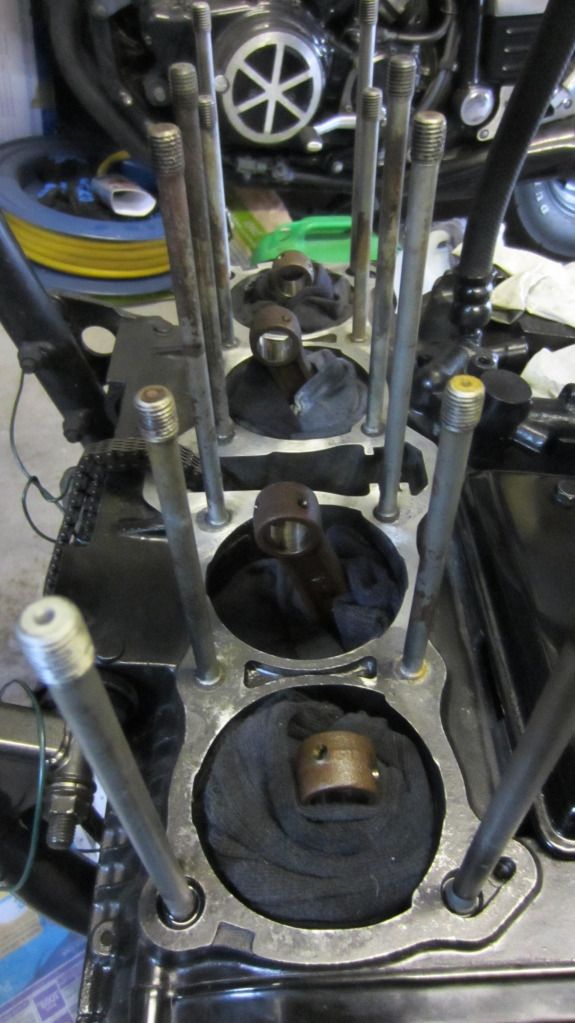
I read about and tried a few methods to get old gasket off, in the end I found 3M 240 grade wet and dry (used dry)and honest elbow (finger) grease got it done. I found that the 240 paper was man enough to get at the unwanted stuff without impacting the surface. Someone else suggested a wire wheel which I found much too harsh.
Barrels and pistons ready for the fun bit, I don't have any ring compression tool so may well resort to the cut bit of drainpipe and tie wraps method seen elsewhere on here.
Head cleaned and ready, don't bike bits take up a lot of space laid out.
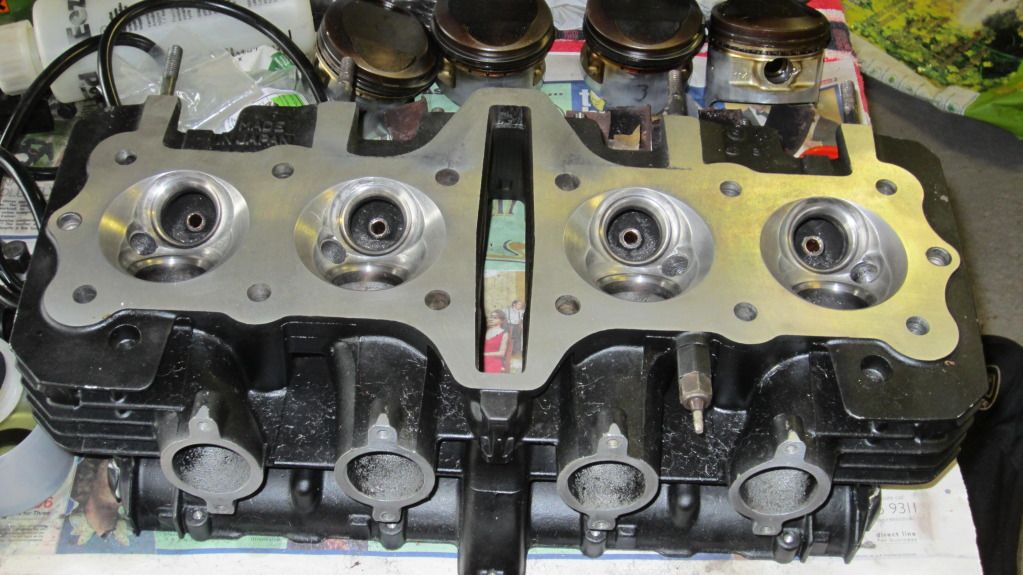
Hopefully the barrels will be on by the weekend then cylinder head assembly, set shims and lob it on top Mmmm, then the cam timing, not done that in a very long time. Wish me luckl.
http://www.z1ownersclub.co.uk/forum/vie ... &start=150
You may recall that at the end of the thread GB sold the bike to Ted, who claimed to have a love hate relationship with with big GPZs.
Well it didn't take him too long to decide to move it on so that's where I enter the story. I had a GPZ750 when I was younger and always promised myself the "big one" one day. Well I could have just gone and bought a "good one" but where would the fun be in that.
To be honest I was hankering after Daveltd's ZRX but my Vmax won't sell so I had to rein in my aspirations and as I said I had always wanted one of these.
Both Ted and GB were very open and honest in what they perceived the bike's faults to be before I handed over my readies.
The main ones were:
1. It burns more oil than petrol
2. It is low on compression
3. It is running rich
4. It has one or more warped brake discs
So this is the list as I know it and hope that it ends there. My aim is to get the bike to a "well sorted" stage before I decide what else I might want to do with it.
So to start with items 1 and 2. Top off and delivered to S.E.P. at Kegworth where they fitted new valve guides and re-cut the valve seats. also a re-bore to accommodate a 1170 Wiseco kit. Hopefully these should address the low compression and oil burning feature.
On strip down I have noticed that there seems to be and oil film all over the engine and wondered how so much oil got out. Is the engine not breathing right, poor gasket seals... I am sure I will find out.
Anyway that takes me to the point that I am at now. Parts back from S.E.P. and looking to re-assemble. Slowly slowly is the order of the day here. I want to throw it back together, but there are tiresome jobs like removal of gaskets and sh_te from mating surfaces and general "fettling" along the way to ensure a clean and presentable end result.
This is the fiddliest surface to clean up, just cyl 1 to finish....
I read about and tried a few methods to get old gasket off, in the end I found 3M 240 grade wet and dry (used dry)and honest elbow (finger) grease got it done. I found that the 240 paper was man enough to get at the unwanted stuff without impacting the surface. Someone else suggested a wire wheel which I found much too harsh.
Barrels and pistons ready for the fun bit, I don't have any ring compression tool so may well resort to the cut bit of drainpipe and tie wraps method seen elsewhere on here.
Head cleaned and ready, don't bike bits take up a lot of space laid out.
Hopefully the barrels will be on by the weekend then cylinder head assembly, set shims and lob it on top


