Hello Guest User,

Please feel free to have a look around the forum but be aware that as an unregistered guest you can't see all of it and you can't post.

To access these 'Registered Users Only' areas simply register and login.

20 year rebuild

Work in Progress

Moderators: KeithZ1R, chrisu, paul doran, Taffus

Message
Author
rogz1a
Regular Poster
Posts: 51
Joined: 9th Aug 2009
Location: gloucestershire

20 year rebuild

#1 PostAuthor: rogz1a » Wed Sep 16, 2009 10:11 pm

It started out one autumn day when I noticed that my Z1A was getting rusty, the chrome was fading, the seat was ripped, paint was scratched and the engine was starting to smoke. I thought I would strip it over the winter fix everything that needed fixing in time for the following summer. That was in 1990. It's survived 2 house moves, I nearly sold it, twice, but some how it's still with me so It's about time I pulled my finger out and put it back on the road where it belongs.
So my challenge is to be riding it next summer. THAT'S ONE LONG WINTER OF 20 YEARS.
I don't have many pictures of what it used to look like and some are already on the 'new here' forum but will add ones that I have. Image
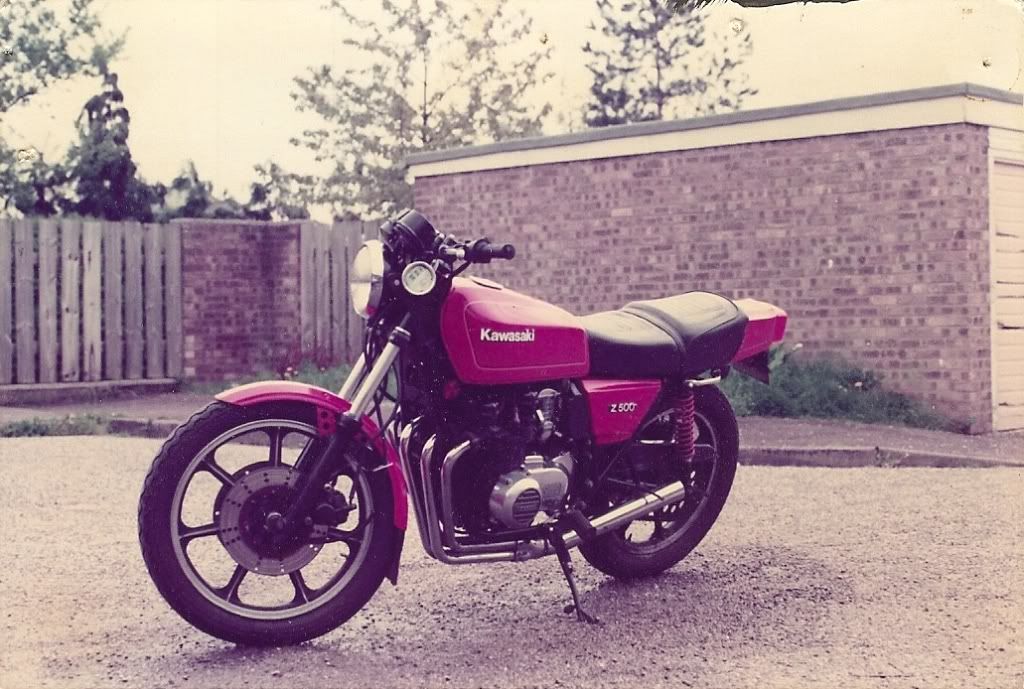
orange frame, black paintwork, beige and black seat, lovely and I rode it like this for 5 years.
Image
Image
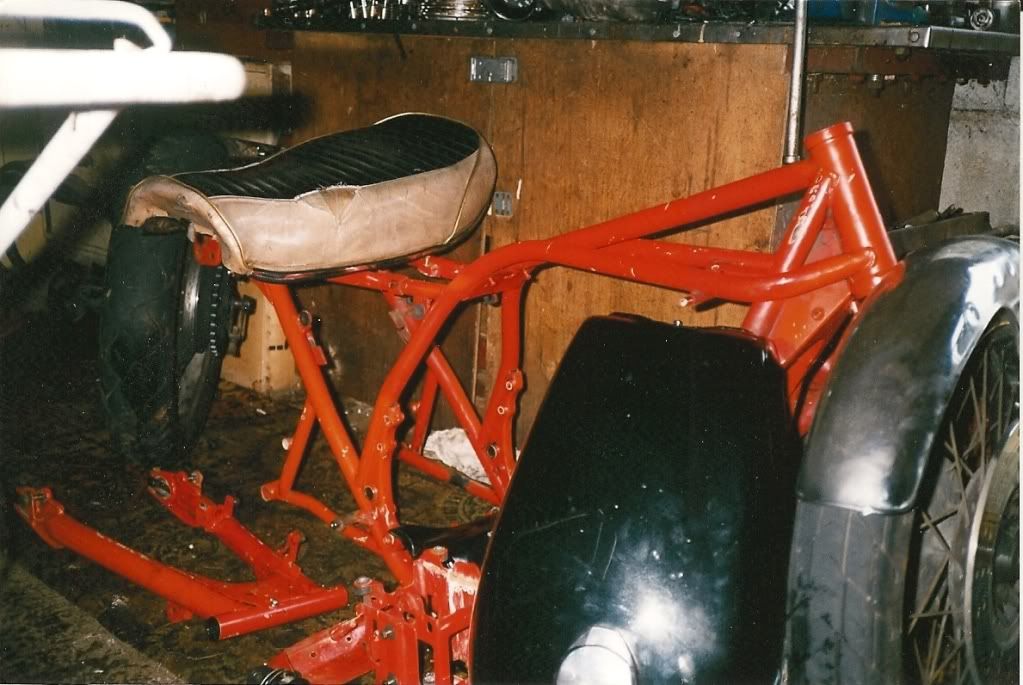
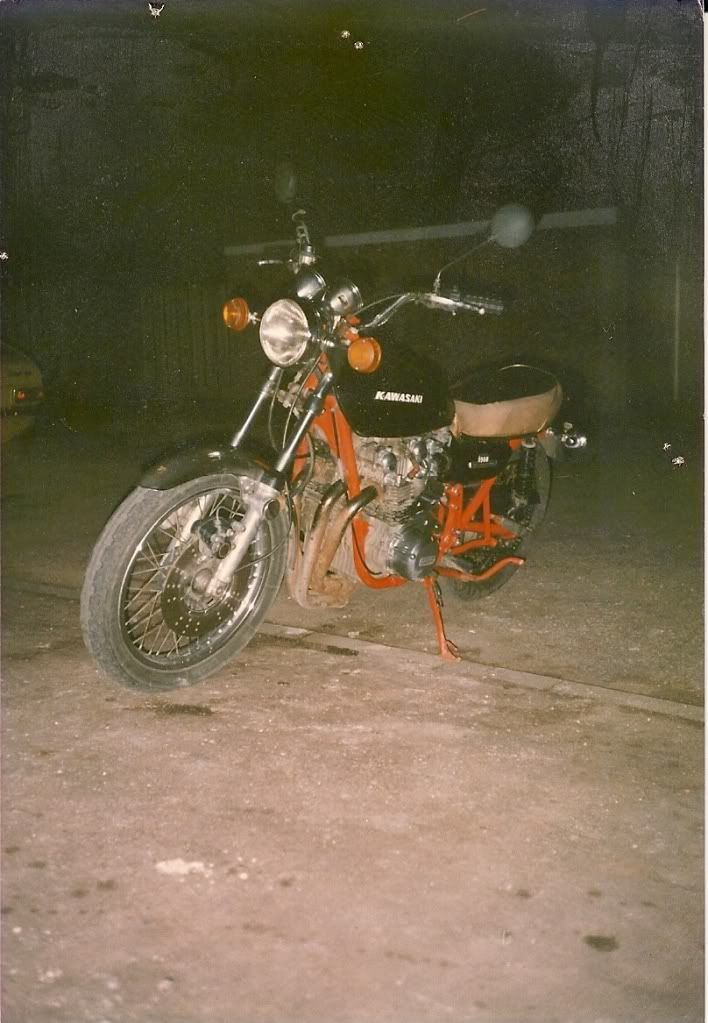
Stripped down in 1990
Image
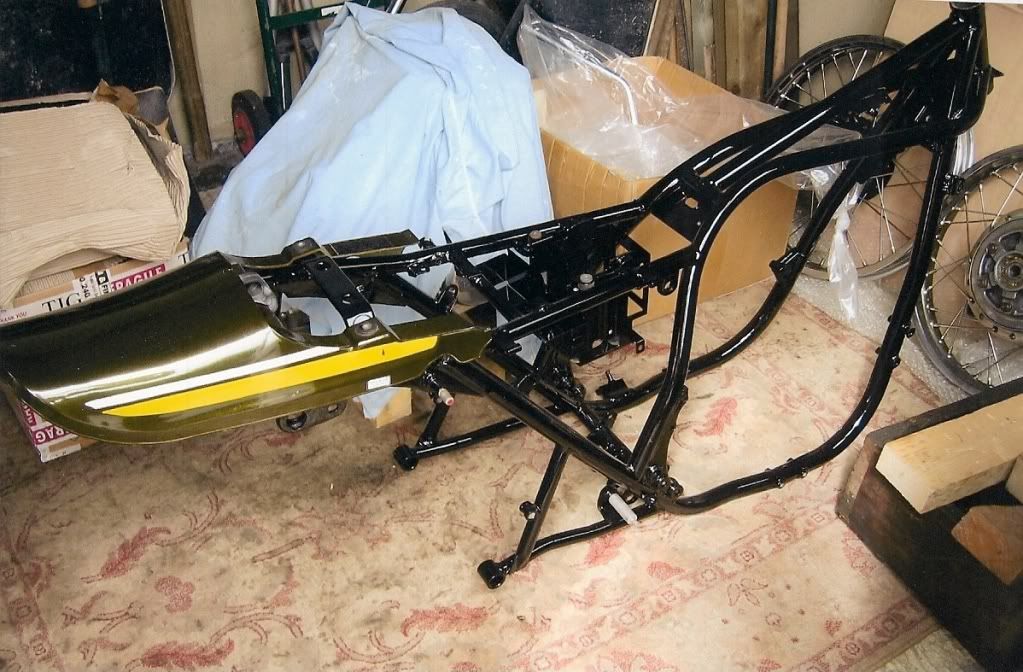
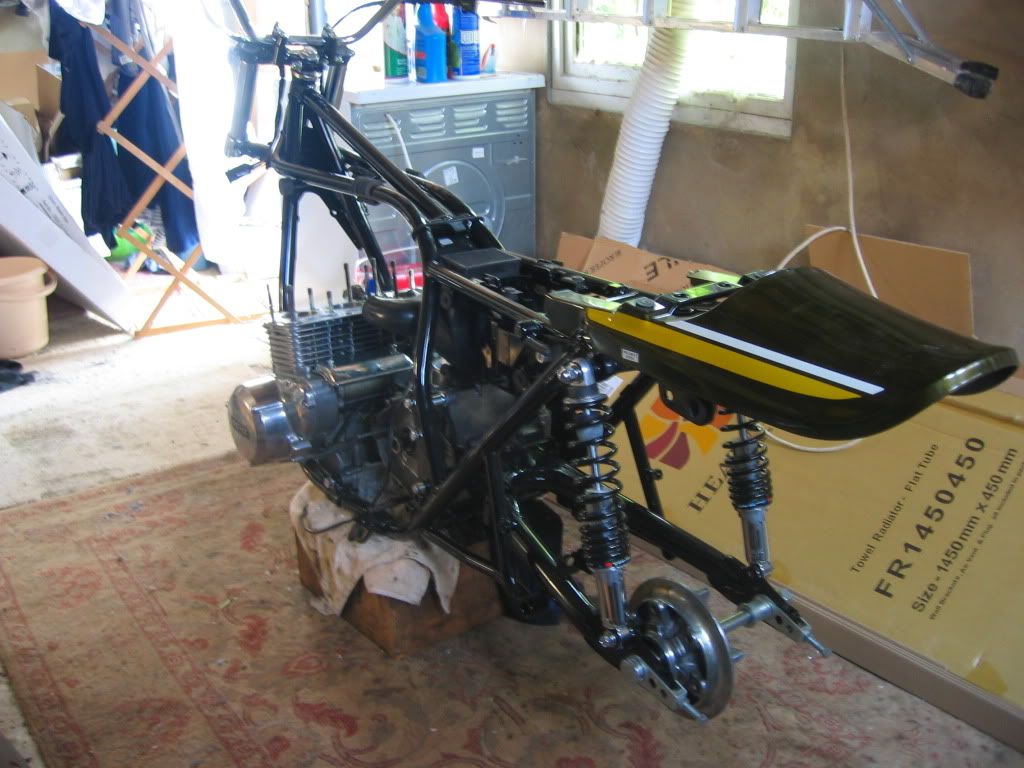
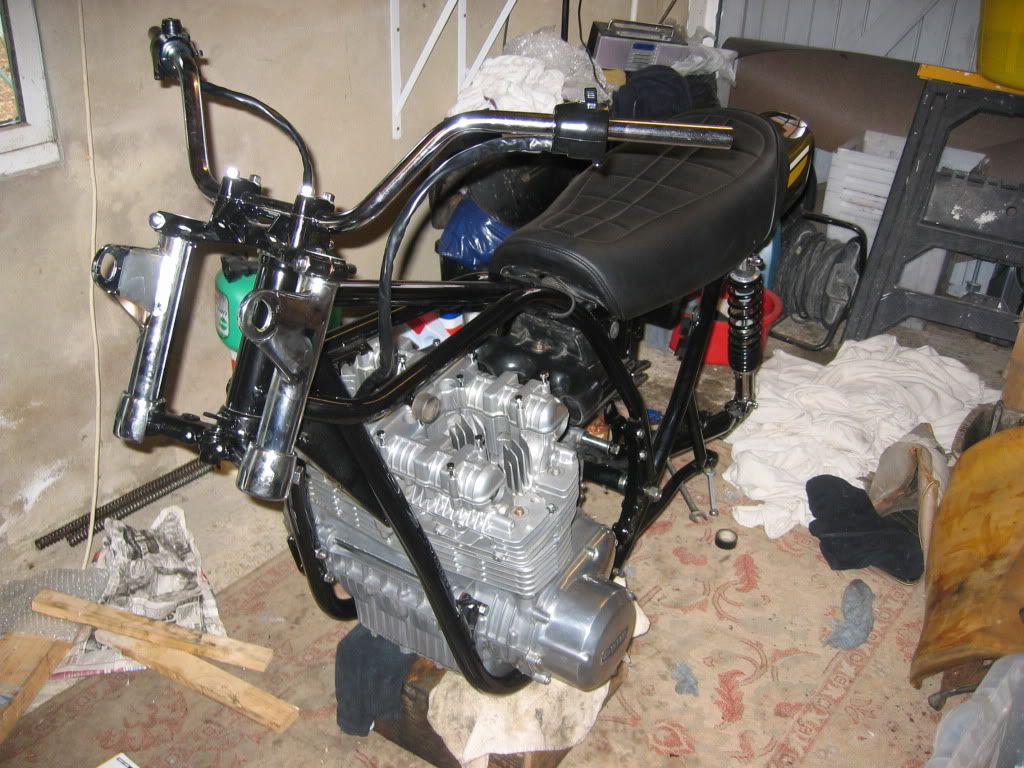
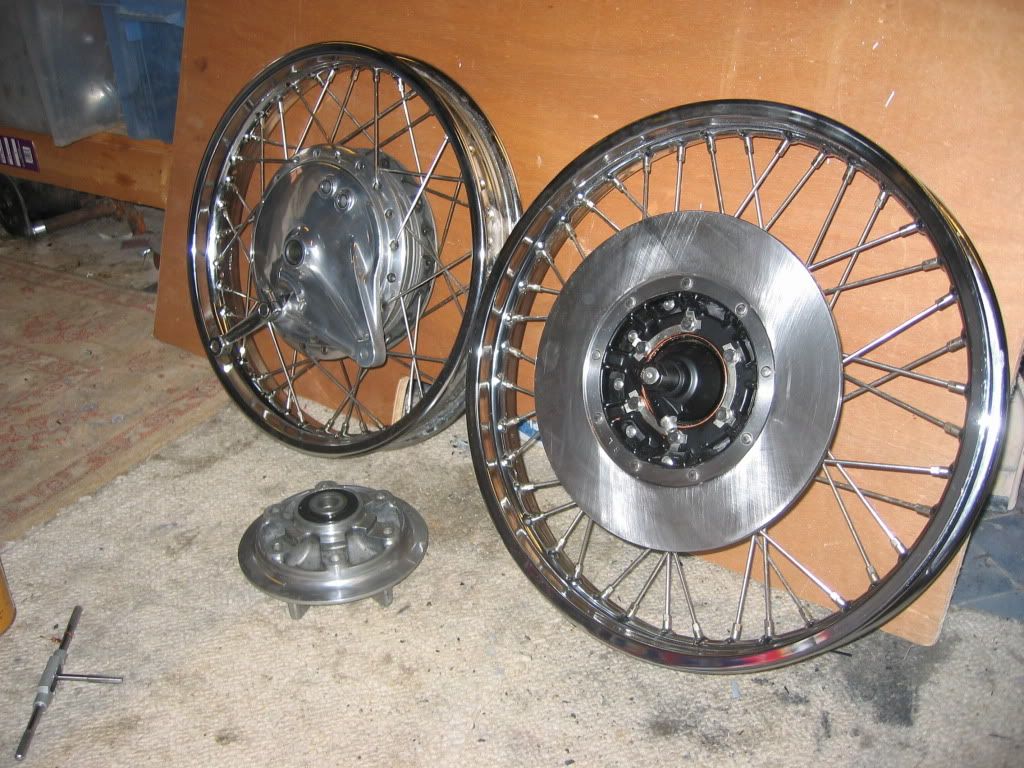
No more orange paint. I've chosen to have the frame stove enamelled instead of powdercoated. Just my preference.
Image
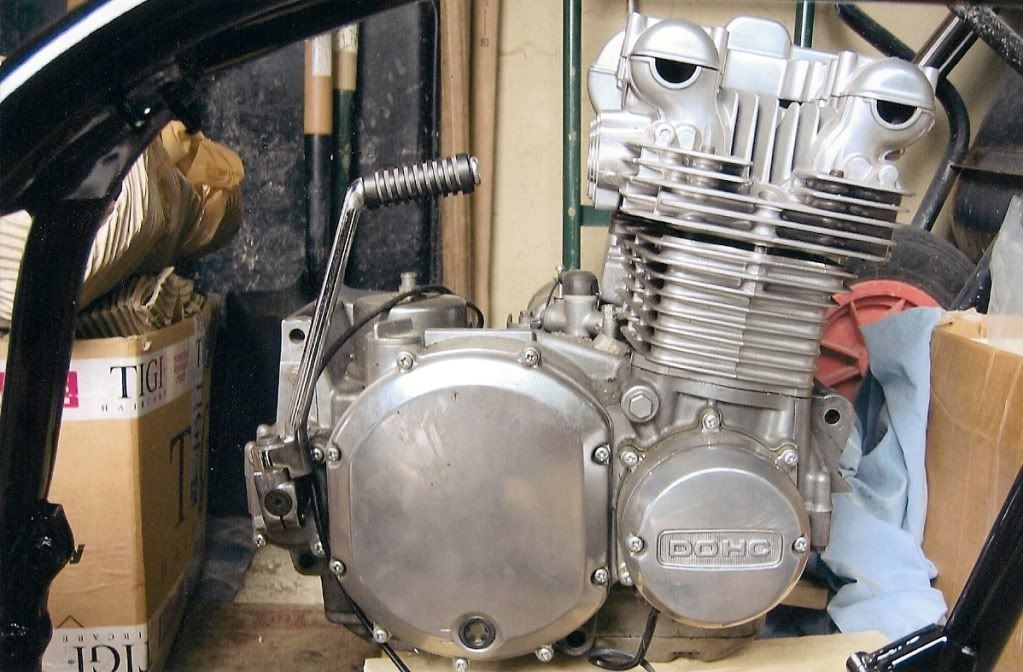
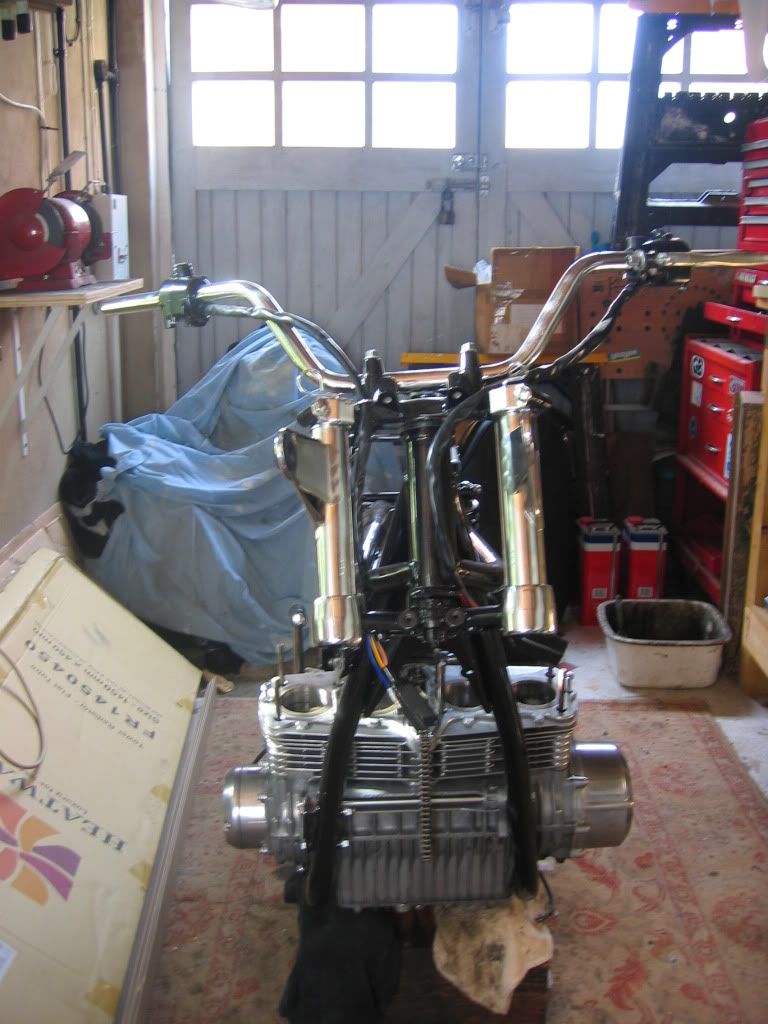
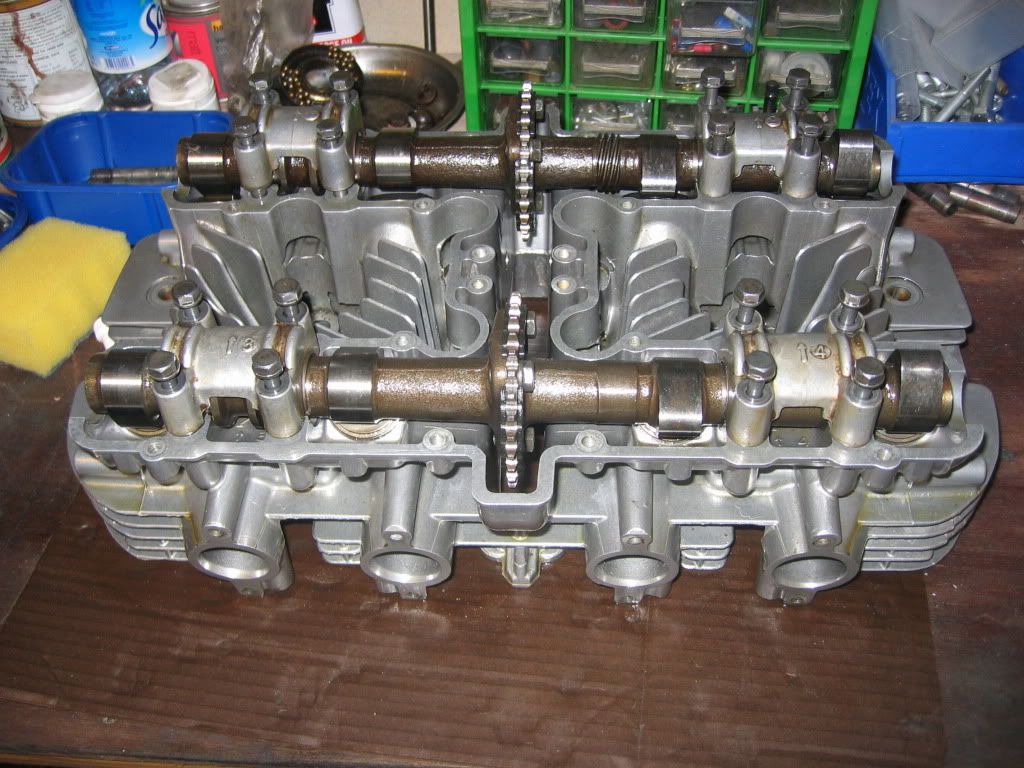
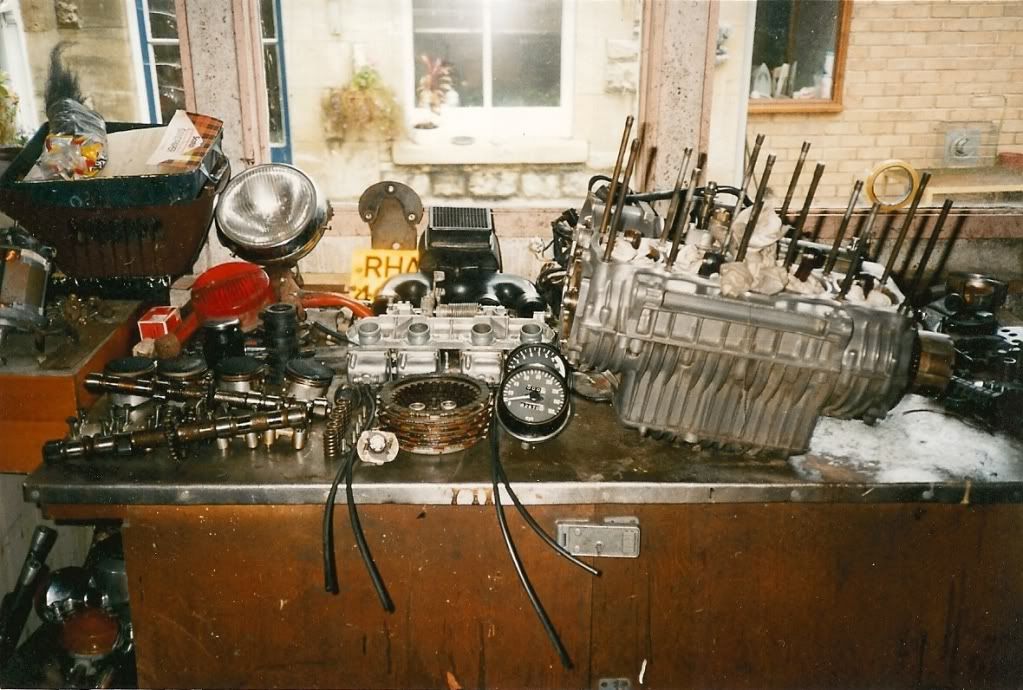
I just placed the head on for the photo. It needs a bit of work to create more valve clearance (machining down the valve stems to give me more scope with the shimming) I fitted a replacement set of 903cc barrels and pistons as it was fitted with 1015cc barrels so now it is as it should be. The engine was stripped and all was good and I replaced the cam chain and lower guides as a matter of course. Replaced the valve guides, valves and seals.
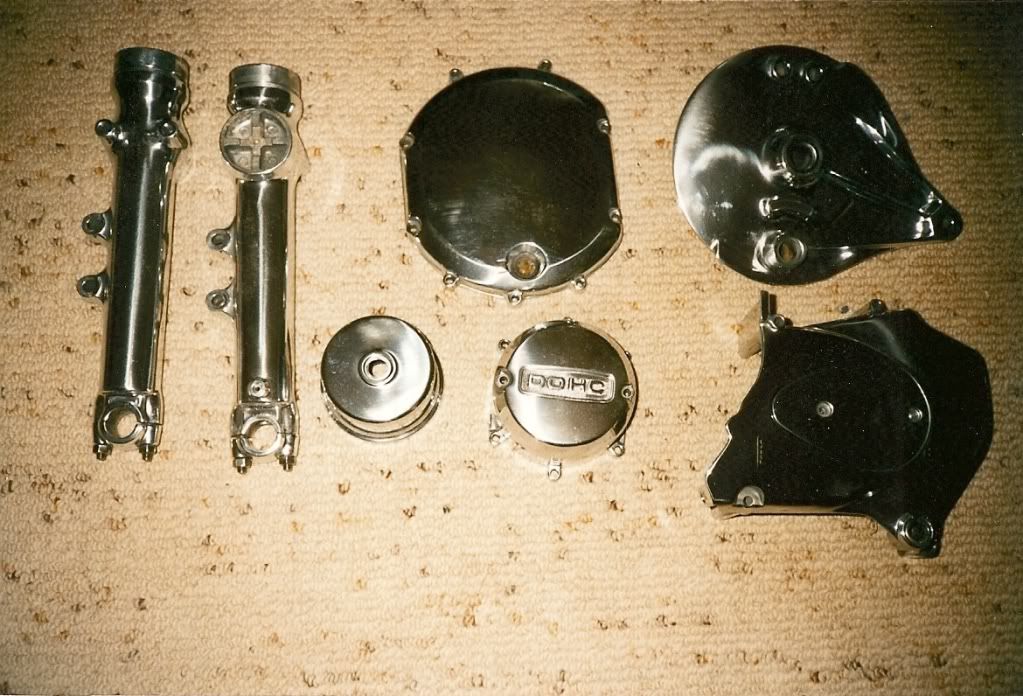
I cleaned up the crankcases but had the barrel and head professionally cleaned.
The colour scheme was for a long time going to be the candy brown until I bought the tailpiece off ebay in the candy green and it won me over. So candy green it is. This bike is to be ridden so although I want it to look good it wont be a show winning example.
Please be patient with updates as I am doing this with limited funds (as well as doing my bathroom)
Anyway cheers for now and will post more pics as work progresses

User avatar
toycollector10
100Club
100Club
Posts: 401
Joined: 10th Dec 2007
Location: New Zealand

#2 PostAuthor: toycollector10 » Thu Sep 17, 2009 4:11 am

Looking great so far. Keep up the good work.

User avatar
mikey
Hardcore
Hardcore
Posts: 3792
Joined: 29th Nov 2005
Location: bristol

#3 PostAuthor: mikey » Thu Sep 17, 2009 3:20 pm

Keep it up roger it will be worth it in the end
Making the world a shiny place with a factory finish

User avatar
colinj
100Club
100Club
Posts: 105
Joined: 3rd May 2009
Location: Uttoxeter

20 years

#4 PostAuthor: colinj » Thu Sep 17, 2009 6:22 pm

Looking forward to this and learning as I follow!

Regards, Colinj
"Life moves pretty fast. You don't stop and look around once in a while, you could miss it!"

Ferris Bueller

rogz1a
Regular Poster
Posts: 51
Joined: 9th Aug 2009
Location: gloucestershire

#5 PostAuthor: rogz1a » Mon Sep 21, 2009 1:38 pm

I've been busy in the garage and put the engine back in the frame minus the head which gave me some valuable extra room. The method I used, which I'm sure you are all familiar with was, ' Phone a good mate and with the promise of a beer or two ask him over. While the wives are chatting about X factor or Facebook or something retire to the garage, beer in hand.'
'Place engine on it's side supported by various pieces of wood. Place essential bolts for the mounting off around the engine. Put beer down to avoid spillage (essential) and with mate at rear end of frame and myself at business end lift up frame and slowly place frame over engine. slide bolts through and pinch up nuts/bolts. Lift up frame/ engine and place on suitable support system (wooden box). Tighten all nuts/ bolts.' Perfect and no scratches on frame. This is easier to do with a bare frame or you will need more mates.
Image

Image

The shock absorbers are the Koni Dial-a-rides I bought in the early 90's. Not original but I've got them so i'll use them and I think they look pretty good.

Shiny bits

Image

Image

I've placed the head one to see how it looks. The handlebars are rechromed and the headlamp brackets along with headstock bolts were all bought back in the early 90's.
The seat was another ebay purchase and has proper stitching around the padded panels and not a moulded stitch effect as I have seen on others.
I'm not sure if this is original but as it is in very good condition I shall use it. There are holes for the seat strap but this was missing. Ebay came up trumps again with an original strap

Image

Image

That's all for this week. I should have the head back next week and have to save my pennies for Z1 Enterprises (cam idler gears, etc ) berfore it can go back on.

User avatar
mikey
Hardcore
Hardcore
Posts: 3792
Joined: 29th Nov 2005
Location: bristol

#6 PostAuthor: mikey » Mon Sep 21, 2009 5:31 pm

Looking very nice so far roger
keep it up mate she will be a beauty
Making the world a shiny place with a factory finish

User avatar
paul doran
Area Rep.
Area Rep.
Posts: 15910
Joined: 24th Sep 2004
Location: near Dublin Ireland

#7 PostAuthor: paul doran » Tue Sep 22, 2009 7:26 am

looking good :clap :clap
way too many Zeds

gbh
Custard Cream
Custard Cream
Posts: 867
Joined: 29th Aug 2005
Location: Japan

#8 PostAuthor: gbh » Tue Sep 22, 2009 8:22 am

Nice work you'e doing there!
I'll bet you're glad you didn't sell it all those years ago.

User avatar
Ginger Bear
Hardcore
Hardcore
Posts: 6850
Joined: 16th Dec 2008
Location: In the Dark.
Contact:

#9 PostAuthor: Ginger Bear » Thu Sep 24, 2009 7:20 pm

That's looking really good, it's always nice to be on the re-build part, fitting nice clean parts, as opposed to the dirty messy strip down. I will watch this with interest!

rogz1a
Regular Poster
Posts: 51
Joined: 9th Aug 2009
Location: gloucestershire

#10 PostAuthor: rogz1a » Sun Sep 27, 2009 9:42 pm

Thanks for the comments and now for this weeks installment.
I finally got my cylinder head back and once I sorted the valves out into their rightful cylinder I had a good mid range of clearances (2.45 to 2.55)
I installed a 2.00 shim and then found my clearances from this position. I then installed a 2.35 shim to recheck the results. All good and have set them at the upper end of tolerance to insure that they seat well on the inital running in. In my experience valve clearances tend to close up on initial start up. I will recheck them within a few hundred miles of running.

Image

Saturday arrived and it was a good day for a bit of painting, warm with no wind. I have decided to spray paint a few small items (master cylinder, brake line splitter etc) in satin black and as I progressed my confidence grew so i also took on the bigger items (clock covers, headlamp shell).
I firstly keyed in the surface and degreased the components with brake cleaner. Then i applied 3 coats of build up primer which gave a good base.
After this I rubbed down the surface with a worn piece of wet/dry paper before applying 3 coats of satin black.

Image

Image

The end results look very good but only time will tell how durable it will be. Looking at previous posts the brake parts may not last but I will deal with this as and when it becomes an issue.
The brake disc was another ebay purchase and as I didn't know it's history I have had it lightly skimmed. My original was ok but had been drilled (see first picture)
Just a question about my master cylinder. As you can see it has a plastic reservoir and other Z1A's I have seen have an all metal reservoir. I have seen similar plastic ones on z1000 but these are taller (twin disc). Could anyone advise me on this. It was fitted and working fine when my bike was on the road so I will use it for now but I would like to know which model it fits.

Lastly I got my wheels out of hibernation. I had these built up with new rims in the early 90's and was lucky that the Takasago rims were still available. I chose stainless spokes and nipples at the time and had the hubs polished or painted as required. They have been coated in grease ever since but don't seem to have suffered much.

Image

Now for something different. I would just like to show you all my first venture into the world of Z with a Z500 I owned before I progressed to Z1 status. This was also my first jap 4 cyl bike. Previously my bike of choice was old british singles and twins. What an eye opener, no vibration, it didn't break down and no oil leaks. I was hooked! It also sounded fantastic with an Alfa 4 exhaust

Image

All in all a good week but things may slow up for a couple of weeks due to work commitments.
Cheers for now

User avatar
Ginger Bear
Hardcore
Hardcore
Posts: 6850
Joined: 16th Dec 2008
Location: In the Dark.
Contact:

#11 PostAuthor: Ginger Bear » Mon Sep 28, 2009 6:44 am

Good progress Rog.

User avatar
debben1
100Club
100Club
Posts: 449
Joined: 17th Feb 2004
Location: Ringwood
Contact:

#12 PostAuthor: debben1 » Mon Sep 28, 2009 7:41 am

:clap :clap :clap

rogz1a
Regular Poster
Posts: 51
Joined: 9th Aug 2009
Location: gloucestershire

#13 PostAuthor: rogz1a » Mon Sep 28, 2009 6:40 pm

I think I have solved my master cylinder question. I Have just bought a couple of classic motorcycle mechanic back issues and there is a picture of a Z1B handlebar/clocks setup with the same master cylinder as mine. I will fit the one i've got and may look for the right one when it's on the road.
This also explains why my switch gear is of the Z1B type. Has anyone out there got some pictures of Z1A switch gear as I'm unsure what the difference is.
Also which is the tyre of choice in this modern world and which size works best. Cheers for now

Hi debben1
I have just seen your website and have sent you a p.m

User avatar
Ginger Bear
Hardcore
Hardcore
Posts: 6850
Joined: 16th Dec 2008
Location: In the Dark.
Contact:

#14 PostAuthor: Ginger Bear » Mon Sep 28, 2009 7:46 pm

rogz1a wrote:
Hi debben1
I have just seen your website and have sent you a p.m


Gonna be like a kid in a toy shop!!!! Hope the plastic can take it........ Enjoy!!

User avatar
Davy Doherty
Hardcore
Hardcore
Posts: 3009
Joined: 28th Oct 2003
Location: Derry Ireland

#15 PostAuthor: Davy Doherty » Mon Sep 28, 2009 8:53 pm

rogz1a wrote:I think I have solved my master cylinder question. I Have just bought a couple of classic motorcycle mechanic back issues and there is a picture of a Z1B handlebar/clocks setup with the same master cylinder as mine. I will fit the one i've got and may look for the right one when it's on the road.
This also explains why my switch gear is of the Z1B type. Has anyone out there got some pictures of Z1A switch gear as I'm unsure what the difference is.
Also which is the tyre of choice in this modern world and which size works best. Cheers for now

Hi debben1
I have just seen your website and have sent you a p.m


If shes an early Z1A the switchgear is the same as the Z1 the plastic master were on the european and i think uk spec Z1's, USA had the round metal type..
Life's too short!


Return to “Projects”

Who is online

Users browsing this forum: No registered users and 10 guests