Hello Guest User,

Please feel free to have a look around the forum but be aware that as an unregistered guest you can't see all of it and you can't post.

To access these 'Registered Users Only' areas simply register and login.

Project Z900 A4 - Restoration - Pic Heavy

Work in Progress

Moderators: KeithZ1R, chrisu, paul doran, Taffus

Message
Author
User avatar
Jay1969
Hardcore
Hardcore
Posts: 4260
Joined: 26th Feb 2013
Location: East Midlands, England.
Contact:

#76 PostAuthor: Jay1969 » Tue Feb 17, 2015 4:42 pm

Hinckley wrote:
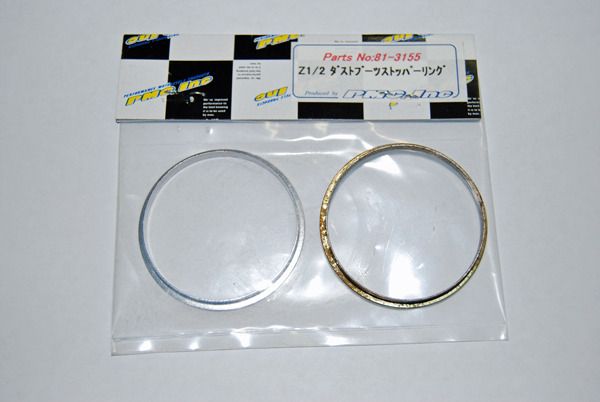
After a bit of searching I found PMC listed replacement items for the Z1 - but they did not say if they would fit the A4.
After a bit of measuring between me and Dave - they measured up pretty similar - so I gave them a try.

Identical! PMC 81-3155 (sold in singles)

Image

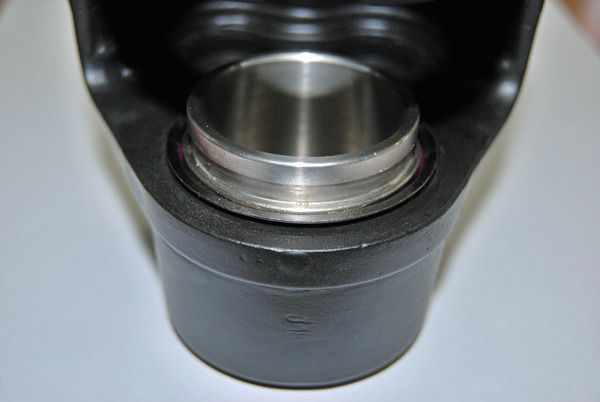
And fit a treat - Stainless steel pistons were well priced from Wemoto and also fit well.

Image


Ah great, I'll order these to replace my knackered ones too.
Those calipers that were on my Z900 certainly would have
struggled to stop on a penny lol

Keep the pics coming :D

~Jay.

User avatar
Hinckley
100Club
100Club
Posts: 263
Joined: 21st Jun 2012
Location: UK

#77 PostAuthor: Hinckley » Tue Feb 17, 2015 4:59 pm

Jay1969 wrote:Those calipers that were on my Z900 certainly would have
struggled to stop on a penny lol
~Jay.


Stopping is relative - one has to slow down first :lol:

User avatar
Jay1969
Hardcore
Hardcore
Posts: 4260
Joined: 26th Feb 2013
Location: East Midlands, England.
Contact:

#78 PostAuthor: Jay1969 » Tue Feb 17, 2015 6:59 pm

Hinckley wrote:
Jay1969 wrote:Those calipers that were on my Z900 certainly would have
struggled to stop on a penny lol
~Jay.


Stopping is relative - one has to slow down first :lol:

This is why I didn't ride fast - taking it easy - safely :D

~Jay.

User avatar
Hinckley
100Club
100Club
Posts: 263
Joined: 21st Jun 2012
Location: UK

#79 PostAuthor: Hinckley » Tue Feb 24, 2015 12:02 pm

February update week 3 ish.

Had a bad few days in the Mojo department of late - lack of sleep does me no favours - I needed a pick-me-up...

As if by magic it appeared in true Zed form when the postie arrived - blooming ek - It's Christmas!

Waiting for parts is like waiting for a bus - nothing for ages then they all come at once....


First to be unpacked was the chroming - not a bad job - not as good as Mikey used to do - but Hey-Ho.

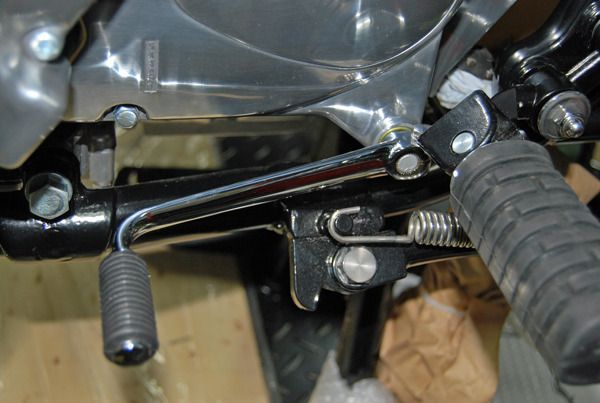
With a topped up Mojo - A new genuine rubber went on the gear lever - a nice shiny stainless bolt - and - on it went.

I then replaced the temporary pattern rear brake lever with the re-chromed original - looks exactly the same - but it's original.

Original torque arm and rear brake arm are good to go...

Image

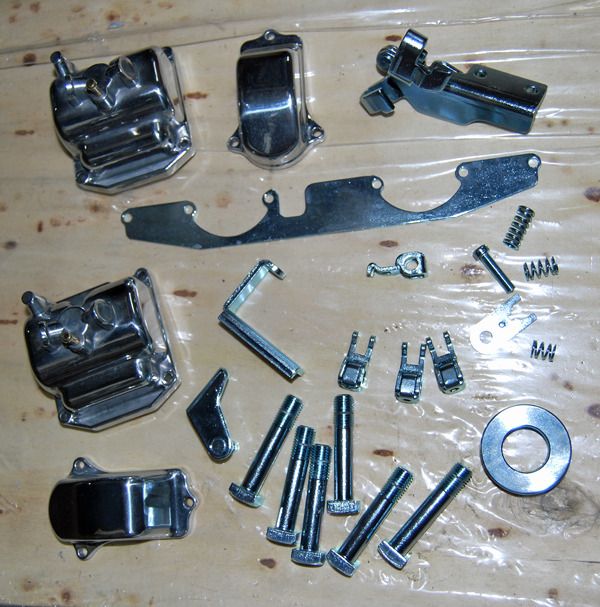
Then after tea I opened Mikeys Plating and Polishing - Sunglasses at the ready! :cool

Image

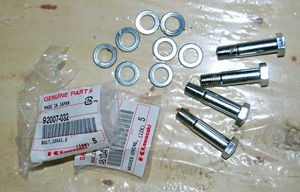
Last was the back ordered genuine parts - the cost of re-chroming the caliper mount bolts 'n' washers was a no brainer - more than getting new ones!
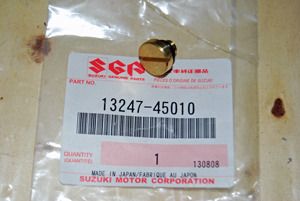
The original carb drain screws were a tad used 'n' abused so I treated her to a new set - Suzuk1 bagged items are identical and were cheaper than the Z-Power ones I got for the Ltd.

ImageImage

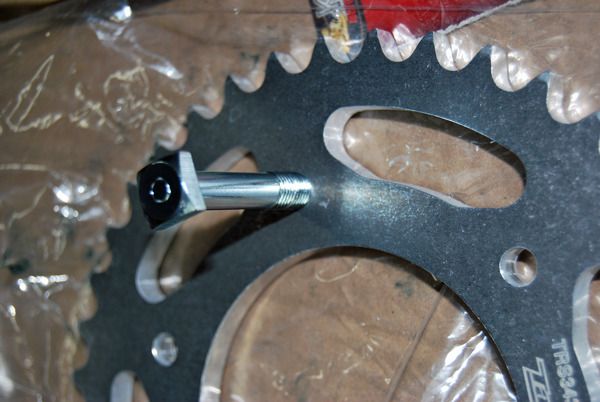
Found a slight issue with the 530 rear sprocket - wrong size mounting holes - a quick wizz through with a 10mm drill will solve that..

Image

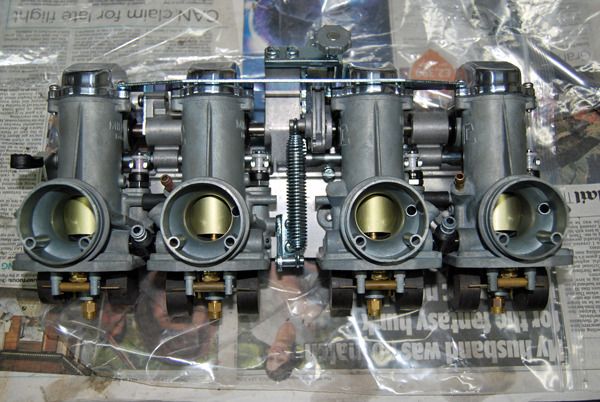
Despite the Siberian conditions inside the garage Carb assembly continued a pace.
With the carbs dressed I set the lift height and fitted the choke bar and lifters.
Just the float heights to set and they can go on.....

Image

Wheels are at Central being checked - I even got a gold star for the build.... cough cough... :)

With the parts budget now sitting just below empty :oops: - it's a good job there are NO more parts to buy - WooHoooo!!

Well there is the paintwork - but there is a budget for that :D

Such Fun :D

User avatar
ollie
Custard Cream
Custard Cream
Posts: 836
Joined: 13th Sep 2002
Location: north yorkshire

#80 PostAuthor: ollie » Tue Feb 24, 2015 11:21 pm

stunning build !!!,well done :wink:
zedsrus:"i don't know man ,i just got here myself !!"

User avatar
Hinckley
100Club
100Club
Posts: 263
Joined: 21st Jun 2012
Location: UK

#81 PostAuthor: Hinckley » Mon Mar 02, 2015 12:00 pm

Thanks Ollie.

March update week 1.

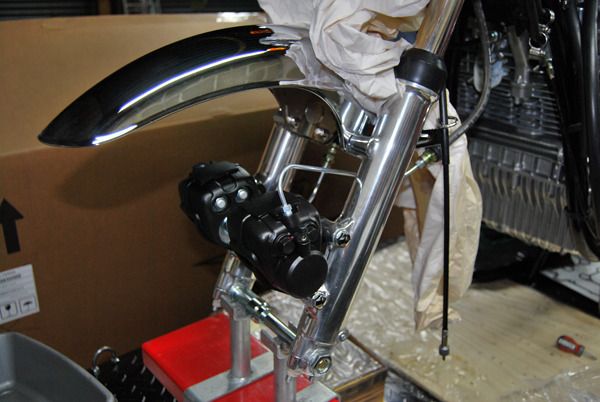
So, with the calipers assembled EBC pads were then fitted and the calipers put in place.
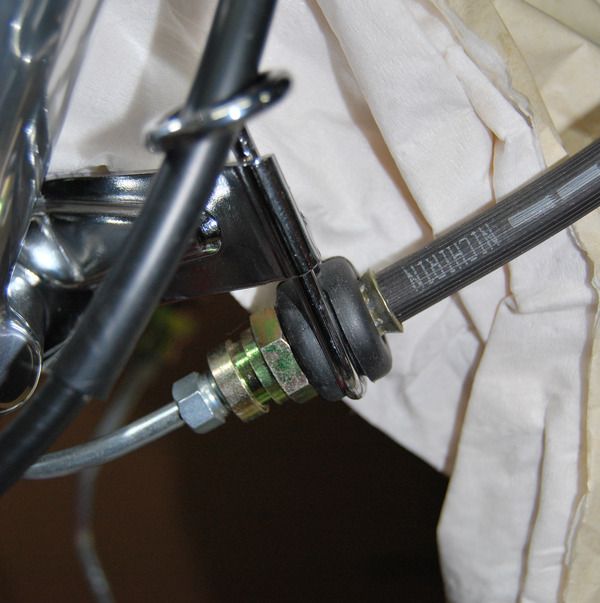
Hardline pipes were then trial fitted.
Image

After a bit of re-shaping of the hardline - everything lines up as it should.

Ready for the wheels......
Image

Back to the carbs.

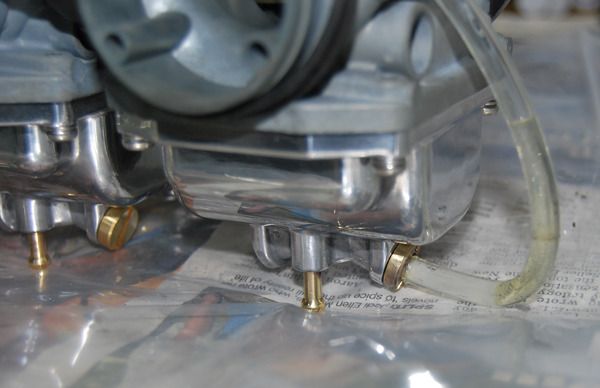
I converted an old drain plug to make a fuel level gauge, after running a drill through - an old spray can tube was fed through the plug and glued in, then some pvc tube pushed over - works a treat.
Image

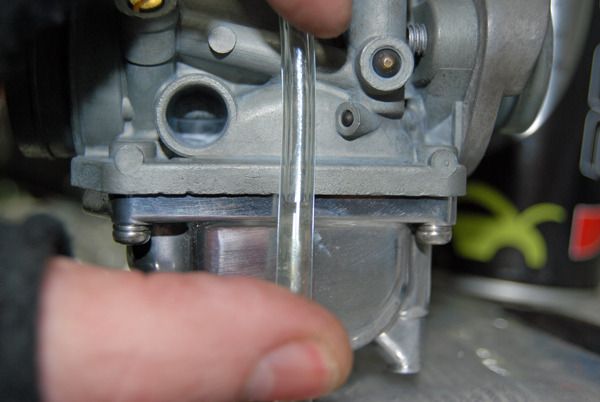
Clymer manual says the float height should be 22mm +/- 1mm, and the fuel level should be 3mm down from the carb body +/-1mm.

With the float height set at 22mm this gave a fuel level of 1mm.
After gaining experience in setting up the Ltd - I found those particular 26ss carbs to be a touch sensitive to float height - erring on the side of caution I opted for the -1mm to give a 2mm measurement - time will tell if this is wise....
Image

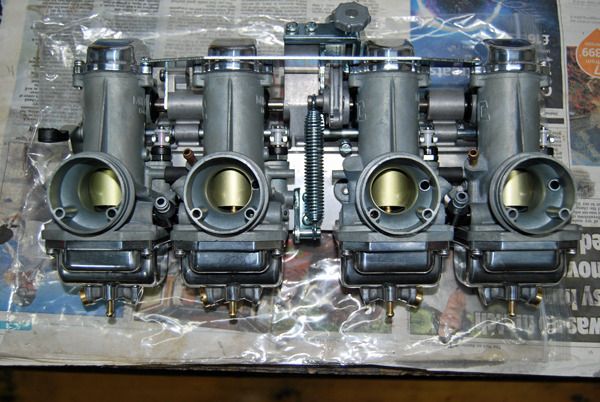
Everything double checked and we're ready to fit - fingers crossed.
Image

Double checked the valve shims, found a couple of clearances I'm still not 100% happy with.

FYI - head had new everything - guides, valves, seats, springs buckets etc..
All seats were cut to identical depths at the minimum tolerance.
Spring lengths and installed tension were identical.
Buckets were double checked to make sure they were identical.
Valve lengths were checked and matched, collet groove measurement from valve seat were checked.

Using Size 300 shims - all inlets are identical at 0.10mm clearance - spot on.
Using Size 300 shims - the nearside pair of exhausts are ok at 0.08mm the offside pair are a tad over at 0.11mm, I'm tempted to leave them as they do hammer in over time.

Wheels back this week - woohooo!

Such fun :D

User avatar
Pigford
Hardcore
Hardcore
Posts: 13314
Joined: 2nd Jan 2006
Location: North Dorset

#82 PostAuthor: Pigford » Mon Mar 02, 2015 1:17 pm

I'd run the engine for a few hundred miles, then re-torque head & check valve clearances again :wink:

Looking good lad :!:
And on the 7th day... Zeds were created!

Rodders5019
100Club
100Club
Posts: 400
Joined: 23rd Jan 2014
Location: Suffolk

#83 PostAuthor: Rodders5019 » Tue Mar 03, 2015 5:26 pm

Hinckley wrote:February update week 3 ish.

Had a bad few days in the Mojo department of late - lack of sleep does me no favours - I needed a pick-me-up...

As if by magic it appeared in true Zed form when the postie arrived - blooming ek - It's Christmas!

Waiting for parts is like waiting for a bus - nothing for ages then they all come at once....


First to be unpacked was the chroming - not a bad job - not as good as Mikey used to do - but Hey-Ho.

With a topped up Mojo - A new genuine rubber went on the gear lever - a nice shiny stainless bolt - and - on it went.

I then replaced the temporary pattern rear brake lever with the re-chromed original - looks exactly the same - but it's original.

Original torque arm and rear brake arm are good to go...

Image

Then after tea I opened Mikeys Plating and Polishing - Sunglasses at the ready! :cool

Image

Last was the back ordered genuine parts - the cost of re-chroming the caliper mount bolts 'n' washers was a no brainer - more than getting new ones!
The original carb drain screws were a tad used 'n' abused so I treated her to a new set - Suzuk1 bagged items are identical and were cheaper than the Z-Power ones I got for the Ltd.

ImageImage

Found a slight issue with the 530 rear sprocket - wrong size mounting holes - a quick wizz through with a 10mm drill will solve that..

Image

Despite the Siberian conditions inside the garage Carb assembly continued a pace.
With the carbs dressed I set the lift height and fitted the choke bar and lifters.
Just the float heights to set and they can go on.....

Image

Wheels are at Central being checked - I even got a gold star for the build.... cough cough... :)

With the parts budget now sitting just below empty :oops: - it's a good job there are NO more parts to buy - WooHoooo!!

Well there is the paintwork - but there is a budget for that :D

Such Fun :D
OOOOOOOOOOOOOOOO SHINEY BITS :D :shock:
Rodders PUM

( REX1100 Z900 A4 )

Steve Cooke
Hardcore
Hardcore
Posts: 1612
Joined: 18th Mar 2007
Location: Southampton

#84 PostAuthor: Steve Cooke » Tue Mar 03, 2015 7:11 pm

Kawasaki increased the upper limit to 6thou in a service bulletin so a 4thou gap is really best as a minimum whilst 4thou is acceptable I would prefer to be above that as you'll be changing them quicker than you would normally need to.

User avatar
Richard Q
Custard Cream
Custard Cream
Posts: 596
Joined: 24th Feb 2014
Location: Sheffield

#85 PostAuthor: Richard Q » Tue Mar 03, 2015 11:43 pm

Awesome job you are doing there :)

I wish I had the patience to get to that standard :oops:

I fitted a pair of those pattern indicators on the rear and thought the thread intruded too far into the centre. The gap between them is almost exactly the same as the width of the rear tyre. I don't suppose the wheel would actually get up that far, but I lopped 20mm off mine just in case :??

Richard
Somewhere, over a rainbow, weigh a pie.

1976 KZ900

User avatar
Hinckley
100Club
100Club
Posts: 263
Joined: 21st Jun 2012
Location: UK

#86 PostAuthor: Hinckley » Wed Mar 04, 2015 1:51 pm

Pigford wrote:I'd run the engine for a few hundred miles, then re-torque head & check valve clearances again :wink:

Looking good lad :!:

Thanks.
I did set the Ltd to 0.15 and after 1k they closed to around 0.12.


Rodders5019 wrote:OOOOOOOOOOOOOOOO SHINEY BITS :D :shock:

Would you expect anything less from Mikey ;)


Steve Cooke wrote:Kawasaki increased the upper limit to 6thou in a service bulletin so a 4thou gap is really best as a minimum whilst 4thou is acceptable I would prefer to be above that as you'll be changing them quicker than you would normally need to.

I still find the Ltd a touch tappety especially when cold, the more miles that go on the quieter it's getting - having just replaced the valve seals I've found No4 exhaust had closed up the most, re-shimmed to 0.15 and it is now noticeably noisier than the rest.


Richard Q wrote:Awesome job you are doing there :)

I wish I had the patience to get to that standard :oops:

I fitted a pair of those pattern indicators on the rear and thought the thread intruded too far into the centre. The gap between them is almost exactly the same as the width of the rear tyre. I don't suppose the wheel would actually get up that far, but I lopped 20mm off mine just in case :??

Richard

Patience of a saint me :)

I must add, having the previous Ltd build experience made some directional decisions very easy, you know the things you would have done differently - so I did - and there are a few things I would do differently next time - hindsight is a wonderful thing.

I did change the pattern indicator posts for a set of originals I scored on the bay, You are correct - the tyre does not come up far enough to cause problems - the shocks do not compress that far.

:beer

User avatar
Hinckley
100Club
100Club
Posts: 263
Joined: 21st Jun 2012
Location: UK

#87 PostAuthor: Hinckley » Mon Mar 09, 2015 10:39 am

March week 2 update.

With the shimming complete for now - the valve cover was fitted.

Getting the carbs onto the new rubbers was fun!! - maybe having a JCB to help with a spot of leverage next time - perhaps!!

Oil cooler came close to being for sale as the hoses were very difficult to fit.
I used the correct Inside diameter hose but found it would not fit easily over the cooler pipework - It didn't seem to want to stretch diameter at all.
Heat helped - as did grease - with determined force a few blisters duly appeared - but at least it's on.
To be honest now it's fitted - I'm not overly keen on the look... I'm re-thinking this one.

With the cooler fitted and valve cover on - it's ready for oil...

Image

The Coolers mounting washers and bolts were replaced with polished stainless items - the originals were red rusty - so they must get a hard life under there.

I was not happy with the fit of the genuine NOS rear brake arm washer I got from Cradley - although it was the correct part number it appeared too small on the outside diameter.
Surplus Supplies to the rescue again - I fitted a replacement polished stainless washer - M8 with a 25mm outer diameter - this looks much better - I even snuck a narrow O-ring in to help retain the grease.

The PMC chainguard bolt kit was supposed to be all stainless items - it turns out only the rear bolt with the shoulder was stainless.
I have now replaced the washers and front bolt with Polished stainless items - the rear bolt was treated to a bit of polishing to match.


Hope to make a start fitting the wheels in on the weekend.


Still a fair way to go - but at last it feels like I'm making progess....... :D

freddyz1r
Hardcore
Hardcore
Posts: 1351
Joined: 10th Mar 2013
Location: mansfield,nottinghamshire

#88 PostAuthor: freddyz1r » Mon Mar 09, 2015 10:55 am

Looking good as always.
how did you think of fitting that 'o' ring :?: it's little things like that, that set you apart from most of us 'knuckle draggers' :lol: :up
Why are you fitting an oil cooler?
Is it more cosmetic, 'belt and braces',or do you think 1 is required ?
Cheerz freddy :D
Punctuation, Spelling and Grammar will be used sparingly. Due to rising costs of inflation.

“It's not me who can't keep a secret. It's the people I tell that can't.â€￾ 

freddyz1r
PUM 329

User avatar
Hinckley
100Club
100Club
Posts: 263
Joined: 21st Jun 2012
Location: UK

#89 PostAuthor: Hinckley » Mon Mar 09, 2015 12:46 pm

freddyz1r wrote:Looking good as always.
how did you think of fitting that 'o' ring :?: it's little things like that, that set you apart from most of us 'knuckle draggers' :lol: :up
Why are you fitting an oil cooler?
Is it more cosmetic, 'belt and braces',or do you think 1 is required ?
Cheerz freddy :D

Thanks freddy, It wasn't divine inspiration or the like though - much more basic I'm afraid.
The O ring came about just because the lever had a very small amount of free play, I could see dirt getting in or water if it got wet - I will now do the same on my Ltd as it too has a small amount of free play and when I checked it yesterday it feels a tad graunchy by comparison.

I'm having second thoughts on the cooler - I fitted it because it came with the bike - so I kinda got to thinking it should be there - I have opened an opinions question in the Discussion section to help me gather more of an informed view.

:beer

User avatar
Hinckley
100Club
100Club
Posts: 263
Joined: 21st Jun 2012
Location: UK

#90 PostAuthor: Hinckley » Fri Mar 13, 2015 5:11 pm

March week 2.1 update.

Oil cooler is coming off! dam ugly thing.


On a lighter note - rubber arrived from tyreleader.co.uk.
Never used them before - I found them to give good service and the price was reasonable.

Couldn't wait to get them mounted and balanced.

Image

I know what I'll be doing on the weekend! :D


Return to “Projects”

Who is online

Users browsing this forum: Bing [Bot] and 10 guests