Hello Guest User,
Please feel free to have a look around the forum but be aware that as an unregistered guest you can't see all of it and you can't post.
To access these 'Registered Users Only' areas simply register and login.
Please feel free to have a look around the forum but be aware that as an unregistered guest you can't see all of it and you can't post.
To access these 'Registered Users Only' areas simply register and login.
Asphalt Cowboy
Moderators: KeithZ1R, chrisu, paul doran, Taffus
Hi Adam.
Yes, the very same Dave Wood. We were discussing how we met.
When he moved into his new unit and planned the layout he wanted the showroom upstairs. He approached several lift companies who quoted him upwards of £30k to install something sufficient to lift bikes up there. I got a phone call from him out of the blue and he suggested an option of modifying a tail lift to suit. I ended up supplying him some maximum length columns and ropes together with enough pulleys to modify something that would only lift 1.4 metres into something that would lift 3 metres. Simple really and he appreciated another lateral thinker.
When Phil was alive we used to discuss Dave`s racing efforts, Phil would regularly talk to racers at events, as he used to run in BSB and still does a bit but in other classes. Don`t ask me which ones
His son, also called Dave, now races and is working his way up through the ranks.
He had him trying to balance a set of Z1B carbs while I was there today. Oh how we laughed
Asphalt Cowboy
Phil Churchett award winner 2015
Phil Churchett award winner 2015
I only spent a couple of hours in the garage today but can now see the wood for the trees as it were in a couple of respects.
First up was the shock fixing. I had seen a rather neat spacer / fixing arrangement like this
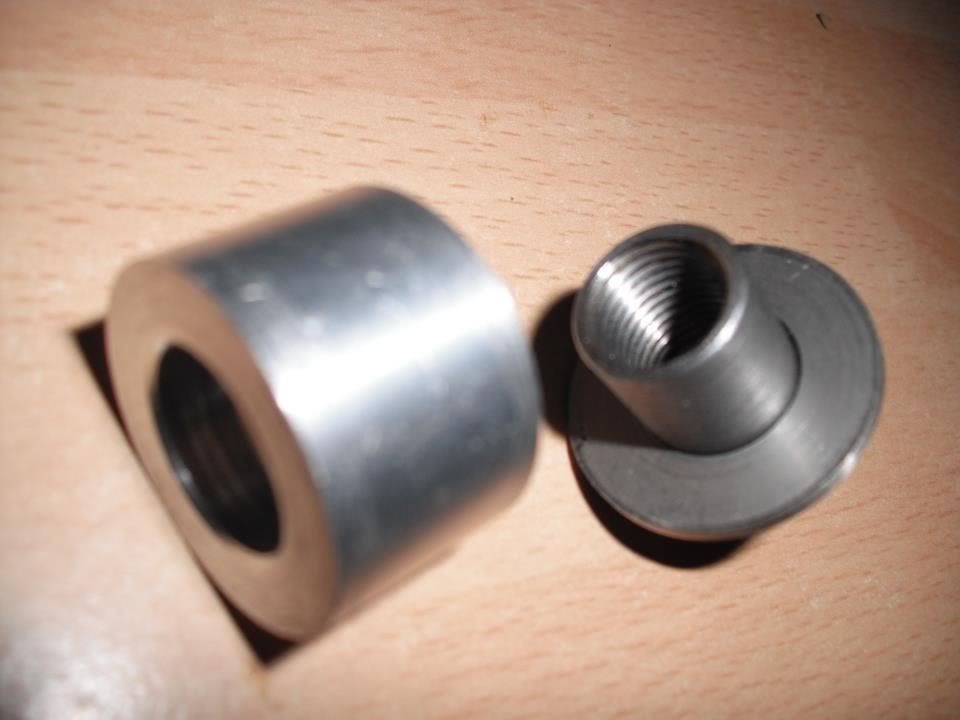
but on closer inspection the swingarm mountings are kicked out by quite a bit. It looked bad. I did a dry fit by fixing the shocks to the inside of the swingarm brackets. This left me enough clearance for the tyre and would mean only spacing out the tops by 6mm. Much more acceptable.
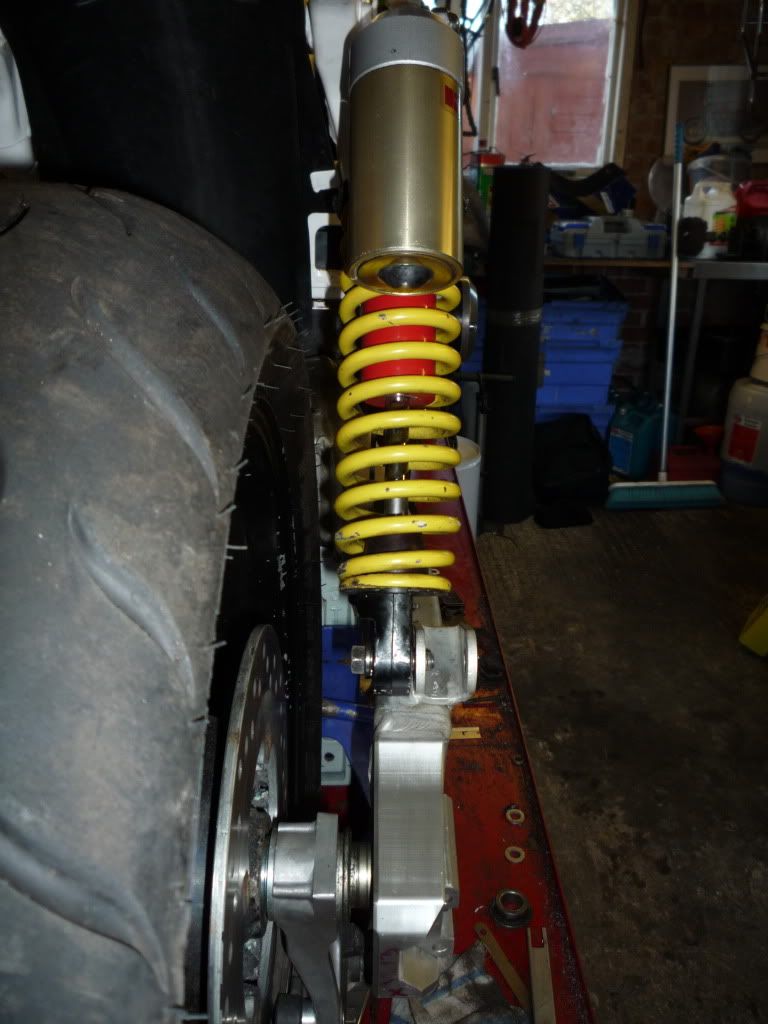
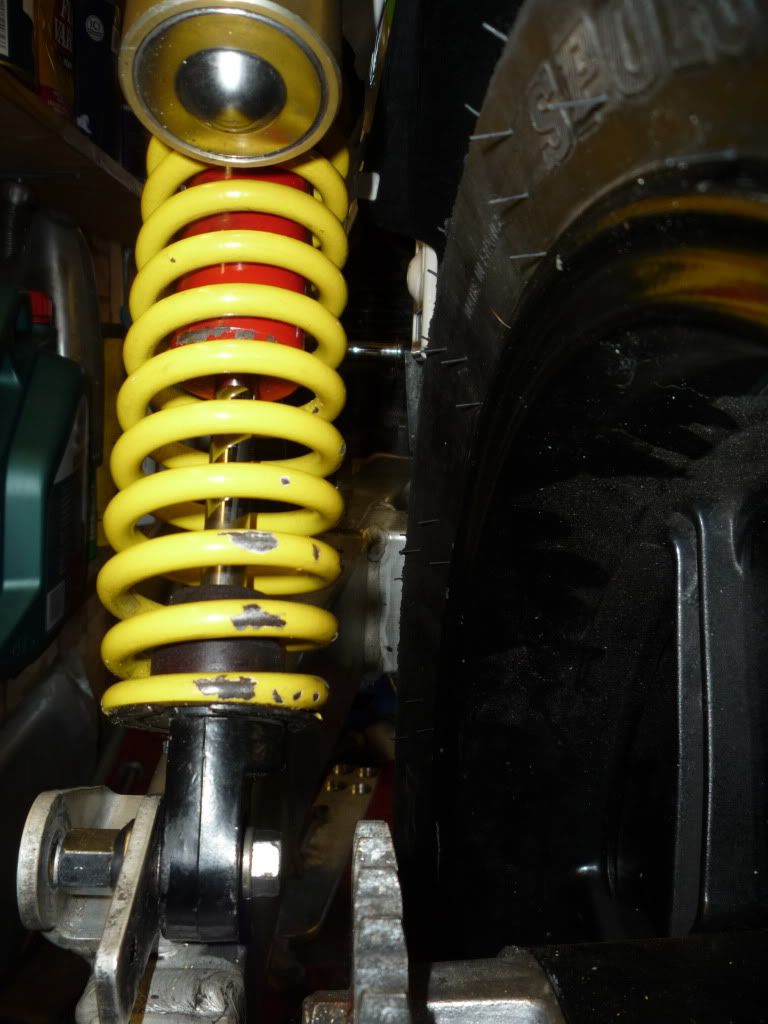
I tried to show a pic of the chain run here but it`s only just possible to see the front sprocket. It looks like it will be very close to ideal. Incidentally the front sprocket is dished. Was the Standard for the GPZ or has it got a non standard one on it?
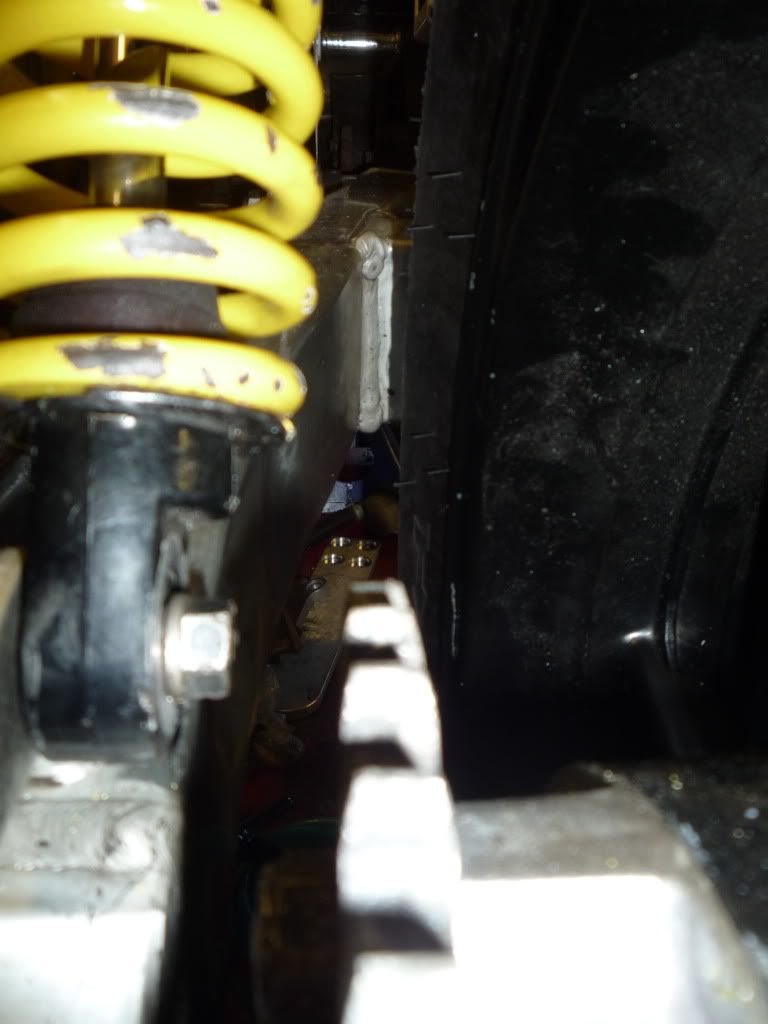
Looking at the clearance between the chain and the rear shock shows it may be a little tight but there is plenty of room to kick the shocks out a little further. Also the design of the Ohlins I intend to fit will need to be taken into account as will the size of rear sprocket.
Any guide on sprocket size will help here please.
First up was the shock fixing. I had seen a rather neat spacer / fixing arrangement like this

but on closer inspection the swingarm mountings are kicked out by quite a bit. It looked bad. I did a dry fit by fixing the shocks to the inside of the swingarm brackets. This left me enough clearance for the tyre and would mean only spacing out the tops by 6mm. Much more acceptable.


I tried to show a pic of the chain run here but it`s only just possible to see the front sprocket. It looks like it will be very close to ideal. Incidentally the front sprocket is dished. Was the Standard for the GPZ or has it got a non standard one on it?

Looking at the clearance between the chain and the rear shock shows it may be a little tight but there is plenty of room to kick the shocks out a little further. Also the design of the Ohlins I intend to fit will need to be taken into account as will the size of rear sprocket.
Any guide on sprocket size will help here please.
Asphalt Cowboy
Phil Churchett award winner 2015
Phil Churchett award winner 2015
I did a dry fit of the left hand peg assembly and have settled on 5" rearwards and 1" higher than stock. On my stock J I sometimes ride using the rear pegs which are 11" further back than the front. I only do this on long runs due to the strain sitting in a "up and beg" stance can become tiring at high speed.
I can easily fabricate a new bracket to mount these 636 footrest assemblies to.

I can easily fabricate a new bracket to mount these 636 footrest assemblies to.

Asphalt Cowboy
Phil Churchett award winner 2015
Phil Churchett award winner 2015
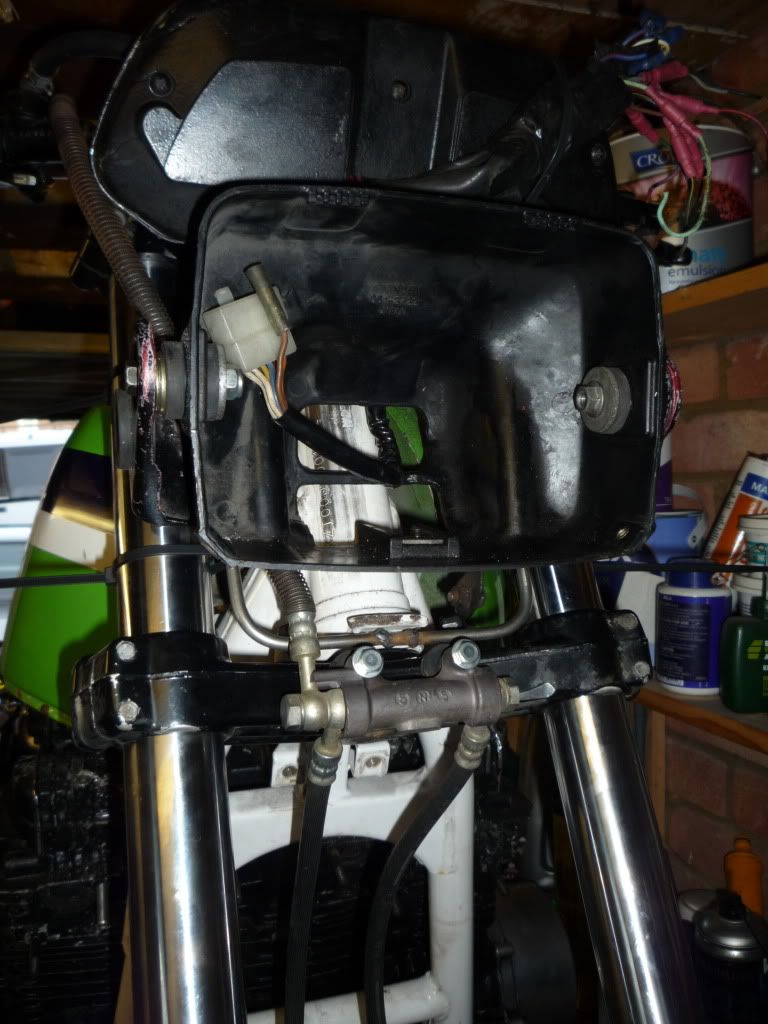
Lastly I have been trialling the headlamp fixing.
I previously made up a bracket similar to the stock arrangement but need to take into account the clock fixing.
The headlamp will probably end up somewhat lower than stock although I have no bike to compare it to. It may also end up a little further forward than stock so I can fit all the gubbins in.
It would be good if someone can post a photo of their remote reservoir fixing brackets. I now have a pair of ZXR7 master cylinders.

Asphalt Cowboy
Phil Churchett award winner 2015
Phil Churchett award winner 2015
- Ginger Bear
- Hardcore

- Posts: 6850
- Joined: 16th Dec 2008
- Location: In the Dark.
- Contact:
Hi Chris.
I see you got the swingarm in the frame NICE! Now I think you should carefully cut of the shock brackets and weld them back on the swingarm in the right position, wich will be very nice towards the inside of the swing arm profile Then you do not need any spacers!!
I use 530 chain 18/44 on my z1000 and it works fine.
As a tumb rule you should use 3 up back for each one up front regardless of chain size, so
you have 15/33, 16/36, 17/39, 18/42
The lenght with the XJR swing will be 115 links so remember to buy a long one
Cheers
I see you got the swingarm in the frame NICE! Now I think you should carefully cut of the shock brackets and weld them back on the swingarm in the right position, wich will be very nice towards the inside of the swing arm profile
I use 530 chain 18/44 on my z1000 and it works fine.
As a tumb rule you should use 3 up back for each one up front regardless of chain size, so
you have 15/33, 16/36, 17/39, 18/42
The lenght with the XJR swing will be 115 links so remember to buy a long one
Cheers

- Ginger Bear
- Hardcore

- Posts: 6850
- Joined: 16th Dec 2008
- Location: In the Dark.
- Contact:
Chris, I meant do you plan to keep the front sprocket. 
Just looked back through my old 1170 project thread, but all the info got lost in the 'Meltdown'. So I've been out in the garage to see what I took off.
What I found was a 40t 530. I remember I increased the rear by 5 teeth & it worked very well, from memory I used a 19t on the front.
Just looked back through my old 1170 project thread, but all the info got lost in the 'Meltdown'. So I've been out in the garage to see what I took off.
What I found was a 40t 530. I remember I increased the rear by 5 teeth & it worked very well, from memory I used a 19t on the front.
A good couple of days has seen some progress on the footrest mounts.
The original mounts were damaged and had been redrilled. I wanted to change them anyway but using the SRAD swinger meant they fouled the path.
I made a cardboard template and cut some sheet steel to suit. Making all four at the same time I bolted them together to help with exact shaping.
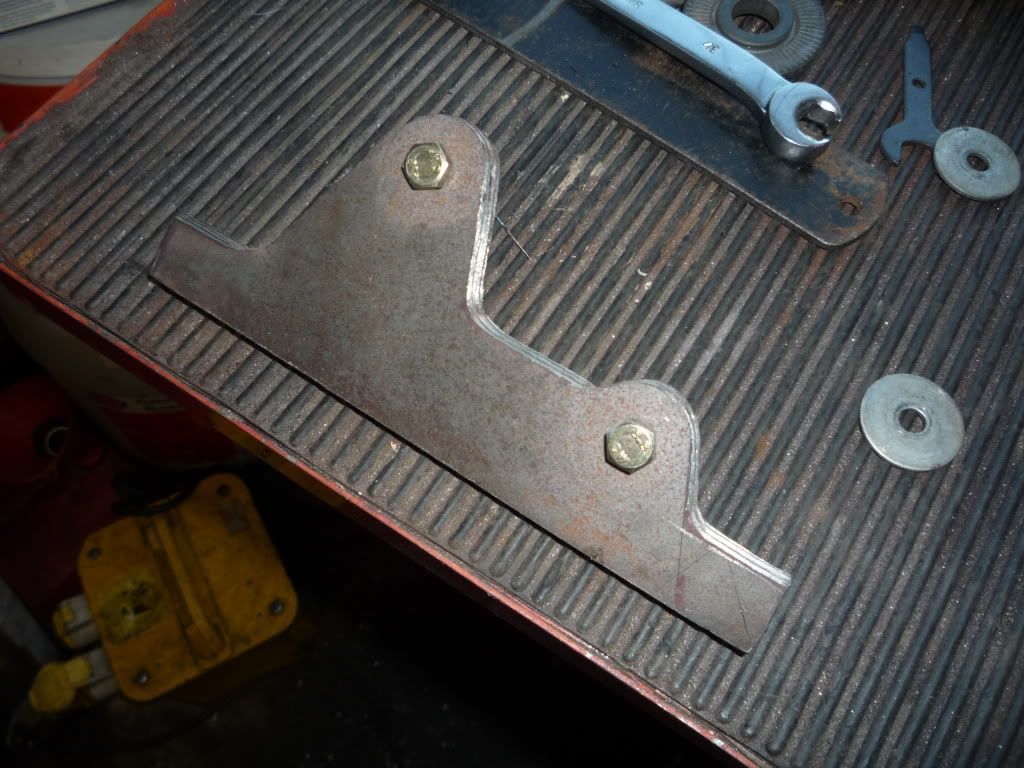
Bear in mind that this is proper blacksmith engineering using what I had to hand. That is drill, grinder, oxy acetylene and heavy metal with various hammers.
After making the necessary shapes I tried it on the bike to get the position.

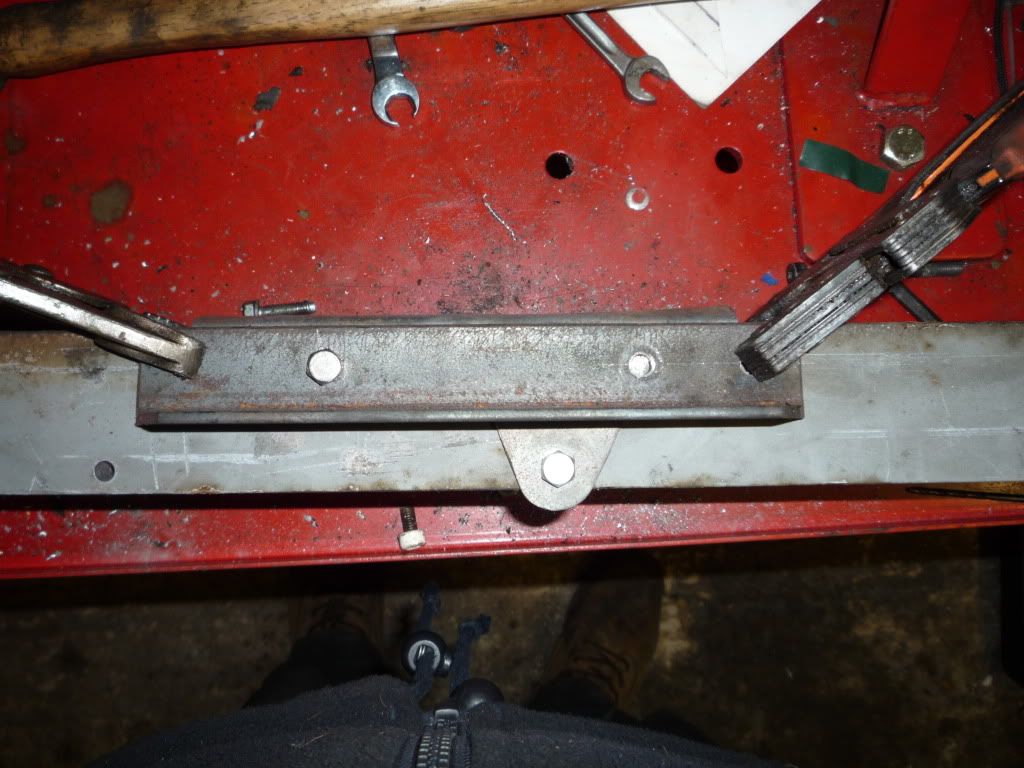
The original fixings are curved around the 35mm frame tube so this is what I wanted to replicate.
I bolted them to a tail lift runner I changed this morning together with a clamp over the top to ensure everything would be stable at the shaping process. I just used a hammer to get a 80 degree bend in the plates.
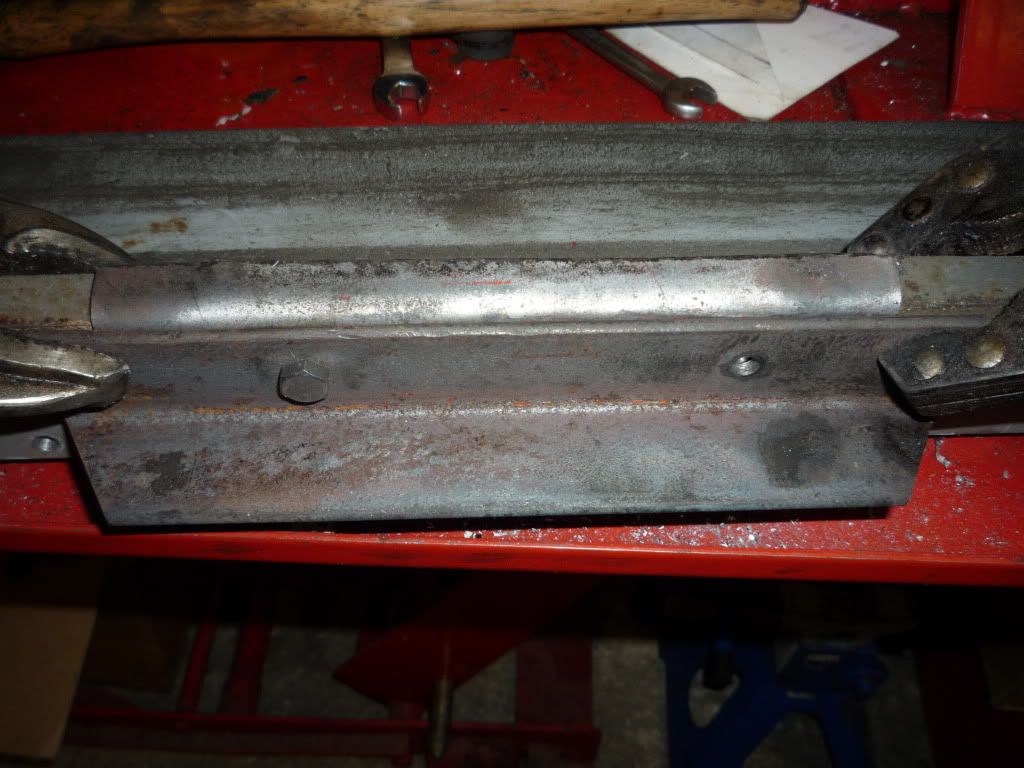
After shaping I had this.
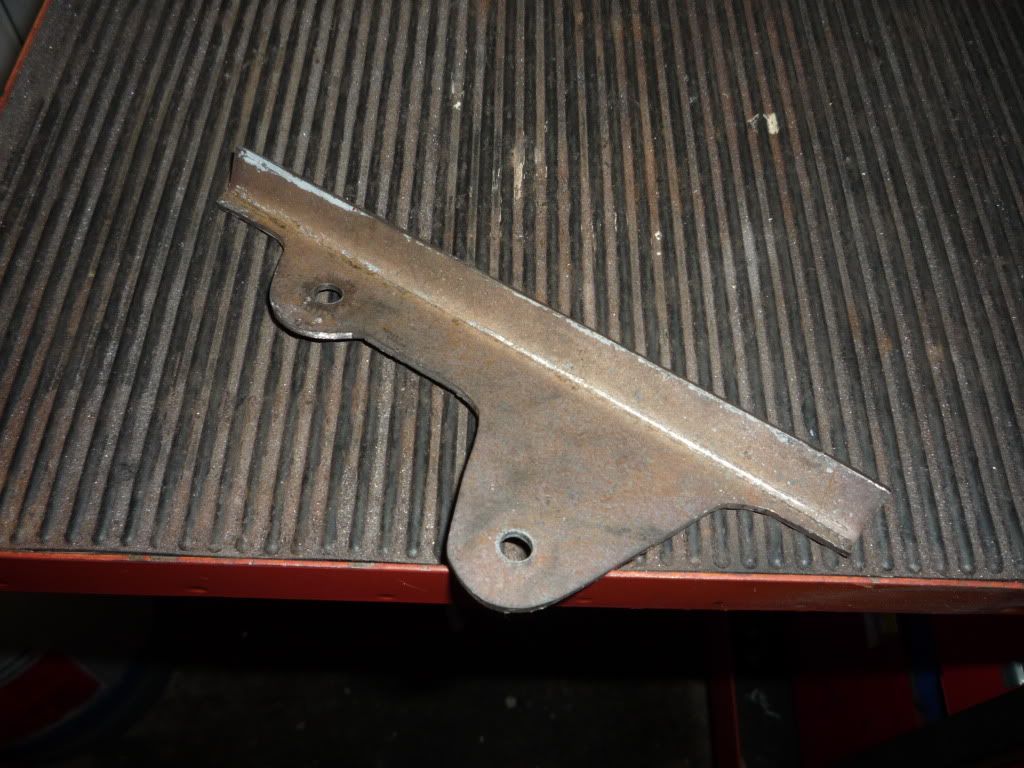
I made 2 left and 2 right sided bends.
I then bolted them up to the footrest to try it all up for size and to measure the capping I would need for the bracket assemblies.
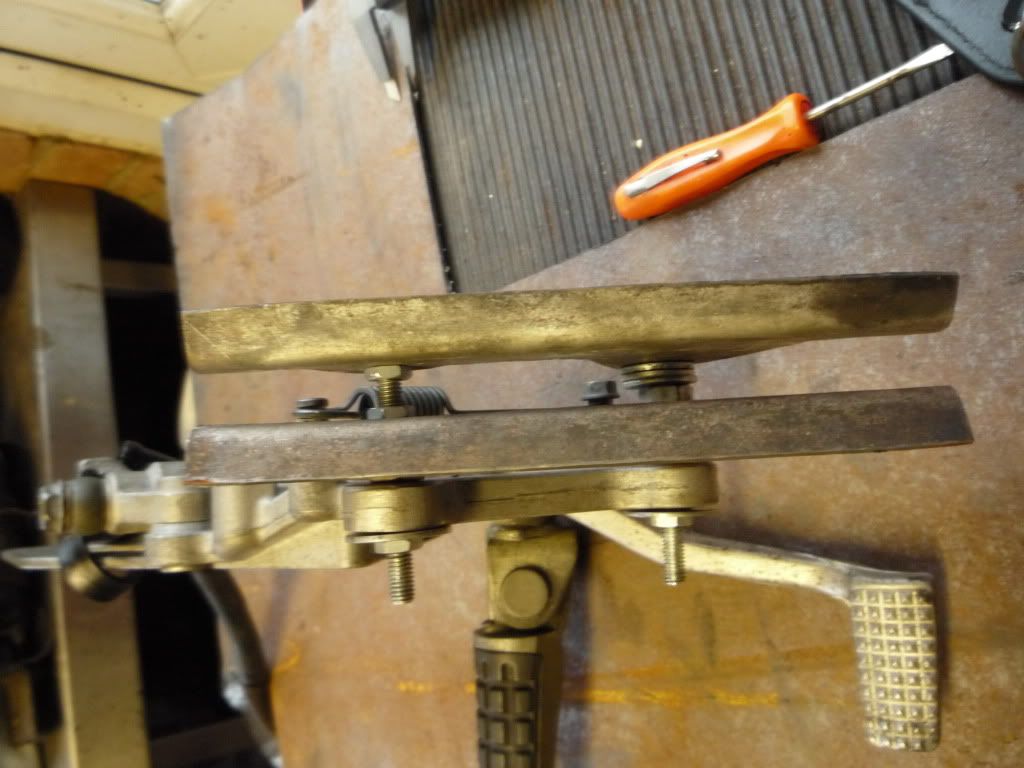
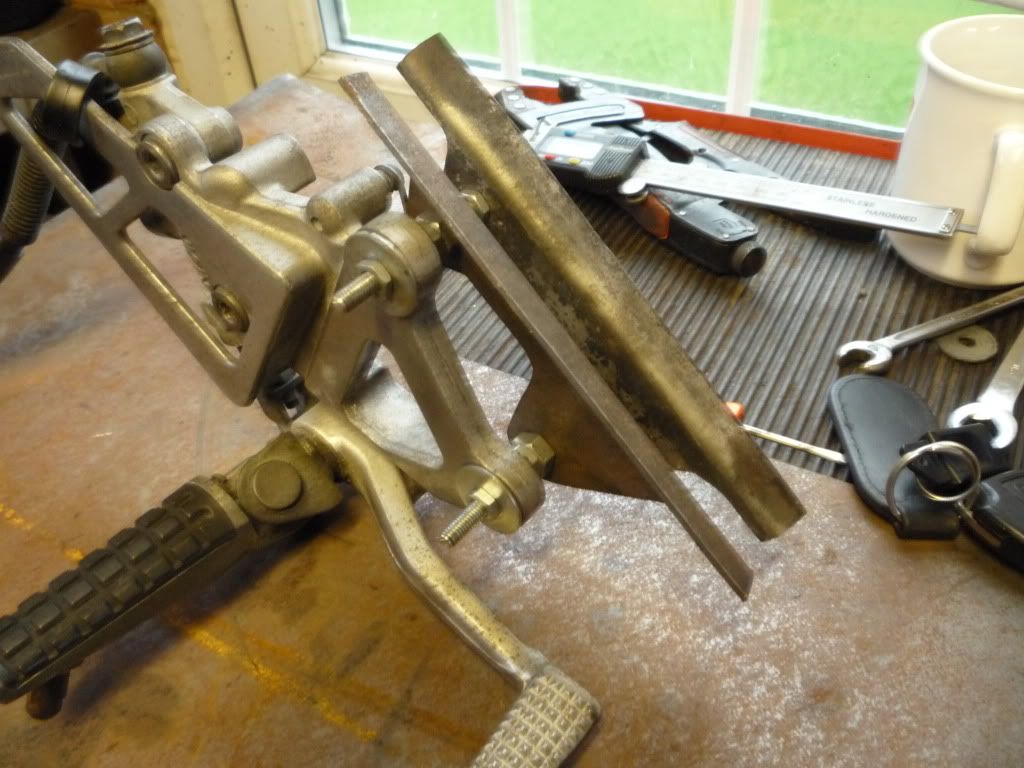
I welded in the capping and ended up with this.
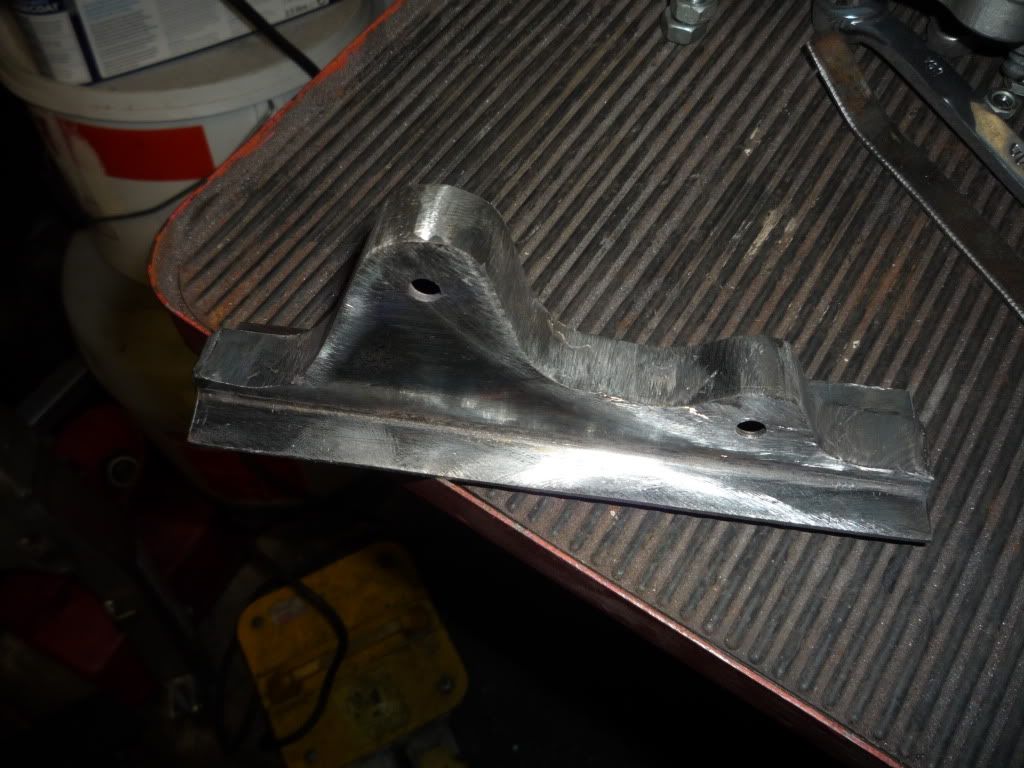
The right side is just tacked on for the moment. I am due to collect a front wheel in a couple of weeks and can then stand the bike up on the floor. I can then be sure that the rearset I have will be suitable. As it has finished up I will have stock rise and 6 inch rearward riders pegs. It looks like that will clear the sidestand on the other side but also save my ageing knees from too high a peg position. At present I have a standard seat but can, if necessary use a cut down seat. Only being able to sit on the bike will tell.
Anyway here is the peg now mounted.
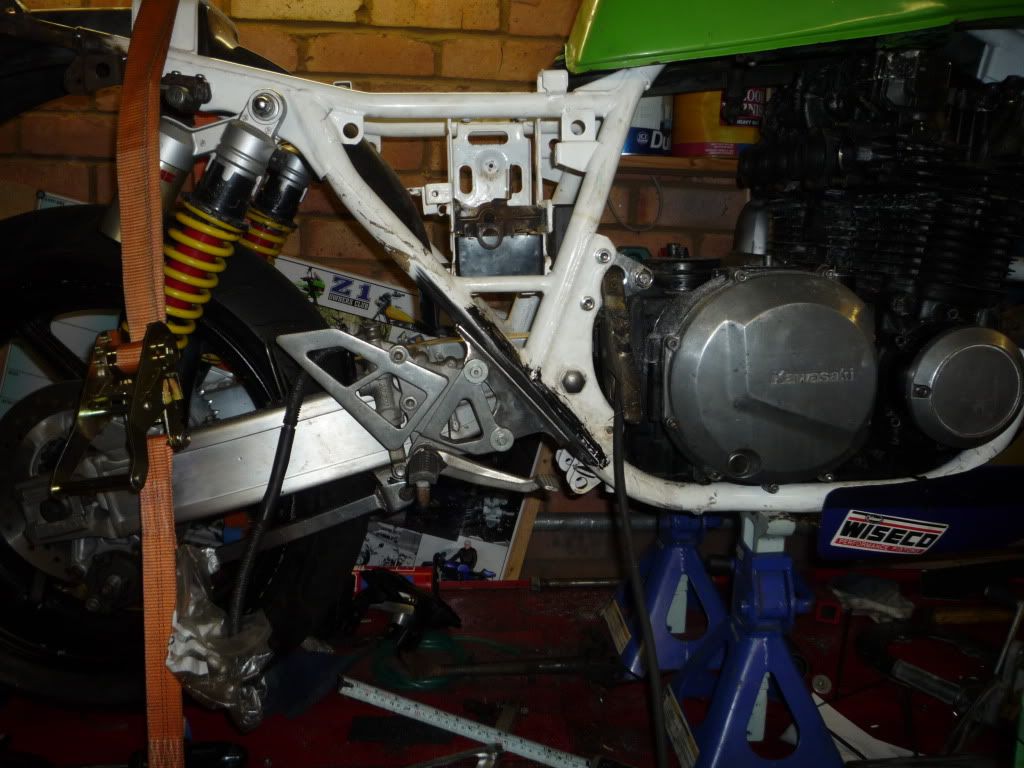
When all is set I will get some 19mm bar machined to go through the mounting brackets. This will reinforce the brackets themselves but also mean I can space the pegs out the 18 - 20mm necessary and be threaded to bolt up the fotrest hangars.
I`m quite pleased with how it has worked out.
The original mounts were damaged and had been redrilled. I wanted to change them anyway but using the SRAD swinger meant they fouled the path.
I made a cardboard template and cut some sheet steel to suit. Making all four at the same time I bolted them together to help with exact shaping.

Bear in mind that this is proper blacksmith engineering using what I had to hand. That is drill, grinder, oxy acetylene and heavy metal with various hammers.
After making the necessary shapes I tried it on the bike to get the position.

The original fixings are curved around the 35mm frame tube so this is what I wanted to replicate.
I bolted them to a tail lift runner I changed this morning together with a clamp over the top to ensure everything would be stable at the shaping process. I just used a hammer to get a 80 degree bend in the plates.


After shaping I had this.

I made 2 left and 2 right sided bends.
I then bolted them up to the footrest to try it all up for size and to measure the capping I would need for the bracket assemblies.


I welded in the capping and ended up with this.

The right side is just tacked on for the moment. I am due to collect a front wheel in a couple of weeks and can then stand the bike up on the floor. I can then be sure that the rearset I have will be suitable. As it has finished up I will have stock rise and 6 inch rearward riders pegs. It looks like that will clear the sidestand on the other side but also save my ageing knees from too high a peg position. At present I have a standard seat but can, if necessary use a cut down seat. Only being able to sit on the bike will tell.
Anyway here is the peg now mounted.

When all is set I will get some 19mm bar machined to go through the mounting brackets. This will reinforce the brackets themselves but also mean I can space the pegs out the 18 - 20mm necessary and be threaded to bolt up the fotrest hangars.
I`m quite pleased with how it has worked out.
Asphalt Cowboy
Phil Churchett award winner 2015
Phil Churchett award winner 2015
- Ginger Bear
- Hardcore

- Posts: 6850
- Joined: 16th Dec 2008
- Location: In the Dark.
- Contact:
Who is online
Users browsing this forum: No registered users and 9 guests


