Hello Guest User,
Please feel free to have a look around the forum but be aware that as an unregistered guest you can't see all of it and you can't post.
To access these 'Registered Users Only' areas simply register and login.
Please feel free to have a look around the forum but be aware that as an unregistered guest you can't see all of it and you can't post.
To access these 'Registered Users Only' areas simply register and login.
Z1100ST Resto +
Moderators: KeithZ1R, chrisu, paul doran, Taffus

-
RALPHARAMA

- Area Rep.

- Posts: 3407
- Joined: 19th May 2007
- Location: Pensford, Somerset
- Contact:
Tried one of the new wholesalers offering their wares at the Expo; they came up with a set of taper roller bearings for the headstock for a comparatively small bag of silver. Also picked up a tool for extracting headstock bearings; it seemed to be too cheap to be any good, but the sales lizards assured me that I could punt it back if not happy!
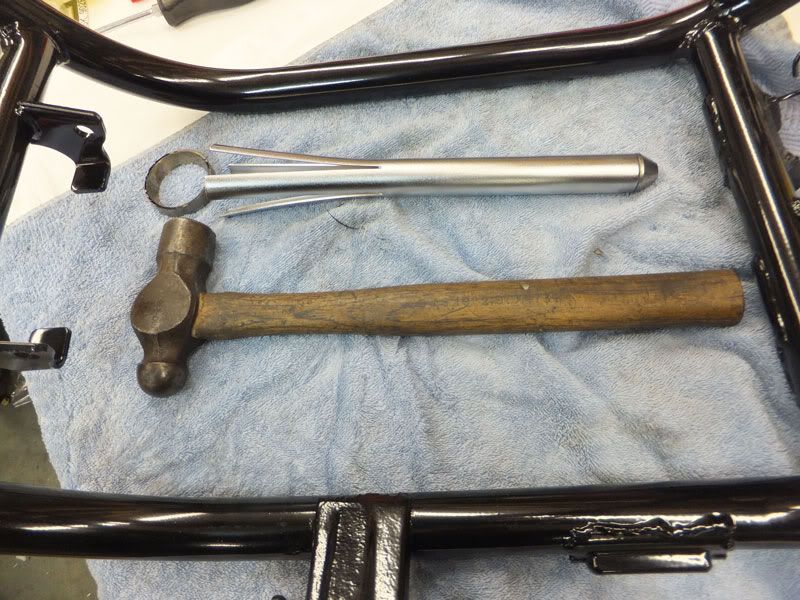
As it turned out it worked a treat - an absolute bargain in my estimation
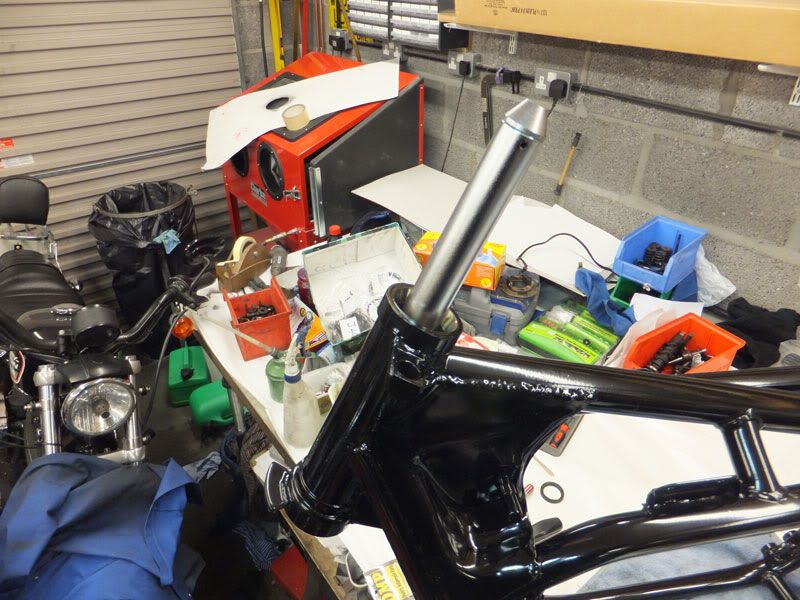
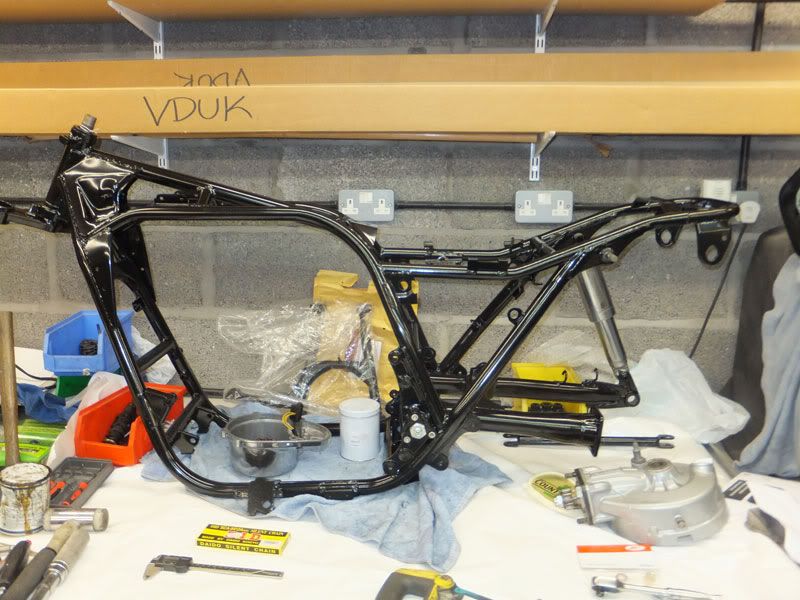
I used a mixture of bits n bobs I've made for bearing fitting to fit the taper rollers in the head stock accurately and easily.
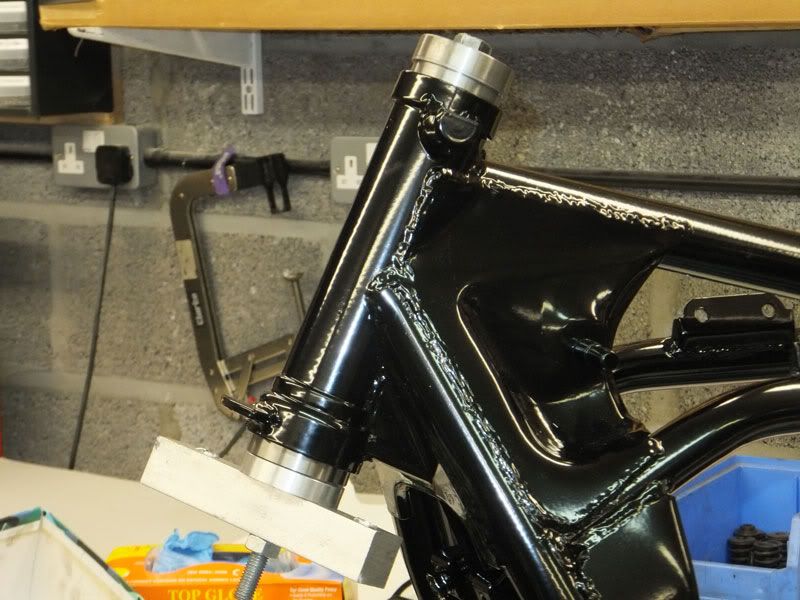
Had to tie some ally wire round the threads as the nuts are still at the platers
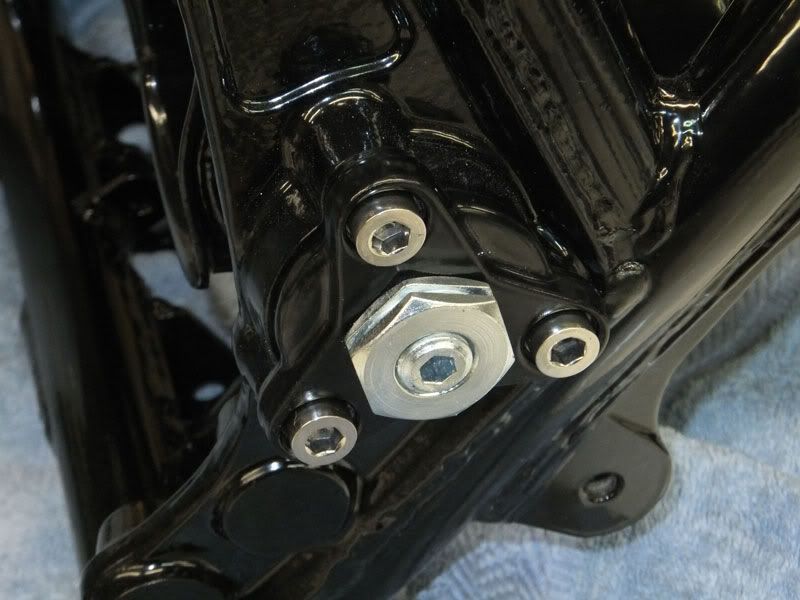
I machined up a scrap brake caliper piston to make a driver for the swinging arm bearings. The swing arm has to be positioned with a 1.5mm distance to the edge of the frame. I used a drill bit as a 'feeler' to set the gap. The pressure on the taper rollers is set using the a torque wrench.
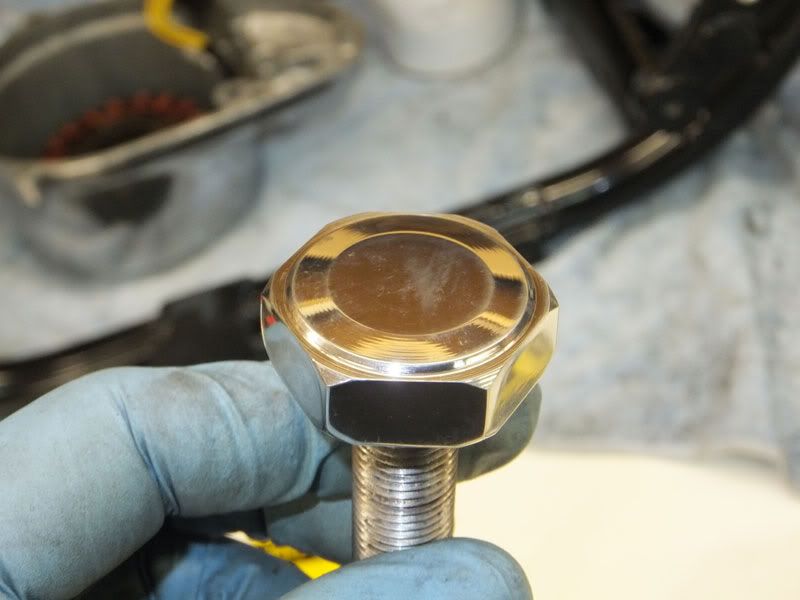
Some 'erbert had made up really horrid stem head bolt, ironically out of stainless. I wish I had photographed it, as it really was very grim. I decided to see if I couldn't make it look a bit better!
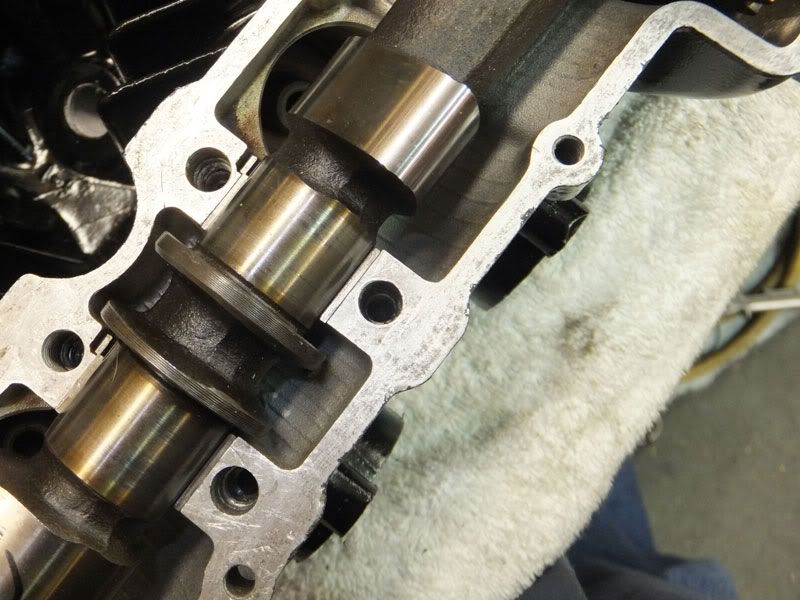
As though this bike hadn't thrown enough shit at me; I was going to reassemble the head last night. First I wanted to see that the cams sat OK; The cam cap bolts were tight and wouldn't do up all the way. When I investigated I realised that some arsehole had made a very bad job of heli-coilling the threaded holes. I had to drop the head back up at Bowden Engineering today in the hope that they can extricate the fecked up coils. If they can get them out I should be able to either fit helicoils properly or maybe even time-serts. GB has kindly offered his time-sert kits.
Stripped a spare front master cylinder today only to discover that the bore on that one is also fecked Has anyone ever succeeded in sleeving a master cylinder? Finding a not fecked master cylinder is proving tricky. As more of these parts are found to be shagged I guess we will need to find a way of saving them
As it turned out it worked a treat - an absolute bargain in my estimation
I used a mixture of bits n bobs I've made for bearing fitting to fit the taper rollers in the head stock accurately and easily.
Had to tie some ally wire round the threads as the nuts are still at the platers
I machined up a scrap brake caliper piston to make a driver for the swinging arm bearings. The swing arm has to be positioned with a 1.5mm distance to the edge of the frame. I used a drill bit as a 'feeler' to set the gap. The pressure on the taper rollers is set using the a torque wrench.
Some 'erbert had made up really horrid stem head bolt, ironically out of stainless. I wish I had photographed it, as it really was very grim. I decided to see if I couldn't make it look a bit better!
As though this bike hadn't thrown enough shit at me; I was going to reassemble the head last night. First I wanted to see that the cams sat OK; The cam cap bolts were tight and wouldn't do up all the way. When I investigated I realised that some arsehole had made a very bad job of heli-coilling the threaded holes. I had to drop the head back up at Bowden Engineering today in the hope that they can extricate the fecked up coils. If they can get them out I should be able to either fit helicoils properly or maybe even time-serts. GB has kindly offered his time-sert kits.
Stripped a spare front master cylinder today only to discover that the bore on that one is also fecked
Ralph Ferrand
Z1000A1 (1977), Z1300A5 (1983), Z900A4 (1976) GPZ1100 Unitrak (1983)(project), RD250B (1975)(project), ZRX1200R (2005) DT175MX (1981) YZF R6 (1999)
http://www.bikerstoolbox.co.uk
Z1000A1 (1977), Z1300A5 (1983), Z900A4 (1976) GPZ1100 Unitrak (1983)(project), RD250B (1975)(project), ZRX1200R (2005) DT175MX (1981) YZF R6 (1999)
http://www.bikerstoolbox.co.uk
-
RALPHARAMA
- Area Rep.
- Posts: 3407
- Joined: 19th May 2007
- Location: Pensford, Somerset
- Contact:
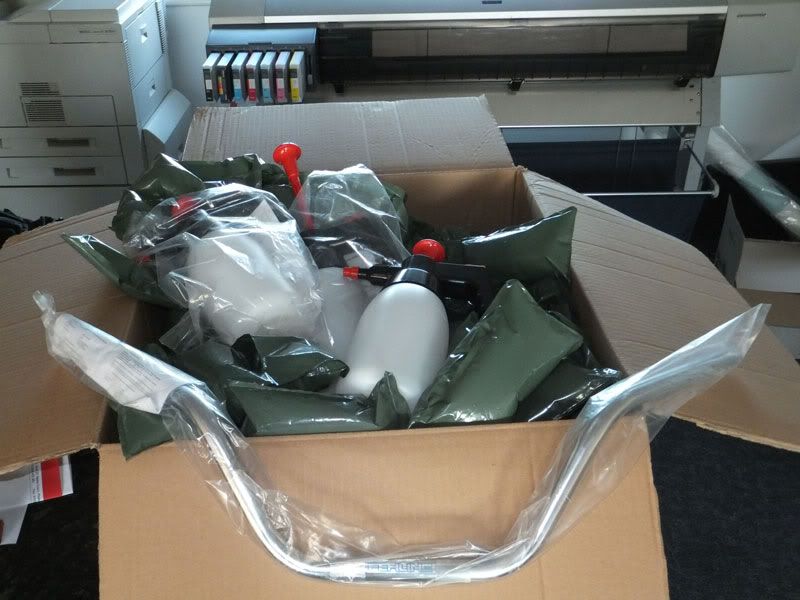
My 2nd parcel came from the new wholesaler from Germany yesterday and had my new handlebars and three new squirty bottles for degreaser and brake cleaner. They seem great quality and were nice and cheap 
The first job last night was to put the cylinder head studs back in
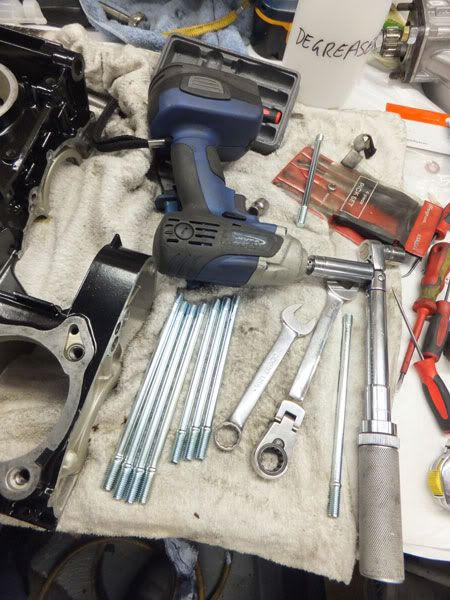
I used my usual technique of two nuts. I know there are special tools but two spanners, two nuts and a torque wrench has served me well over the years.
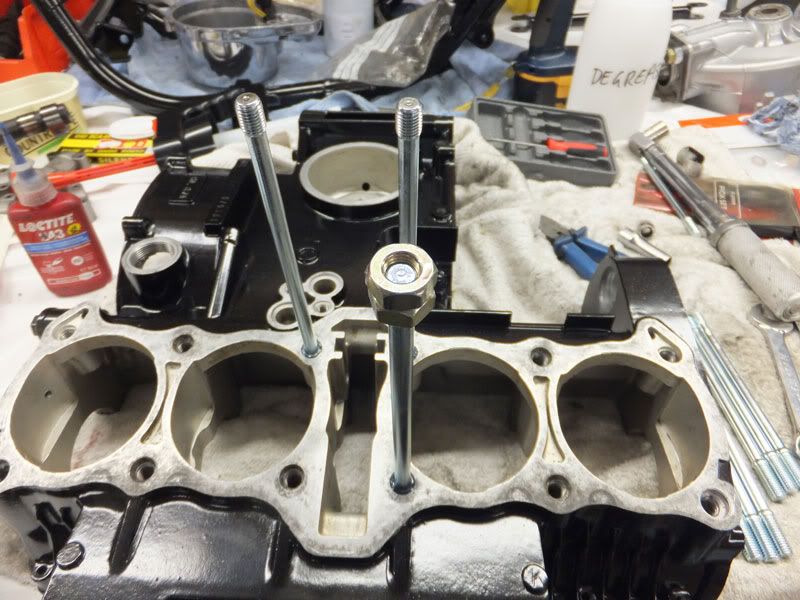
I tend to put the studs in at this stage so that they lift the front of the casing off the bench and give the shiny new cam chain somewhere to hang.
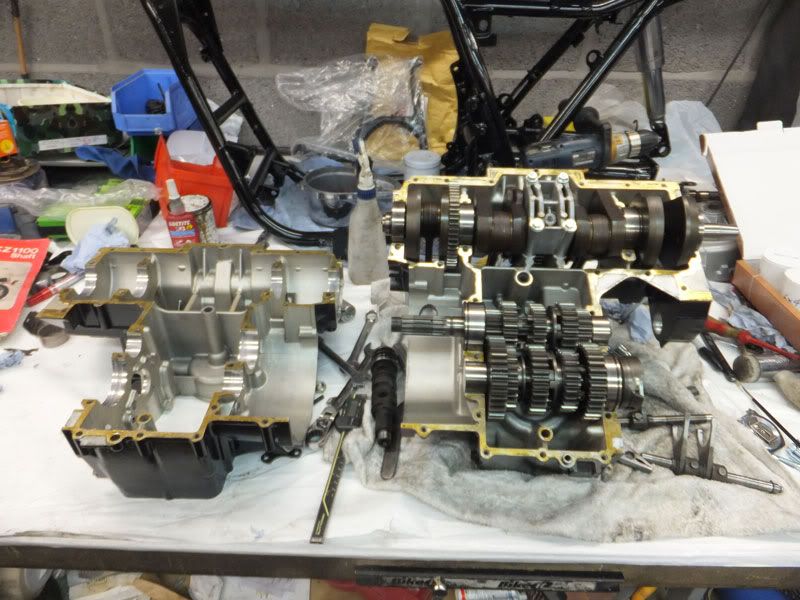
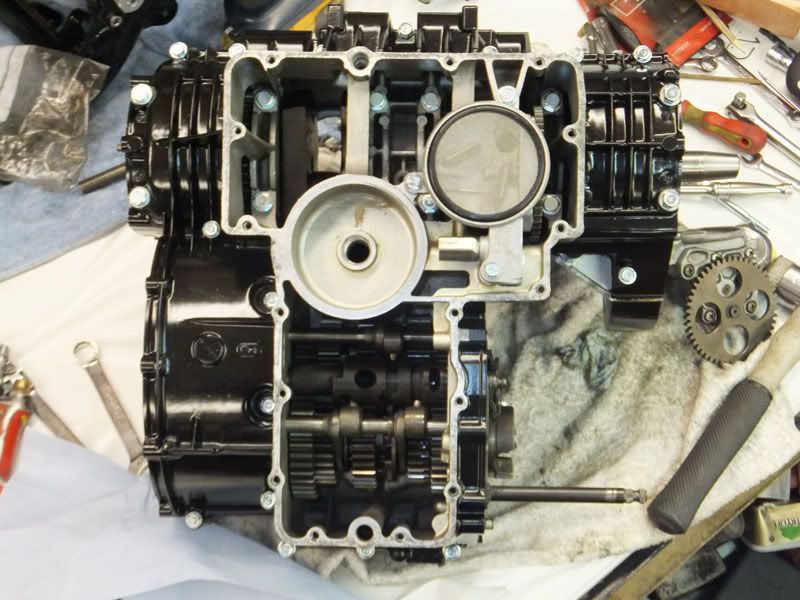
Next task was to fit the crankshaft and the gears. That was the end for last night.

This morning I fitted the gear selectors and drum into the bottom crankcase. I then painted both mating surfaces of the crankcases with my favourite sticky goo, Wellseal. It's really good stuff, which never quite goes off completely. The advantage when you are using gaskets is that you can often reuse a gasket, providing it hasn't been on too long and more to the point it makes cleaning the old gasket of the casing much easier. Obviously in this case there is no gasket.
Tiz nice to use nice freshly plated bolts that look brand new

God alone knows what shite was going around this engine, but what ever got stuck in the oil pump gauze couldn't be removed by ordinary means. Fortunately I had a spare pump so nicked the gauze out of that one, which cleaned up in the manner usually used
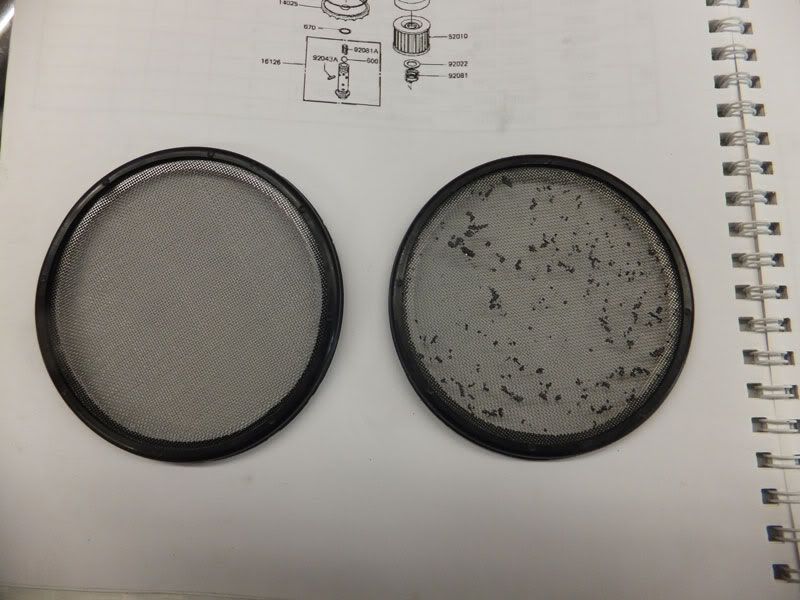
That sorted I added the oil pump.
Sump ready to go
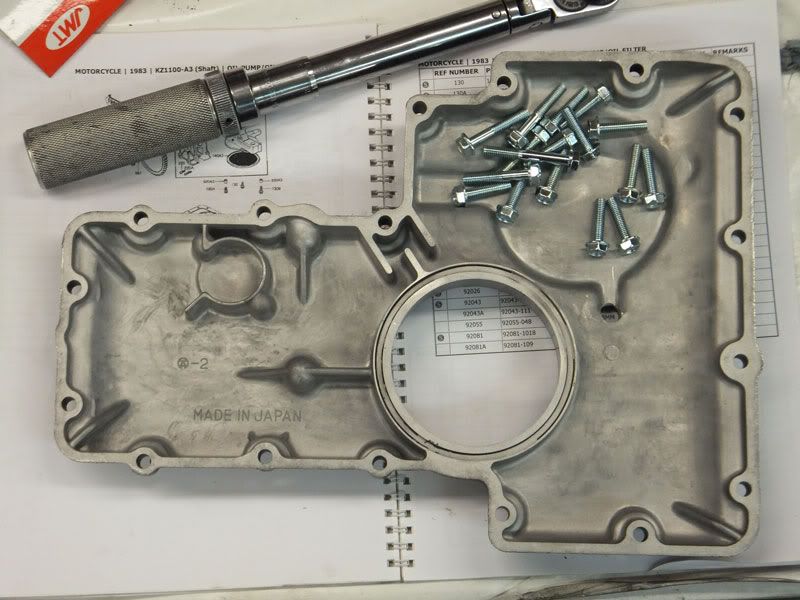
Buttered both halves of the joint with Wellseal and popped the sump on. It's such a bastard to clean up gasket faces when the engine is in the bike; it seemed like a real treat to fit a sump pan like this I decided to fit a magnetic sump plug.
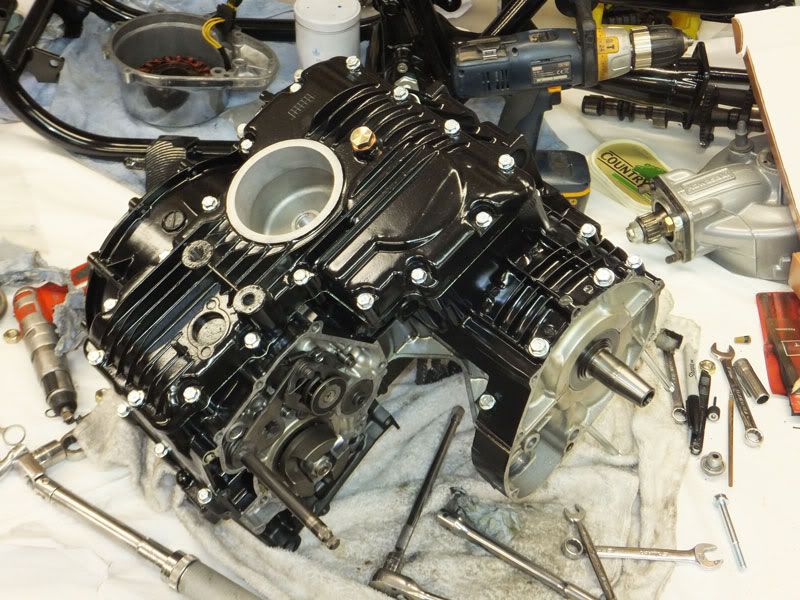
Then flipped the motor back over and fitted the remainder of the crankcase bolts and cable guides. I decided that I wasn't keen on the oil filler being painted, so I grabbed a spare one and gave it a quick polish.
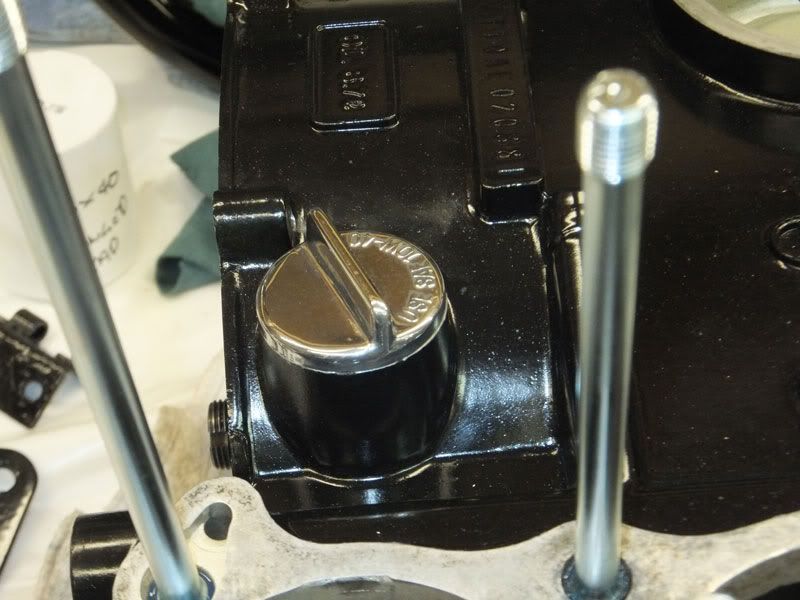
While I was at it I also polished up an oil gallery cap as well, which I think looks better, though I do still have a painted one.

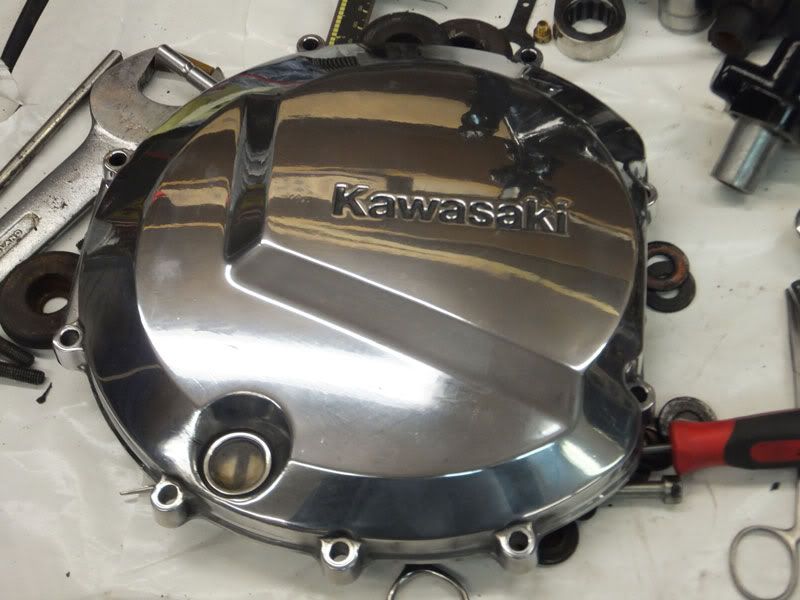
Now I was dirty I thought I might as well polish the clutch cover. Not up to Mikey's high standards but will have to do.
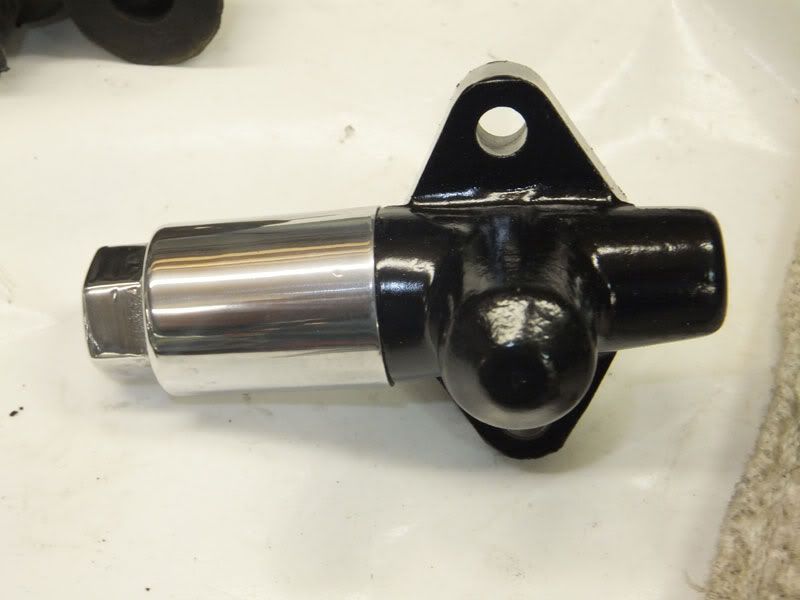
While I was in the mood I did the end of the cam chain tensioner, again I did paint one, but think a polished one might look better
That's it for now
The first job last night was to put the cylinder head studs back in
I used my usual technique of two nuts. I know there are special tools but two spanners, two nuts and a torque wrench has served me well over the years.
I tend to put the studs in at this stage so that they lift the front of the casing off the bench and give the shiny new cam chain somewhere to hang.
Next task was to fit the crankshaft and the gears. That was the end for last night.
This morning I fitted the gear selectors and drum into the bottom crankcase. I then painted both mating surfaces of the crankcases with my favourite sticky goo, Wellseal. It's really good stuff, which never quite goes off completely. The advantage when you are using gaskets is that you can often reuse a gasket, providing it hasn't been on too long and more to the point it makes cleaning the old gasket of the casing much easier. Obviously in this case there is no gasket.
Tiz nice to use nice freshly plated bolts that look brand new
God alone knows what shite was going around this engine, but what ever got stuck in the oil pump gauze couldn't be removed by ordinary means. Fortunately I had a spare pump so nicked the gauze out of that one, which cleaned up in the manner usually used
That sorted I added the oil pump.
Sump ready to go
Buttered both halves of the joint with Wellseal and popped the sump on. It's such a bastard to clean up gasket faces when the engine is in the bike; it seemed like a real treat to fit a sump pan like this
Then flipped the motor back over and fitted the remainder of the crankcase bolts and cable guides. I decided that I wasn't keen on the oil filler being painted, so I grabbed a spare one and gave it a quick polish.
While I was at it I also polished up an oil gallery cap as well, which I think looks better, though I do still have a painted one.
Now I was dirty I thought I might as well polish the clutch cover. Not up to Mikey's high standards but will have to do.
While I was in the mood I did the end of the cam chain tensioner, again I did paint one, but think a polished one might look better
That's it for now
Ralph Ferrand
Z1000A1 (1977), Z1300A5 (1983), Z900A4 (1976) GPZ1100 Unitrak (1983)(project), RD250B (1975)(project), ZRX1200R (2005) DT175MX (1981) YZF R6 (1999)
http://www.bikerstoolbox.co.uk
Z1000A1 (1977), Z1300A5 (1983), Z900A4 (1976) GPZ1100 Unitrak (1983)(project), RD250B (1975)(project), ZRX1200R (2005) DT175MX (1981) YZF R6 (1999)
http://www.bikerstoolbox.co.uk


-
Viktor Larsson
- 100Club

- Posts: 158
- Joined: 11th Jun 2011
- Location: Piteå, Sweden


-
Ginger Bear

- Hardcore

- Posts: 6850
- Joined: 16th Dec 2008
- Location: In the Dark.
- Contact:
Great stuff Ralph, but I would consider binning that cam chain tensioner, I believe I'm right in saying they have a reputation for 'backing off' on the overrun. Something I suffered with on my own 1170R, valves just gently 'kissing' the pistons. 
For what it would cost to buy or make one, I'd consider it a good insurance policy, to look after those lovely new pistons & all the head work you've had done.
For what it would cost to buy or make one, I'd consider it a good insurance policy, to look after those lovely new pistons & all the head work you've had done.

# 104
Phil Churchett Award Winner 2011 & 2016
Buzzworkz Best Modified Zed 2016
-
RALPHARAMA
- Area Rep.
- Posts: 3407
- Joined: 19th May 2007
- Location: Pensford, Somerset
- Contact:
Today has been very miserable for me; from half eight 'til five I was grafting on this piece of crap:

Yes CB's Harley has got snow on it ... no she wasn't pleased
I did however do some work on the ole shafter in the week.
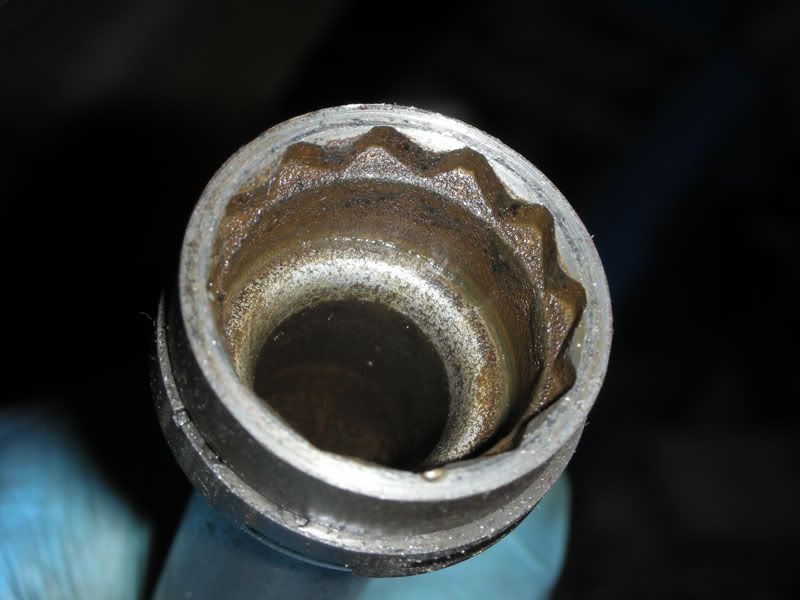
I don't much like taking forks apart, dunno why, I just don't which is why I haven't done the forks yet. I striped one using the old bodge of a broom handle linished with a gentle taper and beaten into the fork piston to hold it still while the air impact gun tries to release the bolt. It was an absolute bastard, being as tight as a catholic priest's dick in a choir boy.
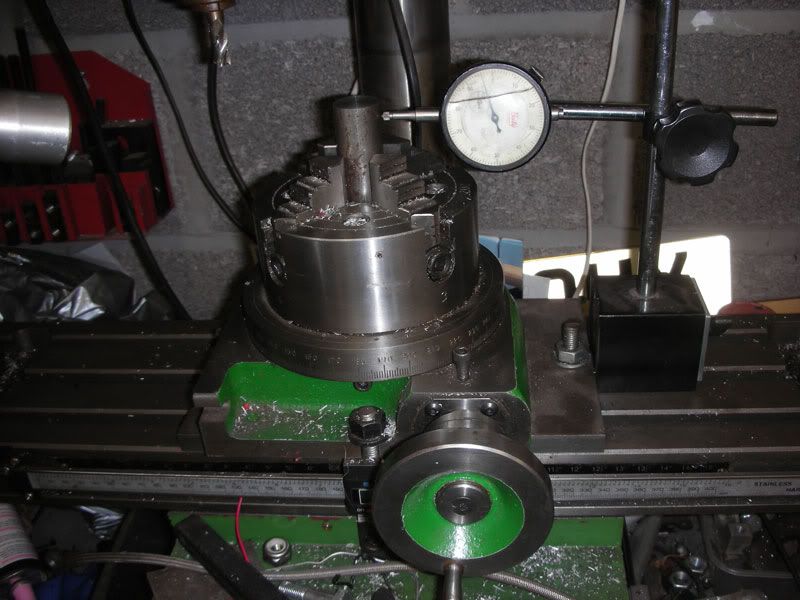
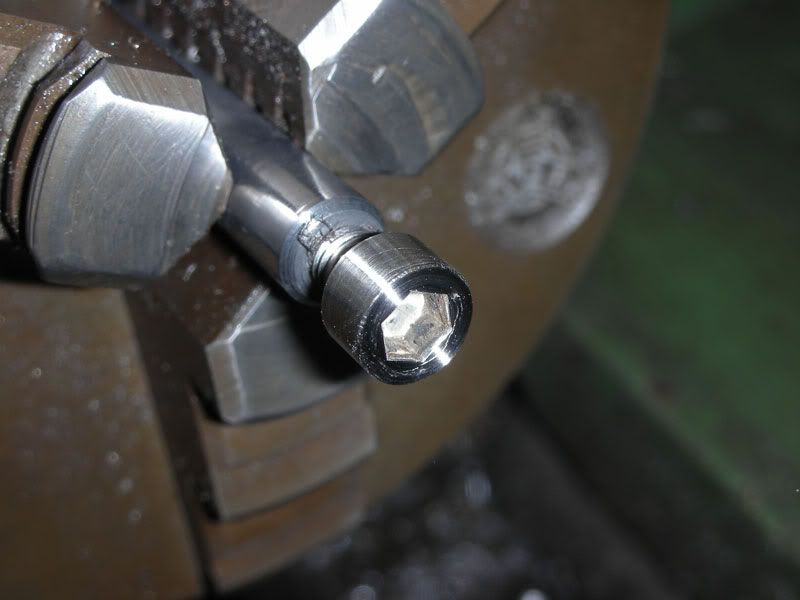
I decided I would make a 'proper' tool for the other side and grabbed a bit of MS stock, faced it in the lathe and then clocked it in on the rotary table on my mill. (Incidently, I made the rotary table my self from castings; I machined the big castings on my mate's 'big' lathe as it was way to big for my 'toy'!)
I then milled the flats with a slot drill....
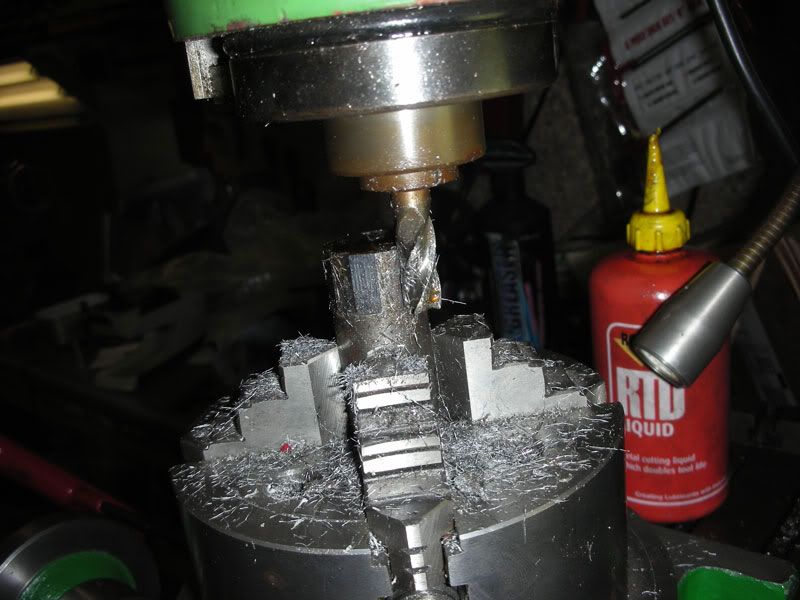
... and turned the round bit to centre the tool in the piston recess, centre drilled it ...
... drilled it 10mm ...
 ...
...
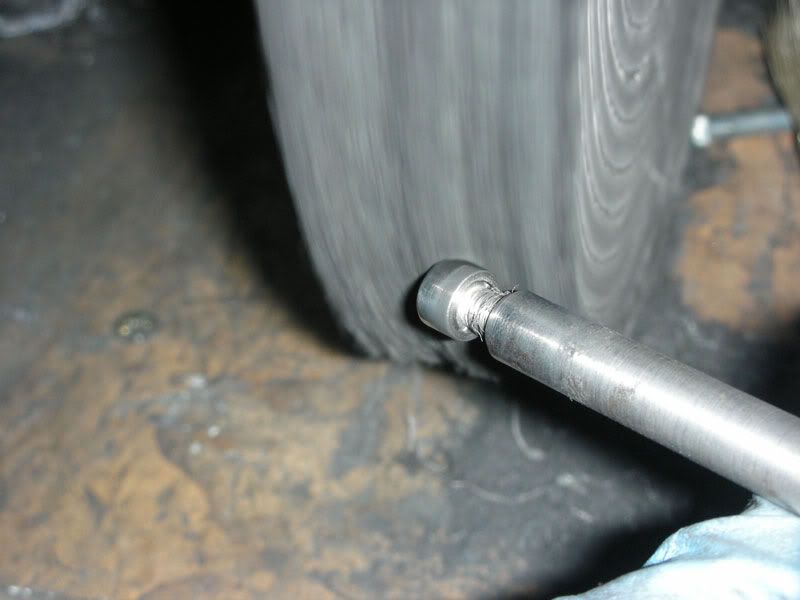
then glued it on to the other end of a bodged up tool I made years ago with the TIG welder.

Ater going to all that effort it was something of a pisser that the bastard bolt was in that tight I ended up having to drill the head off
Still at least I'll be able to torque the new bolt in properly
After marvelling at Mikey and his polishing yesterday, I decided to make a new rake for my polishing. Yes Mikey, you have shamed me into action!!!
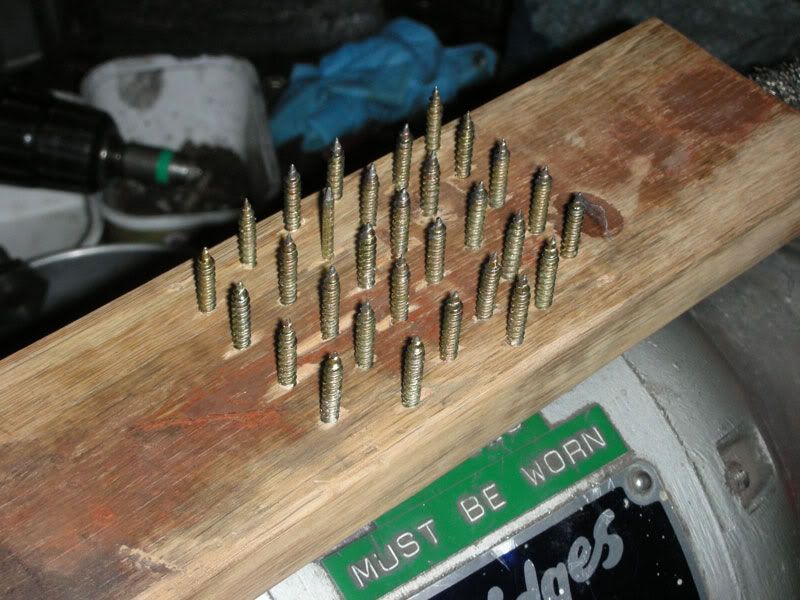
I don't care what he says, I still believe he has sold his soul to the devil and uses black magic to produce the finest polishing I have ever seen
Having stripped the forks, I then turned my attention to the carbs. They've been apart so long I couldn't remember what went where
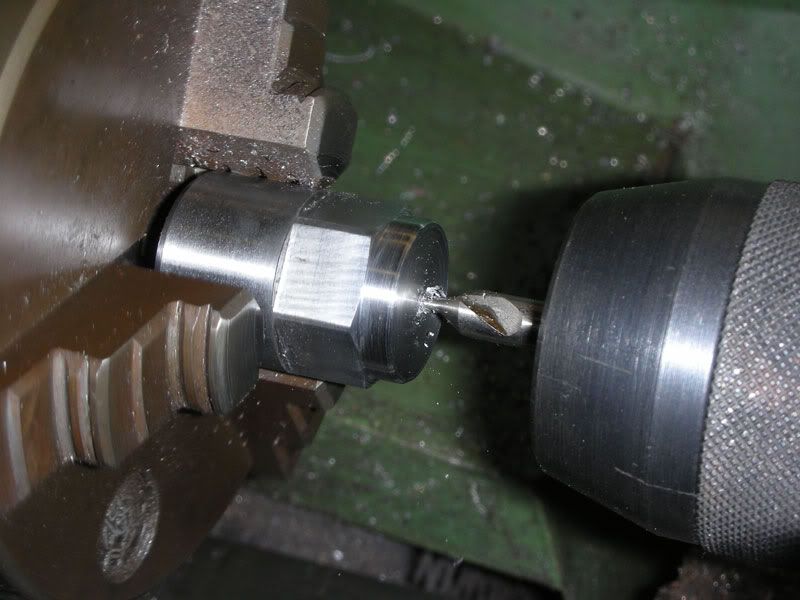
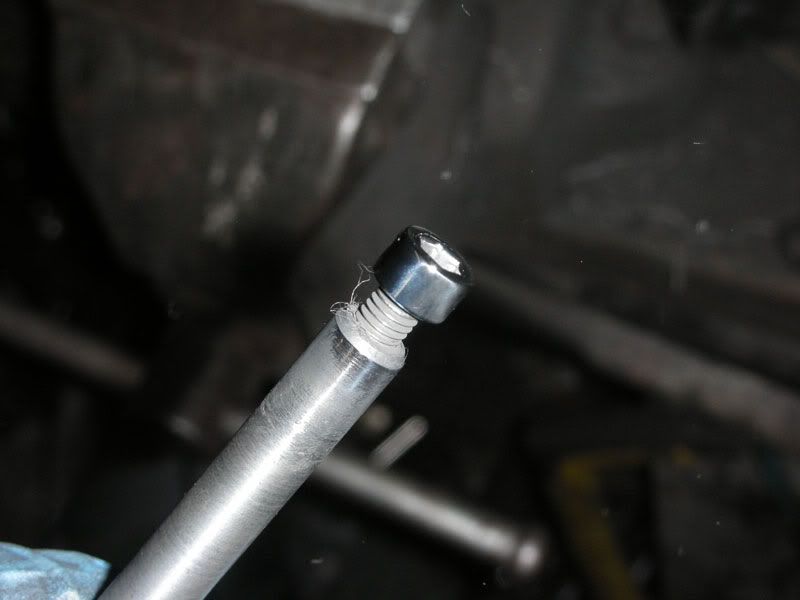
 Whilst I am trying to keep this bike pretty standard, I'm not having philips screws made of cheese, so have decided on stainless cap screws. Trouble is they tend to be a bit rough, so I added to my collection of screw/bolt cleany up tools, with a 5mm version; just a bit o bar drilled and accurately threaded in the lathe.
This means I can screw the cap screws in and machine them tidy ...
... and then polish 'em, without them flying out my fingers all over the shop
I know you can buy 'em ready polished, but that's cheating !!!
This is as far as I got with the carbs, when I got invaded by a paying bike!!
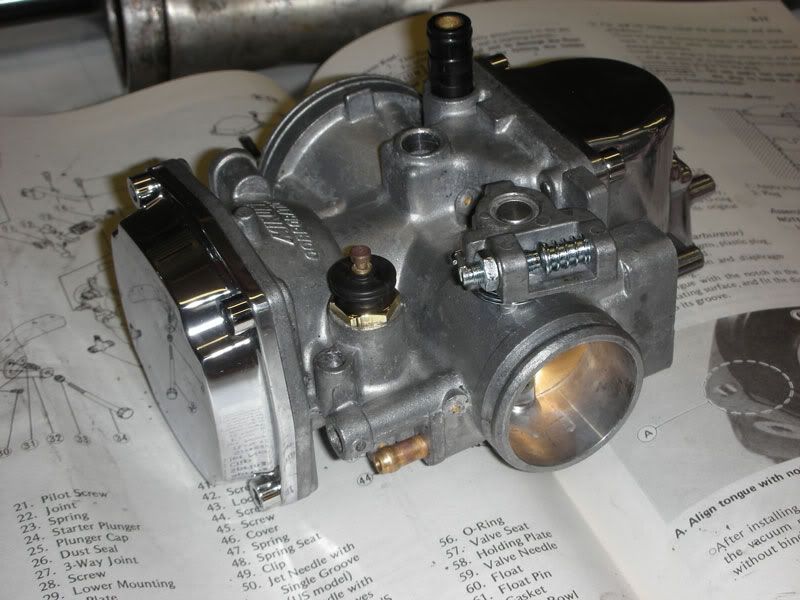
Hopefully after I have tried to work out where the death rattle is coming from in the Beemer I'll do a bit more to the Shafter
Yes CB's Harley has got snow on it ... no she wasn't pleased
I did however do some work on the ole shafter in the week.
I don't much like taking forks apart, dunno why, I just don't which is why I haven't done the forks yet. I striped one using the old bodge of a broom handle linished with a gentle taper and beaten into the fork piston to hold it still while the air impact gun tries to release the bolt. It was an absolute bastard, being as tight as a catholic priest's dick in a choir boy.
I decided I would make a 'proper' tool for the other side and grabbed a bit of MS stock, faced it in the lathe and then clocked it in on the rotary table on my mill. (Incidently, I made the rotary table my self from castings; I machined the big castings on my mate's 'big' lathe as it was way to big for my 'toy'!)
I then milled the flats with a slot drill....
... and turned the round bit to centre the tool in the piston recess, centre drilled it ...
... drilled it 10mm ...
...
then glued it on to the other end of a bodged up tool I made years ago with the TIG welder.
Ater going to all that effort it was something of a pisser that the bastard bolt was in that tight I ended up having to drill the head off
After marvelling at Mikey and his polishing yesterday, I decided to make a new rake for my polishing. Yes Mikey, you have shamed me into action!!!
I don't care what he says, I still believe he has sold his soul to the devil and uses black magic to produce the finest polishing I have ever seen
Having stripped the forks, I then turned my attention to the carbs. They've been apart so long I couldn't remember what went where
This means I can screw the cap screws in and machine them tidy ...
... and then polish 'em, without them flying out my fingers all over the shop
I know you can buy 'em ready polished, but that's cheating !!!
This is as far as I got with the carbs, when I got invaded by a paying bike!!
Hopefully after I have tried to work out where the death rattle is coming from in the Beemer I'll do a bit more to the Shafter
Ralph Ferrand
Z1000A1 (1977), Z1300A5 (1983), Z900A4 (1976) GPZ1100 Unitrak (1983)(project), RD250B (1975)(project), ZRX1200R (2005) DT175MX (1981) YZF R6 (1999)
http://www.bikerstoolbox.co.uk
Z1000A1 (1977), Z1300A5 (1983), Z900A4 (1976) GPZ1100 Unitrak (1983)(project), RD250B (1975)(project), ZRX1200R (2005) DT175MX (1981) YZF R6 (1999)
http://www.bikerstoolbox.co.uk
-
RALPHARAMA
- Area Rep.
- Posts: 3407
- Joined: 19th May 2007
- Location: Pensford, Somerset
- Contact:
Finally got shot of the Beemer so the shafter has pride of place on the bike bench.
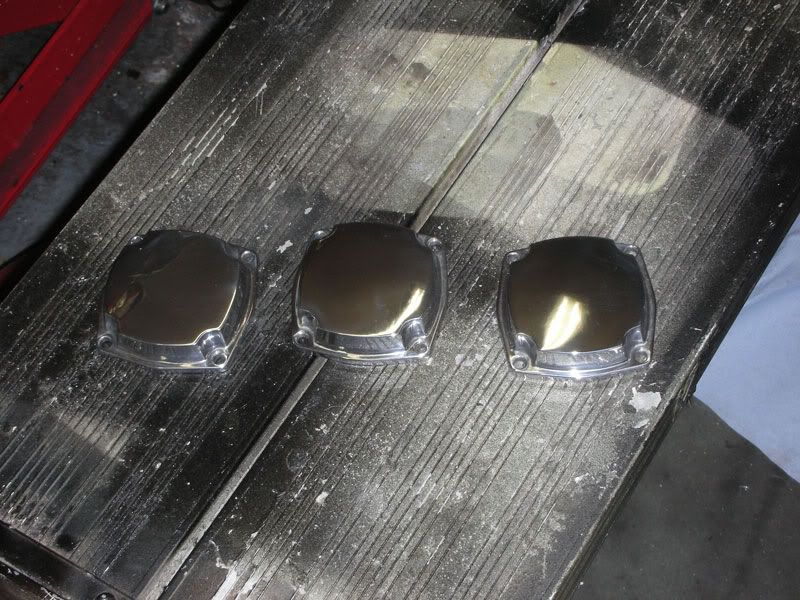
Polished up the rmainder of the carb lids
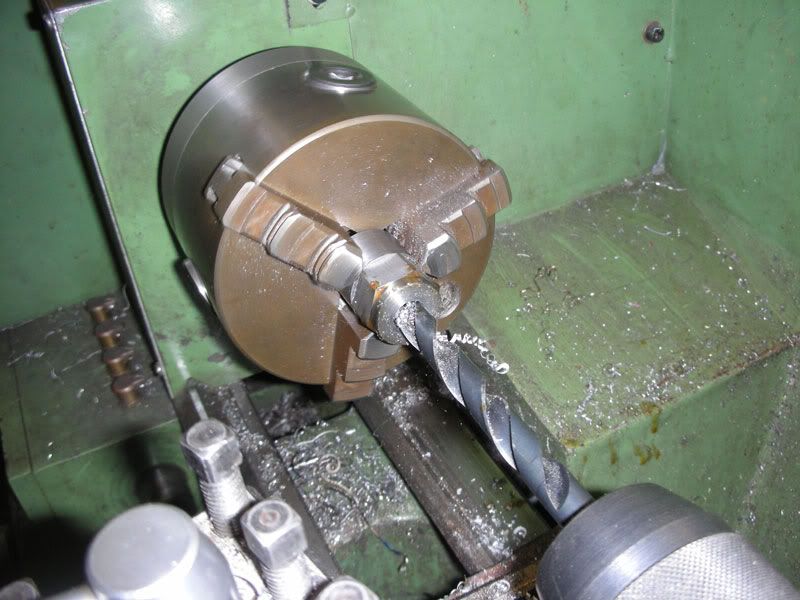
Next job was to repair some threads in the head. I decided to use 'Time Serts' as some t**t had all ready badly fitted a load of helicoils, and I had to pay an engineer to remove them. I'd not used Time Serts before. As with helicoils you drill out the hole
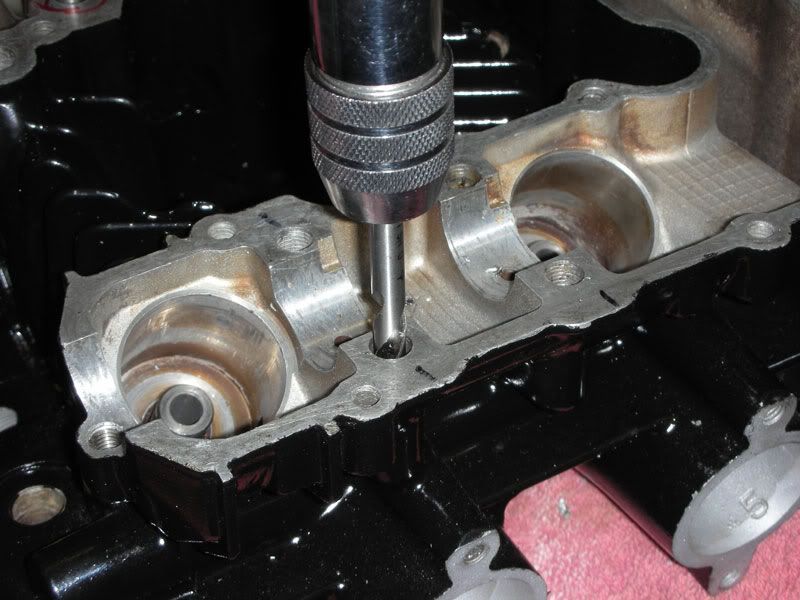
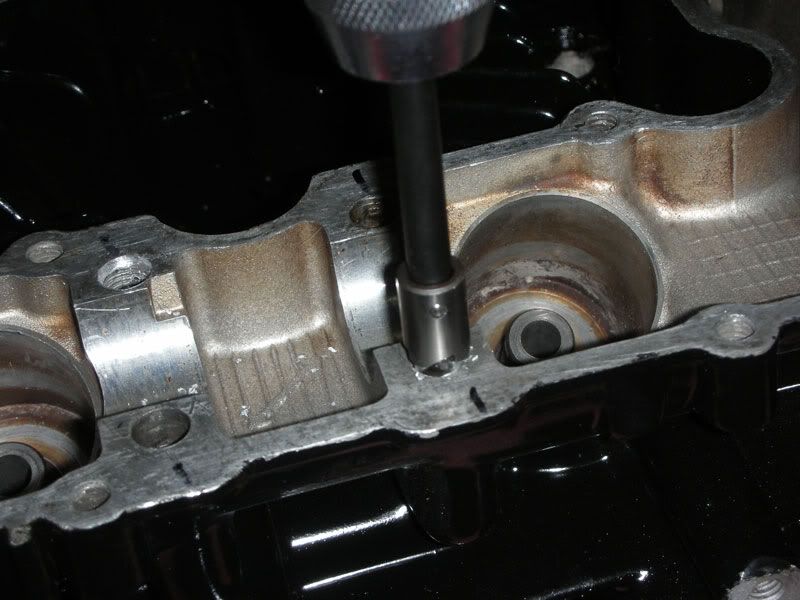
then you counter bore the hole with the supplied tool which is designed in such a way that you can't go too deep
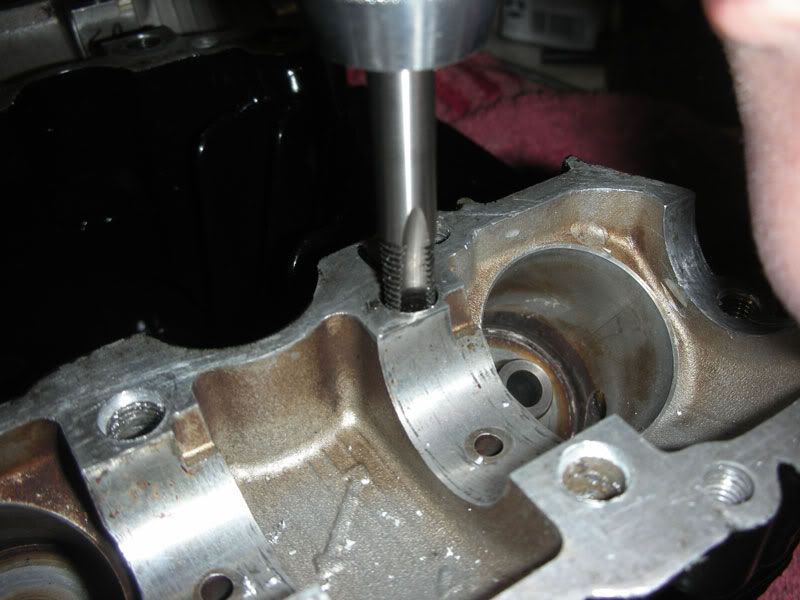
then you tap the hole with the supplied special tap
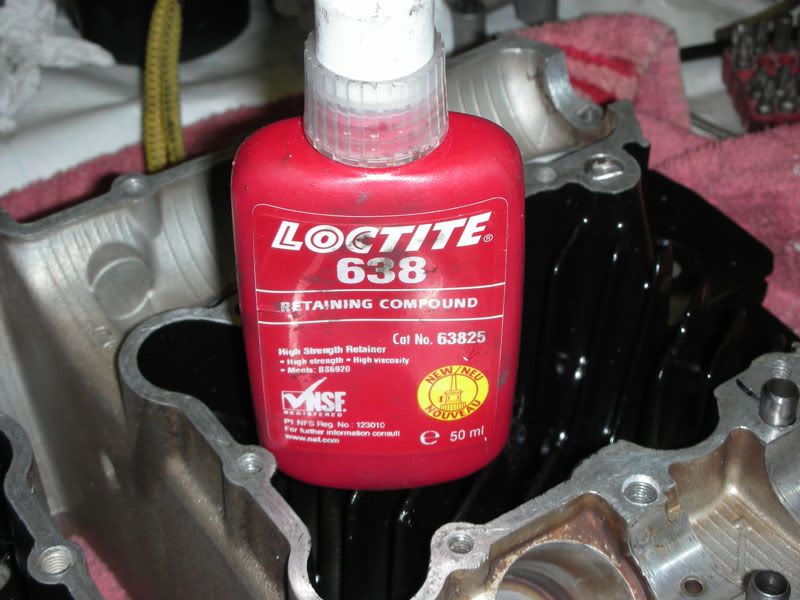
I then decided to stick the buggers in with a drop o loctite; probably unnecessary but I'm a great believer in belt and braces.
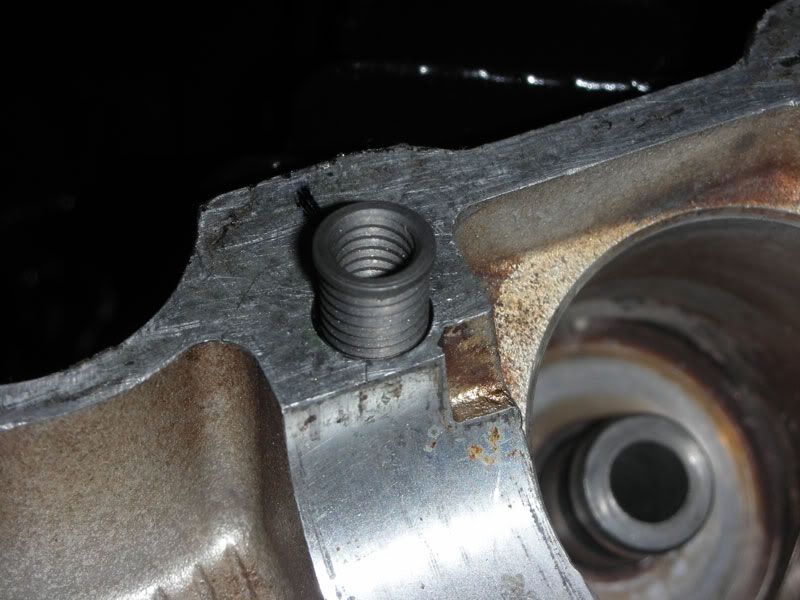
the insert is then inserted with a special tool, but I don't seem to have taken a pic of the tool, just the insert ready to go in
Some of the holes in the head are soooo fucked that I have had to order some 'Big Serts' from the US (they were too expensive from Wurth the UK dealer) They are pretty much the same but fatter to take up the lack of land left by the home-helicoiller
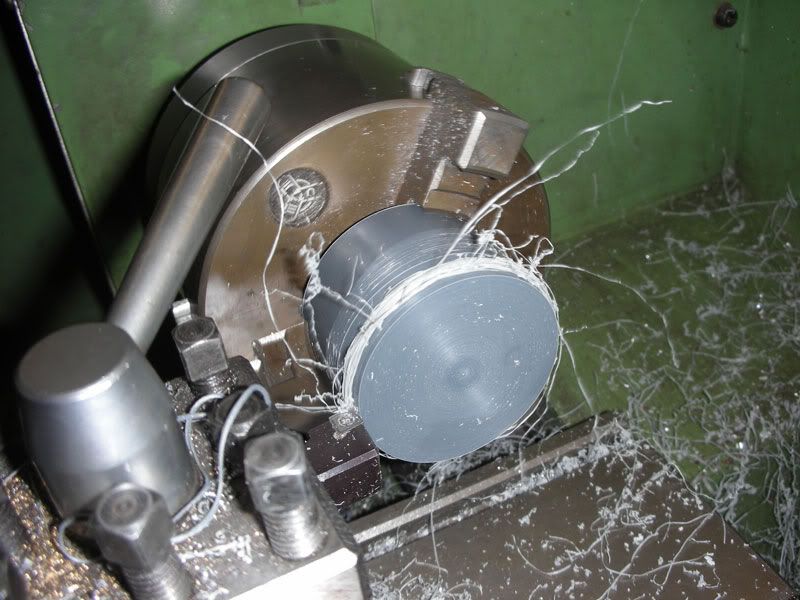
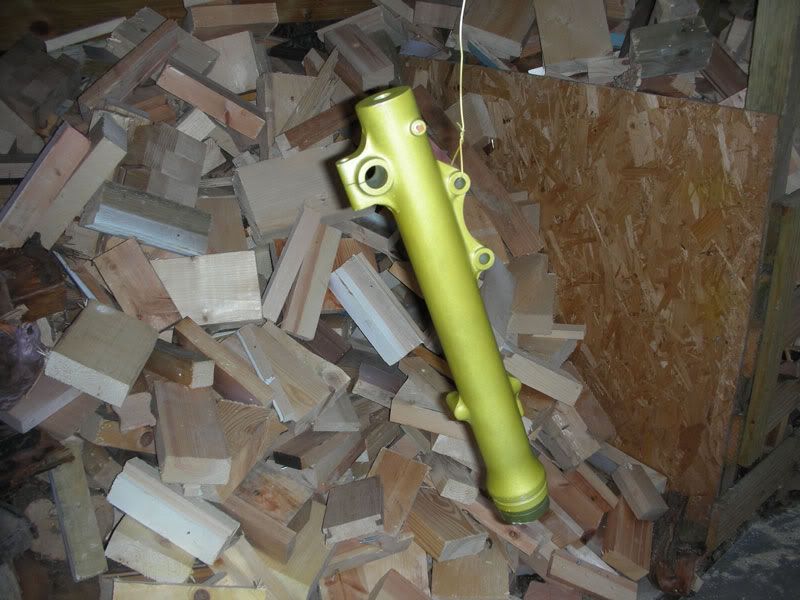
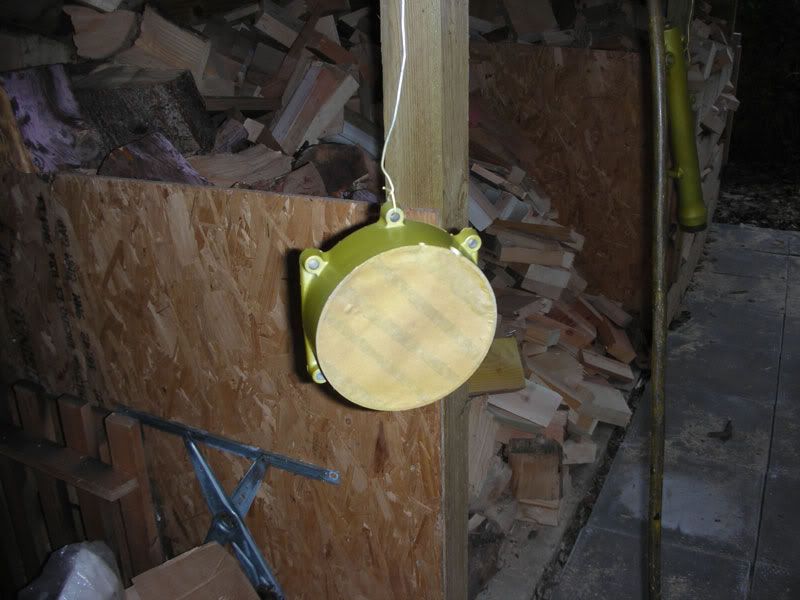
I then turner my attention back to the legs. I ordered some 50mm round PVC bar off tinternet, so that I could make some plugs for the fork sliders. I spun them up in the lathe with a 1° taper so that I could tap them into the big holes in the tops, where the seals go.
Next I mixed up some 2 pack zinc chromate etch primer and put it in my crappy chinese spray gun. I use this gun only for priming with etch primer. It's a horrid gun, but I don't want to use the good one for etch priming.
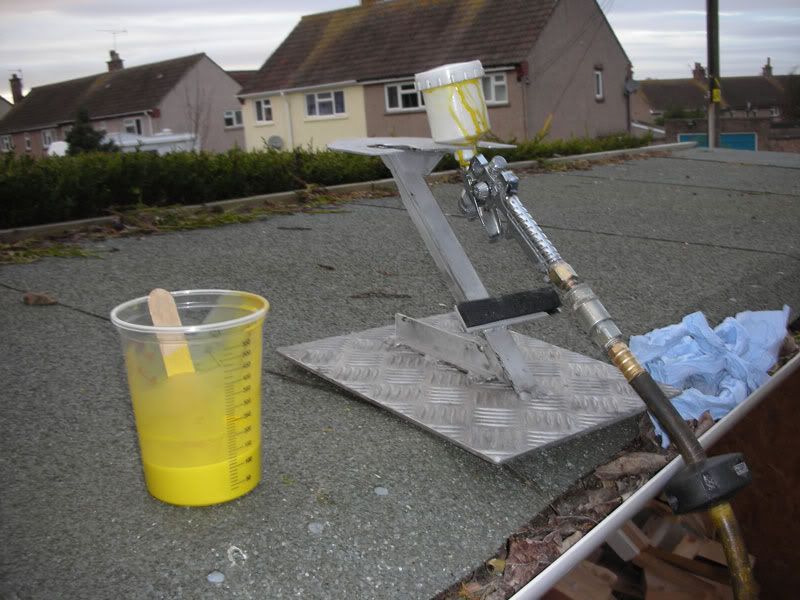
I then sprayed the two legs and the ignition casing I forgot in the last batch.
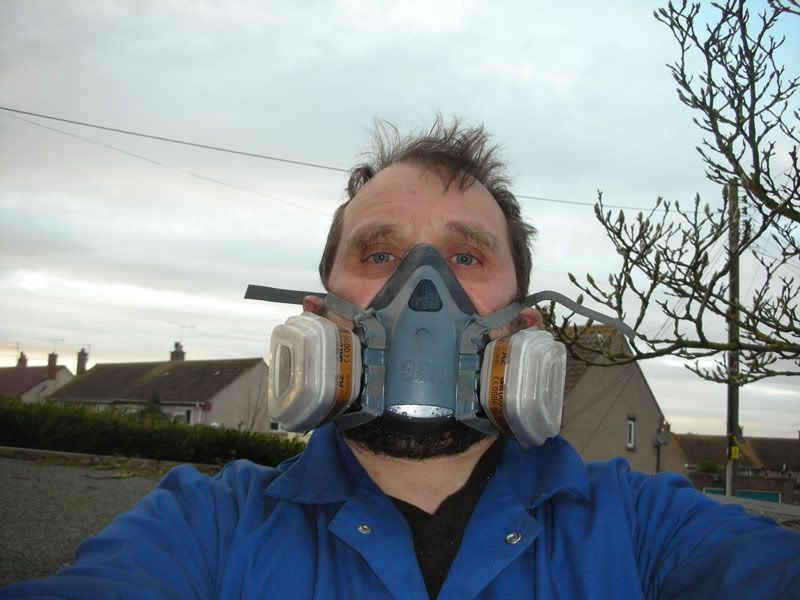
Two pack paint is good stuff, but it uses iso-cyanates in the accelerator, which is properly poisonous, so I always either borrow a proper spray booth or paint outside. The mask I wear is woefully inadequate but I cannot afford the triple filters required to use an air fed mask and although I have a 3 horse compressor (as big as you can run on single phase) I'm not sure that it has enough capacity to run a mask as well as the spray gun. The mask alone pulls 8 CFM.
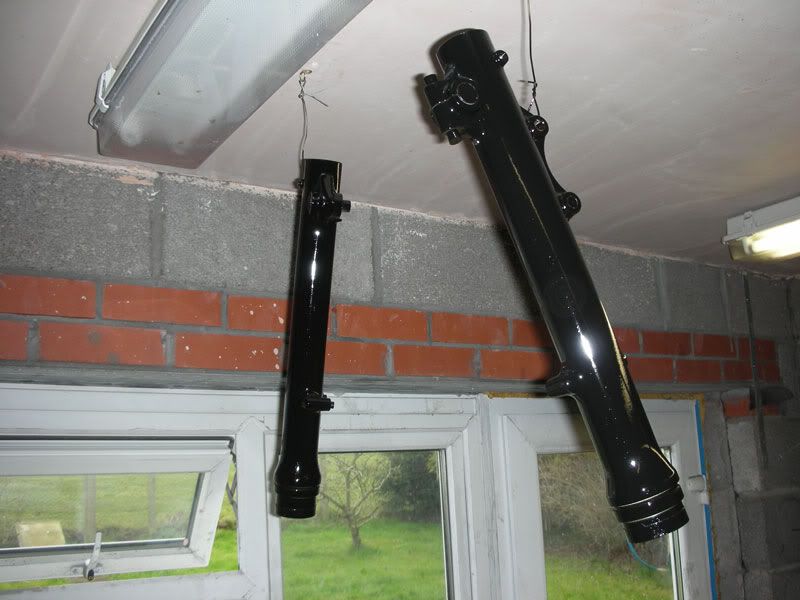
The following morning I painted the items with the two pack marine polyurethane satin black I used on the engine, and I'm pleased with the results.
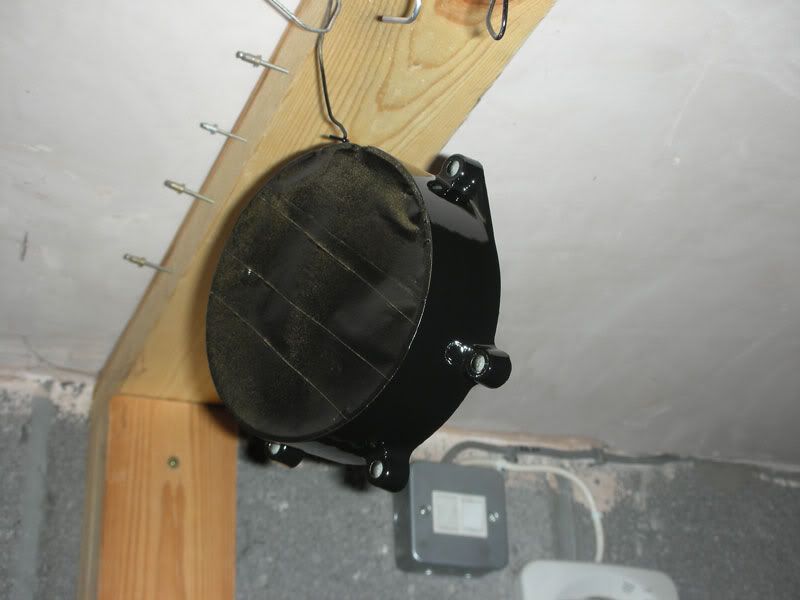
The next parts I want to finish are the wheels. I took the tyres off and took the bearings out.
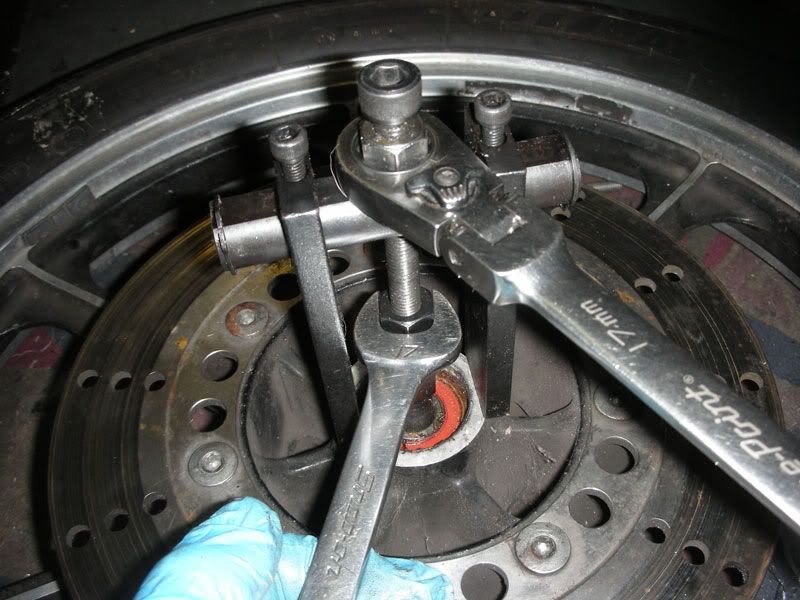
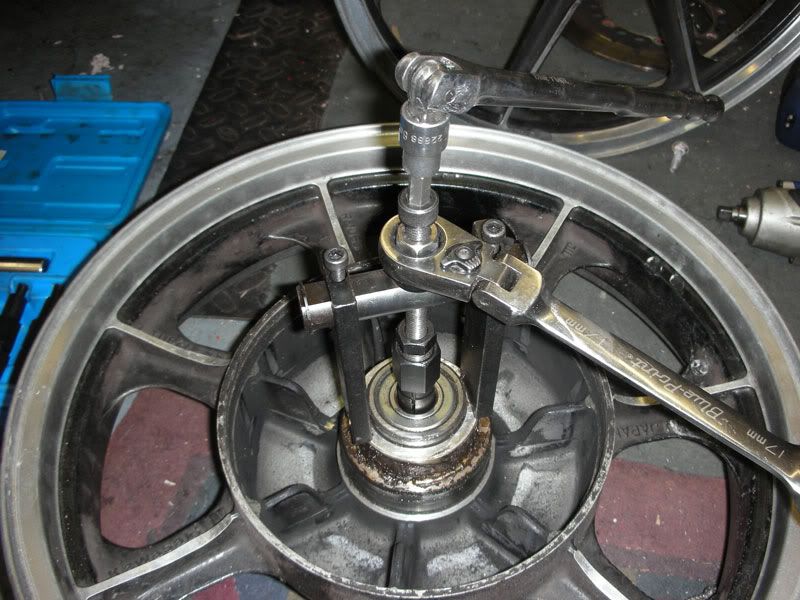
Bearing removal kits are really worth their weight in gold.
I have been cleaning the bare wheels in every chemical I can lay my hands on, in an effort to get the years of shit off the original powder coat. So far I'v tried Wonder Wheels, Jizer, brake cleaner, IPA, degreaser, gun wash (standard thinners) and nothing seems to be really making in inroads. It's coming off gradually, but not easily. I'll continue to keep going ....
Polished up the rmainder of the carb lids
Next job was to repair some threads in the head. I decided to use 'Time Serts' as some t**t had all ready badly fitted a load of helicoils, and I had to pay an engineer to remove them. I'd not used Time Serts before. As with helicoils you drill out the hole
then you counter bore the hole with the supplied tool which is designed in such a way that you can't go too deep
then you tap the hole with the supplied special tap
I then decided to stick the buggers in with a drop o loctite; probably unnecessary but I'm a great believer in belt and braces.
the insert is then inserted with a special tool, but I don't seem to have taken a pic of the tool, just the insert ready to go in
Some of the holes in the head are soooo fucked that I have had to order some 'Big Serts' from the US (they were too expensive from Wurth the UK dealer) They are pretty much the same but fatter to take up the lack of land left by the home-helicoiller
I then turner my attention back to the legs. I ordered some 50mm round PVC bar off tinternet, so that I could make some plugs for the fork sliders. I spun them up in the lathe with a 1° taper so that I could tap them into the big holes in the tops, where the seals go.
Next I mixed up some 2 pack zinc chromate etch primer and put it in my crappy chinese spray gun. I use this gun only for priming with etch primer. It's a horrid gun, but I don't want to use the good one for etch priming.
I then sprayed the two legs and the ignition casing I forgot in the last batch.
Two pack paint is good stuff, but it uses iso-cyanates in the accelerator, which is properly poisonous, so I always either borrow a proper spray booth or paint outside. The mask I wear is woefully inadequate but I cannot afford the triple filters required to use an air fed mask and although I have a 3 horse compressor (as big as you can run on single phase) I'm not sure that it has enough capacity to run a mask as well as the spray gun. The mask alone pulls 8 CFM.
The following morning I painted the items with the two pack marine polyurethane satin black I used on the engine, and I'm pleased with the results.
The next parts I want to finish are the wheels. I took the tyres off and took the bearings out.
Bearing removal kits are really worth their weight in gold.
I have been cleaning the bare wheels in every chemical I can lay my hands on, in an effort to get the years of shit off the original powder coat. So far I'v tried Wonder Wheels, Jizer, brake cleaner, IPA, degreaser, gun wash (standard thinners) and nothing seems to be really making in inroads. It's coming off gradually, but not easily. I'll continue to keep going ....
Ralph Ferrand
Z1000A1 (1977), Z1300A5 (1983), Z900A4 (1976) GPZ1100 Unitrak (1983)(project), RD250B (1975)(project), ZRX1200R (2005) DT175MX (1981) YZF R6 (1999)
http://www.bikerstoolbox.co.uk
Z1000A1 (1977), Z1300A5 (1983), Z900A4 (1976) GPZ1100 Unitrak (1983)(project), RD250B (1975)(project), ZRX1200R (2005) DT175MX (1981) YZF R6 (1999)
http://www.bikerstoolbox.co.uk
-
coldsummer

- Hardcore
- Posts: 3211
- Joined: 29th Jun 2009
- Location: Berkeley


Excellent work Ralph! Do you have any experience, how tough that two-pack stuff is ? I have to paint a sidecar chassis and I would like to do a job that sorts the case for more than just a few months this time...
My Würth Sales-Rep actually told me, where to buy the Timeserts in the US, because he knew me... I think it was like 4 or 5 times the price (with all possible discounts figured in)
Cheers,
Greg
vduk wrote:Some of the holes in the head are soooo fucked that I have had to order some 'Big Serts' from the US (they were too expensive from Wurth the UK dealer) They are pretty much the same but fatter to take up the lack of land left by the home-helicoiller
My Würth Sales-Rep actually told me, where to buy the Timeserts in the US, because he knew me... I think it was like 4 or 5 times the price (with all possible discounts figured in)
Cheers,
Greg
There's no replacement for displacement!
Who is online
Users browsing this forum: No registered users and 10 guests