Hello Guest User,

Please feel free to have a look around the forum but be aware that as an unregistered guest you can't see all of it and you can't post.

To access these 'Registered Users Only' areas simply register and login.

GB's 'Period' modded Z1000A2 with 'Toast Racks'

Work in Progress

Moderators: KeithZ1R, chrisu, paul doran, Taffus

Message
Author
User avatar
Ginger Bear
Hardcore
Hardcore
Posts: 6850
Joined: 16th Dec 2008
Location: In the Dark.
Contact:

#61 PostAuthor: Ginger Bear » Wed Sep 26, 2012 7:18 pm

Ok, managed a bit more, but it seems to be two steps forward, one step back. :roll: More of that later. :??

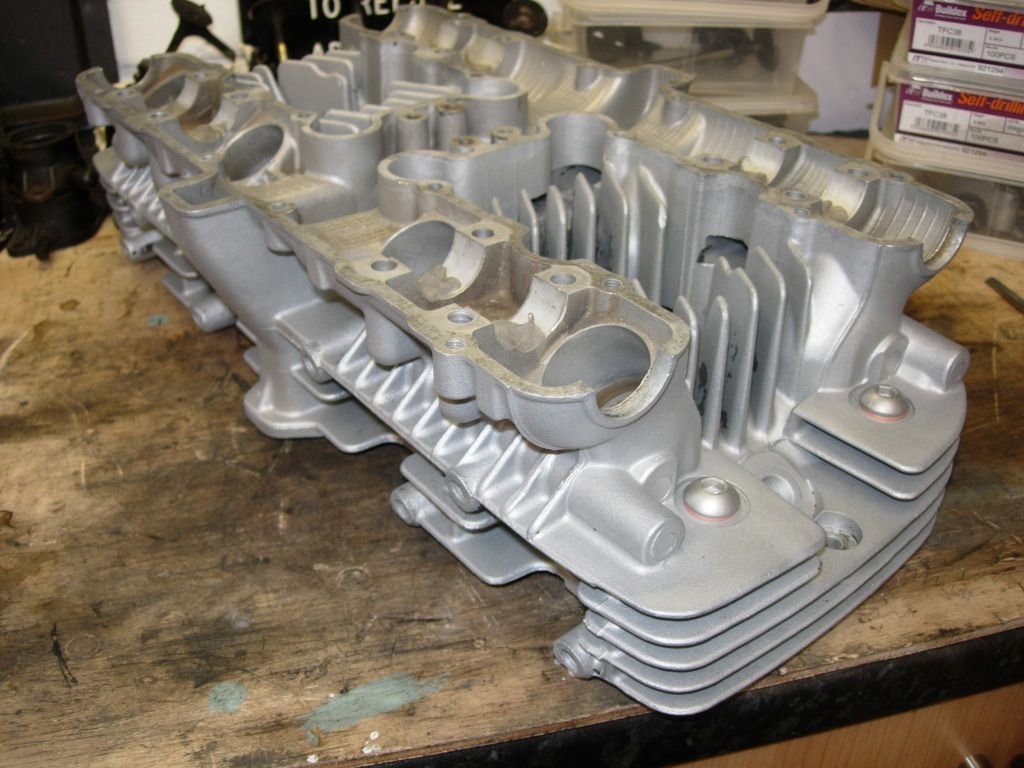
Fitted oil pump & sump with shiny new 'o' rings.

Image

Went shopping....... Cheers Rob. :wink:

Image

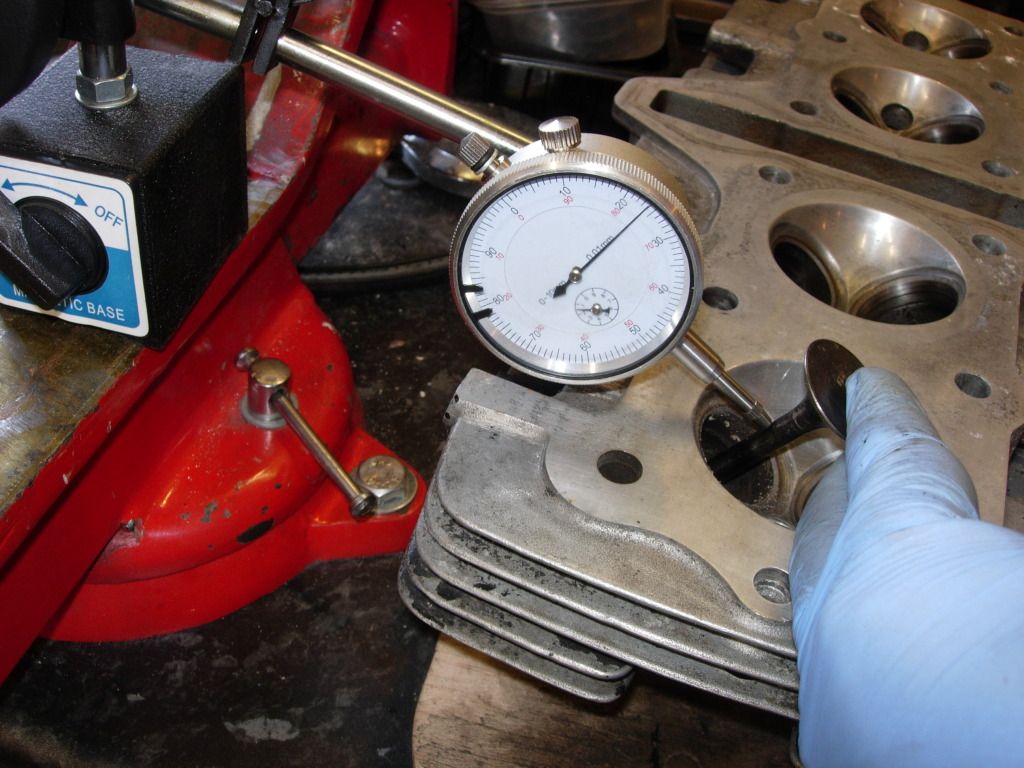
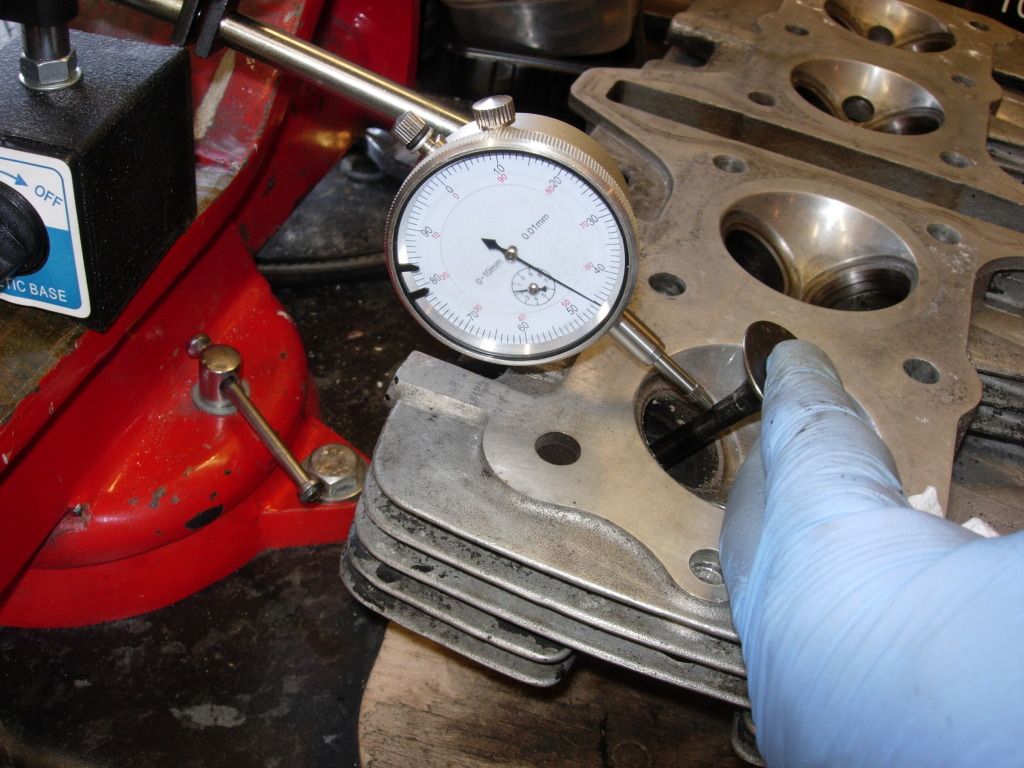
Results are really good. :up

Image

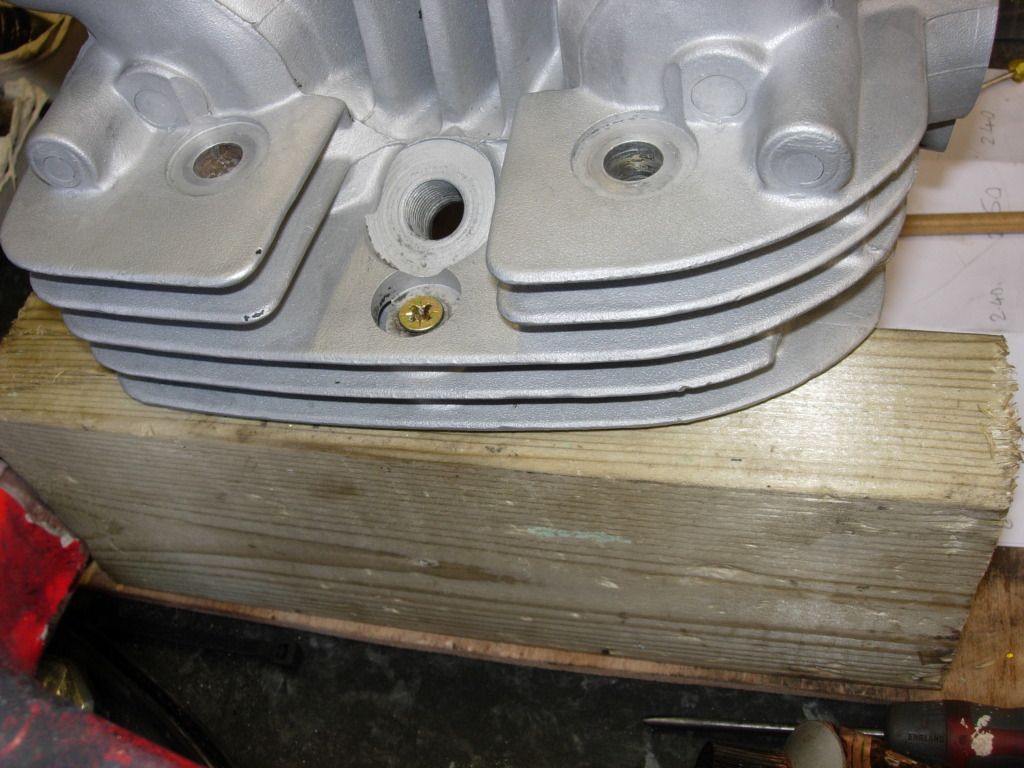
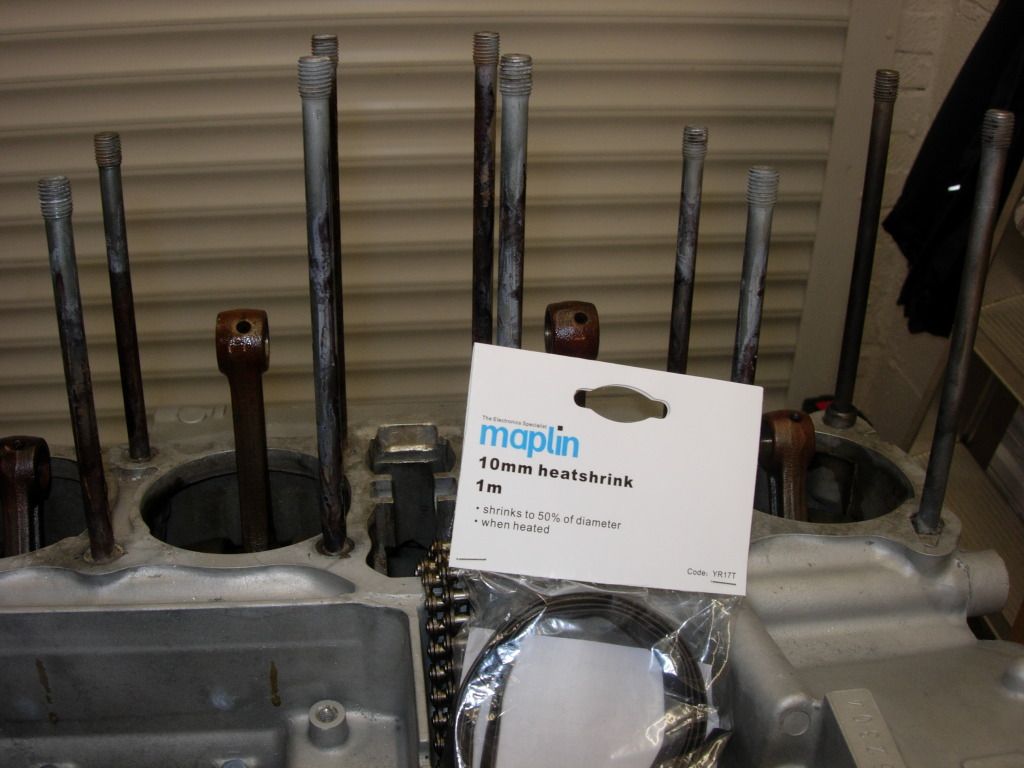
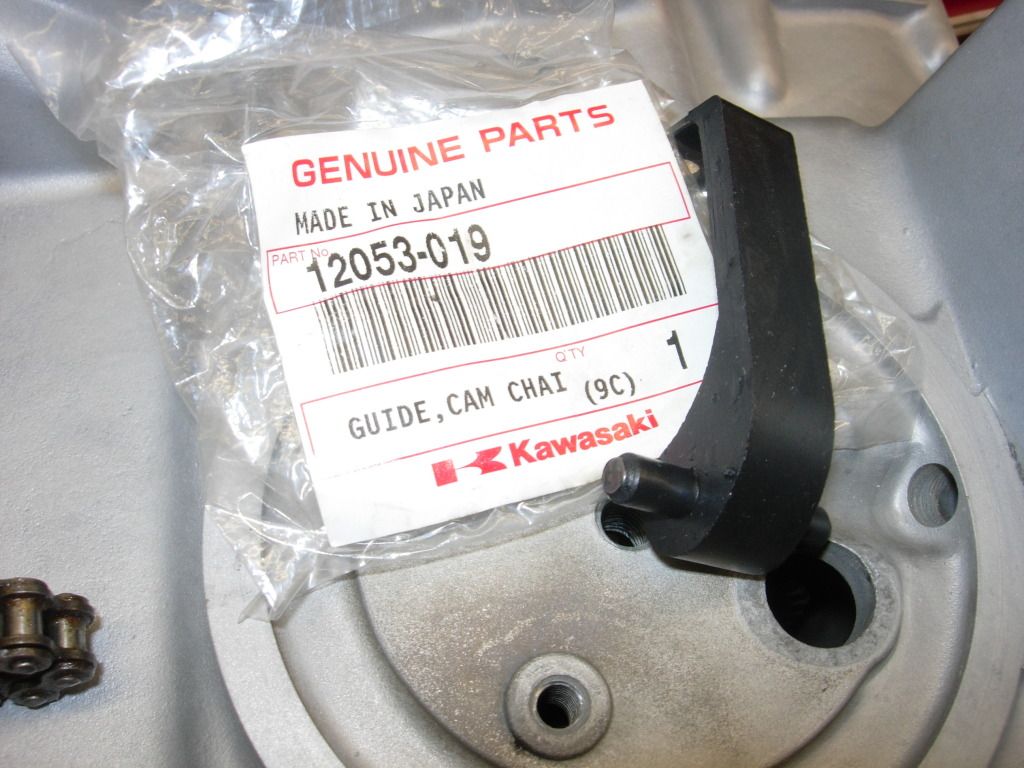
Fitted one of these to the barrels............ Could hardly fit the old one. :roll:

Image

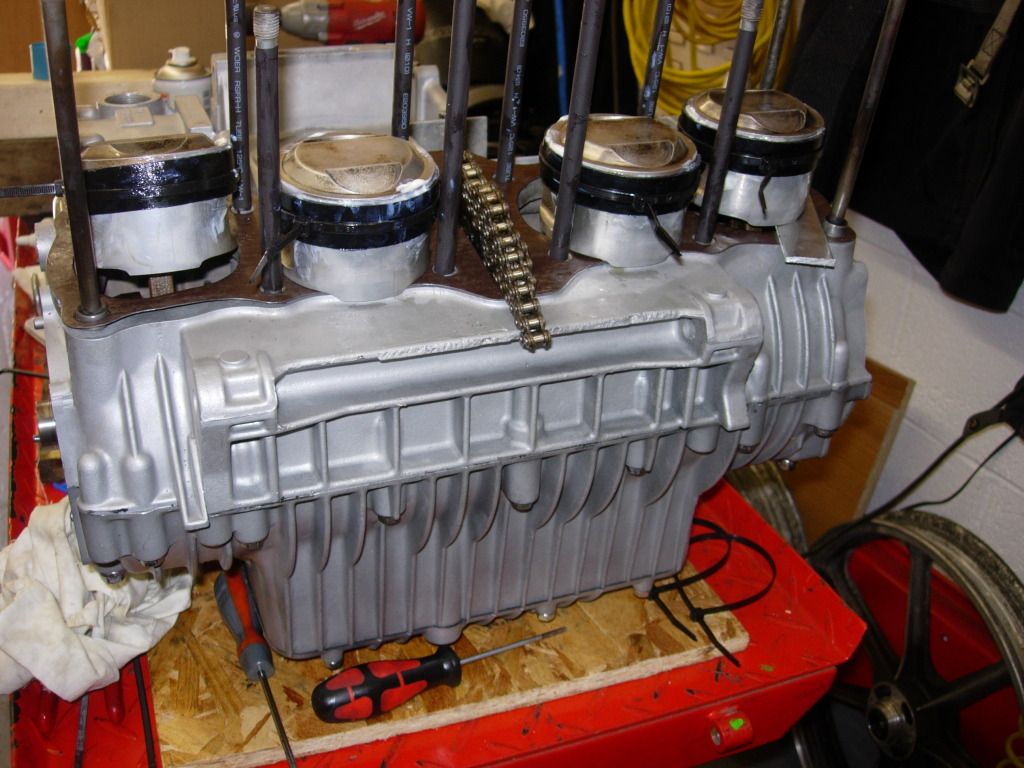
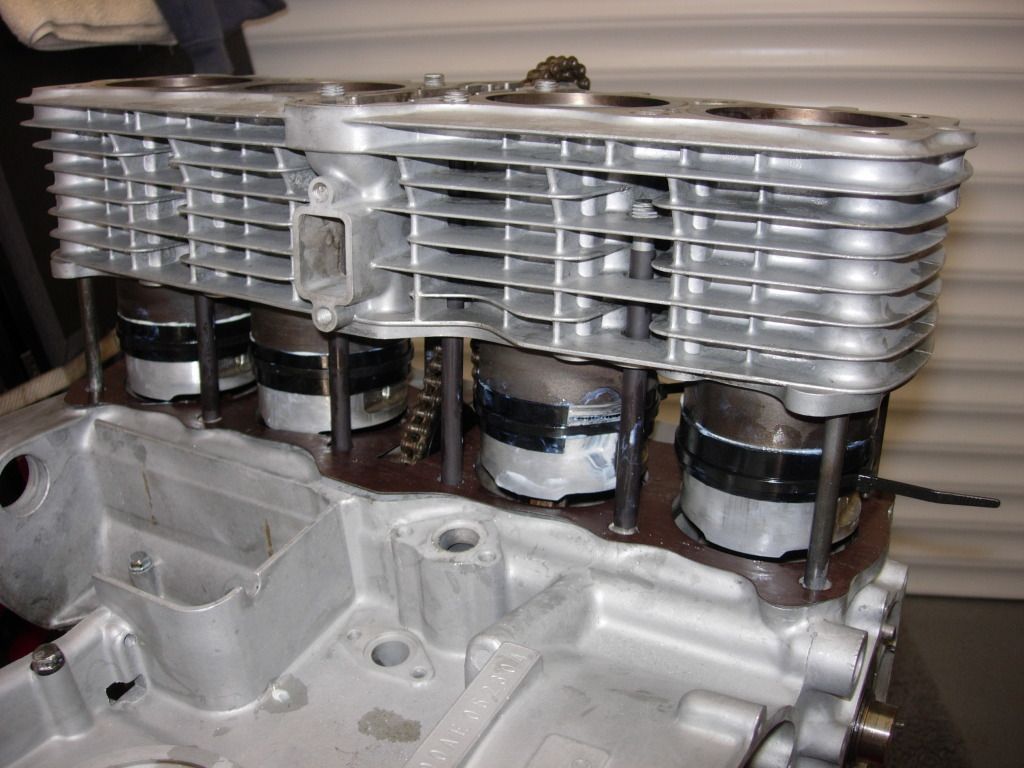
After trying to carefully fit the barrels with out any sort of ring compressor, I quickly realised it would probably end in disaster, so I cut up some trusty drainpipe & lubed it all liberally with Lubriplate No. 105 (Debbens) before cable tying the pipe tight. The bores hadn't been chamfered & this way made it a piece of piss to fit the barrels without causing any damage. Just think of it as an idiot proof method!

Image

Image

Image

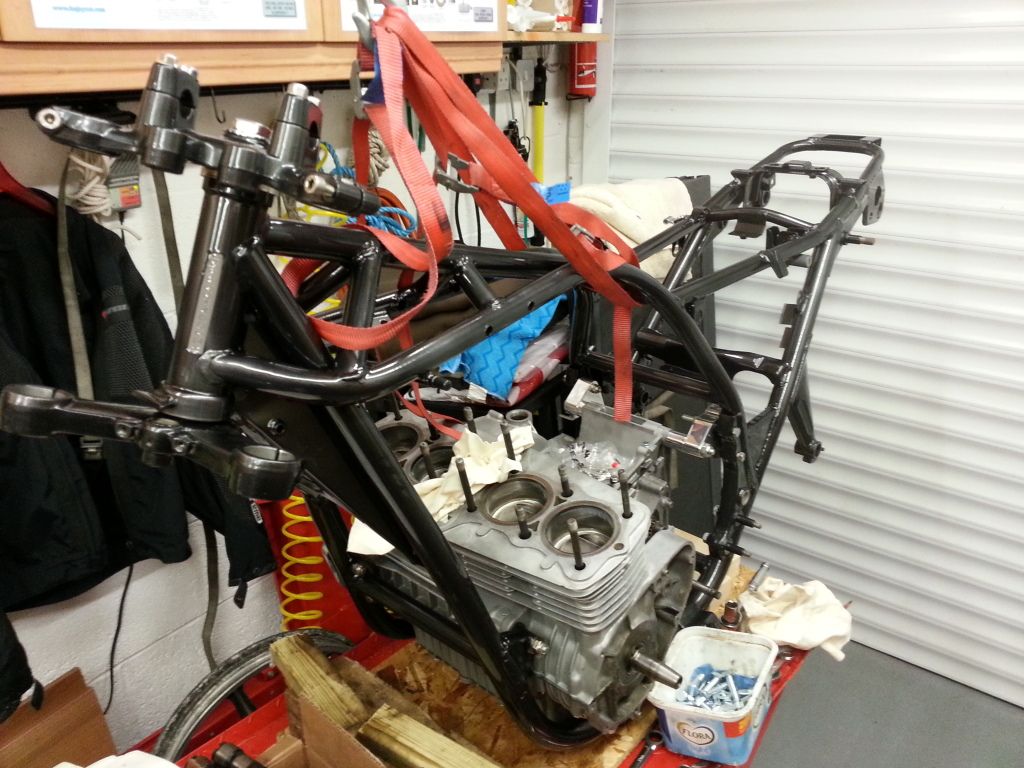
Next up was to fit the frame to the engine. Well I didn't plan to break into a sweat, so used the super lazy boy method of hoisting my frame over the motor. :sou

Image

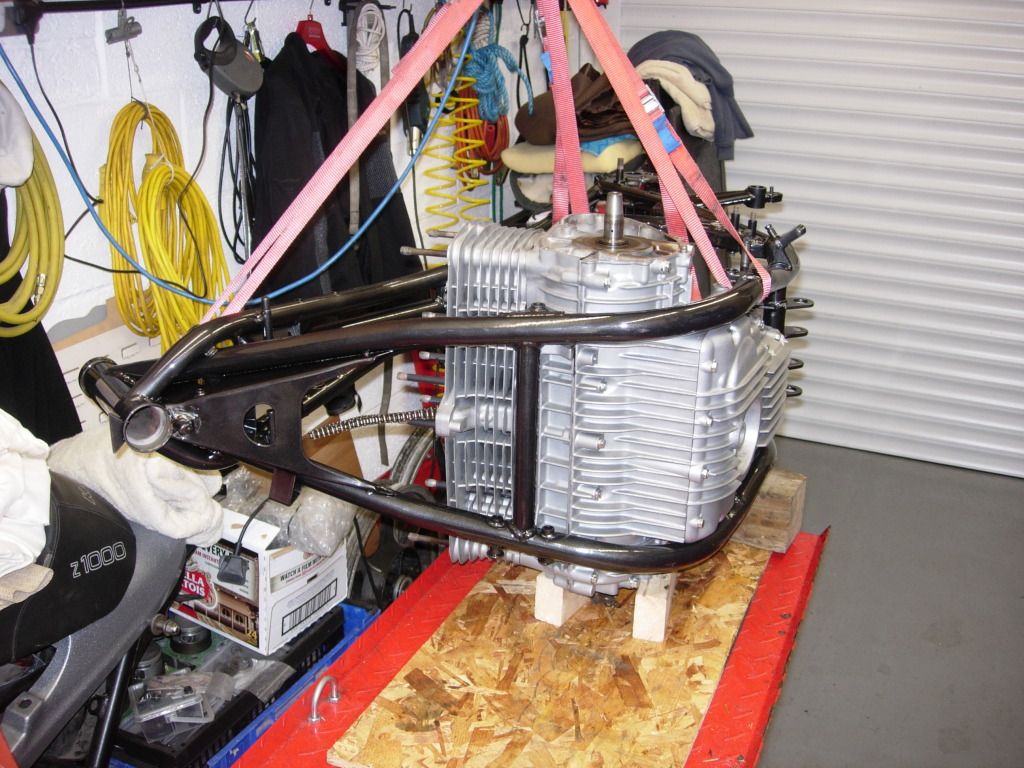
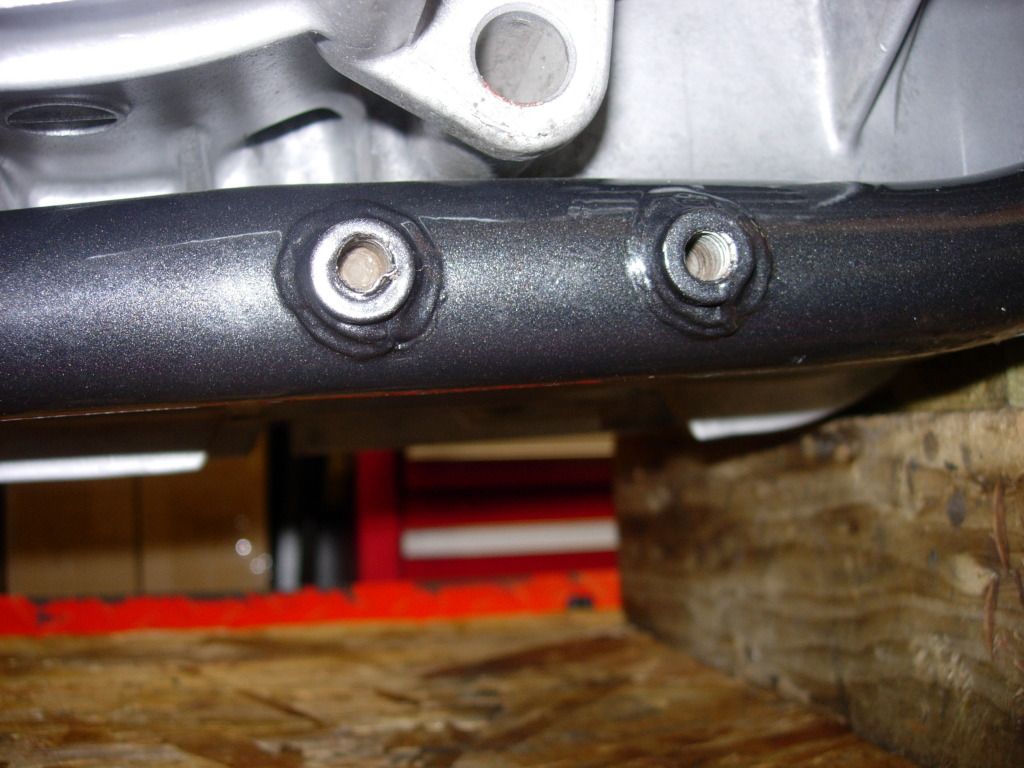
Got a couple of engine mounts fitted, then rolled it upright & discovered this. :shock:

Image

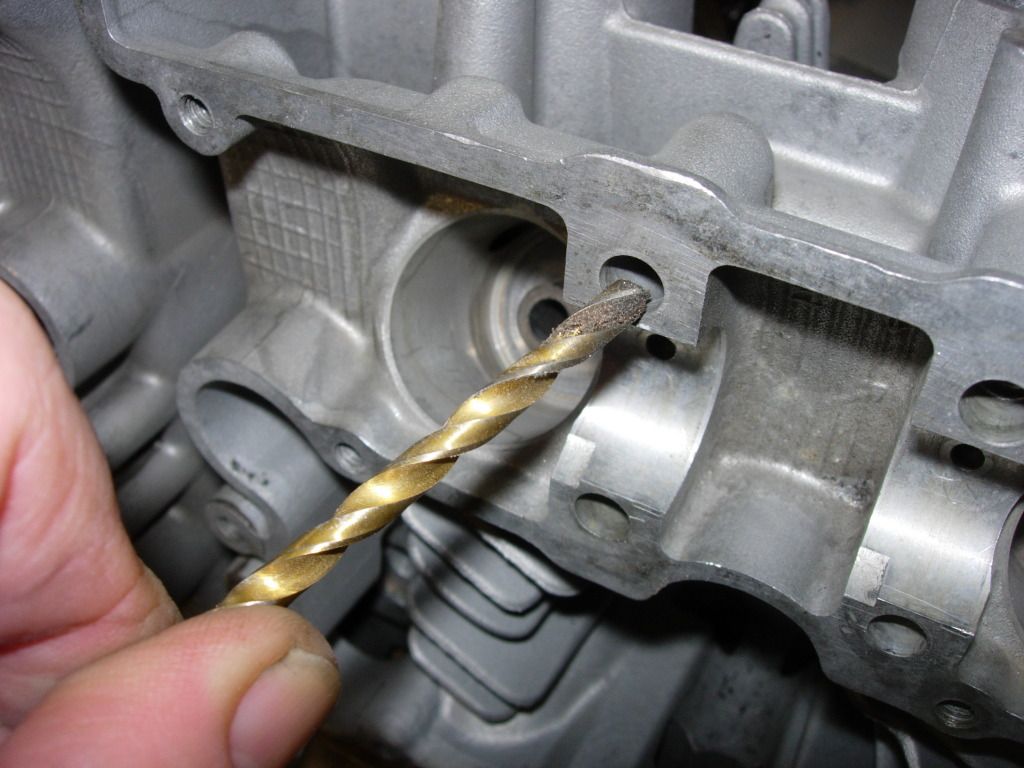
There was a bolt sheared off in there about 15mm below the top of the hole. I hadn't noticed this whist stripping the frame. It looks like someone had attempted to drill it out previously, just not centrally....... This is where my step backwards begins........ There are no pic's, oddly enough I didn't feel like sharing this little balls up. :roll:
I drilled through the old bolt, just fine with a 7mm drill bit, the problem came when I decided to try & tap it. Because the hole wasn't spot on, I think a piece of the original bolt, came loose & jammed the tap. :mad
Upshot of all this is, the engine has come back out & the frame is with the local auto engineer having the bastard tap spark eroded, good news is, the process doesn't produce any heat. bad news is he couldn't guarantee he wouldn't mark the frame trying to squeeze it onto his machine. :|

With a bit of luck I might have it back tomorrow. :v
Image

# 104

Phil Churchett Award Winner 2011 & 2016 :D
Buzzworkz Best Modified Zed 2016

User avatar
ollie
Custard Cream
Custard Cream
Posts: 836
Joined: 13th Sep 2002
Location: north yorkshire

#62 PostAuthor: ollie » Wed Sep 26, 2012 7:51 pm

lets hope it is easily removed without any marks on your frame matey.Must say i like the colour of the frame Steve :wink:
zedsrus:"i don't know man ,i just got here myself !!"

Padders
Hardcore
Hardcore
Posts: 4875
Joined: 15th Jan 2006
Location: Grimsby Lincolnshire

#63 PostAuthor: Padders » Wed Sep 26, 2012 8:02 pm

The engine is looking great Steve fingers crossed for the frame.

User avatar
GUYZED
Area Rep.
Area Rep.
Posts: 2107
Joined: 9th Aug 2008
Location: READING - BERKSHIRE

#64 PostAuthor: GUYZED » Thu Sep 27, 2012 5:07 am

That's a real bugger about the sheared off bolt Steve...hope you get it sorted out OK...the build is coming along nicely.
OLD ZED'S NEVER DIE THEY JUST GO FASTER...
#449
Z1000A2 Z650B1

User avatar
Ginger Bear
Hardcore
Hardcore
Posts: 6850
Joined: 16th Dec 2008
Location: In the Dark.
Contact:

#65 PostAuthor: Ginger Bear » Thu Sep 27, 2012 6:28 pm

Called over to Mikey's today & collected all my finned cases..... Looking good I must say.:sou
Then made a call & picked up my frame......... All sorted........ NO damage...... :lon Lesson learn't there!!

Hopefully I'll get the motor back in the frame over the next couple of days, then I can bolt on all those blingy bits from Mikey.

Then I really must focus on the head.......... Not too keen on that at the moment as it's still a dirty shitty oily mess. :cry:
Image


# 104


Phil Churchett Award Winner 2011 & 2016 :D

Buzzworkz Best Modified Zed 2016

sanderz
Custard Cream
Custard Cream
Posts: 967
Joined: 2nd Mar 2010
Location: Manchester

#66 PostAuthor: sanderz » Thu Sep 27, 2012 6:44 pm

Ginger Bear wrote: made a call & picked up my frame......... All sorted........ NO damage...... :lon


Result! quick turn round as well :up

Will you have to 'timesert' it as it might have a 'baggy hole' if it was slightly off when drilling?

Waiting for the bling pics - finned covers are here to stay :wink:
Wots up DOHC

User avatar
KeithZ1R
Moderator
Posts: 3368
Joined: 15th May 2005
Location: Bury

#67 PostAuthor: KeithZ1R » Fri Sep 28, 2012 1:30 pm

Steve I had a similar Issue in the same position however in my case it had the remnants of a tap in the hole :evil: however 20 minits knockin Fook out of it with a thin hardened punch and a hammer broke it up eventually....result :D a trick I learnt in the field drilling safes :wink:
Keith
:bop :gom

You can never have too many tools in your life, except the two legged variety

I'm never wrong, once I thought I was but I was
mistaken.

Phil Churchett winner 2013

User avatar
Ginger Bear
Hardcore
Hardcore
Posts: 6850
Joined: 16th Dec 2008
Location: In the Dark.
Contact:

#68 PostAuthor: Ginger Bear » Fri Sep 28, 2012 1:47 pm

Keith, I did try bashing the fooker from the other end, with a drift & lump hammer, hoping it might shatter or something, but in the end admitted defeat & took it to the professionals. Before I fooked anything else up.
Did a lot of Googling too & found out Nitric acid would dissolve the tap, but that trick only works in aluminium. :roll:

Anyhow, just about to get my sorry ass back out there & do a bit more!

Sanders, no need for timeserts as engineers have fitted a couple of helicoils for me. Had they have asked, I would have declined & fitted my own, but I was so pleased the frame didn't get marked I didn't want to whinge.
Image


# 104


Phil Churchett Award Winner 2011 & 2016 :D

Buzzworkz Best Modified Zed 2016

User avatar
Ginger Bear
Hardcore
Hardcore
Posts: 6850
Joined: 16th Dec 2008
Location: In the Dark.
Contact:

#69 PostAuthor: Ginger Bear » Sat Sep 29, 2012 6:55 pm

Ok, had a good day today. Fitted frame back over the motor, then flipped it upright & fitted new taper bearings & yokes, along with a bit of Mikey's 'Bling'.

Image

Image

Resisting the temptation to start bolting loads more 'Bling' to the bike I turned my attention to the head.
First off, I stripped the head that was fitted to the bike. Initially I was quite happy to find some largish shims... 265, 260, but then they got as small as 220. Measuring the valve stem diameters revealed all the valves were beyond Kawasaki's service limits, plus the fact, there was so much sideways movement whilst doing the 'wobble test' I didn't even bother to measure it. So I put that to one side & pulled out another already stripped head, that came from the very kind, young Mr Coldsummer. :roll:
This head appears to be in much better condition, seat's look pretty good, the valve stem's are nice & thick & the wobble test, shows less than 0.25mm, which is good. :lon

Image

Image

Downside is there is a little surface rust on top of some of the buckets, but this seems to clean off fairly easily. :D ....... Guess I'm even deeper in to the 'favours owed' now then Simon? :wink:

Next job will be to degrease the head, then get it blasted, after that I can hopefully rebuild it & fit it..............................................


................................................ With the TOAST RACKS!! :aha :aha :aha
Image


# 104


Phil Churchett Award Winner 2011 & 2016 :D

Buzzworkz Best Modified Zed 2016

User avatar
stephen parr
100Club
100Club
Posts: 263
Joined: 19th Oct 2008
Location: leicestershire

#70 PostAuthor: stephen parr » Sat Sep 29, 2012 9:30 pm

Steve, I too had the same problem in the same location as you and Keith, and I had snapped a screw extractor in there :oops: . I used the very small Dremel type stone grinding pieces in an electric drill. I went through a few of 'em and it took a long time, but at least I didn't have to strip my bike. :drill

Is Vic There
Hardcore
Hardcore
Posts: 1460
Joined: 8th Nov 2011
Location: Brisbane, Australia.

#71 PostAuthor: Is Vic There » Sat Sep 29, 2012 10:15 pm

Enjoying this build :D
Z1000R ELR, Z1100R ELR, GPz900R A1, GPz750 Turbo, Norton F1, Harris Mag 2, Harris Mag 5, Yamaha YZR750SP, Triumph Steve McQueen, Suzuki RGV250 Sheene Rep, Suzuki RG500 Walter Wolf, Suzuki RG250 Walter Wolf, Aprilia RS250, Yamaha YL1, RG500. H**** NS400.

User avatar
Ginger Bear
Hardcore
Hardcore
Posts: 6850
Joined: 16th Dec 2008
Location: In the Dark.
Contact:

#72 PostAuthor: Ginger Bear » Wed Oct 03, 2012 7:12 pm

Spent the last couple of days working on the head. Yesterday, it was degreased, blasted with aluminium oxide, the blasted again with glass bead, that took most of the day, what with fitting a new window in my blast cabinet. :roll:

Today I have spent cleaning the head. There's an ongoing debate about blasting heads & getting the oilways full of blasting media. I choose to block 'em up. Bolts through the outside stud holes & a blob of silicone in the camshaft oilways works for me.

Image

Here you can see the silicone 'plug' being pulled out.

Image

Obviously you need to be careful not to leave any silicone in there. I blew everything through with an airline, then flushed it with brake cleaner, then the airline again, before getting the whole thing in to the kitchen sink & flushing it through again.

I also cleaned all the threads of blast media. First by hand with a 3/16" drill, then airline, then brake cleaner, then airline, then I ran a plug tap down 'em all with a little cutting compound on, one more squirt of brake cleaner before a final blast with the airline.

Image

After lapping the valves in, I rebuilt the head, then mounted it onto my 'poormans' head stand, so I could temporarily fit the cams & shim it up.

Image

Image

Spent a little time filling the cam chain tunnel 'o' ring groove with silicone, as I plan to fit the head with a one piece Cometic head gasket I have waiting to be used.
Ran a tap, down the 6mm threads on the outer edges of the barell's & found one of them was past it, so in went a timesert...... Lovely. :lon

Hopefully I'll get the head on over the next couple of days........ :sou
Image


# 104


Phil Churchett Award Winner 2011 & 2016 :D

Buzzworkz Best Modified Zed 2016

User avatar
Ginger Bear
Hardcore
Hardcore
Posts: 6850
Joined: 16th Dec 2008
Location: In the Dark.
Contact:

#73 PostAuthor: Ginger Bear » Sat Oct 06, 2012 7:28 pm

Still waiting for a few engine parts.... Starter ring damper en route from America, so I can't fit the alternator cover. Oil level window on it's way from Germany, so cant fit the clutch cover yet. Cylinder head nut's....... I'm still dithering with that one. Can't decide to get originals re-chromed, buy new genuine Kawasaki or go down the stainless route. Probably gonna be stainless, polished to within an inch of their lives by Mikey, but it will be the first decision to be made on Monday morning, when I can do something about it.

So with nothing to do in the engine department & with it being a good day for working outside, I tackled the dirty shitty wheels. :evil:

Here they are, with the rubber freshly removed;

Image

Bike had stood for 16 years, seems like some of the rubber had become 'very attached'. :roll:

Image

Degreased everything, then masked up all the seals & bearings. I'm being a super tight bastard on this project & not spending on anything I don't have to!

Image

After another 'back breaking' session leant over the blast cabinet, they're ready for a trip to Mikey's to have some 'bling' put back on to the rim's. I did have a quick go with a flap wheel, the the Solvol, but quickly realised I would never be happy with the result, so I'll happily pay an expert to do the job for me.

Image

Image
Image


# 104


Phil Churchett Award Winner 2011 & 2016 :D

Buzzworkz Best Modified Zed 2016

User avatar
Ginger Bear
Hardcore
Hardcore
Posts: 6850
Joined: 16th Dec 2008
Location: In the Dark.
Contact:

#74 PostAuthor: Ginger Bear » Sun Oct 07, 2012 6:59 pm

Not done a lot today, but found a bit of time to fit my JMC GS1000 Swinger. :shock:
Pivot point is narrower than a zed, but just needed one small 10mm spacer to have the swinger shock mounts sitting centrally. Seems the Zed shock centres (width) are 270mm & the ones on the swinger are 285mm, so I will need to turn up a 7.5mm spacer for each top mount.... I can live with that. :D
Eccentric adjusters were re-anodised, courtesy of Mikey & now look fab, compared to the faded originals.

Image

Image

Just been trying to find some M12 x 1.25 stainless acorn nuts for the top mounts & they seem to be rarer than rocking horse shite, maybe something to look for at Stafford?

Dug out some shocks, that hopefully I can make presentable. There is a little surface rust on the body's, which I think I'll blast & paint, but the good news is, the damper rods look to be in excellent condition.

Image

Image

Image
Image


# 104


Phil Churchett Award Winner 2011 & 2016 :D

Buzzworkz Best Modified Zed 2016

User avatar
Bongoball
100Club
100Club
Posts: 235
Joined: 20th Mar 2012
Location: Near Stafford

#75 PostAuthor: Bongoball » Sun Oct 07, 2012 7:39 pm

Ay up The Bear of Gingerness,
I needed some fine pitch dome bolts to fill in the holes where the mirrors used to be on me z1000.
I found these guys really helpful...
http://www.custom-fasteners.co.uk/index.htm
Hope this helps :D
Cheers,
Bongo.
"Keep on Rockin'!"


Return to “Projects”

Who is online

Users browsing this forum: No registered users and 9 guests