Hello Guest User,
Please feel free to have a look around the forum but be aware that as an unregistered guest you can't see all of it and you can't post.
To access these 'Registered Users Only' areas simply register and login.
Please feel free to have a look around the forum but be aware that as an unregistered guest you can't see all of it and you can't post.
To access these 'Registered Users Only' areas simply register and login.
Project Z900 A4 - Restoration - Pic Heavy
Moderators: KeithZ1R, chrisu, paul doran, Taffus
-
wheelysteve

- 100Club

- Posts: 450
- Joined: 10th Mar 2014
- Location: Wokingham, Berks
wheelysteve wrote:That's a good idea!! Mind you, I'm surprised that heat shrink was rated to engine temps but it does looks good.
The heat shrink used is high quality and is rated well above engine temp - same type I used on my Ltd build, that still looks like I fitted it yesterday - easy to clean too.
As Pigford says - it helps stop the crud, road grime gets fired in by the front tyre and wears through the studs plating - then collects on it and holds moisture = Rust!
Mr Smethurst had 'the devils own of a job' to get the old studs out due to the corrosion on the studs - the front centre studs were the worst - he was worried they were going to snap!
The outside four studs are inside the liner holder (barrels/cylinders) so are protected from the elements.
Interestingly, the KZ1000 A1 engine I used on my Ltd build had studs that looked like they hadn't been in that long, That's California for you!

Hinckley wrote:November week 2.5 update
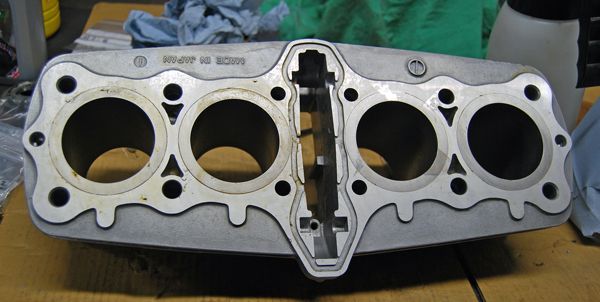
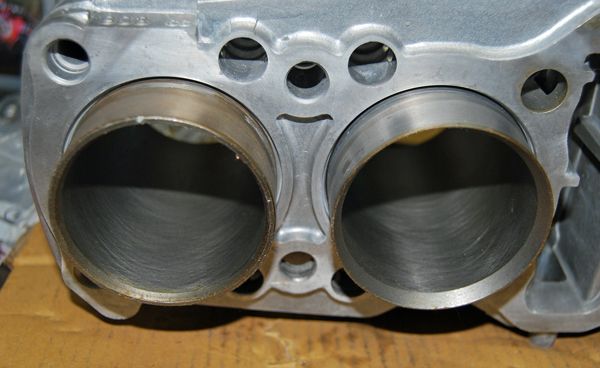
I collected the cylinder block from the machine shop, the new liner is difficult to tell appart from the others.
To recap the liner was from webike, the machine shop said it was a repair liner, 1mm oversize in almost every way, bore measured 65mm.
Liner was turned down to the correct outside dimensions then bored and honed with the others - the new liner sat approx 1mm proud and was skimmed down with the others.
Notice the ring lead is also deeper cut on the new liner.
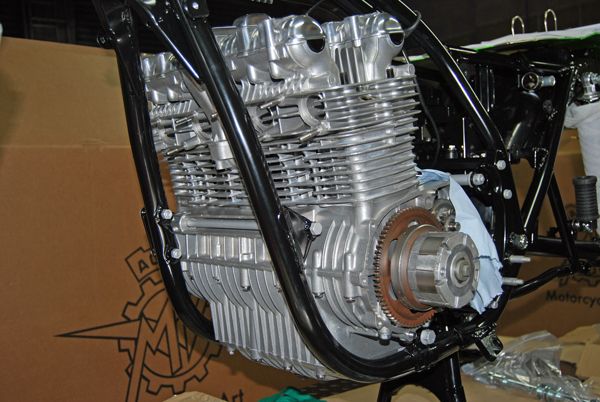
Couldn't resist a dry build - a thing of beauty.
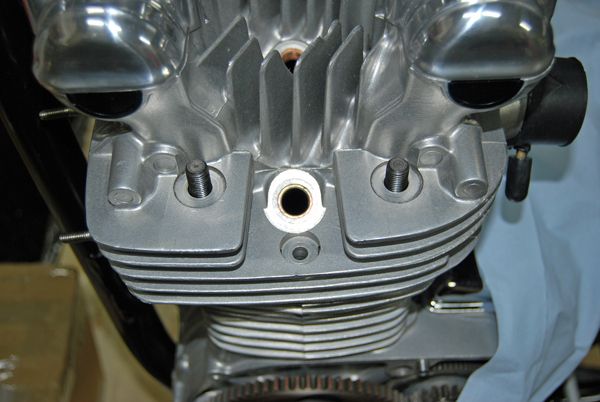
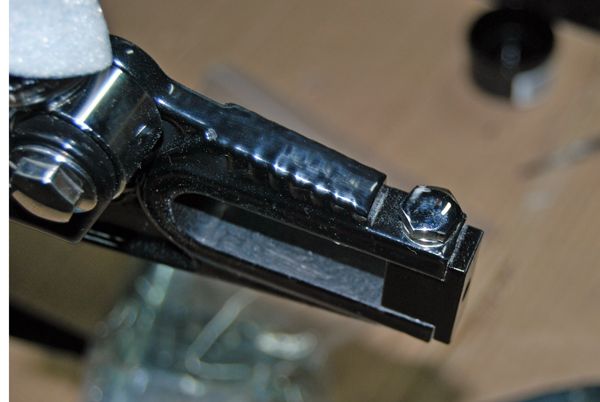
The no gasket dry build did have a purpose, the replacement APE studs measure approx 3mm shorter than the originals.
The left stud is installed to the original stud height.
The Right stud is fully installed - note the difference in height.
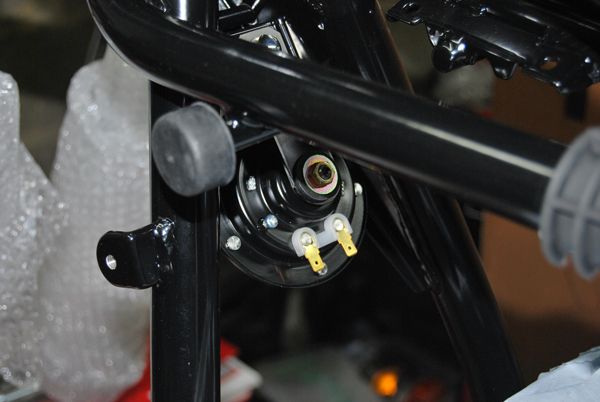
Received some more bits from Saisei yesterday so I got on with fitting centre harness to the electrical plate.
The original horn had a broken bracket and didn't work - Dave's (Saisei) replacement looks pretty darn smart - nice and loud too!
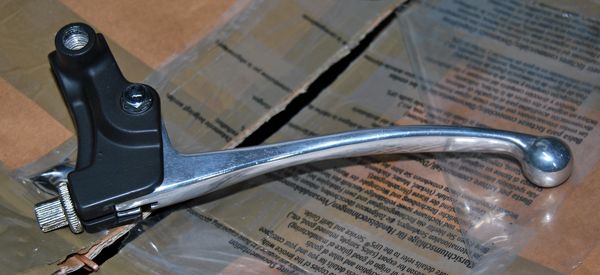
Clutch perch ready to fit, ZP pattern adjuster is shite - it will be replaced with a better one when I have time to find one.
Original lever polished up well.
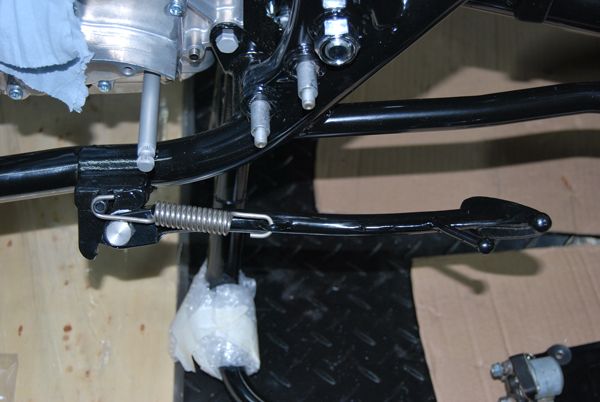
Stainless side stand hardware looks a tad drab - but it's practical.
The foot post is bent down - I've left it this way as I've seen a few others bent the same way - I didn't want to bend it straight only to find it fouls something further into the build.
If it's not meant to be this way - it'll add some originality!
As the beast didn't come with any rear indicators - a pattern set will have to do - as said - it's not going to be rivet counter original.
Roll on the weekend - pistons are going in


Your Attention to detail.. Is the order of the day, for me,..and every day... If I'm putting my name to anything, I am restoring, for me, or someone else.. it's got to be right.. As I know it won't come back with any problems... This bike is going to be a stunner.. Keep the photos coming..
Thanks, much appreciated.
November week 4 update.
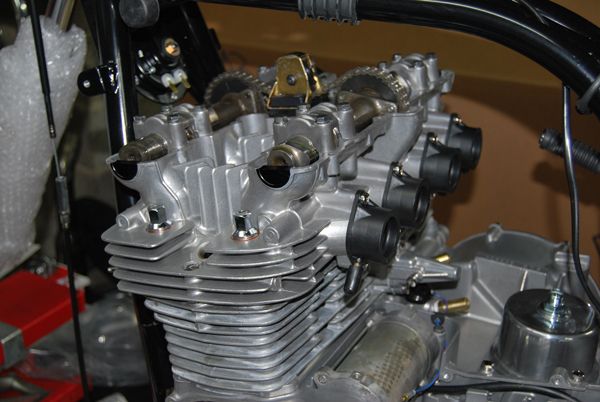
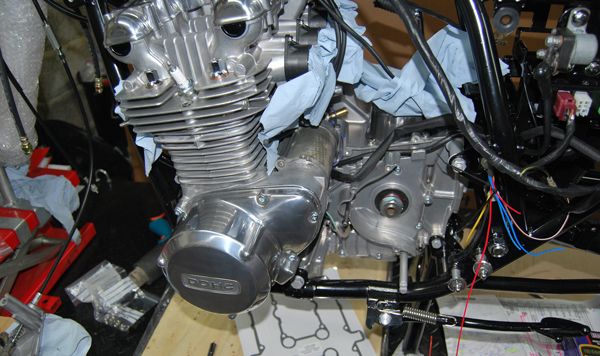
With the APE bolt drama behind me I pressed on with putting the head on.
All went well - genuine gaskets, studs, ZP nuts & washers - Liska cam chain idler wheels.
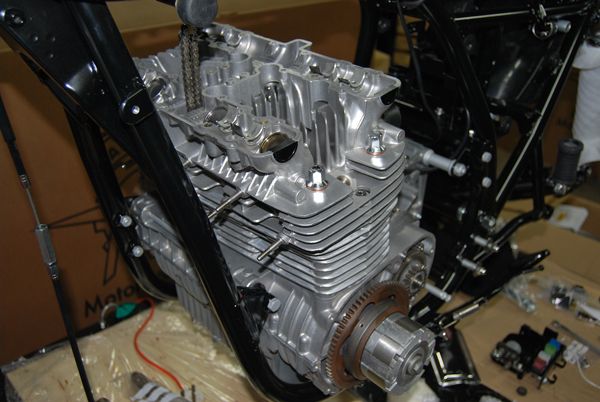
The replacement genuine camshafts I scored on USA ebay were installed with new genuine shells.
Starter motor installed.
Timed and triple checked - sorted.
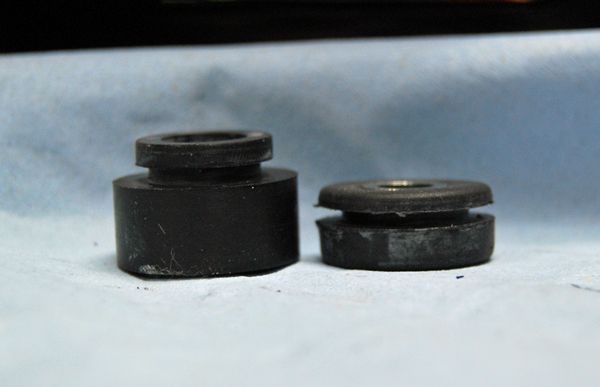
So - back to the battery box, the ZP fitting kit I'd used successfully on my Ltd build was no good for the A4.
Left in the pic is the ZP mounting - Right is the genuine set up - quite a difference!
Being nice and quiet at work gave me time to play with the spaghetti.
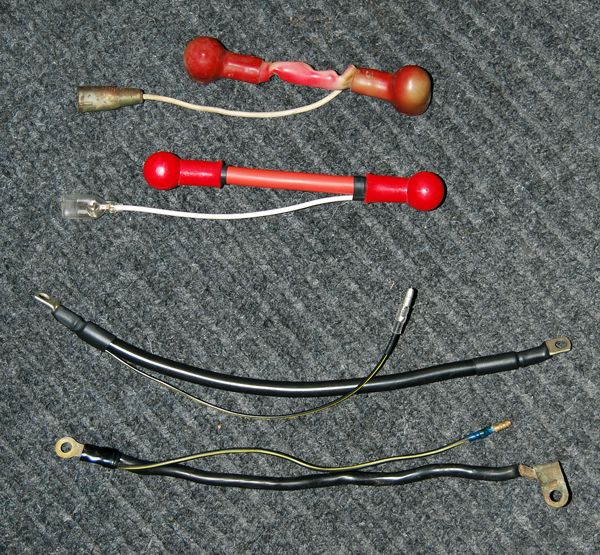
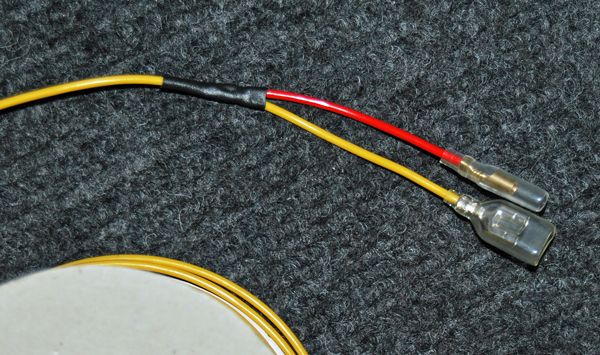
First on the agenda was to knock up the battery leads.
I thought the positive lead was a tad short so I made it a bit longer for ease of installation.
I added 15mm to the earth lead as I wasn't using the top flag connector.
FYI - Red covers were from Auto Electrical Supplies - double bullet female and cover Z1 Enterprises.
This is where spaghetti gets interesting....
I'm using the original Z1 Doremi replacement loom from Dave (saisei) as It's being modified anyway.
If you ever wanted to know the difference between an original Z1 loom and the A4 - this is the main difference.
Ok - so the brown connector is a tad further along the loom and the indicator relay wiring is a tad shorter - but thats not difficult to modify.
They added the extra wiring for the fuse box - and kept it separate!
The original A4 loom I've got had these wires taped up every so many inches with light grey tape!
The red/black wire from the fuse box was spliced into the brown/white - blue wires joint - a simple addition to get fuse protection!
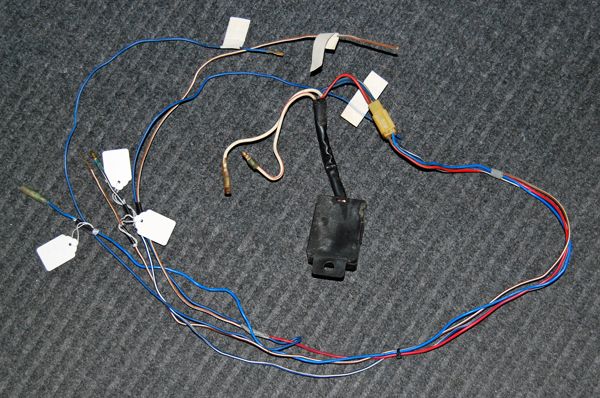
I'm wiring in the 'George' mod before it's fitted to the bike, I've added the extra power supply to make it easier to add Dyna ignition in the future.
With the brown connector and indicator relay wiring moved to their correct positions the bottom half of the loom could be wrapped.
Moving the Brown connector meant shortening the cables, I got the terminals (and ordered replacement white block connectors) from Z1 Enterprises.
With the cables shortened the front of the loom could be wrapped.
I added the 'George' mod wiring and some extra security wiring and were ready to wrap.

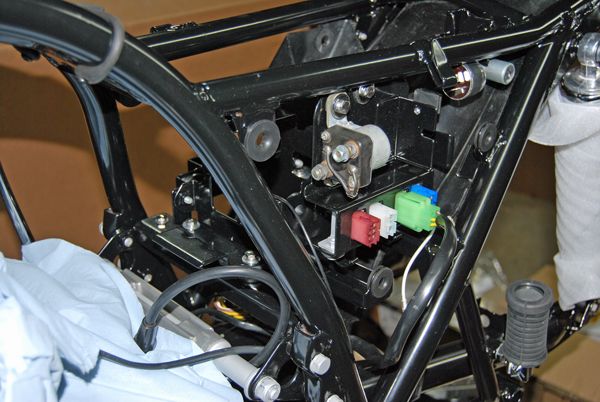
With the correct battery box rubbers fitted the elec plate fitted nicely.
I've junked the separate regulator and rectifier for the ZP combined unit - the attached loom is a tad on the long side but it's ready to go.
Pattern coils for now - I've blown too much of the budget on the motor... Dyna will be fitted later.

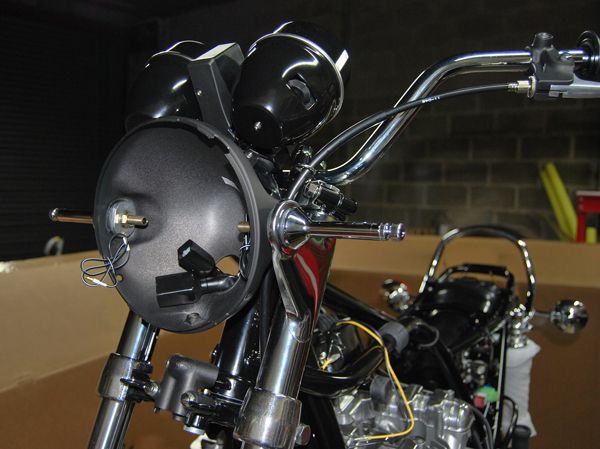
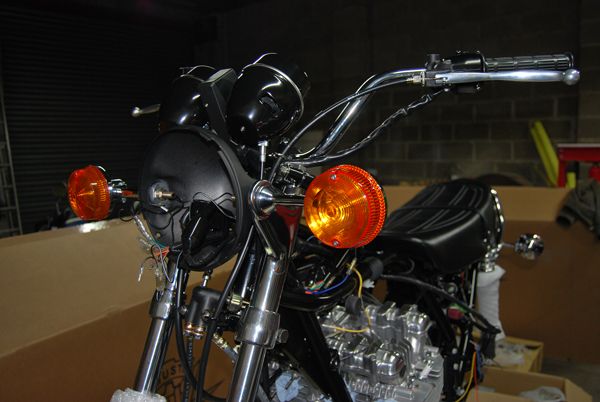
I'm using a H4 pattern headlamp as the original was too far gone, it was very rusty and bent - I'm going to keep the good bits in case I come across a decent used one.
The original indicators have been kept to refurbish at a later date, pattern for now.
The lower fork covers are the originals, the pattern Emgo and PMC don't fit the bottom yoke - I'm looking out for some more to get re-chromed.
Headlamp brackets are Doremi - a tad different to the originals - a bit of 'tweeking' to the offside extra support inside the 'ear' was needed to make it all line up.
Lookin Good!
Progress
November week 4 update.
With the APE bolt drama behind me I pressed on with putting the head on.
All went well - genuine gaskets, studs, ZP nuts & washers - Liska cam chain idler wheels.
The replacement genuine camshafts I scored on USA ebay were installed with new genuine shells.
Starter motor installed.
Timed and triple checked - sorted.
So - back to the battery box, the ZP fitting kit I'd used successfully on my Ltd build was no good for the A4.
Left in the pic is the ZP mounting - Right is the genuine set up - quite a difference!
Being nice and quiet at work gave me time to play with the spaghetti.
First on the agenda was to knock up the battery leads.
I thought the positive lead was a tad short so I made it a bit longer for ease of installation.
I added 15mm to the earth lead as I wasn't using the top flag connector.
FYI - Red covers were from Auto Electrical Supplies - double bullet female and cover Z1 Enterprises.
This is where spaghetti gets interesting....
I'm using the original Z1 Doremi replacement loom from Dave (saisei) as It's being modified anyway.
If you ever wanted to know the difference between an original Z1 loom and the A4 - this is the main difference.
Ok - so the brown connector is a tad further along the loom and the indicator relay wiring is a tad shorter - but thats not difficult to modify.
They added the extra wiring for the fuse box - and kept it separate!
The original A4 loom I've got had these wires taped up every so many inches with light grey tape!
The red/black wire from the fuse box was spliced into the brown/white - blue wires joint - a simple addition to get fuse protection!
I'm wiring in the 'George' mod before it's fitted to the bike, I've added the extra power supply to make it easier to add Dyna ignition in the future.
With the brown connector and indicator relay wiring moved to their correct positions the bottom half of the loom could be wrapped.
Moving the Brown connector meant shortening the cables, I got the terminals (and ordered replacement white block connectors) from Z1 Enterprises.
With the cables shortened the front of the loom could be wrapped.
I added the 'George' mod wiring and some extra security wiring and were ready to wrap.
With the correct battery box rubbers fitted the elec plate fitted nicely.
I've junked the separate regulator and rectifier for the ZP combined unit - the attached loom is a tad on the long side but it's ready to go.
Pattern coils for now - I've blown too much of the budget on the motor... Dyna will be fitted later.
I'm using a H4 pattern headlamp as the original was too far gone, it was very rusty and bent - I'm going to keep the good bits in case I come across a decent used one.
The original indicators have been kept to refurbish at a later date, pattern for now.
The lower fork covers are the originals, the pattern Emgo and PMC don't fit the bottom yoke - I'm looking out for some more to get re-chromed.
Headlamp brackets are Doremi - a tad different to the originals - a bit of 'tweeking' to the offside extra support inside the 'ear' was needed to make it all line up.
Lookin Good!
Progress
Excellent progress Alex! Can't wait to see it, I'll bring my donation of
genuine A4 front calipers over when you're ready for them.
~Jay.
genuine A4 front calipers over when you're ready for them.
~Jay.
Non standard Z900 - purchased from HIGGSPEED - http://www.higgspeed.com/ -
http://www.z1ownersclub.co.uk/forum/vie ... 6a7d5e816c
http://www.z1ownersclub.co.uk/forum/vie ... 6a7d5e816c


December week 1 update
So a quiet weekend allowed for a spot of wheel building.
As discussed on the forum last month – the inner spokes have to be installed first - trust me I know - or rather - I found out the hard way!
Tip: tape the spokes in the direction of installation before you start to assemble - the one that faces the wrong way becomes a royal pain in the arse - take em out and start again!
The new rim was marked with a heavy point, I put the hubs onto a balancer and marked the heavy point, when I started lacing these were as near opposite as I could get them.
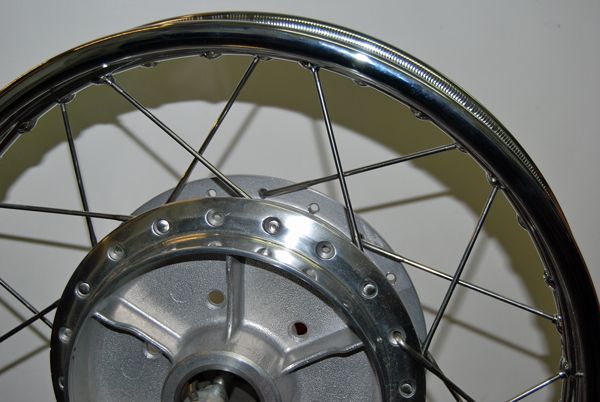
The outer spokes can be fed in one at a time, leaving the inner spokes very loose gives enough space to stop the outer spoke scratching the rim.
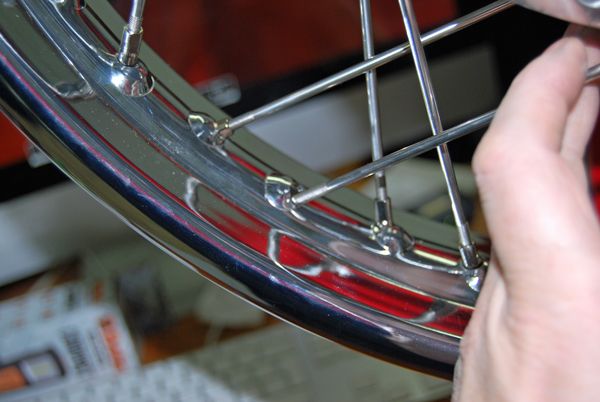
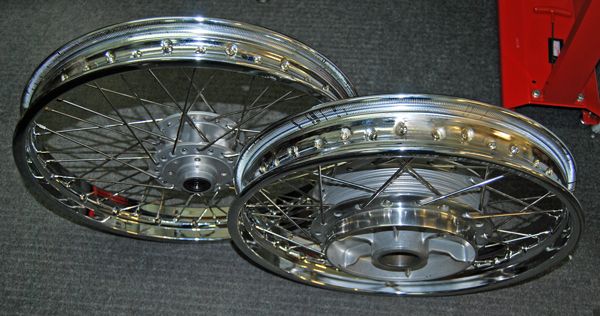
One set of re-spoked wheels – took about an hour once I’d worked out the orientation.
Rims are straight - but will be checked and tensioned by an expert just to be on the safe side.
Pattern rear brake shoes where installed, I didn’t trust the rusty old springs so a new set of genuine ones went in.
Pivot was re-zinced by Mikey – good to go.

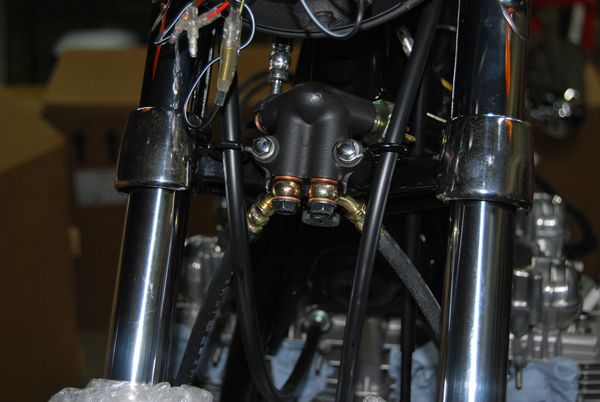
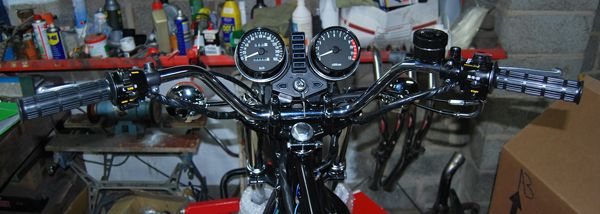
Pattern front brake master cylinder with genuine lines were next, genuine throttle cables and grips, pattern Z1 switchgear – old switchgear has been kept for future referb.
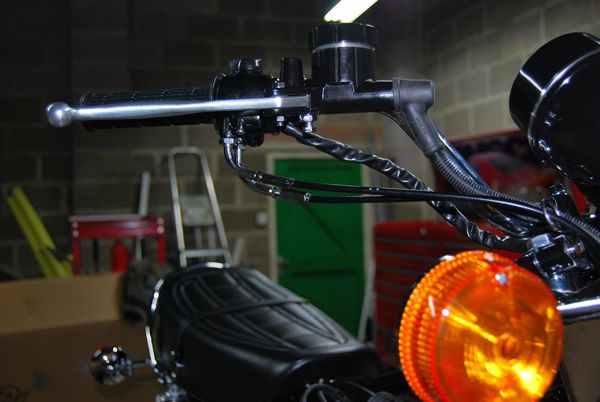
Original banjo bolts were good to go again but were in desperate need of re-plating – a set of genuine Kawasaki update parts will do until I can get the old ones plated.
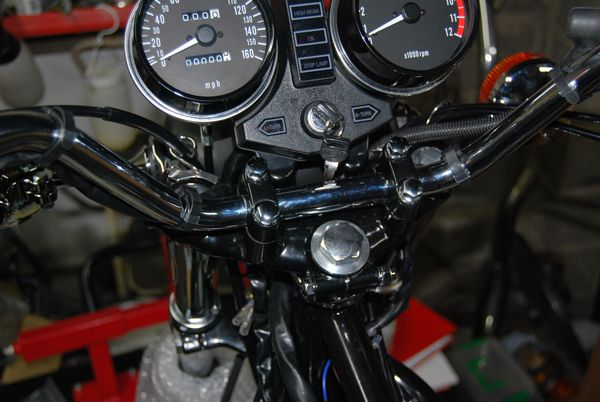
Genuine Speedo and rev counter cables.
Ticking jobs off the list is great - it's beginning to look right.
Decent progress has been made, the modified loom is in, everything connects up ok - just need to orientate it to make everything line up as it should.
Hence the cable ties are only fitted once it does.
Received the stator from Dave (saisei) so got on with fitting up the housing.
Such Fun
So a quiet weekend allowed for a spot of wheel building.
As discussed on the forum last month – the inner spokes have to be installed first - trust me I know - or rather - I found out the hard way!
Tip: tape the spokes in the direction of installation before you start to assemble - the one that faces the wrong way becomes a royal pain in the arse - take em out and start again!
The new rim was marked with a heavy point, I put the hubs onto a balancer and marked the heavy point, when I started lacing these were as near opposite as I could get them.
The outer spokes can be fed in one at a time, leaving the inner spokes very loose gives enough space to stop the outer spoke scratching the rim.
One set of re-spoked wheels – took about an hour once I’d worked out the orientation.
Rims are straight - but will be checked and tensioned by an expert just to be on the safe side.
Pattern rear brake shoes where installed, I didn’t trust the rusty old springs so a new set of genuine ones went in.
Pivot was re-zinced by Mikey – good to go.
Pattern front brake master cylinder with genuine lines were next, genuine throttle cables and grips, pattern Z1 switchgear – old switchgear has been kept for future referb.
Original banjo bolts were good to go again but were in desperate need of re-plating – a set of genuine Kawasaki update parts will do until I can get the old ones plated.
Genuine Speedo and rev counter cables.
Ticking jobs off the list is great - it's beginning to look right.
Decent progress has been made, the modified loom is in, everything connects up ok - just need to orientate it to make everything line up as it should.
Hence the cable ties are only fitted once it does.
Received the stator from Dave (saisei) so got on with fitting up the housing.
Such Fun
December week 1.5 update.
The oil cooler that came with the bike was a bit damaged, after bending the pipework straight I made a start on the fins.

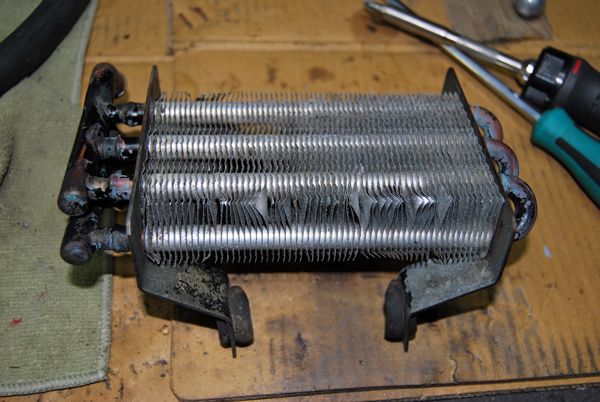
Using a large veg knife and fine screwdriver it was possible to tease the fins back into shape.
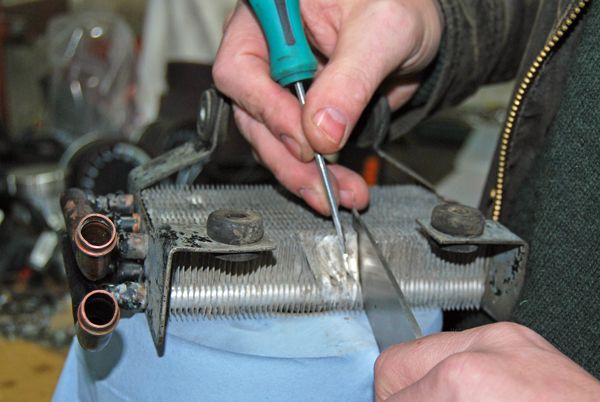
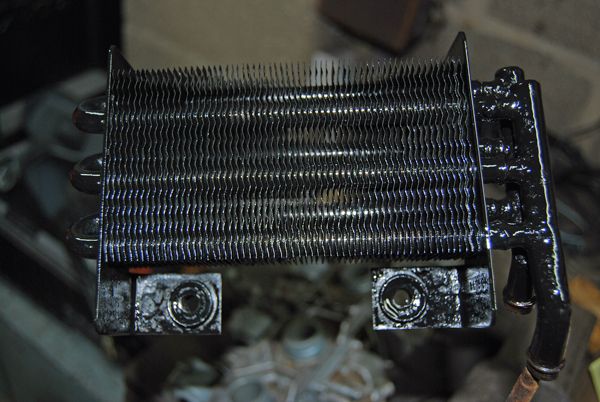
After a couple of hours of fiddling the coolers ready for blasting and paint.

The bracket is galvanised, it reacted with the first coat of high temp paint - I'll blast the paint off again and try again with the cooler hot.
Oh and remove the mounting rubbers this time!
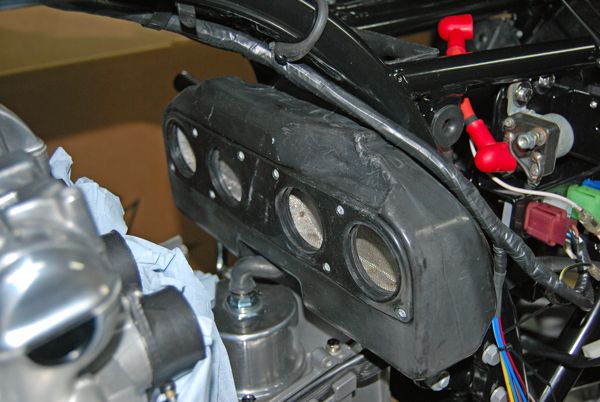
I'm a bit disappointed with the look of the airbox, a tad faded - I'll try the hot linsead oil trick - it may work.
Chain tension blocks got a coat of paint - axle run got a coat of marine black.
Bottom shock and chain tension blocks got polished stainless bolts from Surplus Supplies.
Shopping for tyres next - I'm hoping to get it on it's wheels for the new year
The oil cooler that came with the bike was a bit damaged, after bending the pipework straight I made a start on the fins.
Using a large veg knife and fine screwdriver it was possible to tease the fins back into shape.
After a couple of hours of fiddling the coolers ready for blasting and paint.
The bracket is galvanised, it reacted with the first coat of high temp paint - I'll blast the paint off again and try again with the cooler hot.
Oh and remove the mounting rubbers this time!
I'm a bit disappointed with the look of the airbox, a tad faded - I'll try the hot linsead oil trick - it may work.
Chain tension blocks got a coat of paint - axle run got a coat of marine black.
Bottom shock and chain tension blocks got polished stainless bolts from Surplus Supplies.
Shopping for tyres next - I'm hoping to get it on it's wheels for the new year
-
Is Vic There
- Hardcore

- Posts: 1460
- Joined: 8th Nov 2011
- Location: Brisbane, Australia.
Great thread, some tips I'll use on my build, well done.
Z1000R ELR, Z1100R ELR, GPz900R A1, GPz750 Turbo, Norton F1, Harris Mag 2, Harris Mag 5, Yamaha YZR750SP, Triumph Steve McQueen, Suzuki RGV250 Sheene Rep, Suzuki RG500 Walter Wolf, Suzuki RG250 Walter Wolf, Aprilia RS250, Yamaha YL1, RG500. H**** NS400.
-
Ginger Bear

- Hardcore
- Posts: 6850
- Joined: 16th Dec 2008
- Location: In the Dark.
- Contact:


A nice American guy demonstrating how he does it here - https://www.youtube.com/watch?v=ZQDBTeIObak
~Jay.
~Jay.
Non standard Z900 - purchased from HIGGSPEED - http://www.higgspeed.com/ -
http://www.z1ownersclub.co.uk/forum/vie ... 6a7d5e816c
http://www.z1ownersclub.co.uk/forum/vie ... 6a7d5e816c
I use a hot air gun, on most old faded plastic parts. But don't get too close, and mind the paint work if working close to painted body work.. most new cars have plastic bumpers, and some not painted. I have seen lots of unpainted bumpers, with the corner pushed in, and with a little time and know how, could be pushed back out..
if your looking for a heat gun.. don't buy the most expansive ones ( or the cheapest one ), I bought a dewalt and it lasted 4 weeks.. got my money back and bought a black & decker ( with a 2 year guarantee ) same thing... a few years a go, there was a small company, called dewalt ( the yellow chappy) . they were bought out by black & decker, and revamped.. so black & decker own dewalt.. if you hold the dewalt & black & decker side by side there the same, just different colours..
when you use heat to any plastic, what you are doing is heating it up, and bringing the fat to the top.( because there's new plastic under the oxidation plastic ) plastic has a memory, and it's not only making it look like new, but returning it back to its natural position/state. lesson over..
Hinckley wrote:December week 1.5 update.
The oil cooler that came with the bike was a bit damaged, after bending the pipework straight I made a start on the fins.
Using a large veg knife and fine screwdriver it was possible to tease the fins back into shape.
After a couple of hours of fiddling the coolers ready for blasting and paint.
The bracket is galvanised, it reacted with the first coat of high temp paint - I'll blast the paint off again and try again with the cooler hot.
Oh and remove the mounting rubbers this time!
I'm a bit disappointed with the look of the airbox, a tad faded - I'll try the hot linsead oil trick - it may work.
Chain tension blocks got a coat of paint - axle run got a coat of marine black.
Bottom shock and chain tension blocks got polished stainless bolts from Surplus Supplies.
Shopping for tyres next - I'm hoping to get it on it's wheels for the new year
On the fins. you can buy a fin comb..on .ebay. it's metal and puts them all in line..
Who is online
Users browsing this forum: No registered users and 20 guests