I only meassured them up, because I couldn't get the first one into the caliper at all (no matter of force would have done that).
Oh, I only have a minilathe as well... just as they say, take very, very gentle cuts and your time.
The Brembo P05s and P08s have Teflon-coated ally pistons. Ally would make the heat question interesting, as it expands a lot more than steel. And the last thing you want would be a brake that seizes, when hot.
Cheers,
Greg
Hello Guest User,
Please feel free to have a look around the forum but be aware that as an unregistered guest you can't see all of it and you can't post.
To access these 'Registered Users Only' areas simply register and login.
Please feel free to have a look around the forum but be aware that as an unregistered guest you can't see all of it and you can't post.
To access these 'Registered Users Only' areas simply register and login.
Z1100ST Resto +
Moderators: KeithZ1R, chrisu, paul doran, Taffus
vduk wrote: Has anyone ever made ally pistons? I can't remember taking any out of a bike. The Brembo ones are Teflon coated; I wonder if they're ally? Haven't got any here currently hmmm
AP run hard anodised in their twin piston calipers, the other calipers I don't know about but expect they do. I have made some for my 4 pots and will make some for my 6 pots during the summer. Better than st/st as no electrolytic reaction.
Rich
diplomacy is a form of art - I was never any good at art
diplomacy is a form of art - I was never any good at art
-
RALPHARAMA

- Area Rep.

- Posts: 3407
- Joined: 19th May 2007
- Location: Pensford, Somerset
- Contact:
Thanks to Piggy for letting me have head Rob was selling and thanks to Rob for being kind enough to deliver it on Saturday morning.
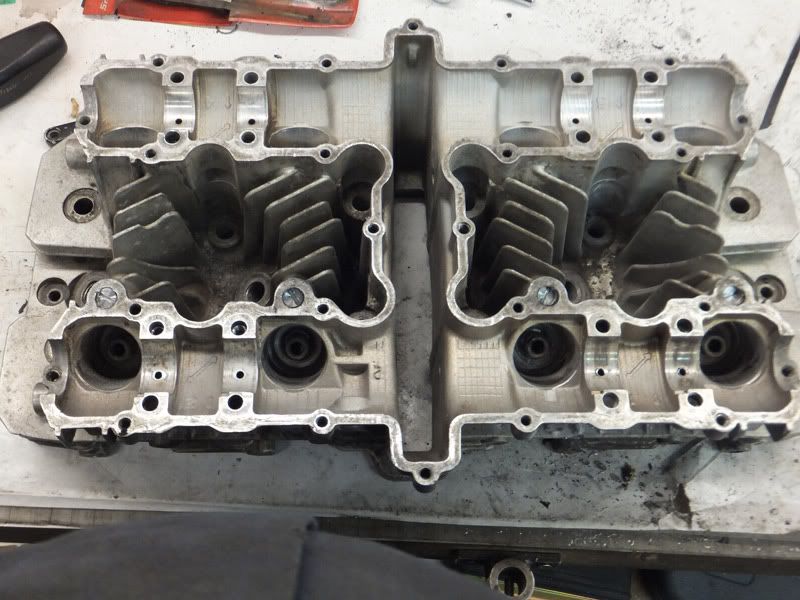
It was very 'brown' inside so I spent some time cleaning it with paint stripper and brake cleaner. It's much better than it was. I couldn't mask up for bead blasting cos one of the valve guides has the bottom broken, but this is no bother as I'm having new ones fitted anyway; I still too cowardly to have a go myself besides I've measured up the oven and it won't fit.
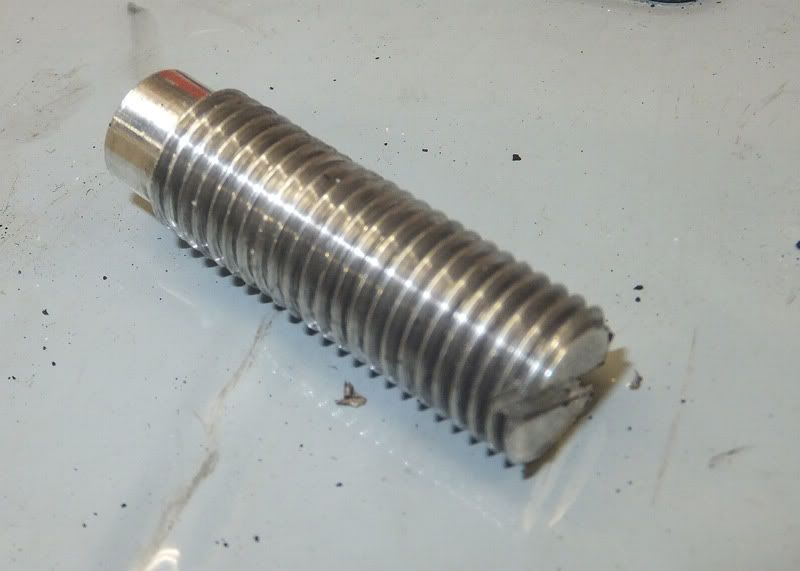
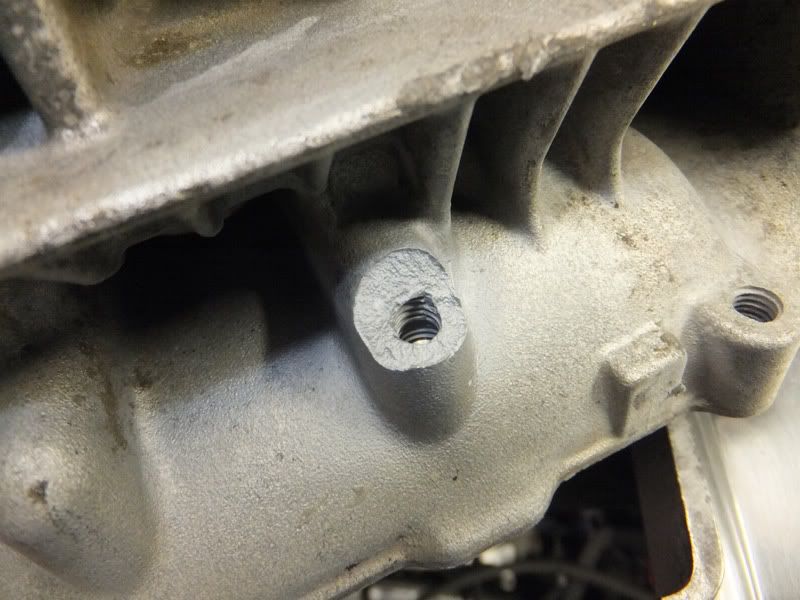
The new head was from a Yankie bike so has the holes the tree huggers like from the exhaust ports up into the cam cover. I scrounged some half inch ally bar from my friend and machined it into M10 x 1.25 plugs.
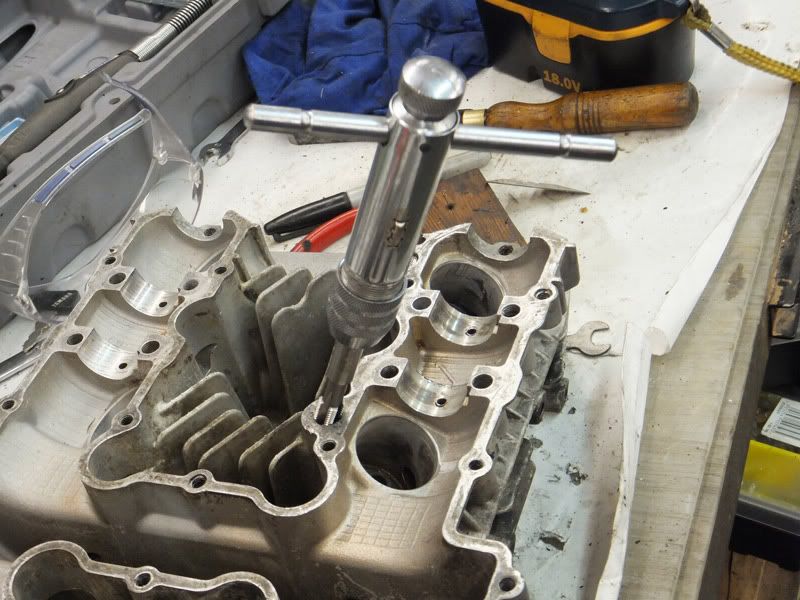
I drilled out the holes with a suitable tapping drill and cut threads as deeply as the tap would go.
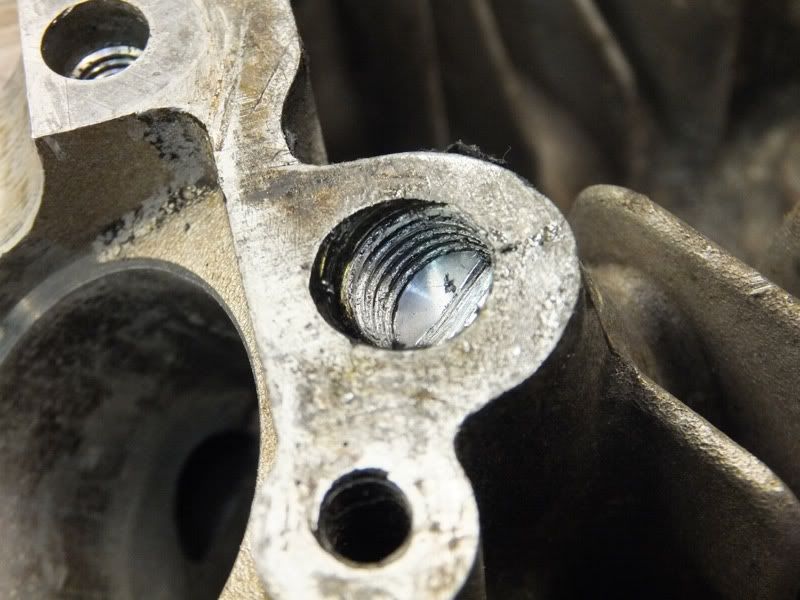
I then screwed the plugs in with a good thread full of Loctite 638 retaining compound - so they'll not be going anywhere soon!
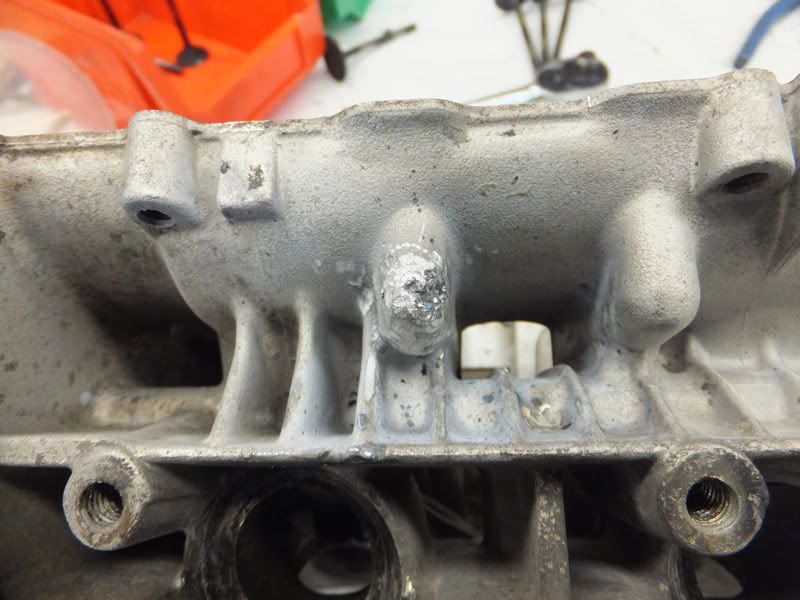
Clearly some dumbfuck in the past has tried to use a bolt that was too long in one of the cam caps as there was a lump hit off.
No problem - just clean it up with my new toy - the Soda blasting Paraffin gun and then blow some sparks at it Nearly finished and the bloody argoshield bottle ran out!!!!
I took the head up to Gary Bowden at Bowden Auto Engineering this morning for him to fit the guides and dropped in at BOC on my way home to get another Argon bottle. The bloke pointed to my new bottle and fucked off leaving me to struggle in and out of my van with the bottles unaided. I use full size bottles and they're firkin heavy!!! Had I slipped on the soggy concrete and hit the valve out the bastard thing would have gone into orbit - they have approx 3000PSI in 'em when full; then BOC charge a handling fee of £15 !!!! Grrrr
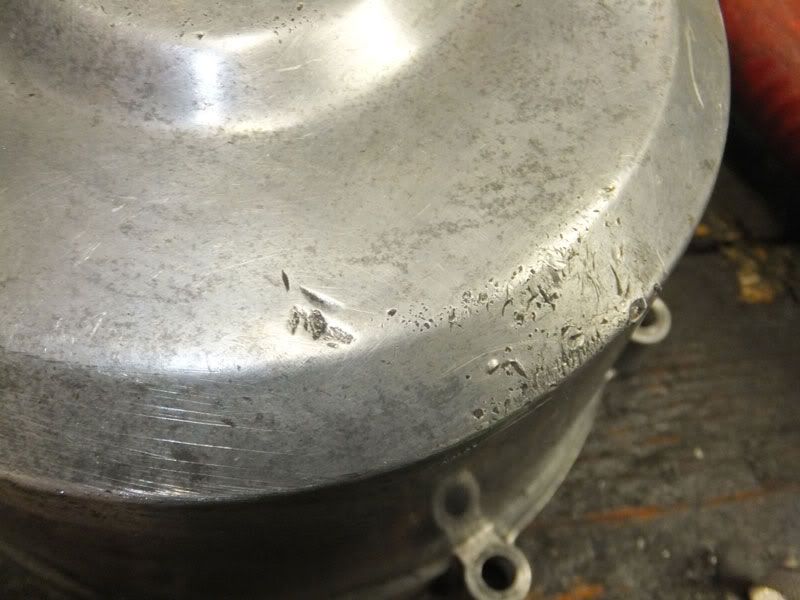
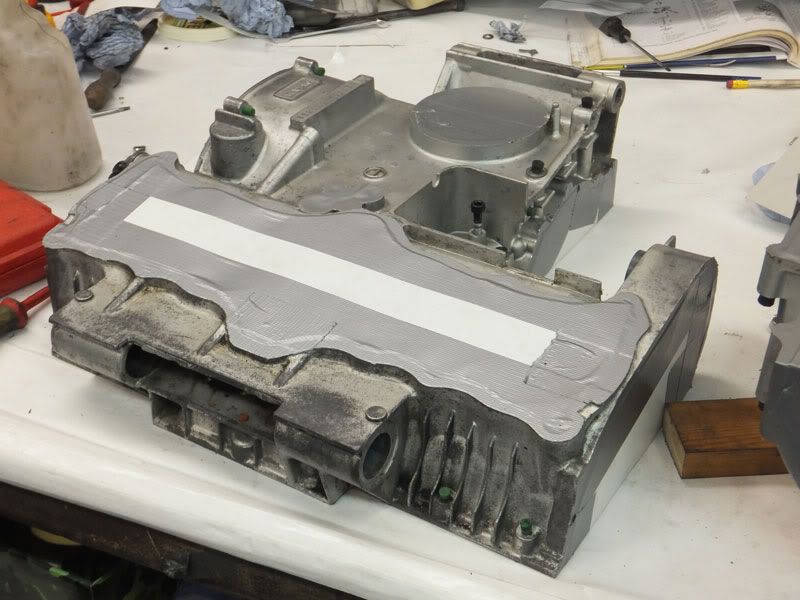
I started doing a bit of casing polishing last night. At first I thought I had started polishing the wrong ignition cover as it was broken, then I realised that both were broken!!! Problem is when stuff is just cracked it is virtually impossible to weld as so much crap gets into the crack and you just can't get it out. I tried and failed to weld up the final drive casing that was cracked, but tigging ally that's not perfectly clean is a total waste of expensive gas and time. Better welders than me might fair better, but that's been my experience. I got on better with the deeply scratched alternator casing, but I need some properly small wheels to get into some corners, so I'll have to spend some more dosh I guess. I'd do far better to pay Mikey, but I have this obsession with doing as much of the work as I can, and that goes as far as all the masking for the powder coating and all the polishing for chroming. Silly really, cos I hate polishing, but I do love the feeling of pride when I have finished
It was very 'brown' inside so I spent some time cleaning it with paint stripper and brake cleaner. It's much better than it was. I couldn't mask up for bead blasting cos one of the valve guides has the bottom broken, but this is no bother as I'm having new ones fitted anyway; I still too cowardly to have a go myself
The new head was from a Yankie bike so has the holes the tree huggers like from the exhaust ports up into the cam cover. I scrounged some half inch ally bar from my friend and machined it into M10 x 1.25 plugs.
I drilled out the holes with a suitable tapping drill and cut threads as deeply as the tap would go.
I then screwed the plugs in with a good thread full of Loctite 638 retaining compound - so they'll not be going anywhere soon!
Clearly some dumbfuck in the past has tried to use a bolt that was too long in one of the cam caps as there was a lump hit off.
No problem - just clean it up with my new toy - the Soda blasting Paraffin gun
I took the head up to Gary Bowden at Bowden Auto Engineering this morning for him to fit the guides and dropped in at BOC on my way home to get another Argon bottle. The bloke pointed to my new bottle and fucked off leaving me to struggle in and out of my van with the bottles unaided. I use full size bottles and they're firkin heavy!!! Had I slipped on the soggy concrete and hit the valve out the bastard thing would have gone into orbit - they have approx 3000PSI in 'em when full; then BOC charge a handling fee of £15 !!!! Grrrr
I started doing a bit of casing polishing last night. At first I thought I had started polishing the wrong ignition cover as it was broken, then I realised that both were broken!!! Problem is when stuff is just cracked it is virtually impossible to weld as so much crap gets into the crack and you just can't get it out. I tried and failed to weld up the final drive casing that was cracked, but tigging ally that's not perfectly clean is a total waste of expensive gas and time. Better welders than me might fair better, but that's been my experience. I got on better with the deeply scratched alternator casing, but I need some properly small wheels to get into some corners, so I'll have to spend some more dosh I guess.
Ralph Ferrand
Z1000A1 (1977), Z1300A5 (1983), Z900A4 (1976) GPZ1100 Unitrak (1983)(project), RD250B (1975)(project), ZRX1200R (2005) DT175MX (1981) YZF R6 (1999)
http://www.bikerstoolbox.co.uk
Z1000A1 (1977), Z1300A5 (1983), Z900A4 (1976) GPZ1100 Unitrak (1983)(project), RD250B (1975)(project), ZRX1200R (2005) DT175MX (1981) YZF R6 (1999)
http://www.bikerstoolbox.co.uk
-
RALPHARAMA
- Area Rep.
- Posts: 3407
- Joined: 19th May 2007
- Location: Pensford, Somerset
- Contact:
I've been growling Humbug over the holiday, but have taken the time off to play with the shaftie, when not damaging my liver 
HAd another play with the Bicarbonate of Soda again on the head and clutch outer bit :
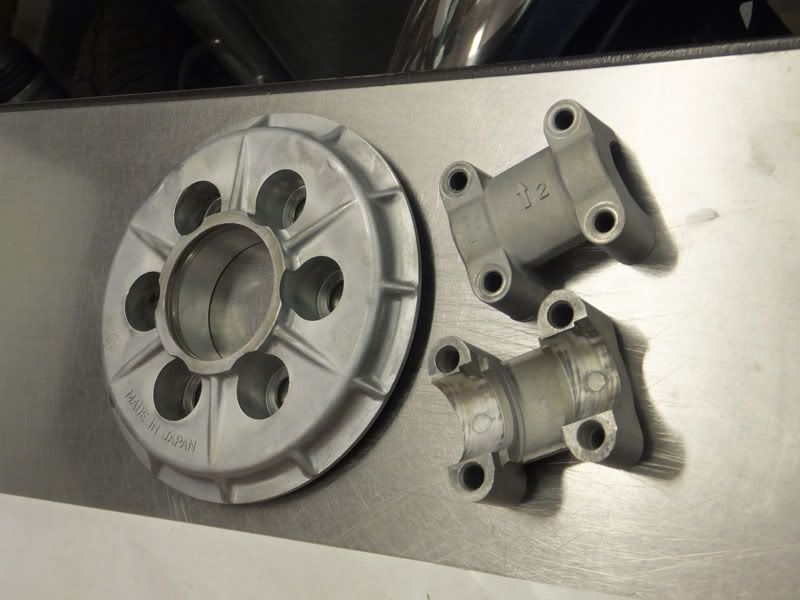
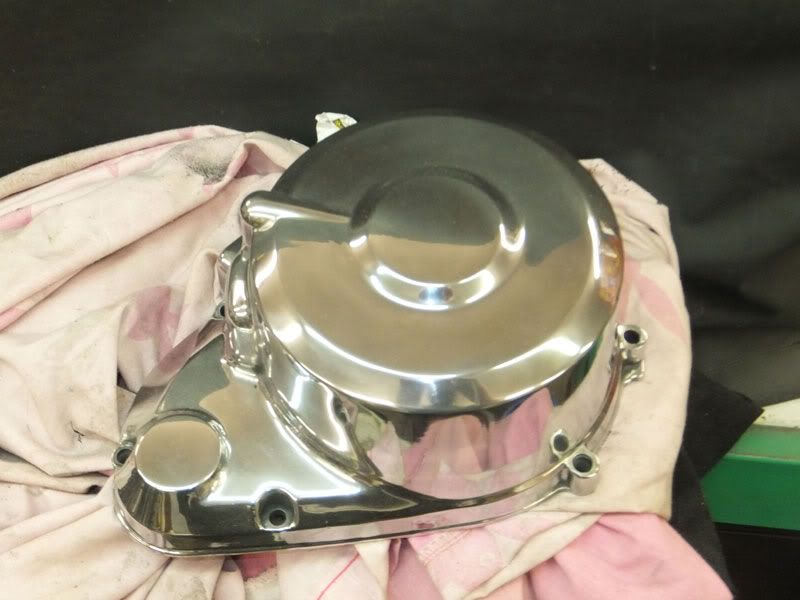
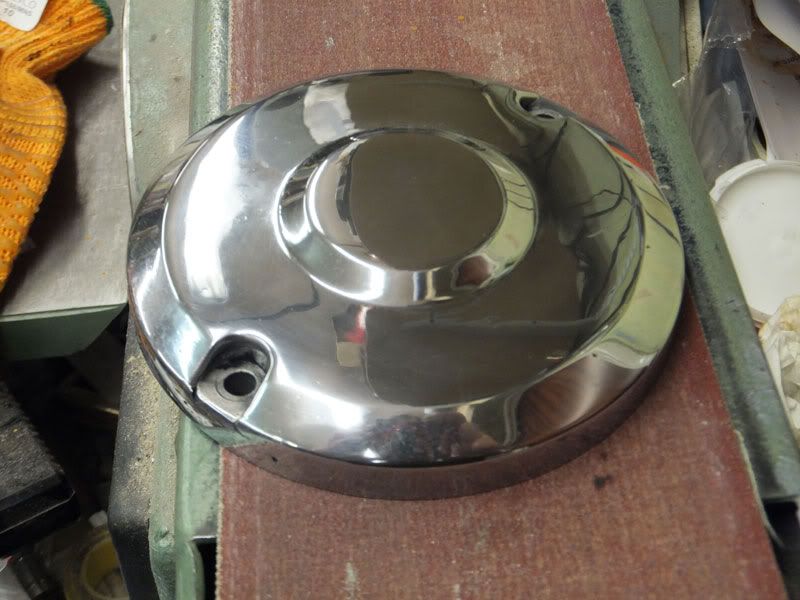
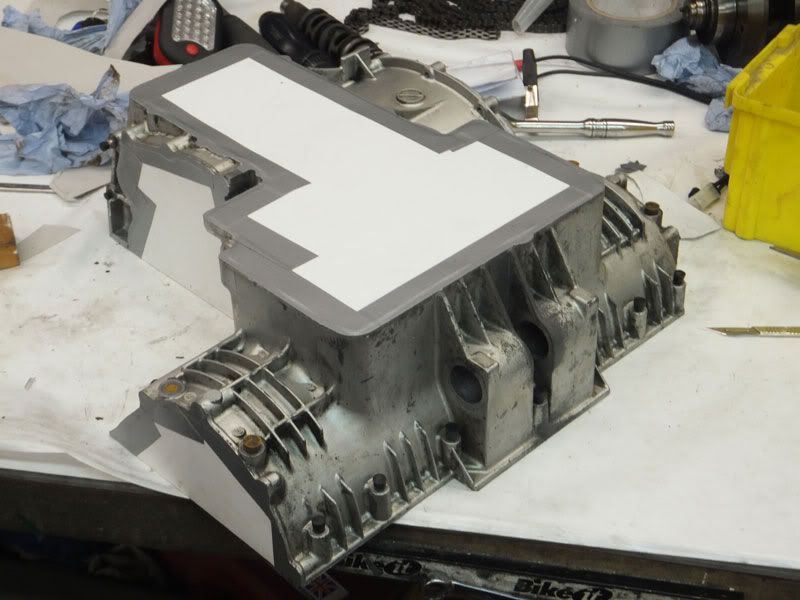
I decided to have a go at some polishing; not a job I especially enjoy, but I do like the satisfaction of doing as much of the restoration as I possibly can. It's hugely tempting to give such jobs to Mikey who's much better at it than me Here's some pics of the alternator casing I dug out to replace the really buggered one that came with the bike, though I still might have a crack at welding that one up
It could really do with a bit more attention, but I've had a guts full of polishing for the time being
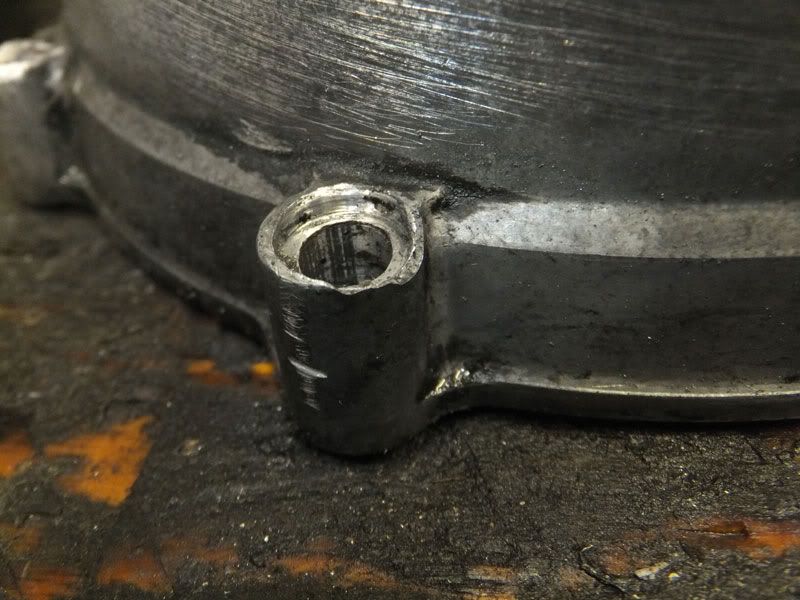
I started polishing the ignition cover I had dug out and then realized, after putting in loads of effort, that it was also buggered in the same place. I decided to have a go at tigging it up, but didn't hold much hope, given that amount of shit trapped in the crack. The first one was no good, but the second was near enough to be used, until I manage to come across a perfect one

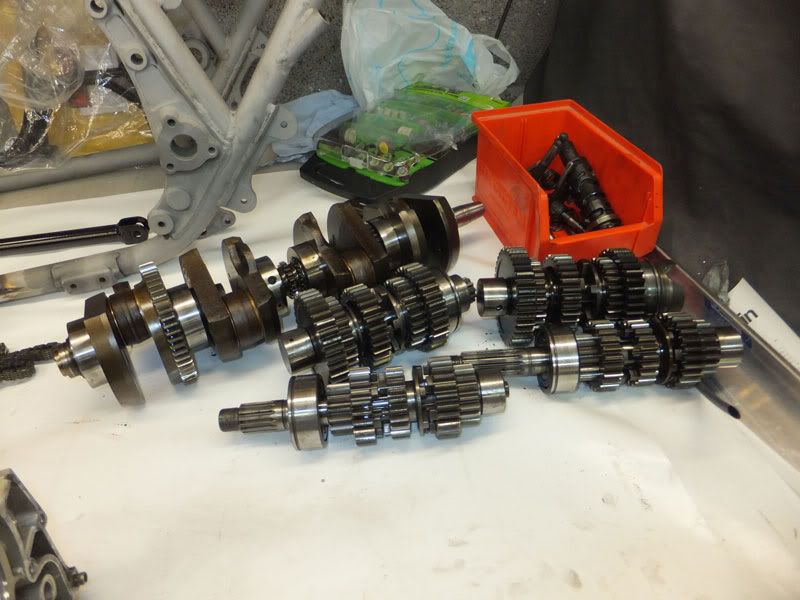
This bike probably didn't have an oil change for a long time; you don't often see a gear selector fork with this much wear!
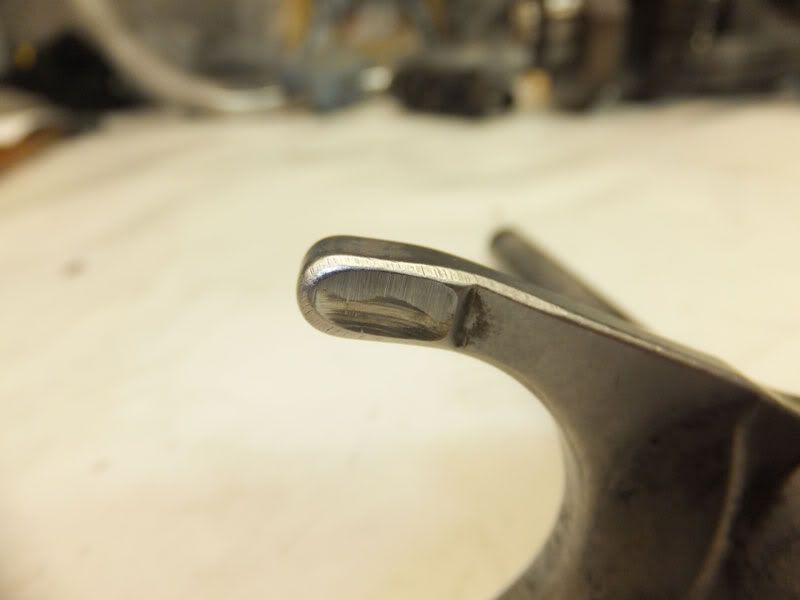
All the forks were the same. The teeth on the gears show quite a bit of wear.
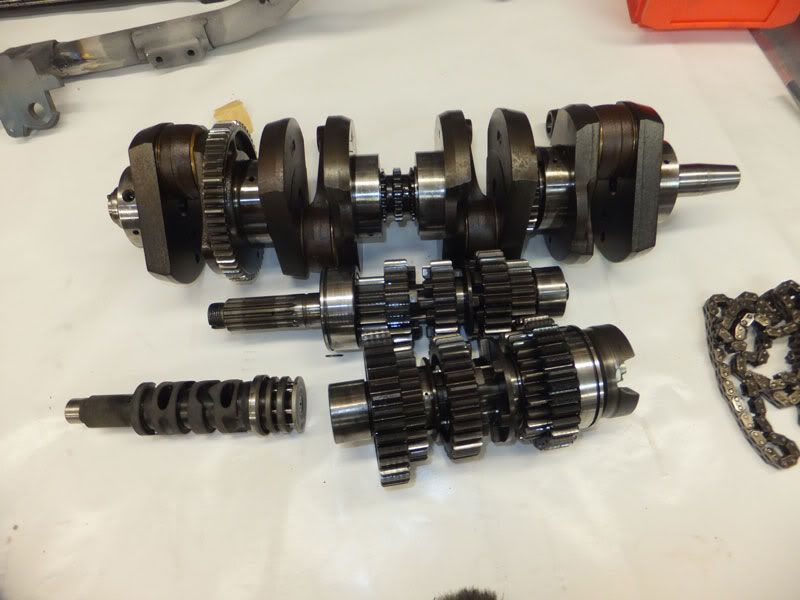
I striped my 'spare' donor J gearbox, and the gearbox part have a lot less wear, but the shafts are different. I'll probably putt the gears off the shafts and see if the gears are the same and if they are I'll swop them.
The crank cases were sooo filthy it was un-real! Initially I gave them a good bath in Jizer in the parts washer. I then applied loads of paint stripper to them and then washed it out with water. I then blasted them with standard thinners using my el-cheapo spray gun.
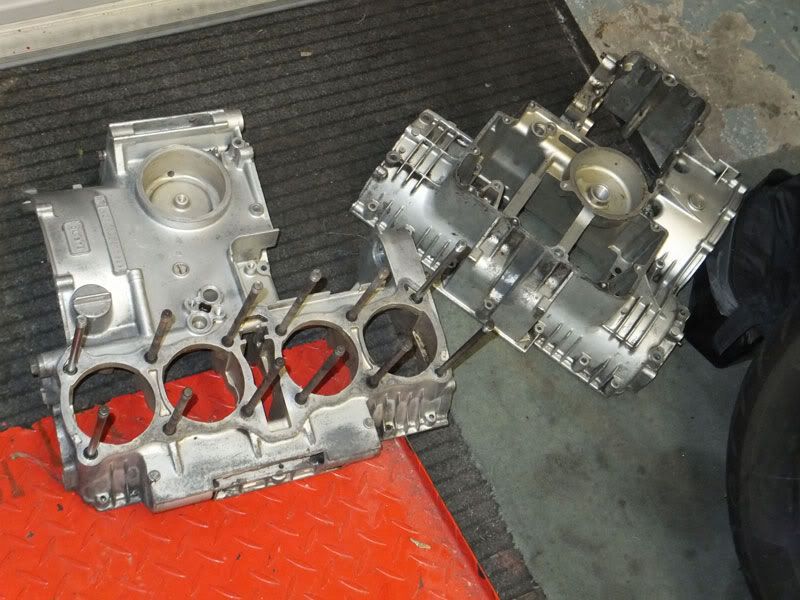
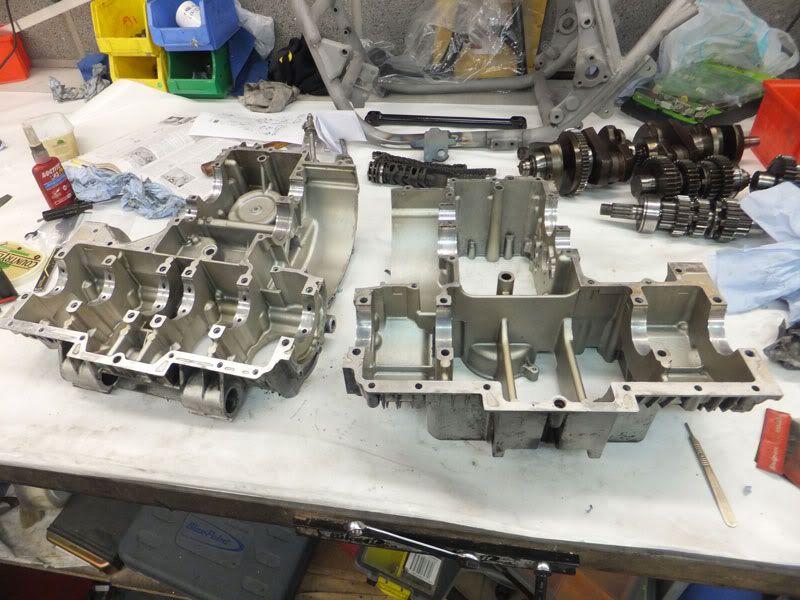
I then masked them up for bead blasting
More later
HAd another play with the Bicarbonate of Soda again on the head and clutch outer bit :
I decided to have a go at some polishing; not a job I especially enjoy, but I do like the satisfaction of doing as much of the restoration as I possibly can. It's hugely tempting to give such jobs to Mikey who's much better at it than me
It could really do with a bit more attention, but I've had a guts full of polishing for the time being
I started polishing the ignition cover I had dug out and then realized, after putting in loads of effort, that it was also buggered in the same place. I decided to have a go at tigging it up, but didn't hold much hope, given that amount of shit trapped in the crack. The first one was no good, but the second was near enough to be used, until I manage to come across a perfect one
This bike probably didn't have an oil change for a long time; you don't often see a gear selector fork with this much wear!
All the forks were the same. The teeth on the gears show quite a bit of wear.
I striped my 'spare' donor J gearbox, and the gearbox part have a lot less wear, but the shafts are different. I'll probably putt the gears off the shafts and see if the gears are the same and if they are I'll swop them.
The crank cases were sooo filthy it was un-real! Initially I gave them a good bath in Jizer in the parts washer. I then applied loads of paint stripper to them and then washed it out with water. I then blasted them with standard thinners using my el-cheapo spray gun.
I then masked them up for bead blasting
More later
Ralph Ferrand
Z1000A1 (1977), Z1300A5 (1983), Z900A4 (1976) GPZ1100 Unitrak (1983)(project), RD250B (1975)(project), ZRX1200R (2005) DT175MX (1981) YZF R6 (1999)
http://www.bikerstoolbox.co.uk
Z1000A1 (1977), Z1300A5 (1983), Z900A4 (1976) GPZ1100 Unitrak (1983)(project), RD250B (1975)(project), ZRX1200R (2005) DT175MX (1981) YZF R6 (1999)
http://www.bikerstoolbox.co.uk
-
RALPHARAMA
- Area Rep.
- Posts: 3407
- Joined: 19th May 2007
- Location: Pensford, Somerset
- Contact:
I ordered some mudguards and a seat from a breaker in the States. The seat hadn't looked great but I thought that the base would be good. They arrived yesterday, but despite Mr Osbourne doing me up the rear for nearly £40 before delivery, the seat wasn't great. I cut the cover off as it was proper fecked.

The mudguards were great, really heavy, very few dings and virtually no sign of tin worm.

I treated treated the base to some Jenolite. I then washed it off and bead blasted it.
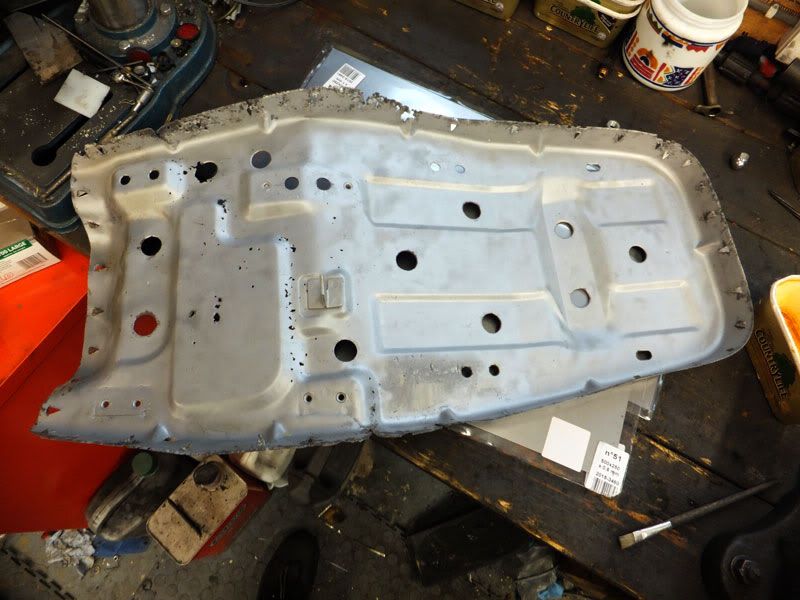
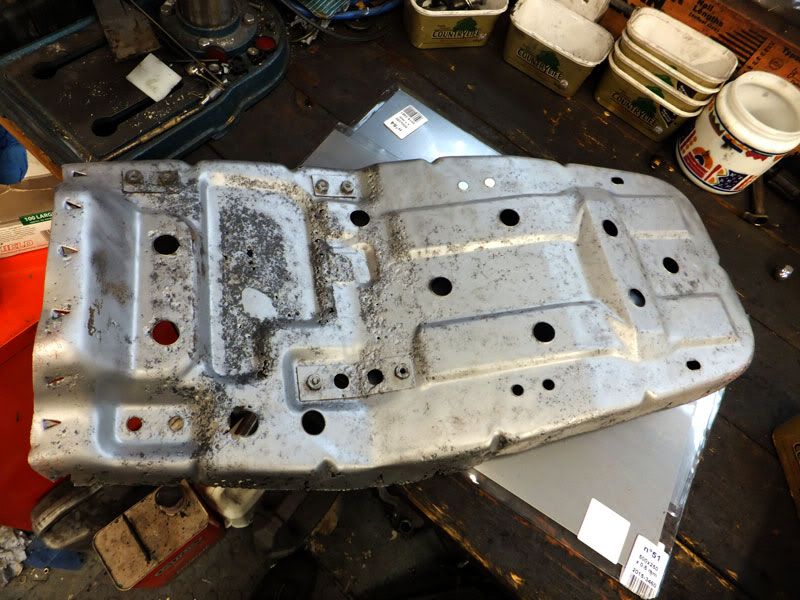
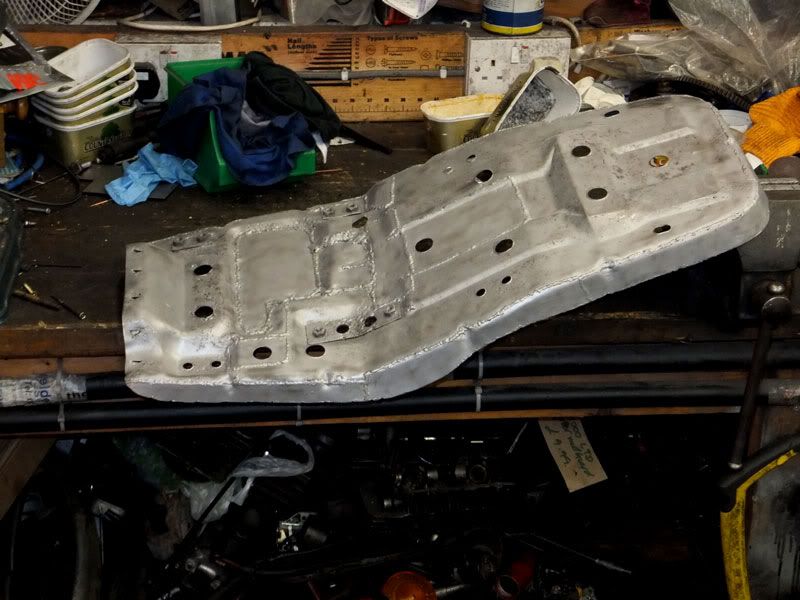
As you can probably see from the pix it's a rotten as a carrot
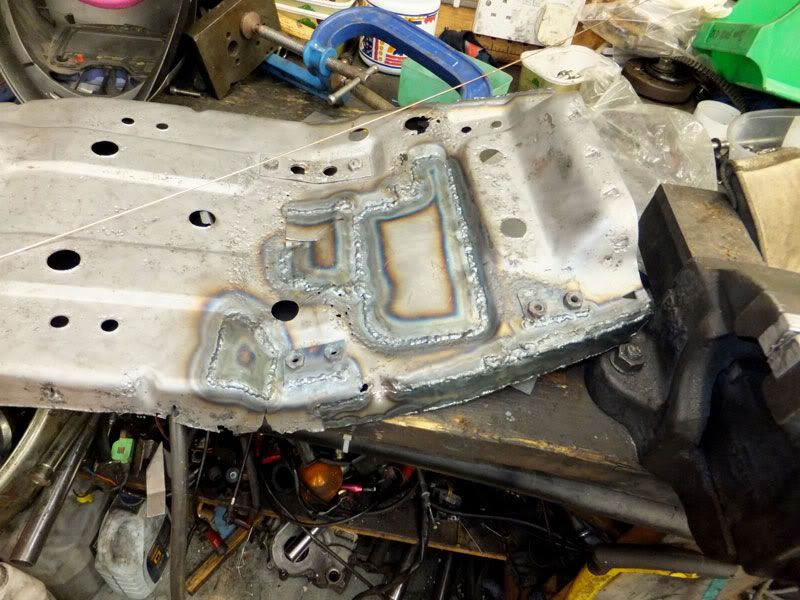
It has, however, retained it's shape so I should be able make it solid with many happy hours of tiggin' . I have made a start today, but am feeling quite unwell from the welding fumes. Note to self 'install extraction on welding bench'.
Praps I'll put a fan in front of the window tomorrow
The mudguards were great, really heavy, very few dings and virtually no sign of tin worm.
I treated treated the base to some Jenolite. I then washed it off and bead blasted it.
As you can probably see from the pix it's a rotten as a carrot
It has, however, retained it's shape so I should be able make it solid with many happy hours of tiggin' . I have made a start today, but am feeling quite unwell from the welding fumes. Note to self 'install extraction on welding bench'.
Praps I'll put a fan in front of the window tomorrow
Ralph Ferrand
Z1000A1 (1977), Z1300A5 (1983), Z900A4 (1976) GPZ1100 Unitrak (1983)(project), RD250B (1975)(project), ZRX1200R (2005) DT175MX (1981) YZF R6 (1999)
http://www.bikerstoolbox.co.uk
Z1000A1 (1977), Z1300A5 (1983), Z900A4 (1976) GPZ1100 Unitrak (1983)(project), RD250B (1975)(project), ZRX1200R (2005) DT175MX (1981) YZF R6 (1999)
http://www.bikerstoolbox.co.uk


-
Bill Newman

- 100Club

- Posts: 459
- Joined: 27th May 2007
- Location: Ipswich
kz900B1 wrote:I am enjoying seeing this one progressing Ralph.Must be harder to get good used bits for these Especially the tinware .Keep it up and well done
Ditto that thought. Ralph - respect to you for getting into that bike like you have. I've just stripped mine and am cursing a couple of missing rubbers and a bit of "light" bodgery. Your project makes me look a wimp!!!
Look forward to seeing it in 2012.
Bill
-
RALPHARAMA
- Area Rep.
- Posts: 3407
- Joined: 19th May 2007
- Location: Pensford, Somerset
- Contact:
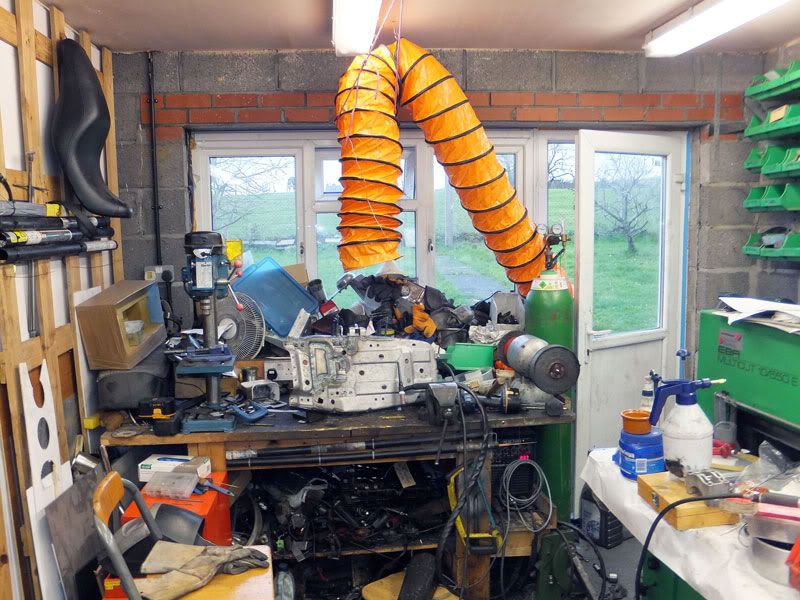
After making myself sooo ill with welding fumes yesterday, my first job smornin was to head to Machine Mart to get a fume extractor. I looked 'em up on my iPhone form the comfort of our pit and £120ish seemed OK, so I rang up to ensure they had one in stock, jumped into the rusty old Vito and trucked on down. Whilst the man dug one out the extractor I grabbed some welding clamps. The chap then asked if I wanted a pipe but I said that surely it's included - it's shown in the pictures on the web site and catalogue; the pipe was a shed load more money, but as I was still coughing from the previous session I stuck my hand deep and meaningful into my company debit card.
The welding has been pretty tough as I am trying to weld to steel full of holes and varying thickness with all the corrosion, but I'm doing my best I always seem to be welding crap, very rarely nice new materials
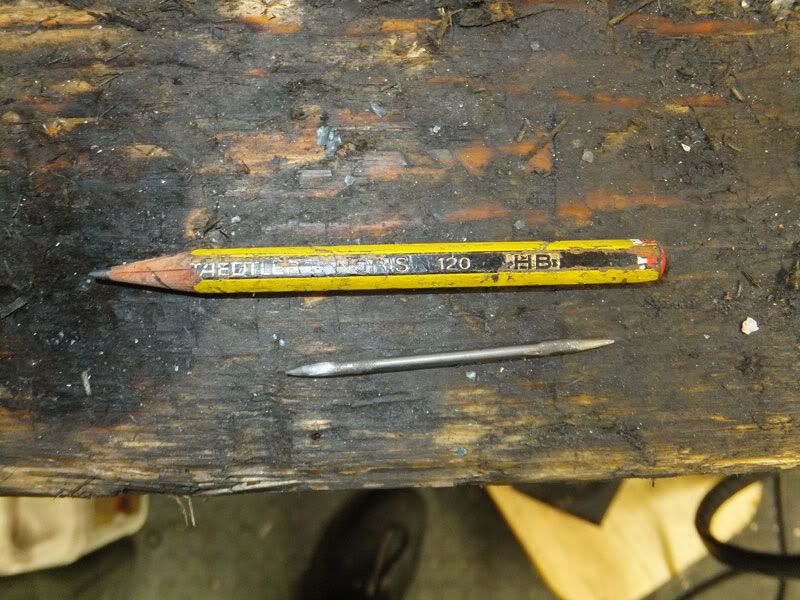
This tungsten seems to be getting a tad short, but I don't throw them away til they're really short
Hopefully I'll finish it tomorrow Here's the culmination of yesterdays and todays work:
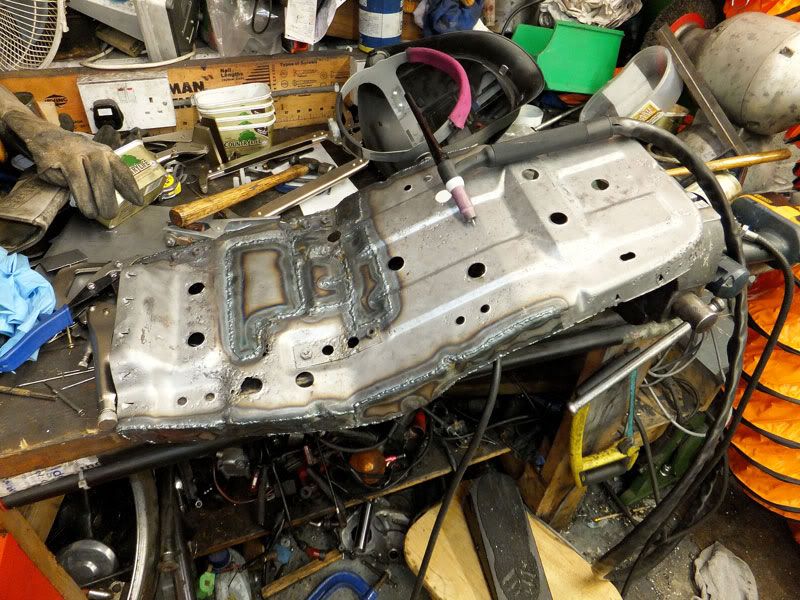
The welding has been pretty tough as I am trying to weld to steel full of holes and varying thickness with all the corrosion, but I'm doing my best
This tungsten seems to be getting a tad short, but I don't throw them away til they're really short
Hopefully I'll finish it tomorrow
Ralph Ferrand
Z1000A1 (1977), Z1300A5 (1983), Z900A4 (1976) GPZ1100 Unitrak (1983)(project), RD250B (1975)(project), ZRX1200R (2005) DT175MX (1981) YZF R6 (1999)
http://www.bikerstoolbox.co.uk
Z1000A1 (1977), Z1300A5 (1983), Z900A4 (1976) GPZ1100 Unitrak (1983)(project), RD250B (1975)(project), ZRX1200R (2005) DT175MX (1981) YZF R6 (1999)
http://www.bikerstoolbox.co.uk
-
Is Vic There
- Hardcore

- Posts: 1460
- Joined: 8th Nov 2011
- Location: Brisbane, Australia.
-
stephen parr

- 100Club
- Posts: 263
- Joined: 19th Oct 2008
- Location: leicestershire
-
RALPHARAMA
- Area Rep.
- Posts: 3407
- Joined: 19th May 2007
- Location: Pensford, Somerset
- Contact:
Rather a late start today.
Finished the welding and though it's not the prettiest job, it is now the correct shape and is nice and solid.
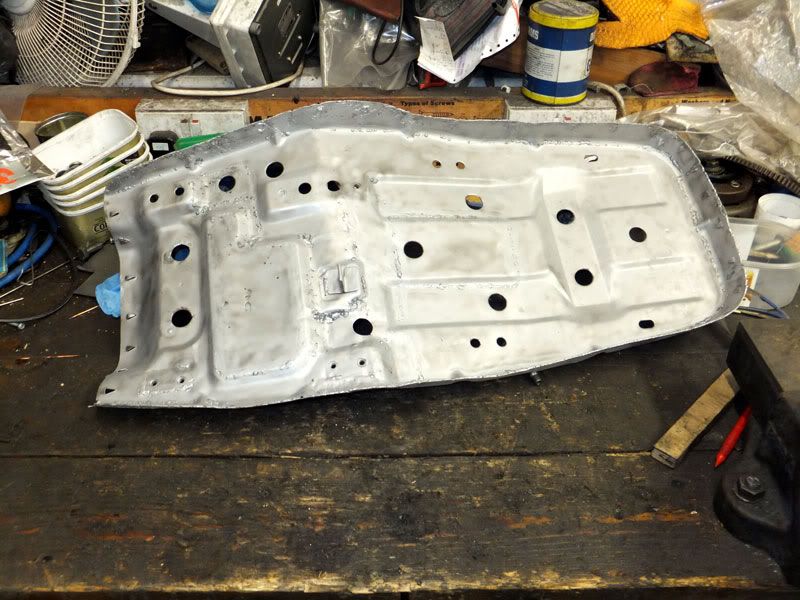
Now I have the rear mudguards and seat I am able to assess the frame.
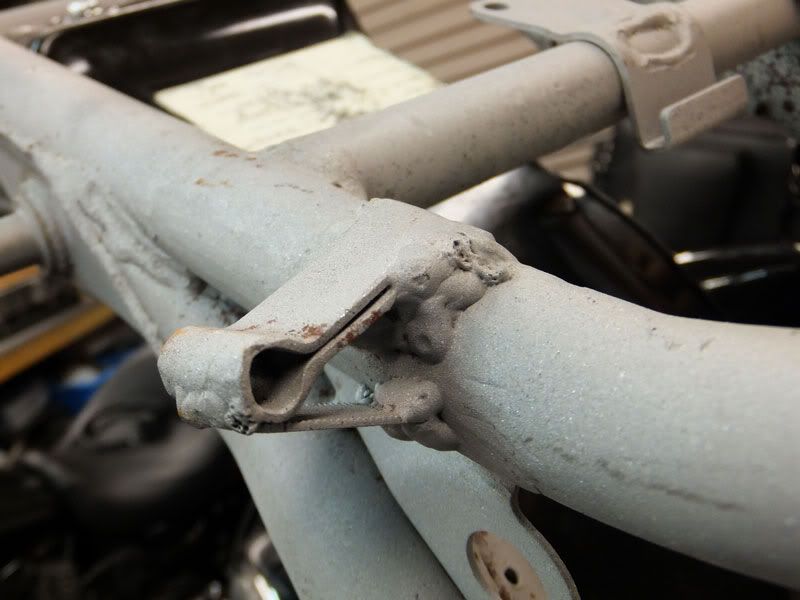
Sadly my suspicions about the rear of the frame were conformed:
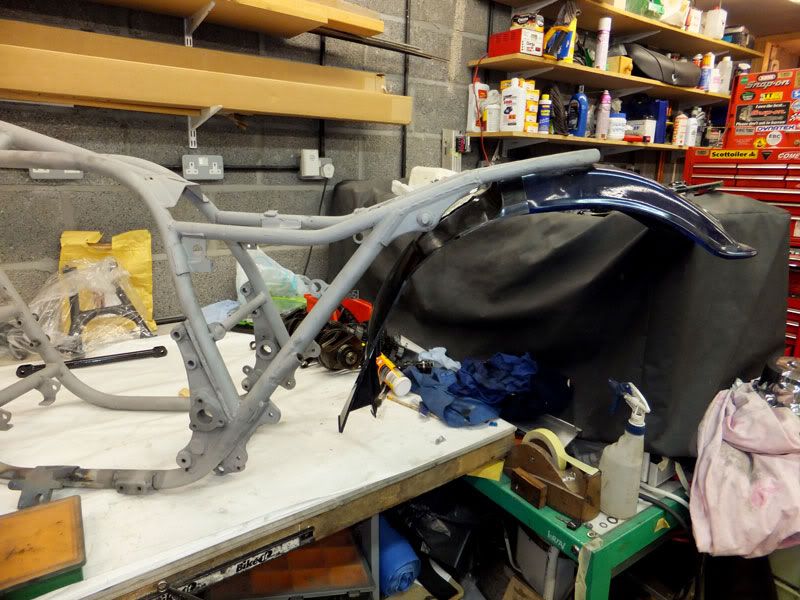
This pic shows why I suspected it had been 'got at'
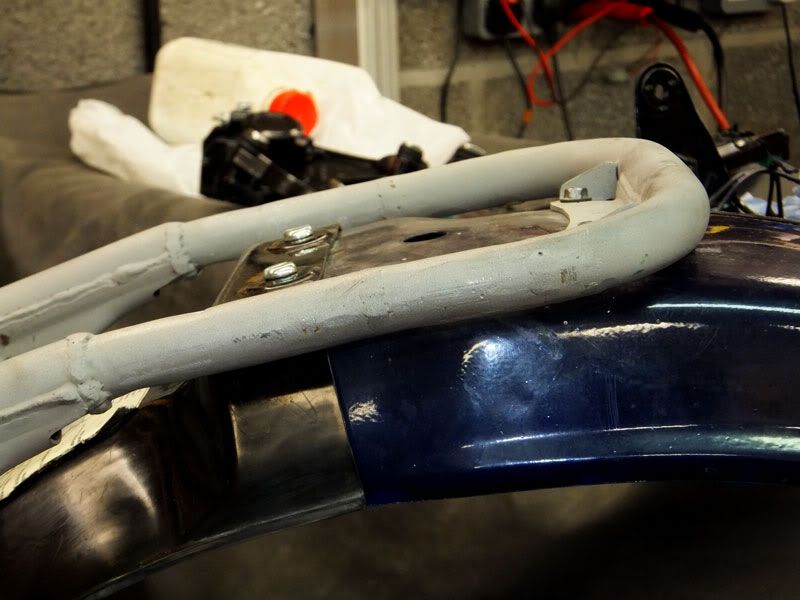
The hinges are defo badly made home bodged
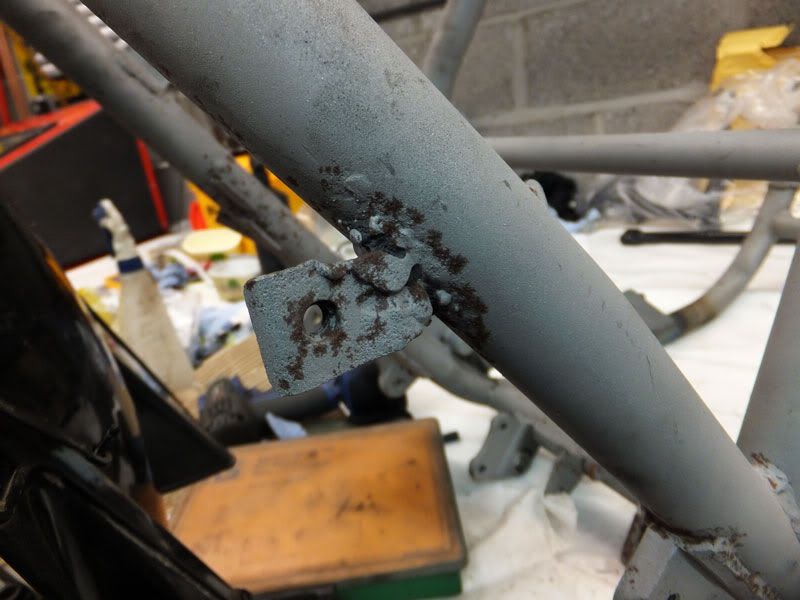
This doesn't look quite right either
Finished the welding and though it's not the prettiest job, it is now the correct shape and is nice and solid.
Now I have the rear mudguards and seat I am able to assess the frame.
Sadly my suspicions about the rear of the frame were conformed:
This pic shows why I suspected it had been 'got at'
The hinges are defo badly made home bodged
This doesn't look quite right either
Ralph Ferrand
Z1000A1 (1977), Z1300A5 (1983), Z900A4 (1976) GPZ1100 Unitrak (1983)(project), RD250B (1975)(project), ZRX1200R (2005) DT175MX (1981) YZF R6 (1999)
http://www.bikerstoolbox.co.uk
Z1000A1 (1977), Z1300A5 (1983), Z900A4 (1976) GPZ1100 Unitrak (1983)(project), RD250B (1975)(project), ZRX1200R (2005) DT175MX (1981) YZF R6 (1999)
http://www.bikerstoolbox.co.uk


Who is online
Users browsing this forum: No registered users and 12 guests