Hello Guest User,
Please feel free to have a look around the forum but be aware that as an unregistered guest you can't see all of it and you can't post.
To access these 'Registered Users Only' areas simply register and login.
Please feel free to have a look around the forum but be aware that as an unregistered guest you can't see all of it and you can't post.
To access these 'Registered Users Only' areas simply register and login.
THE WIDOW SHAKER................. GB's Looking to the future
Moderators: KeithZ1R, chrisu, paul doran, Taffus
- paul doran
- Area Rep.

- Posts: 15910
- Joined: 24th Sep 2004
- Location: near Dublin Ireland
- Ginger Bear
- Hardcore

- Posts: 6850
- Joined: 16th Dec 2008
- Location: In the Dark.
- Contact:
Big Fluff wrote:Waste of a good engine but a great idea. I reckon a flat 4 would've been a better fit but it wouldn't be a Zed then would it?
Will, it would have been a bigger waste leaving this lump in the back of the shed, at least now it will get run & will be removed in an instant should I need a replacement for one of my bikes.
it's also giving me a great chance to improve my welding skills....
- Ginger Bear
- Hardcore

- Posts: 6850
- Joined: 16th Dec 2008
- Location: In the Dark.
- Contact:
Bit more progress..............
Made a couple of diagonal rear mounts, mainly to use the rear of the cases as a 'stressed' ( It fookin will be. ) member to stop the chassis rails flexing too much once I get me fat arse on board.
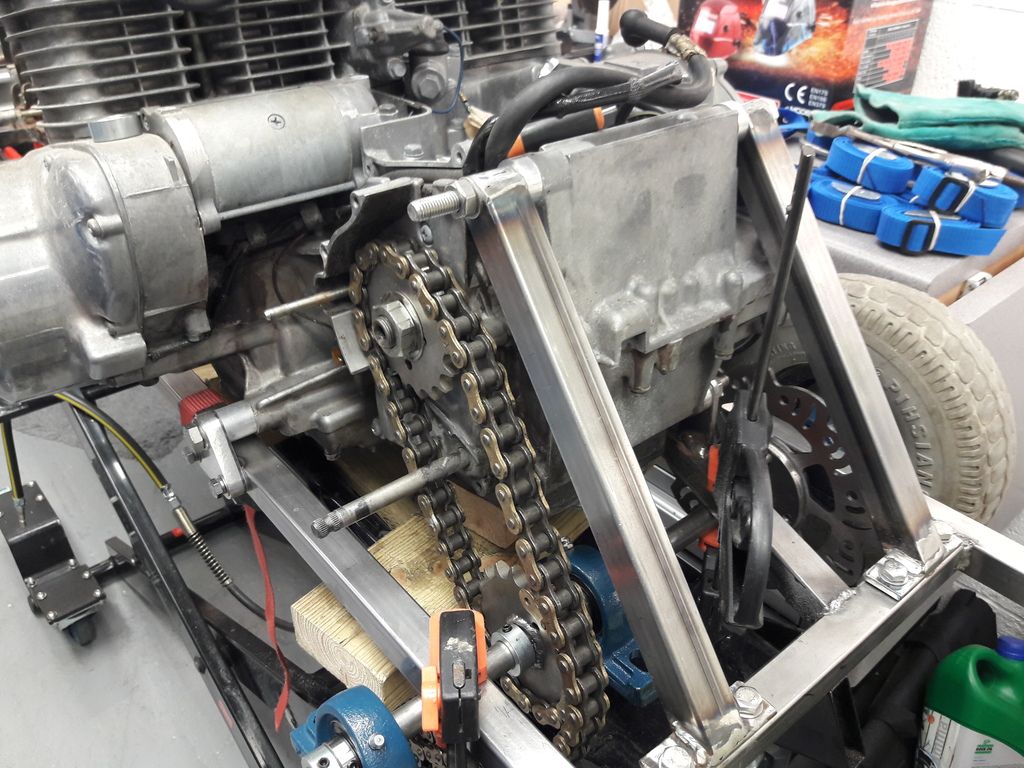
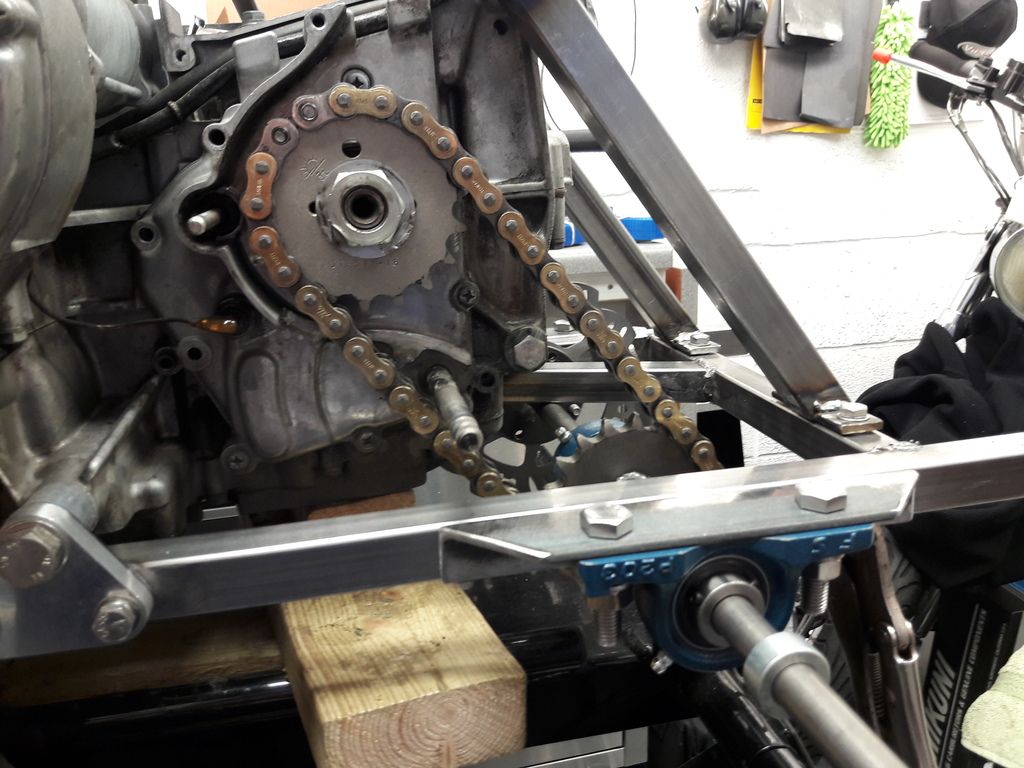
Now this will make the toes of some of you curl..... I took the grinder to the lower 'flange' of the transmission cover.
 You'll see why when you look at the chain run.
The bolt head to the rear of the sprocket is currently fouling the chain. I plan to fit a spacer behind the sprocket & if its still a problem I'll remove it, countersink the case & then a countersunk bolt.
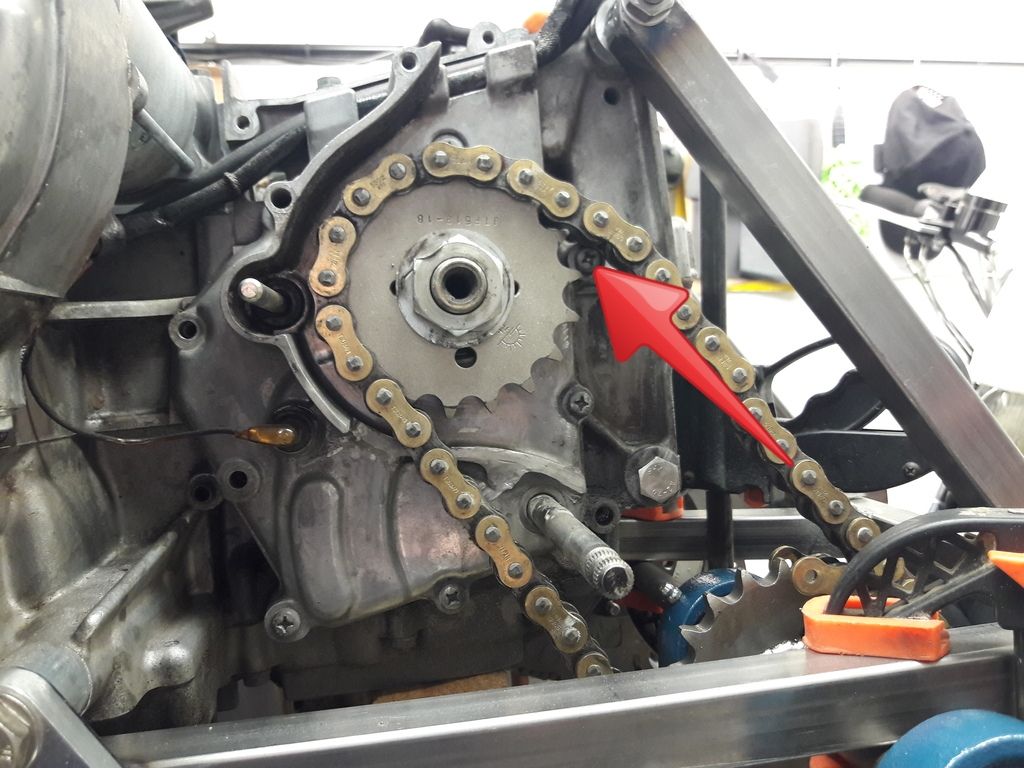
Made a couple of diagonal rear mounts, mainly to use the rear of the cases as a 'stressed' ( It fookin will be.

Now this will make the toes of some of you curl..... I took the grinder to the lower 'flange' of the transmission cover.
The bolt head to the rear of the sprocket is currently fouling the chain. I plan to fit a spacer behind the sprocket & if its still a problem I'll remove it, countersink the case & then a countersunk bolt.

I like this,if its up to usual Gb standard should go on the club stand,how about some ideas for a name for this Beast? How about the "The Coffin Dodger"??
PAULJAC47,,,,,"She may not look like much, but she's got it where it counts, kid."
-Han Solo
You can't polish a turd, but you can roll it in glitter
Salad is what real food eats.
Anon
PUM 673
-Han Solo
You can't polish a turd, but you can roll it in glitter
Salad is what real food eats.
Anon
PUM 673
- Ginger Bear
- Hardcore

- Posts: 6850
- Joined: 16th Dec 2008
- Location: In the Dark.
- Contact:
- Ginger Bear
- Hardcore

- Posts: 6850
- Joined: 16th Dec 2008
- Location: In the Dark.
- Contact:
'Widowshaker'...... I like that Gary, been chuckling about it all day. 
 If nothing else tickles me more in the next few days, then that's it!!
Had another couple of hours to meself earlier.
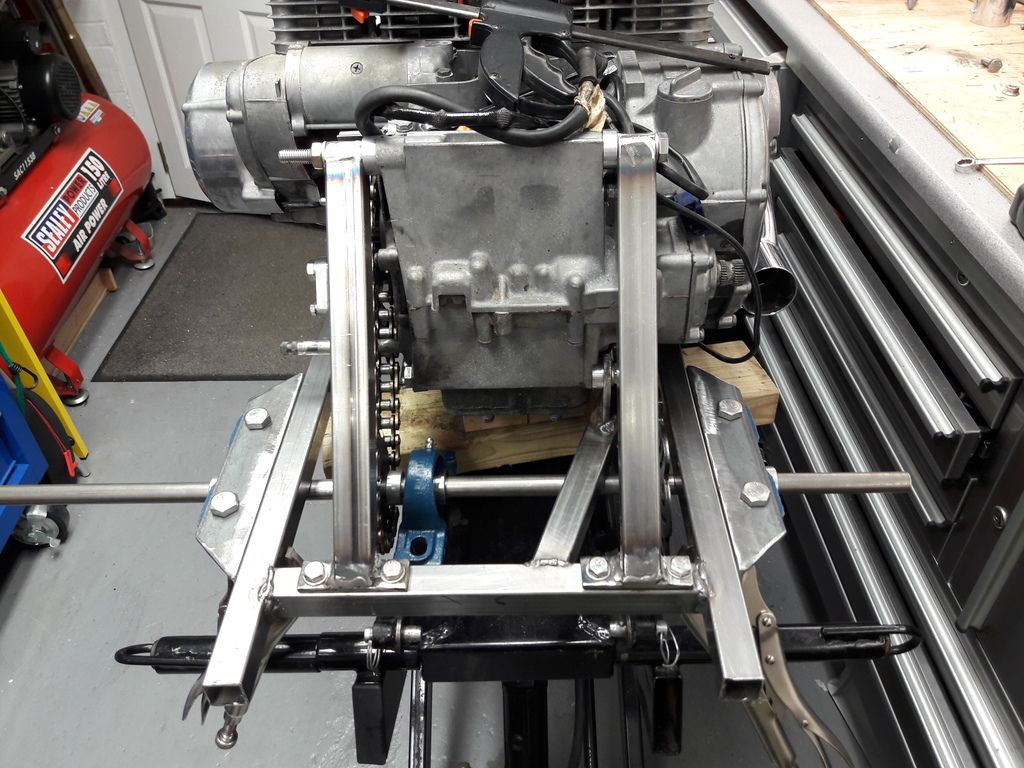
Cut and drilled some 25 x 40mm angle to act as bearing mounts.
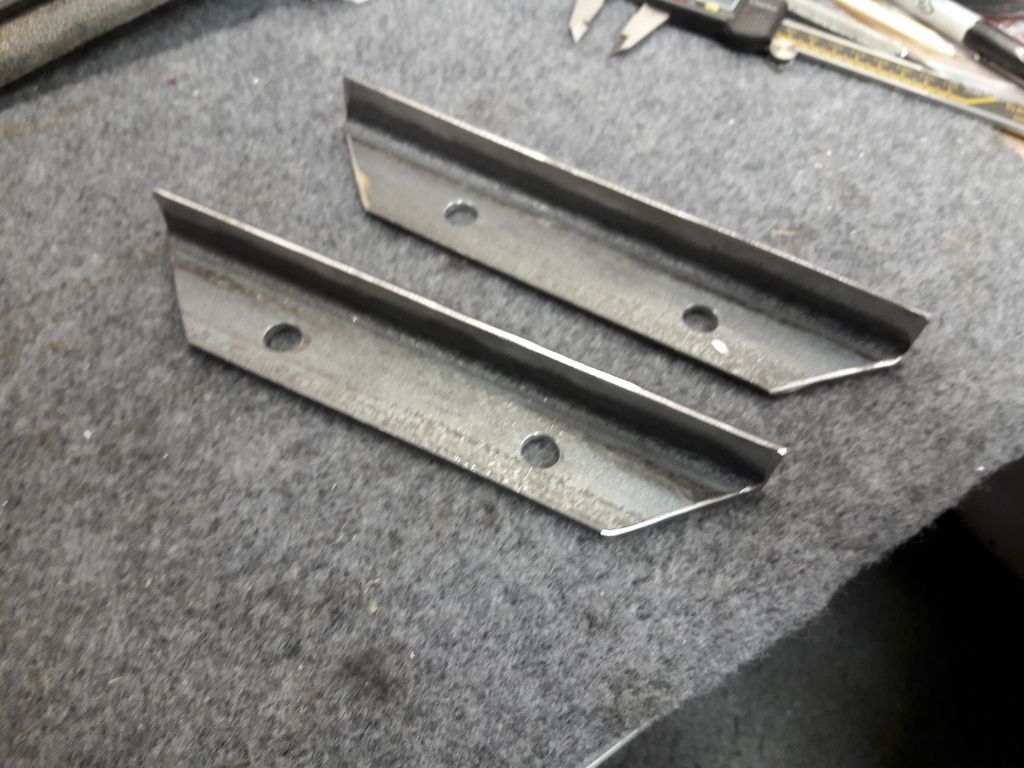
Slid the drive sprocket along the splines to clear the screw head & cut the chain to length. I'll probably machine a bit of nylon bar to slide over the gear change shaft, to save it rattling on bare metal. Pulled taught there's around 5mm clearance, but that'll disappear on the 'overrun'
Squared up & clamped bearing mounts to the frame rails ready for welding. Once thats done it'll be time to cut the axle to length & machine some slots to take the drive pins.
Had another couple of hours to meself earlier.
Cut and drilled some 25 x 40mm angle to act as bearing mounts.

Slid the drive sprocket along the splines to clear the screw head & cut the chain to length. I'll probably machine a bit of nylon bar to slide over the gear change shaft, to save it rattling on bare metal. Pulled taught there's around 5mm clearance, but that'll disappear on the 'overrun'

Squared up & clamped bearing mounts to the frame rails ready for welding. Once thats done it'll be time to cut the axle to length & machine some slots to take the drive pins.

Who is online
Users browsing this forum: No registered users and 11 guests


