Hello Guest User,
Please feel free to have a look around the forum but be aware that as an unregistered guest you can't see all of it and you can't post.
To access these 'Registered Users Only' areas simply register and login.
Please feel free to have a look around the forum but be aware that as an unregistered guest you can't see all of it and you can't post.
To access these 'Registered Users Only' areas simply register and login.
Project Z900 A4 - Restoration - Pic Heavy
Moderators: KeithZ1R, chrisu, paul doran, Taffus
November week 1 update.
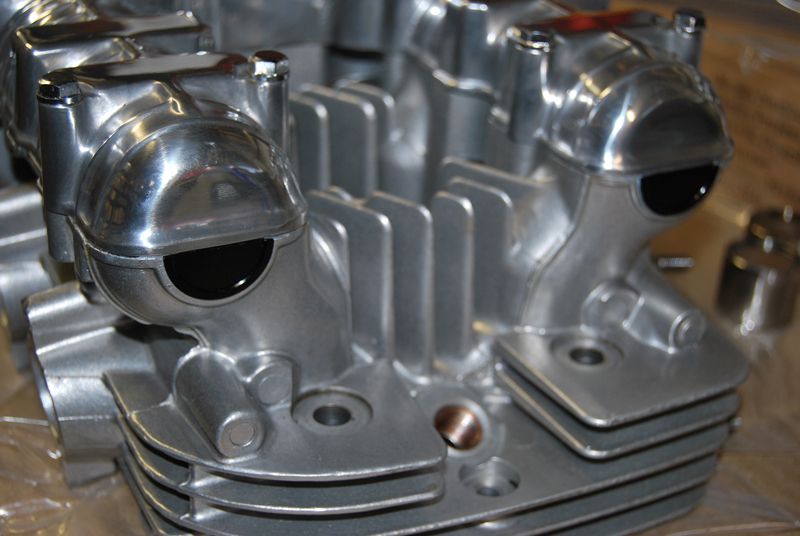
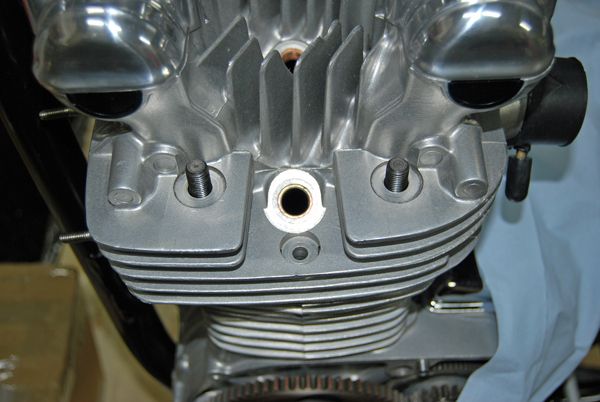
Quieter now at work so I had time to finish the prep on the head.
Mikey's polishing on the cam cover, new bolts and a set of PMC black alloy cam end plugs - sure does give the desired effect.
A couple of hours of rubbing with duck oil managed to remove most of the staining the machine shop left me with.
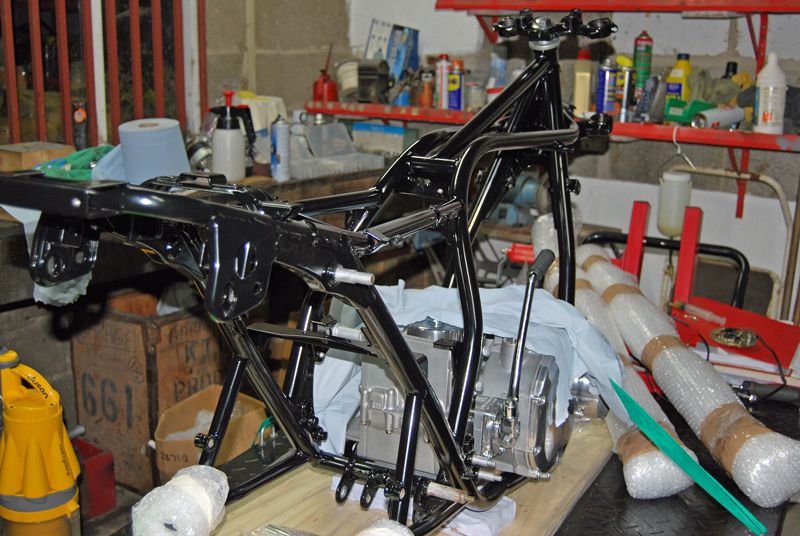
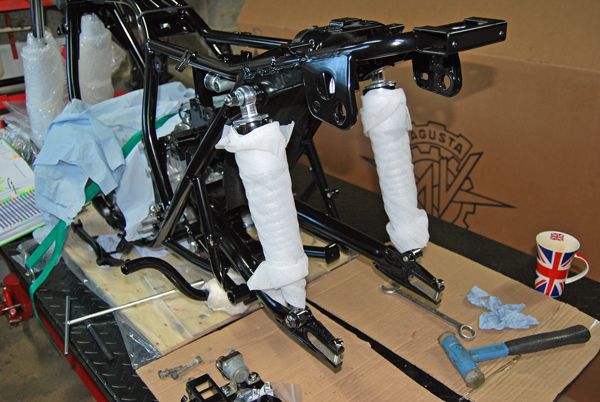
The frame was getting in the way so a spare 20 mins and some assistance from the wife - and the bottom end of the motor was in.
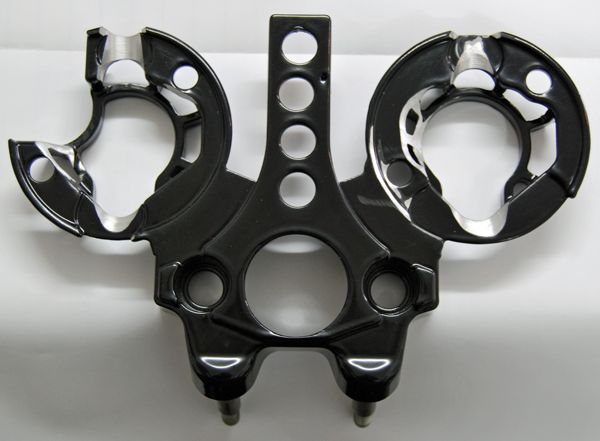
In the week I'd cleaned the excess powder coat off the yokes, fitted the head stock bearings and steering lock - ten mins on sat and the yokes were in.
Half hour with the blast cabinet saw the sprocket bolts and yoke brake splitter ready for primer.
Sunday was a day of five mins here - five mins there, but still managed to make steady progress.
The blasted brake splitter was given a couple of coats of satin black spray, a couple of polished stainless bolts and on it went.
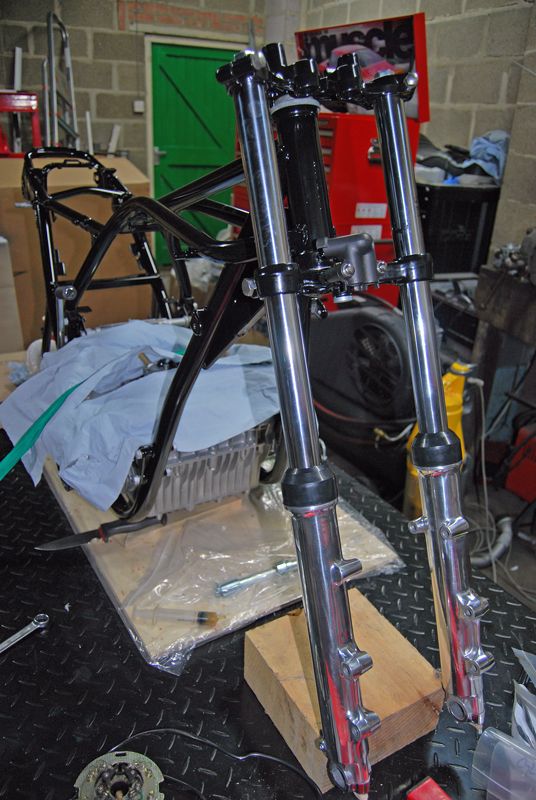
Managed to get the forks in place - two less things to trip over..
Got around to deciding on the colour, I was leaning towards candy red, after visiting Stafford show and seeing various colours - its going - Green!
Quieter now at work so I had time to finish the prep on the head.
Mikey's polishing on the cam cover, new bolts and a set of PMC black alloy cam end plugs - sure does give the desired effect.
A couple of hours of rubbing with duck oil managed to remove most of the staining the machine shop left me with.
The frame was getting in the way so a spare 20 mins and some assistance from the wife - and the bottom end of the motor was in.
In the week I'd cleaned the excess powder coat off the yokes, fitted the head stock bearings and steering lock - ten mins on sat and the yokes were in.
Half hour with the blast cabinet saw the sprocket bolts and yoke brake splitter ready for primer.
Sunday was a day of five mins here - five mins there, but still managed to make steady progress.
The blasted brake splitter was given a couple of coats of satin black spray, a couple of polished stainless bolts and on it went.
Managed to get the forks in place - two less things to trip over..
Got around to deciding on the colour, I was leaning towards candy red, after visiting Stafford show and seeing various colours - its going - Green!


November week 2 update
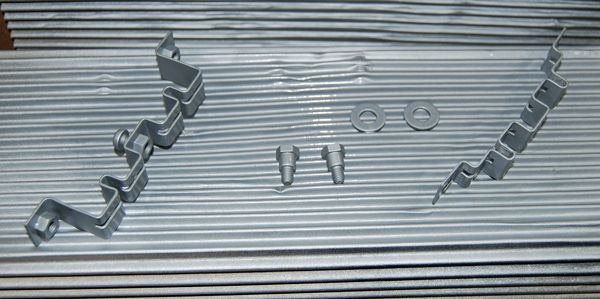
Using pattern gauges requires a few modifications to the original bracket.
Worth the effort as they now sit straight.
This old girl is never going to be rivet counter original so:
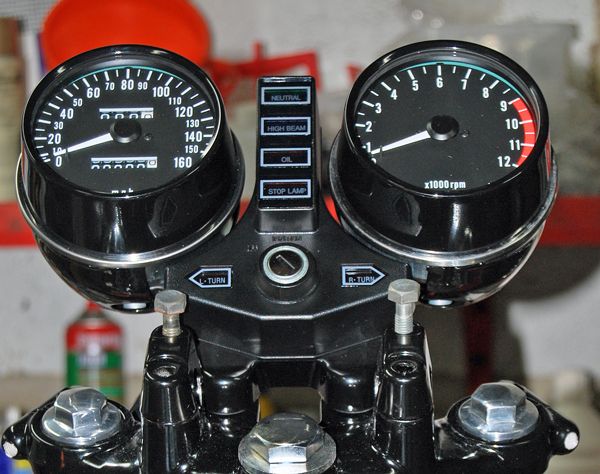
Pattern gauges + loom, lower covers, idiot light covers and lock set.
The scabby clutch lever perch got a trip through the blaster and coat of paint.

As did the rusty old elec panel loom bracket.
Pattern parts can bite you in the arse - aftermarket battery box mounting kit cheap but - pants..
The mounts sit the battery box too high, air box support is too high, elec plate can't be fitted as the cross tube fouls the bracket... back to original parts..
New bronze swingarm bushes got pressed in..
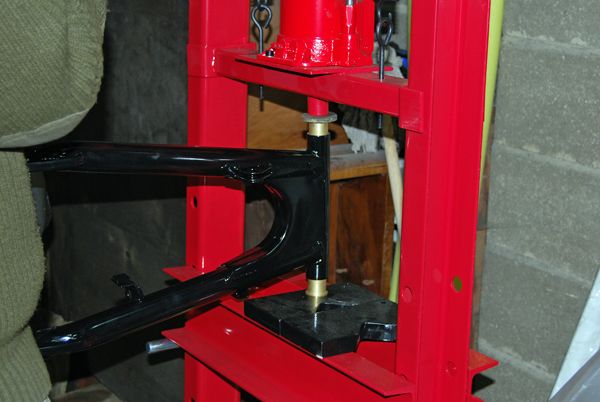
Half hours work on Sunday saw the centre stand fitted along with the swingarm and shocks.
Long way to go
Using pattern gauges requires a few modifications to the original bracket.
Worth the effort as they now sit straight.
This old girl is never going to be rivet counter original so:
Pattern gauges + loom, lower covers, idiot light covers and lock set.
The scabby clutch lever perch got a trip through the blaster and coat of paint.
As did the rusty old elec panel loom bracket.
Pattern parts can bite you in the arse - aftermarket battery box mounting kit cheap but - pants..
The mounts sit the battery box too high, air box support is too high, elec plate can't be fitted as the cross tube fouls the bracket... back to original parts..
New bronze swingarm bushes got pressed in..
Half hours work on Sunday saw the centre stand fitted along with the swingarm and shocks.
Long way to go
November week 2.5 update
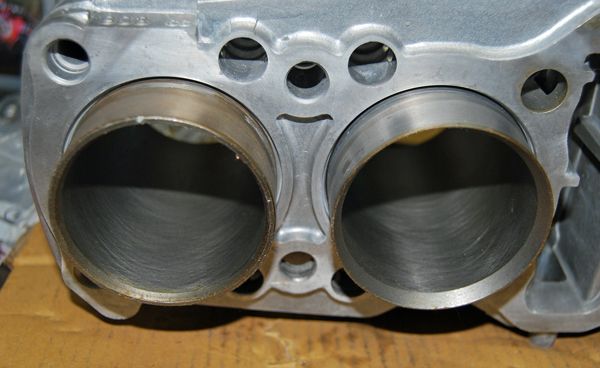
I collected the cylinder block from the machine shop, the new liner is difficult to tell appart from the others.
To recap the liner was from webike, the machine shop said it was a repair liner, 1mm oversize in almost every way, bore measured 65mm.
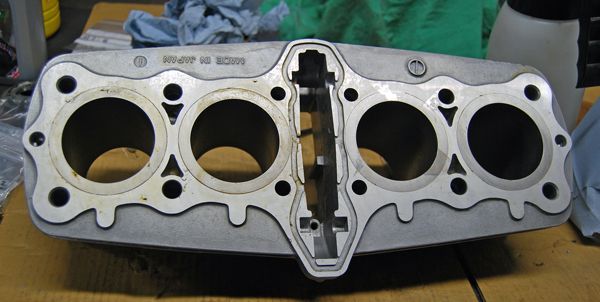
Liner was turned down to the correct outside dimensions then bored and honed with the others - the new liner sat approx 1mm proud and was skimmed down with the others.
Notice the ring lead is also deeper cut on the new liner.
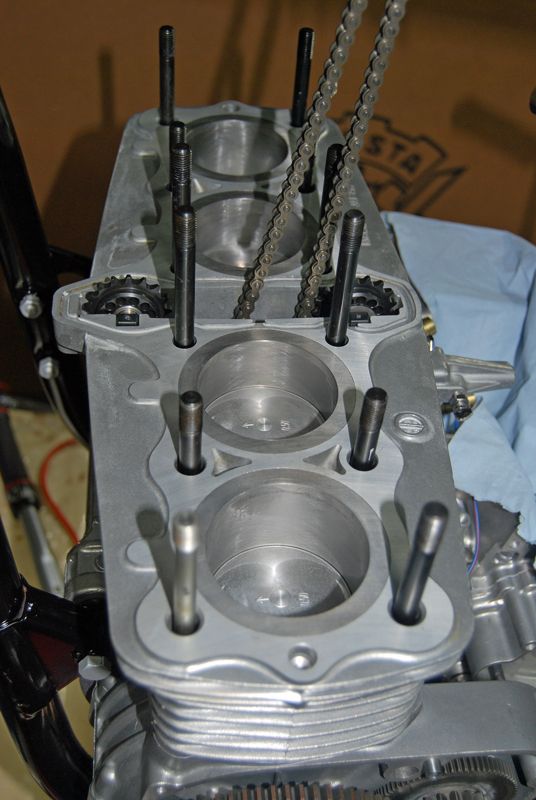
Couldn't resist a dry build - a thing of beauty.
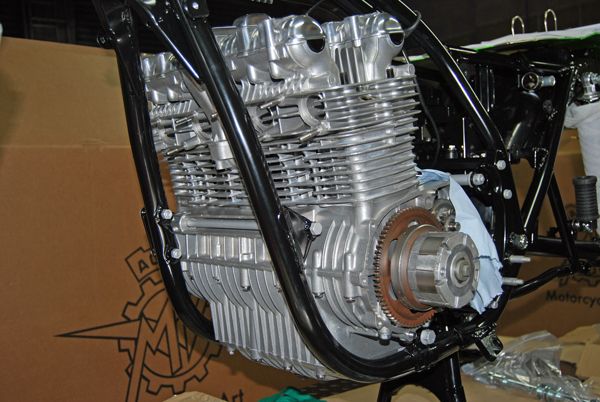
The no gasket dry build did have a purpose, the replacement APE studs measure approx 3mm shorter than the originals.
The left stud is installed to the original stud height.
The Right stud is fully installed - note the difference in height.
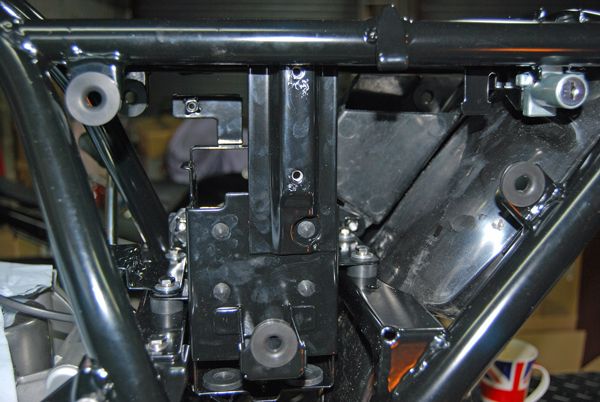
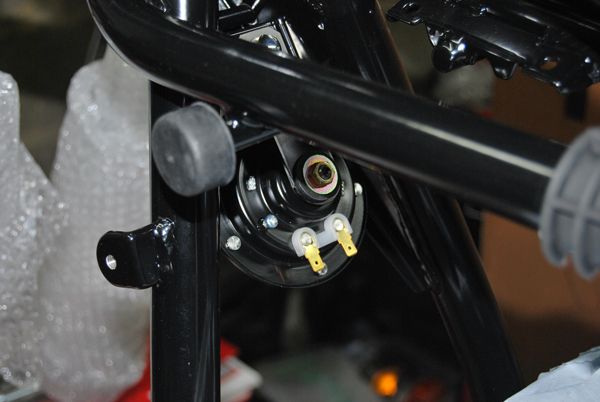
Received some more bits from Saisei yesterday so I got on with fitting centre harness to the electrical plate.

The original horn had a broken bracket and didn't work - Dave's (Saisei) replacement looks pretty darn smart - nice and loud too!
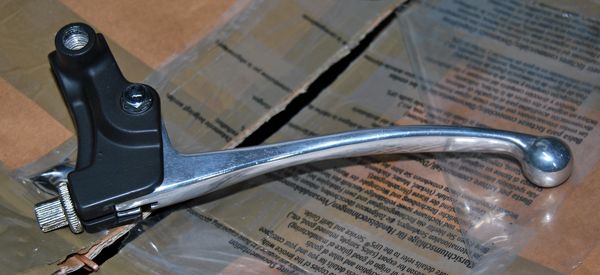
Clutch perch ready to fit, ZP pattern adjuster is shite - it will be replaced with a better one when I have time to find one.
Original lever polished up well.
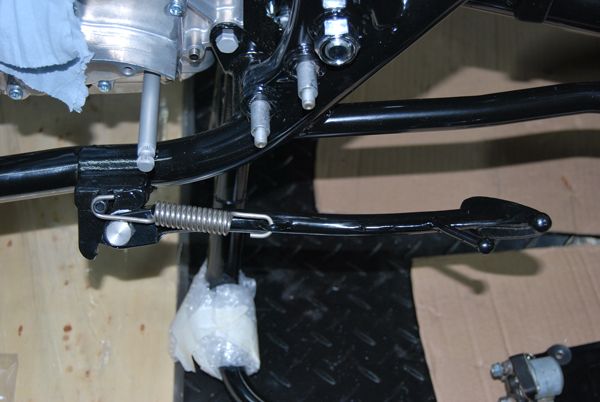
Stainless side stand hardware looks a tad drab - but it's practical.
The foot post is bent down - I've left it this way as I've seen a few others bent the same way - I didn't want to bend it straight only to find it fouls something further into the build.
If it's not meant to be this way - it'll add some originality!
As the beast didn't come with any rear indicators - a pattern set will have to do - as said - it's not going to be rivet counter original.

Roll on the weekend - pistons are going in
I collected the cylinder block from the machine shop, the new liner is difficult to tell appart from the others.
To recap the liner was from webike, the machine shop said it was a repair liner, 1mm oversize in almost every way, bore measured 65mm.
Liner was turned down to the correct outside dimensions then bored and honed with the others - the new liner sat approx 1mm proud and was skimmed down with the others.
Notice the ring lead is also deeper cut on the new liner.
Couldn't resist a dry build - a thing of beauty.
The no gasket dry build did have a purpose, the replacement APE studs measure approx 3mm shorter than the originals.
The left stud is installed to the original stud height.
The Right stud is fully installed - note the difference in height.
Received some more bits from Saisei yesterday so I got on with fitting centre harness to the electrical plate.
The original horn had a broken bracket and didn't work - Dave's (Saisei) replacement looks pretty darn smart - nice and loud too!
Clutch perch ready to fit, ZP pattern adjuster is shite - it will be replaced with a better one when I have time to find one.
Original lever polished up well.
Stainless side stand hardware looks a tad drab - but it's practical.
The foot post is bent down - I've left it this way as I've seen a few others bent the same way - I didn't want to bend it straight only to find it fouls something further into the build.
If it's not meant to be this way - it'll add some originality!
As the beast didn't come with any rear indicators - a pattern set will have to do - as said - it's not going to be rivet counter original.
Roll on the weekend - pistons are going in
z1r wrote:looking great so far, cant decide weather to restore my Z1R or keep it original, but when i see restorations like yous it makes me want to do mine.
cheers michael
Thanks Michael.
To restore or not is sometimes a difficult choice, I didn't have the option with this one, it was always either a complete restoration or a modified.


November week 3 update.
A busy weekend of half hour slots saw the pistons go in - and back out again!!
Pistons used are ZP 66.5mm, genuine gaskets and o rings, APE studs and genuine head nuts.
When I built the Ltd engine despite using a genuine gasket I had a small oil weep from the barrel to crankcase joint, although it has since self sealed I decided to use some gasket sealant on this build.
To clamp the barrels down after fitting I popped the head on (without gasket) and torqued it down.
After a couple of hours I guessed the sealant had gone off.
Things were going well so I was keen to get on - all I've got to do is - head off - double check piston protrusion - gasket on - head on - happy days!!!
At this point I was about to regret my choice of studs!!!!
On fitting the head - all the nuts bar the nearside front span on by hand - this one required a spanner at first but freed up a little as it went down- they all then tightened down without issue - the same cannot be said for undoing them.
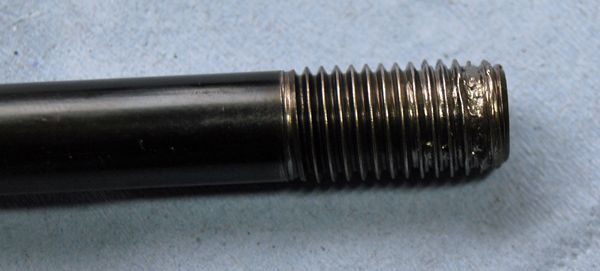
The nearside front nut turned 1/4 of a turn then locked solid - further pressure unwound the stud, once removed I had to fight the nut off using a vice and a heavy duty air gun, the pic shows the damage to the stud - the same was true for the genuine nut!
As the pic shows the stud was missing part of the first thread coil, It had not bottomed out on the nut and the installation height was stock - (I had used a washer on each stud to take up the missing gasket height).
As shown in the above pic - I re-installed the nearside front original stud to check the installed height - measured the internal clearance of both old and new nuts - all spot on.
On inspecting the other studs they too didn't look good around the top thread coil, with nagging doubt creeping in - I decided to replace the APE studs with a set of genuine ones - after all - the original studs were good enough for the first 38 years!!
I had tapped the crankcase threads after the ceramic cleaning - but I'm kicking myself for not thread chasing the APE studs before the build, at some point during installation the first 1/4 of the coil on the No2 offside rear stud has clearly fractured off and somehow got mashed into the thread - nice!
I should have smelled a rat as the studs were a little tight on installation - some a little tighter than others.

I decided it would be safer to pull the barrels back off and run a tap down the crankcase threads - just in case.
On tapping - the No2 offside rear had steel swarf on the grease when the tap was removed, thread looks good although it does have a witness mark about 12mm down.
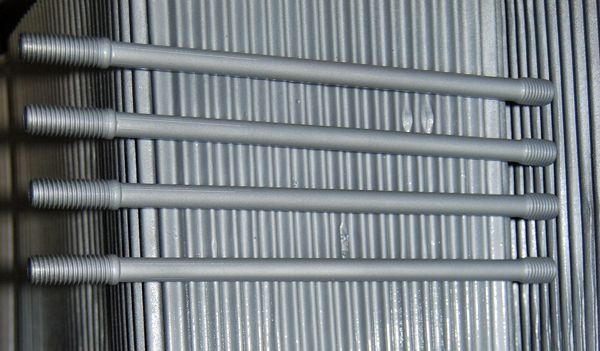
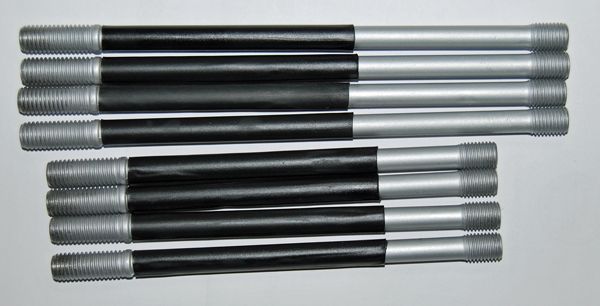
I trial installed the genuine studs with no issues - I ran a thread chaser down each one as they came out the bag with the lessons learned and all that!!..
Although already plated I gave them a coat of bright zinc spray anyway...
Heatshrink to the middle eight and we are good to go - again...
Found an issue with the Emgo Lower Fork Covers I got from ZP.
The covers wouldn't fit the bottom yoke!
Compared to the original genuine covers the reason is obvious.
I did have a chuckle when I spoke to ZP about it - 'Cut em down or send em back' - cut em down e says!
Spent a few mins unwrapping the new loom ready for modification..
The Z1 Doremi pattern loom is a tad different to the pattern A4 one - but as I'm modifying anyway - better suited to my needs..
Having the original next to the new one makes for easy reference.
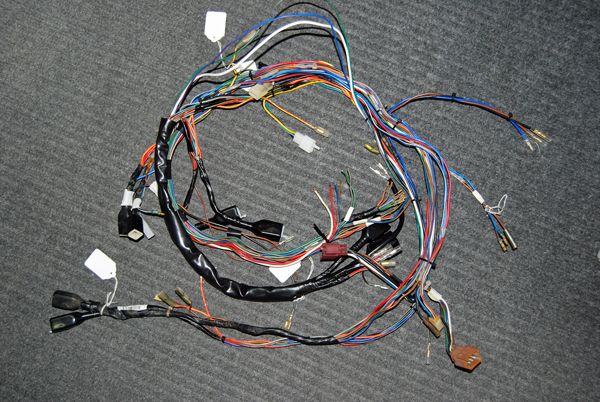
Such Fun
A busy weekend of half hour slots saw the pistons go in - and back out again!!
Pistons used are ZP 66.5mm, genuine gaskets and o rings, APE studs and genuine head nuts.
When I built the Ltd engine despite using a genuine gasket I had a small oil weep from the barrel to crankcase joint, although it has since self sealed I decided to use some gasket sealant on this build.
To clamp the barrels down after fitting I popped the head on (without gasket) and torqued it down.
After a couple of hours I guessed the sealant had gone off.
Things were going well so I was keen to get on - all I've got to do is - head off - double check piston protrusion - gasket on - head on - happy days!!!
At this point I was about to regret my choice of studs!!!!
On fitting the head - all the nuts bar the nearside front span on by hand - this one required a spanner at first but freed up a little as it went down- they all then tightened down without issue - the same cannot be said for undoing them.
The nearside front nut turned 1/4 of a turn then locked solid - further pressure unwound the stud, once removed I had to fight the nut off using a vice and a heavy duty air gun, the pic shows the damage to the stud - the same was true for the genuine nut!
As the pic shows the stud was missing part of the first thread coil, It had not bottomed out on the nut and the installation height was stock - (I had used a washer on each stud to take up the missing gasket height).
As shown in the above pic - I re-installed the nearside front original stud to check the installed height - measured the internal clearance of both old and new nuts - all spot on.
On inspecting the other studs they too didn't look good around the top thread coil, with nagging doubt creeping in - I decided to replace the APE studs with a set of genuine ones - after all - the original studs were good enough for the first 38 years!!
I had tapped the crankcase threads after the ceramic cleaning - but I'm kicking myself for not thread chasing the APE studs before the build, at some point during installation the first 1/4 of the coil on the No2 offside rear stud has clearly fractured off and somehow got mashed into the thread - nice!
I should have smelled a rat as the studs were a little tight on installation - some a little tighter than others.
I decided it would be safer to pull the barrels back off and run a tap down the crankcase threads - just in case.
On tapping - the No2 offside rear had steel swarf on the grease when the tap was removed, thread looks good although it does have a witness mark about 12mm down.
I trial installed the genuine studs with no issues - I ran a thread chaser down each one as they came out the bag with the lessons learned and all that!!..
Although already plated I gave them a coat of bright zinc spray anyway...
Heatshrink to the middle eight and we are good to go - again...
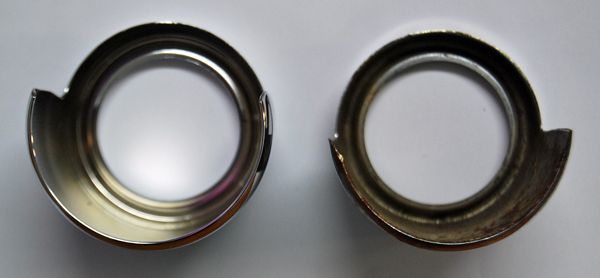
Found an issue with the Emgo Lower Fork Covers I got from ZP.
The covers wouldn't fit the bottom yoke!
Compared to the original genuine covers the reason is obvious.
I did have a chuckle when I spoke to ZP about it - 'Cut em down or send em back' - cut em down e says!
Spent a few mins unwrapping the new loom ready for modification..
The Z1 Doremi pattern loom is a tad different to the pattern A4 one - but as I'm modifying anyway - better suited to my needs..
Having the original next to the new one makes for easy reference.
Such Fun
Despite the setbacks, it goes to show the progress you make
through your determination and experience are exciting, well done!

~Jay.
through your determination and experience are exciting, well done!
~Jay.
Non standard Z900 - purchased from HIGGSPEED - http://www.higgspeed.com/ -
http://www.z1ownersclub.co.uk/forum/vie ... 6a7d5e816c
http://www.z1ownersclub.co.uk/forum/vie ... 6a7d5e816c
-
wheelysteve

- 100Club

- Posts: 450
- Joined: 10th Mar 2014
- Location: Wokingham, Berks

Who is online
Users browsing this forum: No registered users and 10 guests