Hello Guest User,
Please feel free to have a look around the forum but be aware that as an unregistered guest you can't see all of it and you can't post.
To access these 'Registered Users Only' areas simply register and login.
Please feel free to have a look around the forum but be aware that as an unregistered guest you can't see all of it and you can't post.
To access these 'Registered Users Only' areas simply register and login.
Z1100ST Resto +
Moderators: KeithZ1R, chrisu, paul doran, Taffus


-
Is Vic There
- Hardcore

- Posts: 1460
- Joined: 8th Nov 2011
- Location: Brisbane, Australia.


-
RALPHARAMA

- Area Rep.

- Posts: 3407
- Joined: 19th May 2007
- Location: Pensford, Somerset
- Contact:
Believe it or not, I have finally got my brakes as had as a reasonable hard thing 
I have used my new cable making kit to alter the clutch cable, which had too much inner cable and I have made a new throttle cable from scratch. I sacrificed an old 'J' cable for the curvy bit that goes into the twist grip as that is very much 'Mr Kawasaki' special. I am now going to be on the constant look out for knackered cables for spares Some parts of cables are specific to models. None of the nipples is the kit fitted, so I made my own up on the lathe and milling machine. Not just cos I'm tight, but I didn't want to wait. Curiously the 'barrel' diameters were all imperial, which was handy cos all my brass stock is imperial from my model engineering play.
I have used my new cable making kit to alter the clutch cable, which had too much inner cable and I have made a new throttle cable from scratch. I sacrificed an old 'J' cable for the curvy bit that goes into the twist grip as that is very much 'Mr Kawasaki' special. I am now going to be on the constant look out for knackered cables for spares
Some parts of cables are specific to models. None of the nipples is the kit fitted, so I made my own up on the lathe and milling machine. Not just cos I'm tight, but I didn't want to wait. Curiously the 'barrel' diameters were all imperial, which was handy cos all my brass stock is imperial from my model engineering play.Ralph Ferrand
Z1000A1 (1977), Z1300A5 (1983), Z900A4 (1976) GPZ1100 Unitrak (1983)(project), RD250B (1975)(project), ZRX1200R (2005) DT175MX (1981) YZF R6 (1999)
http://www.bikerstoolbox.co.uk
Z1000A1 (1977), Z1300A5 (1983), Z900A4 (1976) GPZ1100 Unitrak (1983)(project), RD250B (1975)(project), ZRX1200R (2005) DT175MX (1981) YZF R6 (1999)
http://www.bikerstoolbox.co.uk
-
RALPHARAMA
- Area Rep.
- Posts: 3407
- Joined: 19th May 2007
- Location: Pensford, Somerset
- Contact:
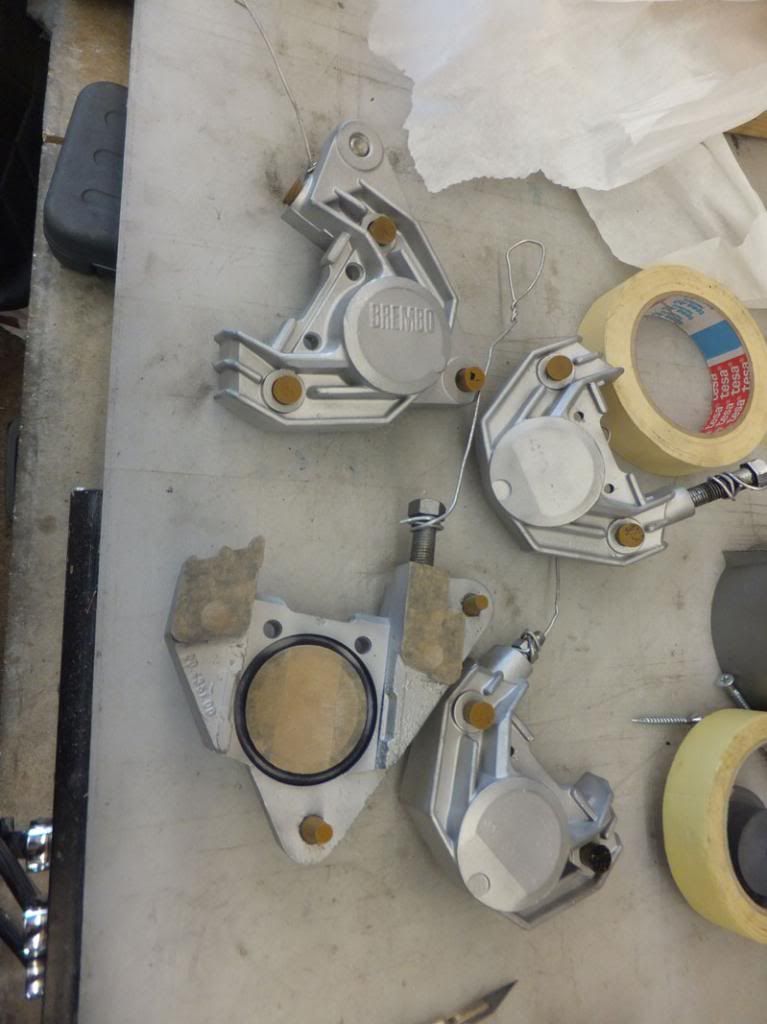
Once the brakes were working as a dry run, it was time to strip them and nicefy them 
The first thing to offend me was the pins in the calipers - Brembo for some reason best known to themselves, make the pad holding pins in mild steel which obviously always rusts like feck. I know that one can buy stainless pins from Motorworks, but as I am skint and still held up by things beyond my control, last weekend I decided to spend the Saturday making new ones
I ground up a mini parting tool for the groove that hold the securing ring ...
Sadly I didn't have any 6mm stainless, only 1/4", so I had to turn the diameter all the way and that had to be done between centres; I've tried using the travelling steady on this lathe before and it's as much use as tits on a bull
The pretty groove at the end I turned free hand with a bull nose tool which wasn't the right radius so I had to dance the hand wheels a bit.
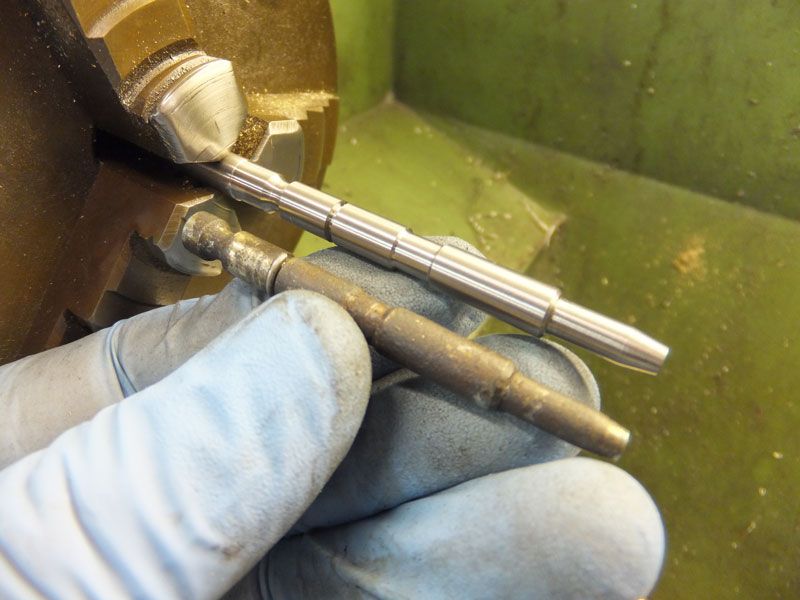
But after spending a ridiculous amount of time they looked OK to me
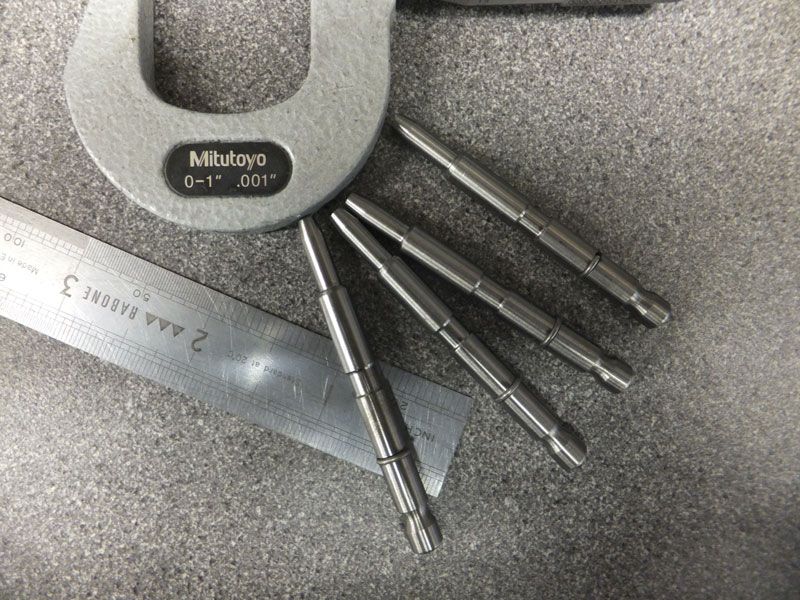
I was fortunate to find a set of EBC HH pads in stock; I can only assume that I must have bought them for a customer's BMW some time ago - it was a welcome find Next job was to mask up with blasting mask and show the bodies the glass beads, then strip and re-mask them for paint.
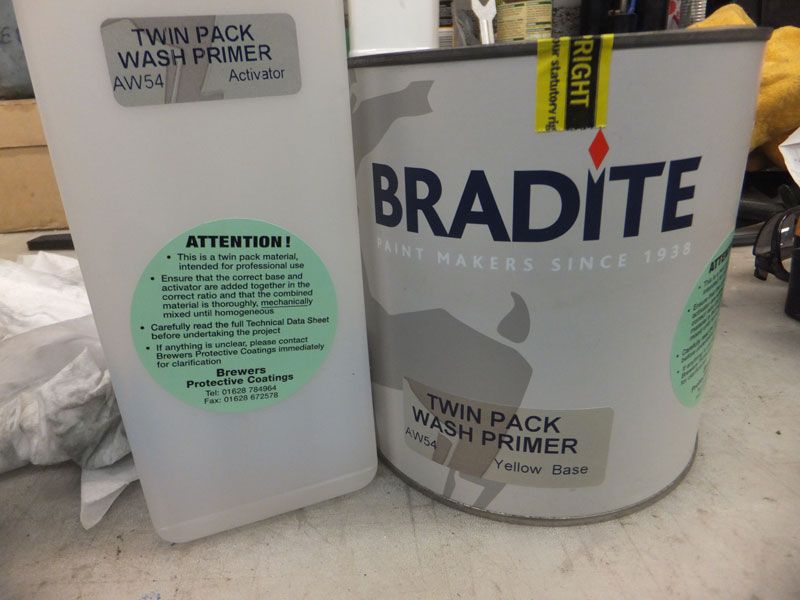
I bought some more Zinc Chromate etch primer. It is essential for these sort of parts to use an etch with no build. I'm not looking for an uber flat surface as on a tank. If you use an etch with a build (filler), and 99% of it does, and should you be unfortunate enough, as I was with CB's Z650 to have a fuel line fracture, the petrol will get sucked into the the porous primer and push the paint off - that sight is soul destroying I can assure you! Getting this primer was really tricky, but now I have a good source - Brewers This is the stuff you want plus some thinners.
When I was getting pain and grief from the master cylinder, I accidentally dripped some brake fluid on the engine and when I realised what I had done the bloody stuff had been there for at least quarter of an hour. I used the colourful language that usually rings out in my workshop when I'm working on this bike; but to my surprise, when I wiped the drips off there was no damage to the paint As a control experiment I took the cam chain tensioner cover, that I had painted at the same time as the engine, but had discarded in favour of polishing another one and gave it a good paint with fresh brake fluid and it too was unharmed. The paint was again Bradite - a two pack satin polyurethane yacht varnish with a black pigment I was intending to have the caliper bodies powder coated, but not now - from now on all my caliper will be 2 packed I had CB's Zephyr calipers powder coated a while back and the bloody stuff is coming off already - but getting it all off will be a pigging nightmare.
I etch primed them in the shade of the log store as the wind was blowing a bleedin' gale ...
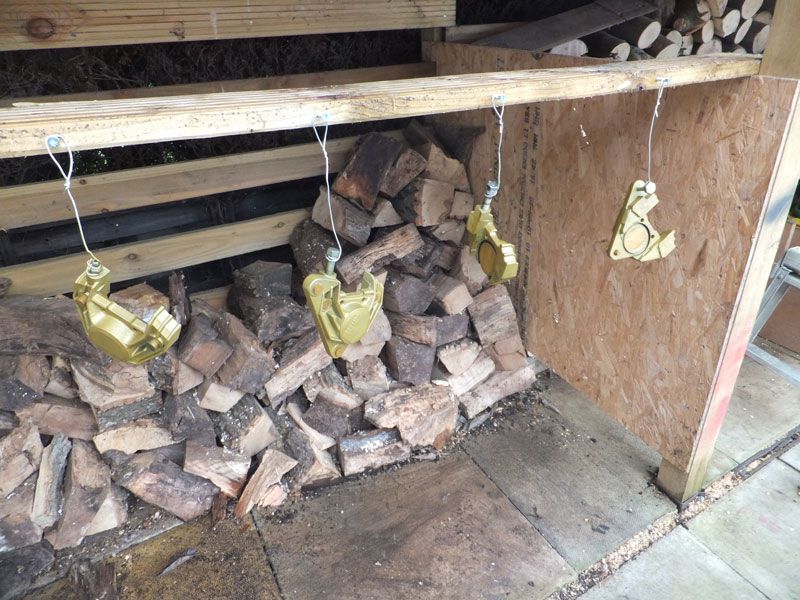
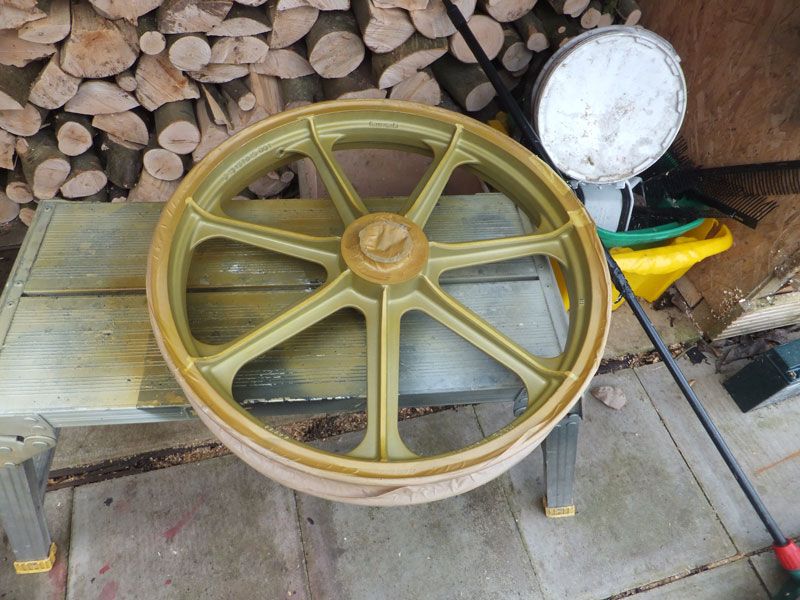
... I did the front wheel as well ...
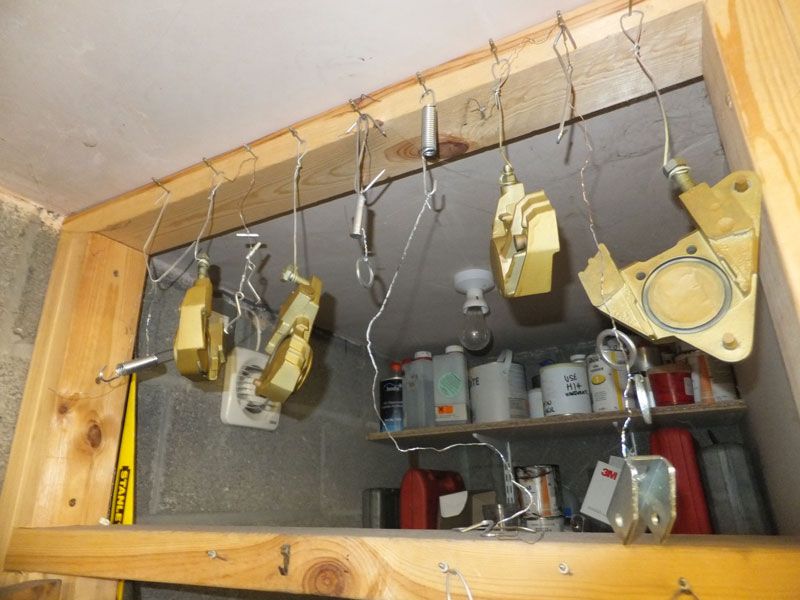
... then hung them up to dry above the bog door along with some plating I had done ...
On a more temperate day I painted the calipers on CB's washing line in the back garden and also the wheel and of course back to the drying bog ...
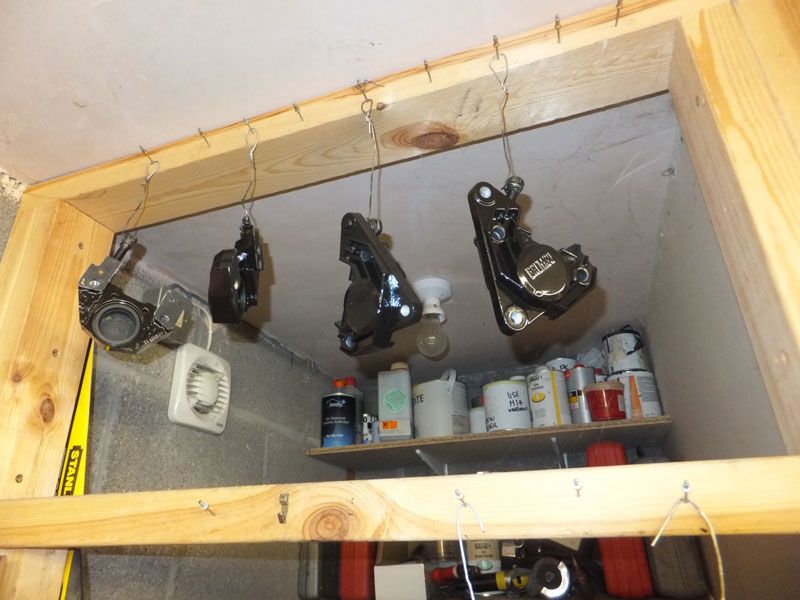

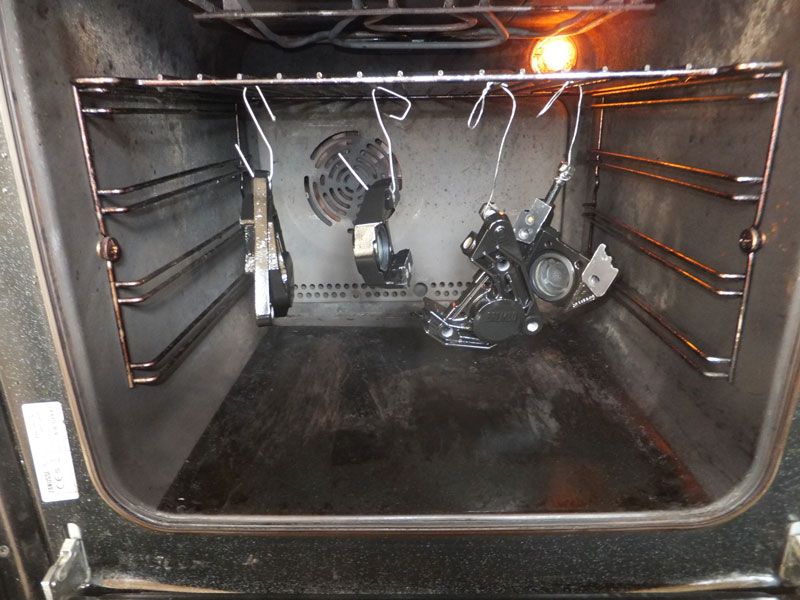
I decided to bake the calipers at 70°C for a few hours, given that they were going to have to cope with brake fluid. That paint does take a long time to cure, but is pretty dandy when it has I waited for CB to go out before entering her domain, but she came back earlier than expected and caught me red handed  but she's like biker rock, so considered it acceptable behaviour as it was for a Kawasaki I'm a lucky man
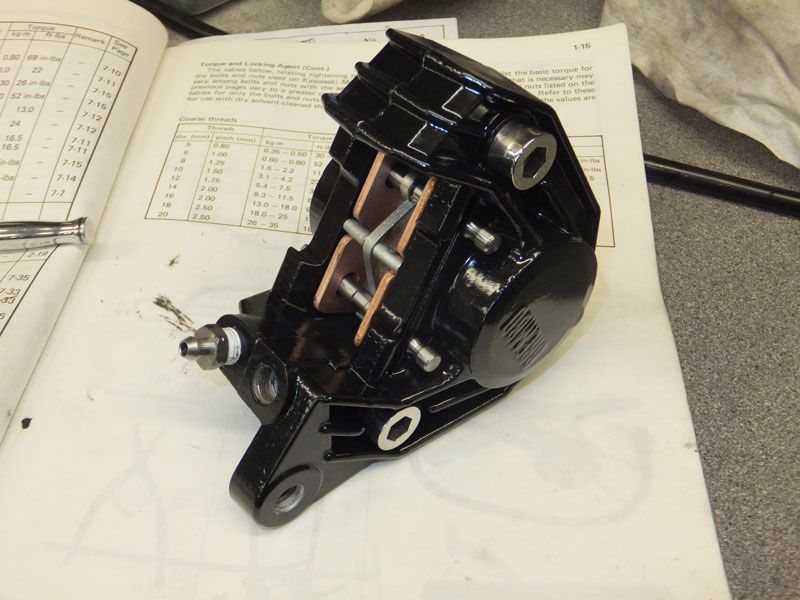
I obviously re-plated all the zinc plated bits, machined and polished some stainless bolts and here's one of the calipers ready to go on ...
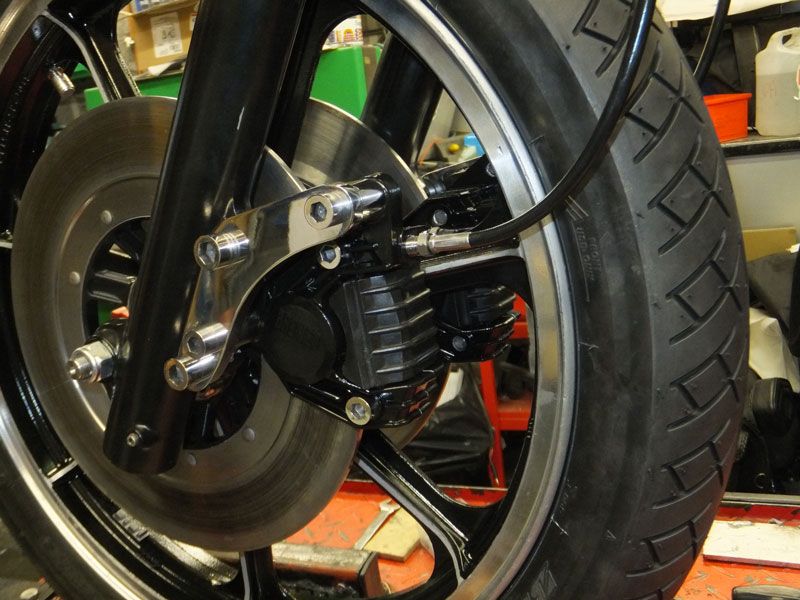
Then it was just a case of fitting the new master cylinder and bleeding it all up ...
I took the tyre off the 'original wheel and fitted it to the 'new' wheel with a new extra tough inner tube. I was really surprised how bloody heavy these wheels are
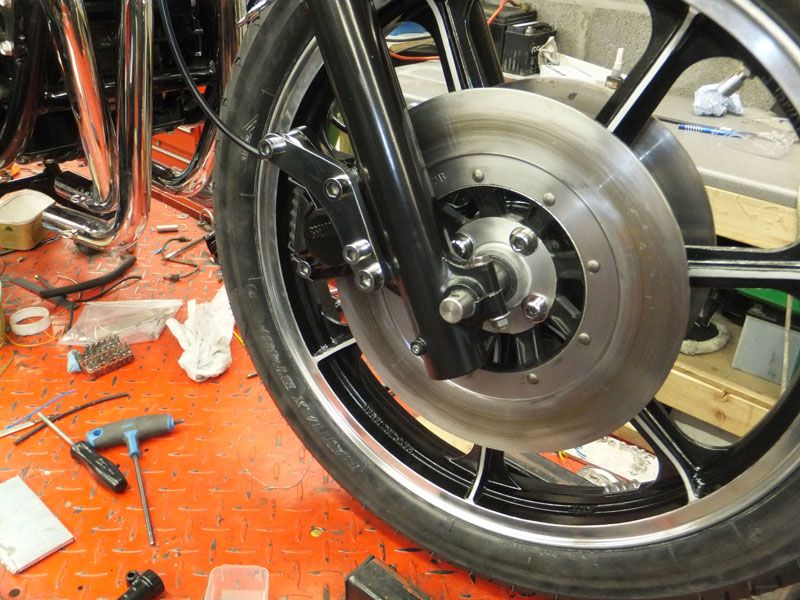
Now I can give TLC his wheel back - Many thanks for the loan Chris.
I did some more plating today as I had temporarily lost one of the fat washers from the front LHS foot rests when I did the last lot and I had also forgotten to do the front spindle nut. As I was setting up the kit I managed to break the tank heater, so I had to go to Pets at Home or whatever the ghastly place is called to buy another aquarium heater I have now bolted up all the footpegs ...
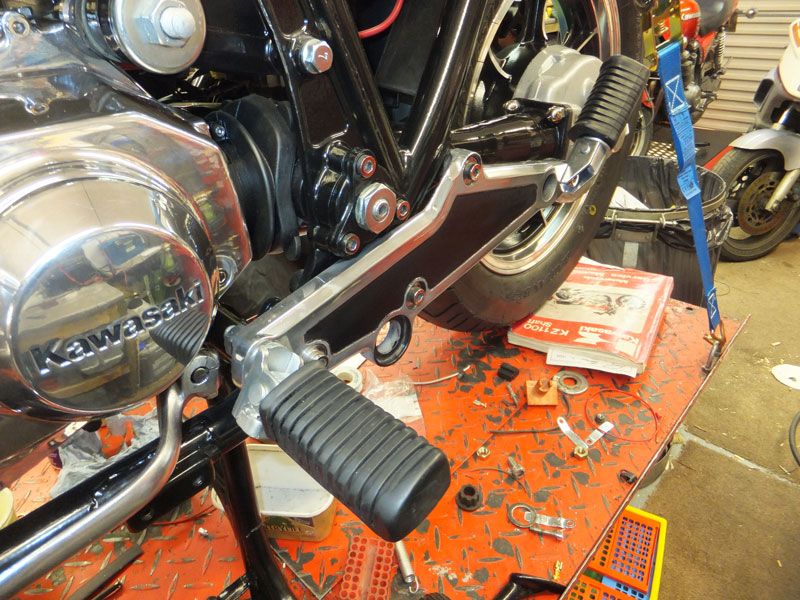
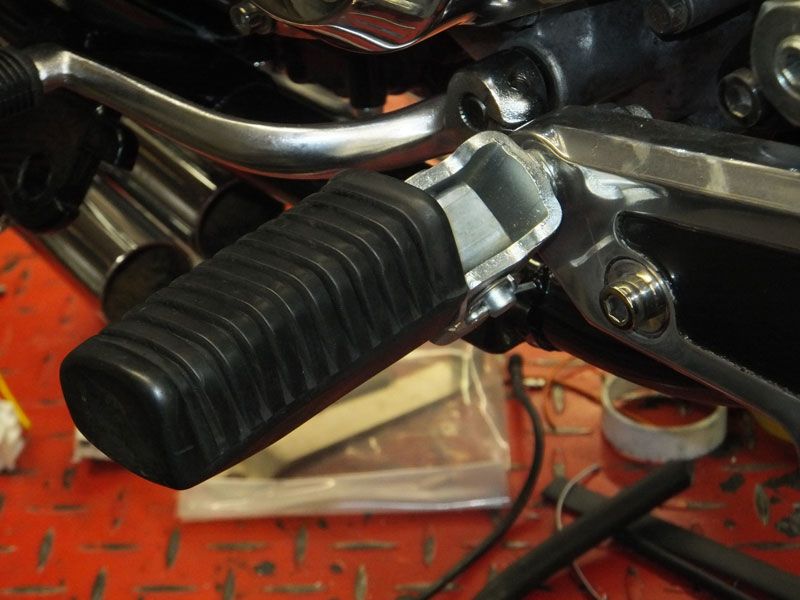
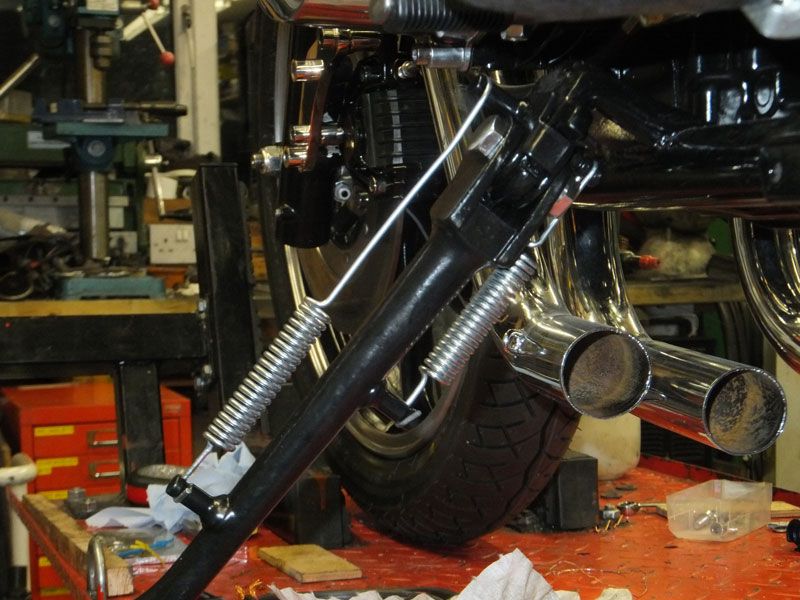
Last job today was to fit the side stand. The bloody bolt has a worn thread so it looks as though I'll have to make another. Fecker was turning round and round
Not too sure how good the thread is in the stand itself either Best I order up an M12 x 1.25 split die  At least it'll be stainless this time
The first thing to offend me was the pins in the calipers - Brembo for some reason best known to themselves, make the pad holding pins in mild steel which obviously always rusts like feck. I know that one can buy stainless pins from Motorworks, but as I am skint and still held up by things beyond my control, last weekend I decided to spend the Saturday making new ones
I ground up a mini parting tool for the groove that hold the securing ring ...
Sadly I didn't have any 6mm stainless, only 1/4", so I had to turn the diameter all the way and that had to be done between centres; I've tried using the travelling steady on this lathe before and it's as much use as tits on a bull
The pretty groove at the end I turned free hand with a bull nose tool which wasn't the right radius so I had to dance the hand wheels a bit.
But after spending a ridiculous amount of time they looked OK to me
I was fortunate to find a set of EBC HH pads in stock; I can only assume that I must have bought them for a customer's BMW some time ago - it was a welcome find
I bought some more Zinc Chromate etch primer. It is essential for these sort of parts to use an etch with no build. I'm not looking for an uber flat surface as on a tank. If you use an etch with a build (filler), and 99% of it does, and should you be unfortunate enough, as I was with CB's Z650 to have a fuel line fracture, the petrol will get sucked into the the porous primer and push the paint off - that sight is soul destroying I can assure you! Getting this primer was really tricky, but now I have a good source - Brewers
When I was getting pain and grief from the master cylinder, I accidentally dripped some brake fluid on the engine and when I realised what I had done the bloody stuff had been there for at least quarter of an hour. I used the colourful language that usually rings out in my workshop when I'm working on this bike; but to my surprise, when I wiped the drips off there was no damage to the paint
I etch primed them in the shade of the log store as the wind was blowing a bleedin' gale ...
... I did the front wheel as well ...
... then hung them up to dry above the bog door along with some plating I had done ...
On a more temperate day I painted the calipers on CB's washing line in the back garden and also the wheel and of course back to the drying bog
I decided to bake the calipers at 70°C for a few hours, given that they were going to have to cope with brake fluid. That paint does take a long time to cure, but is pretty dandy when it has
I obviously re-plated all the zinc plated bits, machined and polished some stainless bolts and here's one of the calipers ready to go on ...
Then it was just a case of fitting the new master cylinder and bleeding it all up ...
I took the tyre off the 'original wheel and fitted it to the 'new' wheel with a new extra tough inner tube. I was really surprised how bloody heavy these wheels are
Now I can give TLC his wheel back - Many thanks for the loan Chris.
I did some more plating today as I had temporarily lost one of the fat washers from the front LHS foot rests when I did the last lot and I had also forgotten to do the front spindle nut. As I was setting up the kit I managed to break the tank heater, so I had to go to Pets at Home or whatever the ghastly place is called to buy another aquarium heater
Last job today was to fit the side stand. The bloody bolt has a worn thread so it looks as though I'll have to make another. Fecker was turning round and round
Not too sure how good the thread is in the stand itself either
Ralph Ferrand
Z1000A1 (1977), Z1300A5 (1983), Z900A4 (1976) GPZ1100 Unitrak (1983)(project), RD250B (1975)(project), ZRX1200R (2005) DT175MX (1981) YZF R6 (1999)
http://www.bikerstoolbox.co.uk
Z1000A1 (1977), Z1300A5 (1983), Z900A4 (1976) GPZ1100 Unitrak (1983)(project), RD250B (1975)(project), ZRX1200R (2005) DT175MX (1981) YZF R6 (1999)
http://www.bikerstoolbox.co.uk
-
coldsummer

- Hardcore
- Posts: 3211
- Joined: 29th Jun 2009
- Location: Berkeley


-
RALPHARAMA
- Area Rep.
- Posts: 3407
- Joined: 19th May 2007
- Location: Pensford, Somerset
- Contact:
The Shafter has poured more misery on my soul the last couple of weeks. I decided to get the candy on last weekend as it was the nearest to spraying weather we've had for months. I rocked up at my friend's spray booth with all my kit and Jak (my paint mentor) and cracked on with de-shiting the booth. Jak talked me through lots of the prep I had forgotten and put on the silver base coat. This went on well with no hiccups. I was disappointed that the silver was quite fine, which isn't really what you want for a candy. The candy itself though was a bloody nightmare. It was a two pack and wasn't drying quickly in the cold air and the tight bastards that supplied it had been mean with the more expensive concentrate, so the colour was thin. This meant I had to lard a whole litre of the stuff on and because it was so wet for so long I ended up with huge amounts of detritus in it and to top it all a blob of paint and shite dripped off the top of the gun right in the middle of the tank top That really put the tin hat on it. I blasted over a few coats of clear coat in the hope I could rescue it. Trouble is that when you lumps of shite land in candy, it goes very dark and so no amount of flatting will put it right again.
I have now given up on it and am flatting it back and will put a blue base coat on which I have had specially mixed with a strong, coarse, sparkly silver in it.
The spray booth I use isn't heated and has no filtration for the air coming in, so has a tendency to grab shite from outside, so banging on a one pack basecoat and then protecting it with loads of 2 pack clearcoat is probably my best plan. If you get a bit of shite in the base coat you can always nip it out with a bit o flatting paper.
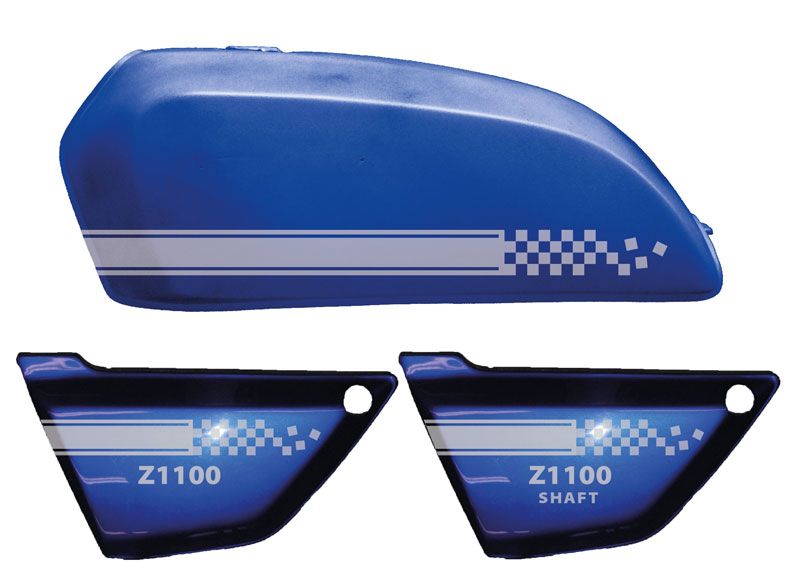
I have ordered some self adhesive stencil material, which I'll cut on my vinyl cutter for the graphics. I took some pic of the tank ages ago and made it sorta blue and designed the graphics this morning. I also decided to add some graphic to the side panels. Here's a rough mock up:
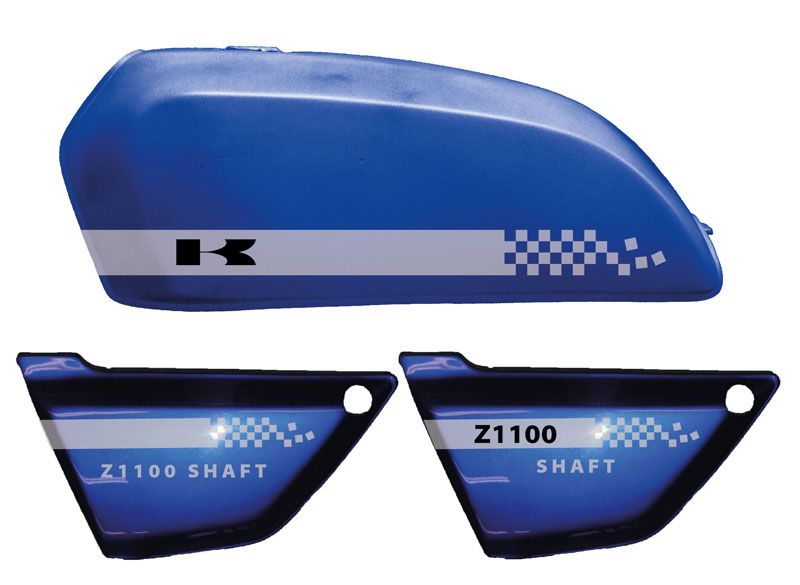
Any views on the designs?
Rather than cutting reversed out graphics I think I'll blast some silver base coat on the relevant areas of the tank and side panels, let it go off and then mask over the silver, so that if we ever get any suitable weather to finish the paint job all I need to do is bang on the blue base coat and clear coat it. I have been asking around body shops to see if any one will hire me some space, but so far all has fallen upon infertile soil
I have now given up on it and am flatting it back and will put a blue base coat on which I have had specially mixed with a strong, coarse, sparkly silver in it.
The spray booth I use isn't heated and has no filtration for the air coming in, so has a tendency to grab shite from outside, so banging on a one pack basecoat and then protecting it with loads of 2 pack clearcoat is probably my best plan. If you get a bit of shite in the base coat you can always nip it out with a bit o flatting paper.
I have ordered some self adhesive stencil material, which I'll cut on my vinyl cutter for the graphics. I took some pic of the tank ages ago and made it sorta blue and designed the graphics this morning. I also decided to add some graphic to the side panels. Here's a rough mock up:
Any views on the designs?
Rather than cutting reversed out graphics I think I'll blast some silver base coat on the relevant areas of the tank and side panels, let it go off and then mask over the silver, so that if we ever get any suitable weather to finish the paint job all I need to do is bang on the blue base coat and clear coat it. I have been asking around body shops to see if any one will hire me some space, but so far all has fallen upon infertile soil
Ralph Ferrand
Z1000A1 (1977), Z1300A5 (1983), Z900A4 (1976) GPZ1100 Unitrak (1983)(project), RD250B (1975)(project), ZRX1200R (2005) DT175MX (1981) YZF R6 (1999)
http://www.bikerstoolbox.co.uk
Z1000A1 (1977), Z1300A5 (1983), Z900A4 (1976) GPZ1100 Unitrak (1983)(project), RD250B (1975)(project), ZRX1200R (2005) DT175MX (1981) YZF R6 (1999)
http://www.bikerstoolbox.co.uk

-
RALPHARAMA
- Area Rep.
- Posts: 3407
- Joined: 19th May 2007
- Location: Pensford, Somerset
- Contact:
I've been sooo frustrated by being held up lately that I'd forgotten that I have done a bit here and there. I bit get the 'arris pipe stripped of chrome, cut it up and re-welded it so that it will fit the bike and sent it back to Norman Hyde so they can re-polish and re-plate it. The tossers who striped the chrome, charged me 50% on top of the original quote and then didn't strip it properly, so when I was trying to weld it there was a fire work night display under my tungsten Any way it's back oop norf, so hopefully it'll re-appear as some point. I didn't have time to take pix of that operation.
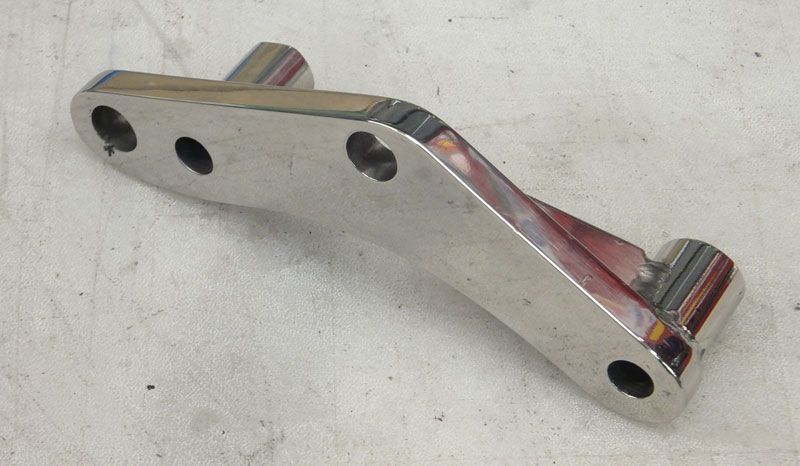
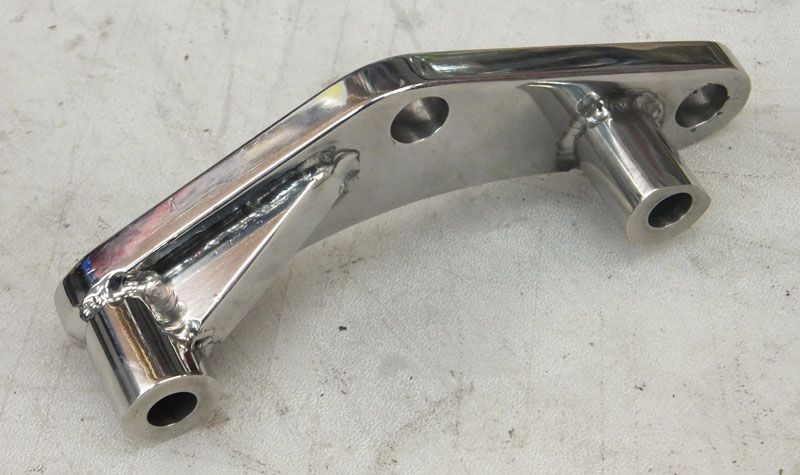
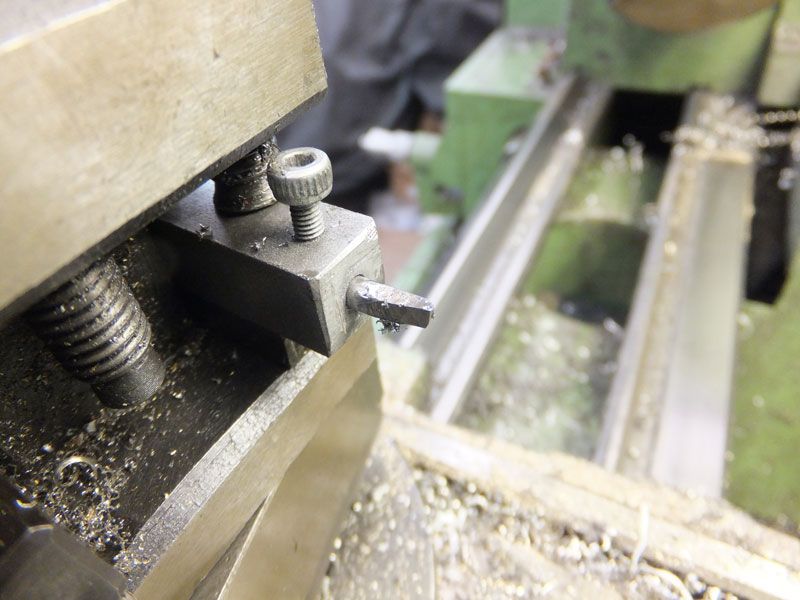
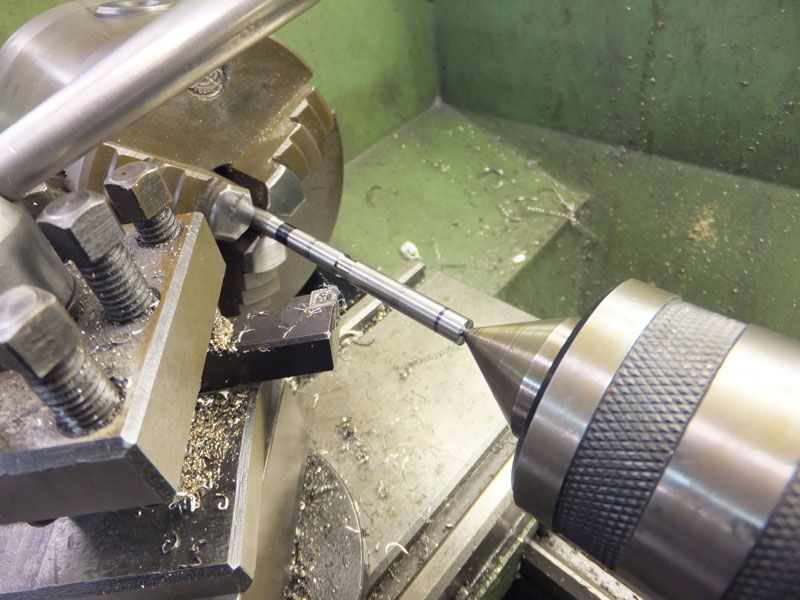
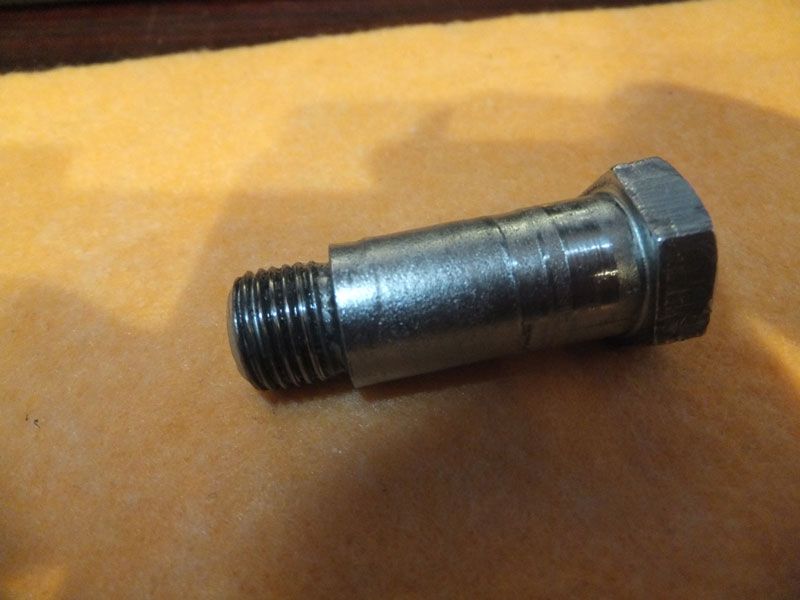
The bloody side stand bolt was rather short of threads so when it 'did up' it went around and round Being as tight as arseholes, I didn't even approach Mr KAwasaki for a replacement but grabbed a bit of 316 round stock off the shelf and stuck it in the lathe. It would have been easier to start with a bit o hex, but I didn't have any the correct size, so having machined the thread and plain bearing bit I had to turn my home made rotary table on its end, clock in the material in the four jaw chuck and mill the flats.
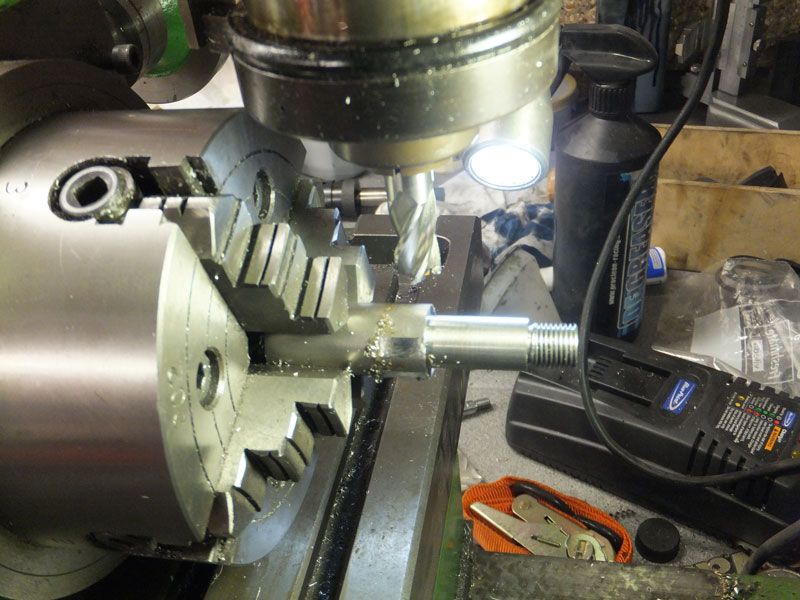
It was a bit shaky with the rotary table that way up, but I got there in the end.
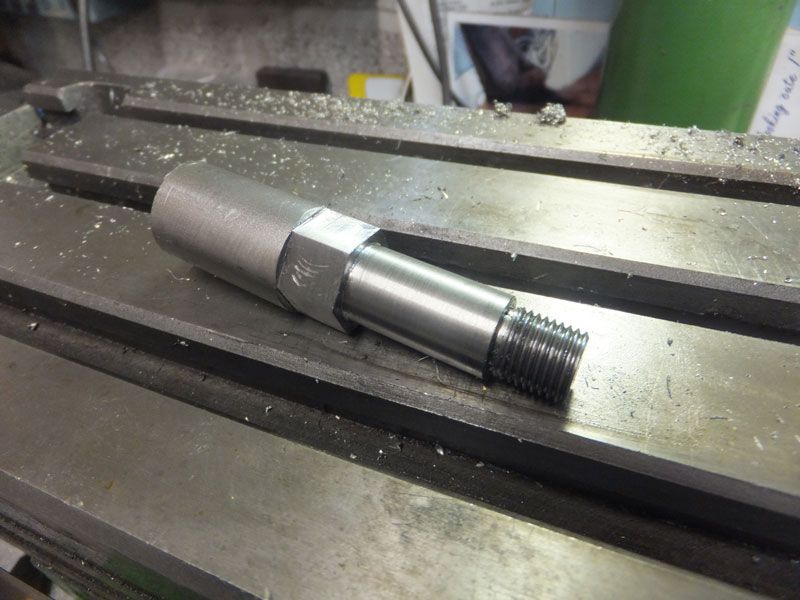
I then cut the hex bit in two, so I could have a lock nut, which the original didn't have. This will make it much stronger and less likely to suffer from thread damage again.
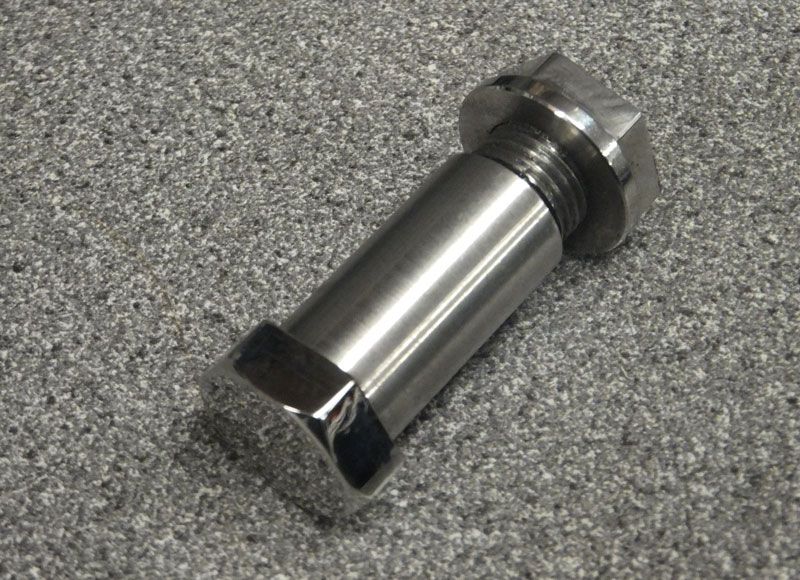
It fitted a treat and should be better than the original BZP mild steel item
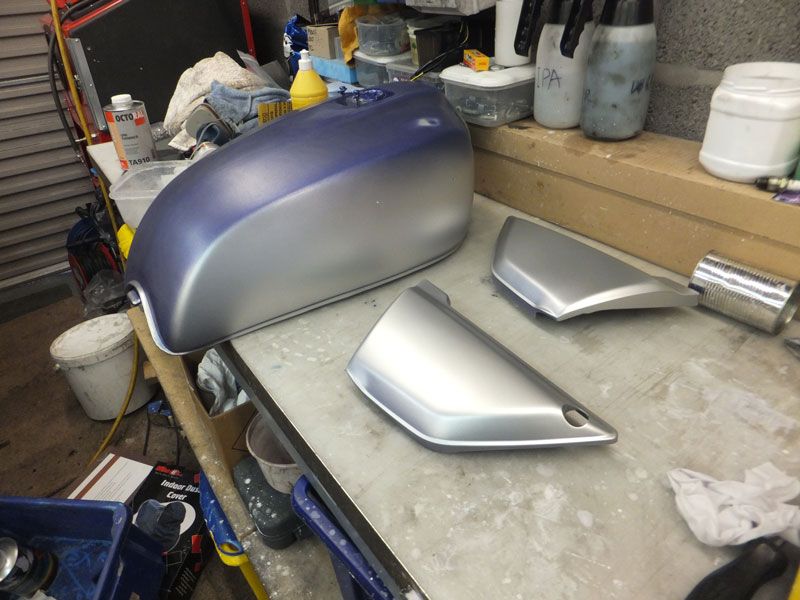
As the rain ceased this afternoon I have blown some silver base coat on the tank and side panels, ready for masking up for the blue base coat.
I have re-evaluated the graphix after chatting with Jak and here is the latest version
The masking material should be here tomoz or the next day, so I'll have to see if I can remember how to drive the vinyl cutter
The bloody side stand bolt was rather short of threads so when it 'did up' it went around and round
It was a bit shaky with the rotary table that way up, but I got there in the end.
I then cut the hex bit in two, so I could have a lock nut, which the original didn't have. This will make it much stronger and less likely to suffer from thread damage again.
It fitted a treat and should be better than the original BZP mild steel item
As the rain ceased this afternoon I have blown some silver base coat on the tank and side panels, ready for masking up for the blue base coat.
I have re-evaluated the graphix after chatting with Jak and here is the latest version
The masking material should be here tomoz or the next day, so I'll have to see if I can remember how to drive the vinyl cutter
Ralph Ferrand
Z1000A1 (1977), Z1300A5 (1983), Z900A4 (1976) GPZ1100 Unitrak (1983)(project), RD250B (1975)(project), ZRX1200R (2005) DT175MX (1981) YZF R6 (1999)
http://www.bikerstoolbox.co.uk
Z1000A1 (1977), Z1300A5 (1983), Z900A4 (1976) GPZ1100 Unitrak (1983)(project), RD250B (1975)(project), ZRX1200R (2005) DT175MX (1981) YZF R6 (1999)
http://www.bikerstoolbox.co.uk
Who is online
Users browsing this forum: No registered users and 17 guests