Talking of brakes. A set that is both and upgrade and easy to fit are the Nissin calipers of a CBR600 PC25 or PC31. I am in the process of fitting them on my Z1000J with Z1100ST forks, so if you're interested I'll send you some pix and measurements (no point in doing the adapter-plates for you as it's a simple 4-hole-drilling and tapping job and I use bigger 300mm disks anyway).
Cheers
Greg
Hello Guest User,
Please feel free to have a look around the forum but be aware that as an unregistered guest you can't see all of it and you can't post.
To access these 'Registered Users Only' areas simply register and login.
Please feel free to have a look around the forum but be aware that as an unregistered guest you can't see all of it and you can't post.
To access these 'Registered Users Only' areas simply register and login.
Z1100ST Resto +
Moderators: KeithZ1R, chrisu, paul doran, Taffus
-
Is Vic There
- Hardcore

- Posts: 1460
- Joined: 8th Nov 2011
- Location: Brisbane, Australia.
Don't give up mate, this thread is a brilliant inspirational restoration guide and you should be truly proud of your achievement so far.
Love your work.
Love your work.
Z1000R ELR, Z1100R ELR, GPz900R A1, GPz750 Turbo, Norton F1, Harris Mag 2, Harris Mag 5, Yamaha YZR750SP, Triumph Steve McQueen, Suzuki RGV250 Sheene Rep, Suzuki RG500 Walter Wolf, Suzuki RG250 Walter Wolf, Aprilia RS250, Yamaha YL1, RG500. H**** NS400.

-
kev edwards
- Hardcore
- Posts: 1487
- Joined: 3rd Apr 2009
- Location: leverington UK
-
Ginger Bear

- Hardcore
- Posts: 6850
- Joined: 16th Dec 2008
- Location: In the Dark.
- Contact:
Still need a wheel Ralph 
This one is 2.15 wide.
http://www.ebay.co.uk/itm/Kawasaki-Z650 ... 0560265%26
This one is 2.15 wide.
http://www.ebay.co.uk/itm/Kawasaki-Z650 ... 0560265%26

# 104
Phil Churchett Award Winner 2011 & 2016
Buzzworkz Best Modified Zed 2016
-
RALPHARAMA

- Area Rep.

- Posts: 3407
- Joined: 19th May 2007
- Location: Pensford, Somerset
- Contact:
Ginger Bear wrote:Still need a wheel Ralph
This one is 2.15 wide.
http://www.ebay.co.uk/itm/Kawasaki-Z650 ... 0560265%26
Cheers Steve, I have already got it in my watched items and am ready to pounce
Ralph Ferrand
Z1000A1 (1977), Z1300A5 (1983), Z900A4 (1976) GPZ1100 Unitrak (1983)(project), RD250B (1975)(project), ZRX1200R (2005) DT175MX (1981) YZF R6 (1999)
http://www.bikerstoolbox.co.uk
Z1000A1 (1977), Z1300A5 (1983), Z900A4 (1976) GPZ1100 Unitrak (1983)(project), RD250B (1975)(project), ZRX1200R (2005) DT175MX (1981) YZF R6 (1999)
http://www.bikerstoolbox.co.uk
-
RALPHARAMA
- Area Rep.
- Posts: 3407
- Joined: 19th May 2007
- Location: Pensford, Somerset
- Contact:
nanno wrote:Talking of brakes. A set that is both and upgrade and easy to fit are the Nissin calipers of a CBR600 PC25 or PC31. I am in the process of fitting them on my Z1000J with Z1100ST forks, so if you're interested I'll send you some pix and measurements (no point in doing the adapter-plates for you as it's a simple 4-hole-drilling and tapping job and I use bigger 300mm disks anyway).
Cheers
Greg
Thanks for that Greg; I really want to keep it with period bits and have already bought some Brembos of the right era. I just have the nightmare of getting it all to work together
Ralph Ferrand
Z1000A1 (1977), Z1300A5 (1983), Z900A4 (1976) GPZ1100 Unitrak (1983)(project), RD250B (1975)(project), ZRX1200R (2005) DT175MX (1981) YZF R6 (1999)
http://www.bikerstoolbox.co.uk
Z1000A1 (1977), Z1300A5 (1983), Z900A4 (1976) GPZ1100 Unitrak (1983)(project), RD250B (1975)(project), ZRX1200R (2005) DT175MX (1981) YZF R6 (1999)
http://www.bikerstoolbox.co.uk
-
RALPHARAMA
- Area Rep.
- Posts: 3407
- Joined: 19th May 2007
- Location: Pensford, Somerset
- Contact:
The shafter continues to try my patience  But I'm learning all the time; I thought I needed a new speedo drive as the drive on the older wheel is different to the J series wheels. A mate, Jak, gave me a speedo drive and then I realised that other than the removable bit they're very similar. I then realised the one I had been given didn't work. I had a dig around in the crap in the attic and found one which I think is probably of a Z250 and I also found a front wheel spindle - no idea what it's from, but it was a starting point.
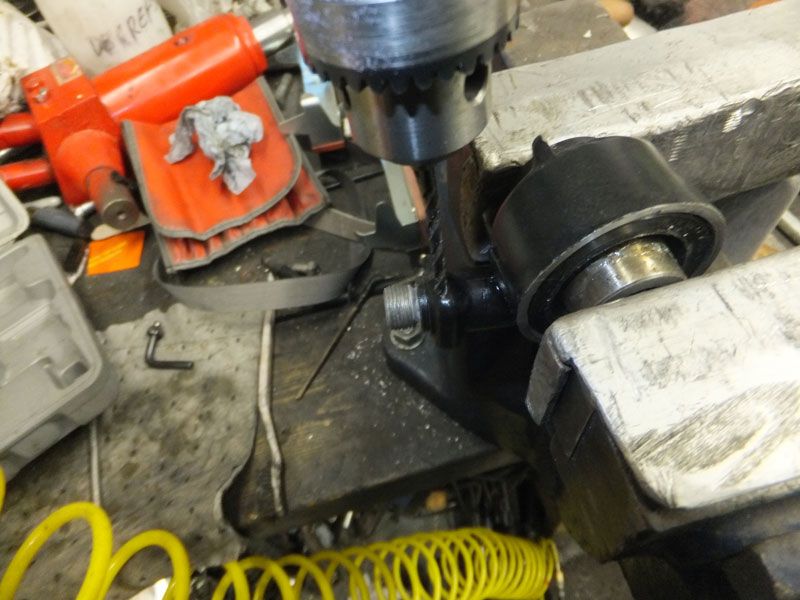
Now having three speedo drives I thought I would try and make one decent one out of the lot. The worm drive output is held in place with a blind roll pin; how the feck you're supposed to get them out I have no idea. After piss arsing about with various sharp pointy things, wood screws and stud extractors I gave up and drilled a pilot hole through the the middle of the roll pin ...
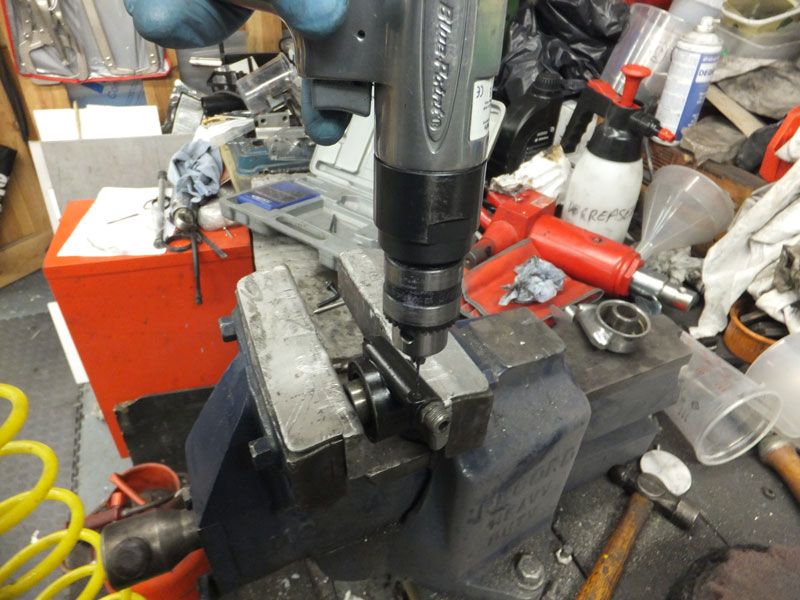
... and then drilled out from the other side the same diameter as the roll pin so I could drift out the roll pin with a straight pin punch. {sets of Signet straight pin punches are on special offer on Biker's Toolbox this month if you haven't got a set } ...
} ...
... then I could drag out the worm drive and the bit the cable screws onto, which has a larger thread on the J series than the other two. When I disassembled the one that came with the bike, the worm drive was fecked as well. The one from the Z250(?) had a slightly different pitch on the drive gear, but at least it wasn't bollocks'd. The Kwaka speedos were never renowned for accuracy so I don't suppose it'll be the end of the earth. I chose the best shell and bored it out in the lath to fit the spindle and Micky'd it.
The spindle I had dug out then needed the attention of my lathe. I got a piece of free cutting mild steel and machined up a sleeve to fit in the pinch bit on the right hand fork leg.
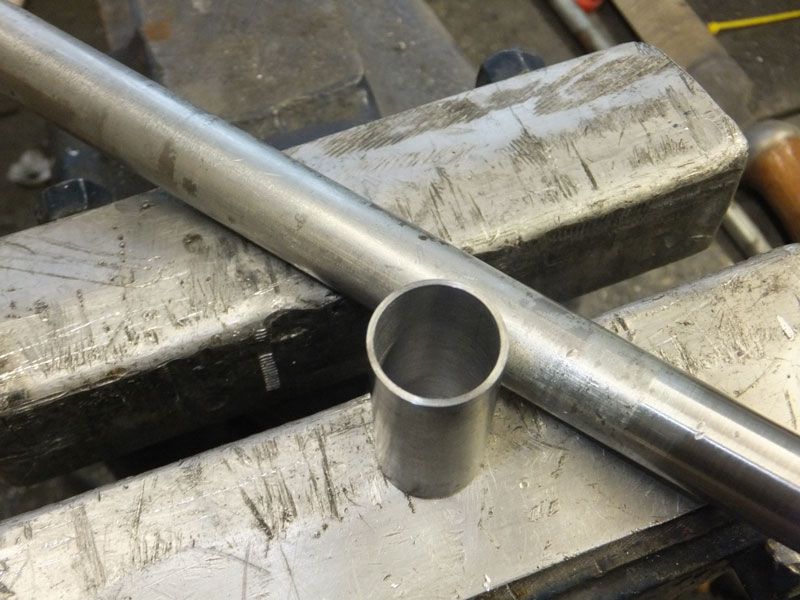
I thought, wrongly it seems, that the best way to attach it was with silver solder so I dragged out the big ciggy lighter But, even with a large jet in the sapphire torch, it was struggling to heat up the spindle but was burning the thin sleeve. I gave that up as a bad job and blew some sparks at it with the tig and then cleaned it up in the lathe.
I had to machine off various bits of the spindle which proved to be very tough material, which seemed to vary in hardness; it was a bit like machining cast iron castings that have bits of 'chill' in places. On the other end I had to machine off the thread and re-cut it with M14 x 1.5. As I didn't have a die that size, I thought I'd thread cut it on the lathe, but the bastard chinese piece of shit wasn't having any of it and kept jumping gears on the change wheel drive to the lead screw. I can tell you I was getting plenty pissed off with it and finally had to accept defeat and promised myself that come hell or high water I will get a decent fecking lathe this year To be fair I have done a fair bit of thread cutting with it in the past, but it simply wasn't built to machine grown up materials. In the end I invested in a new M14 x 1.5 die to sit next to the M14 x 1.25 in my box, which has also only been used the once
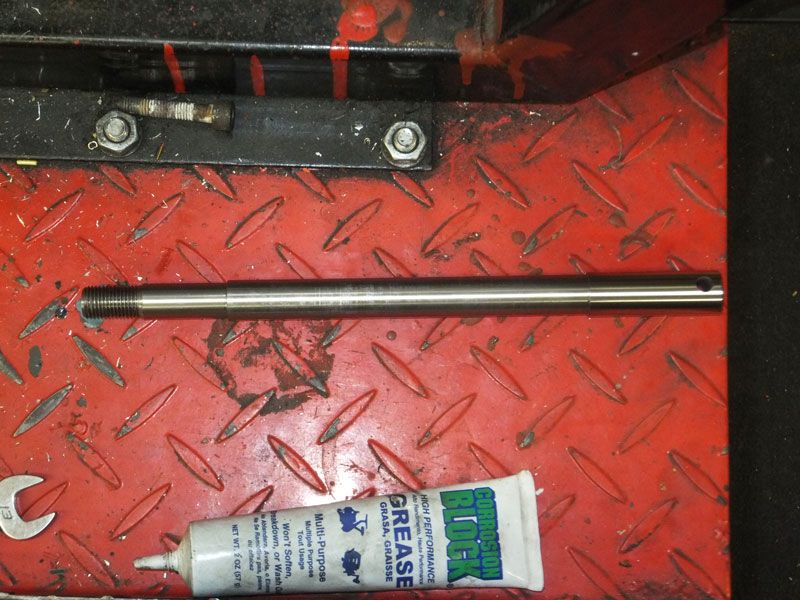
I finally finished the spindle, though I'm still tempted to make another in 316 stainless, just not sure if it's really strong enough - I'll need to research that one I guess.
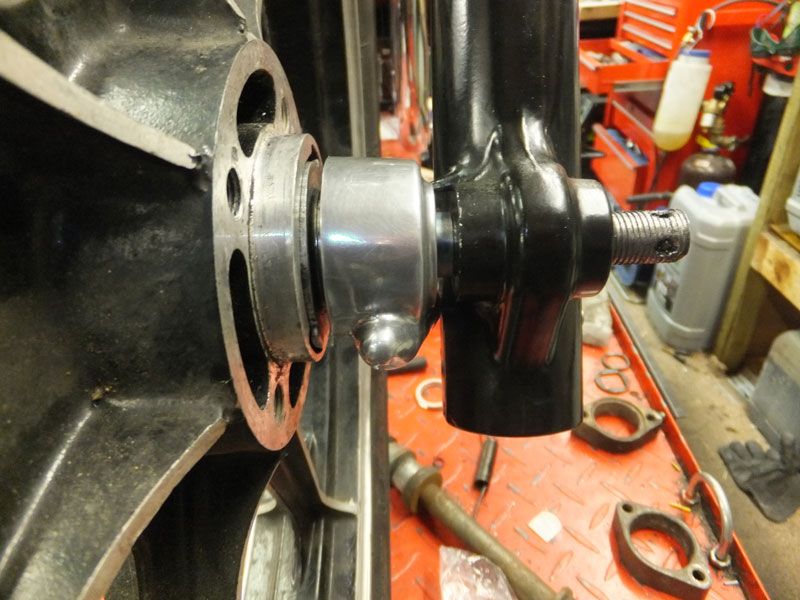
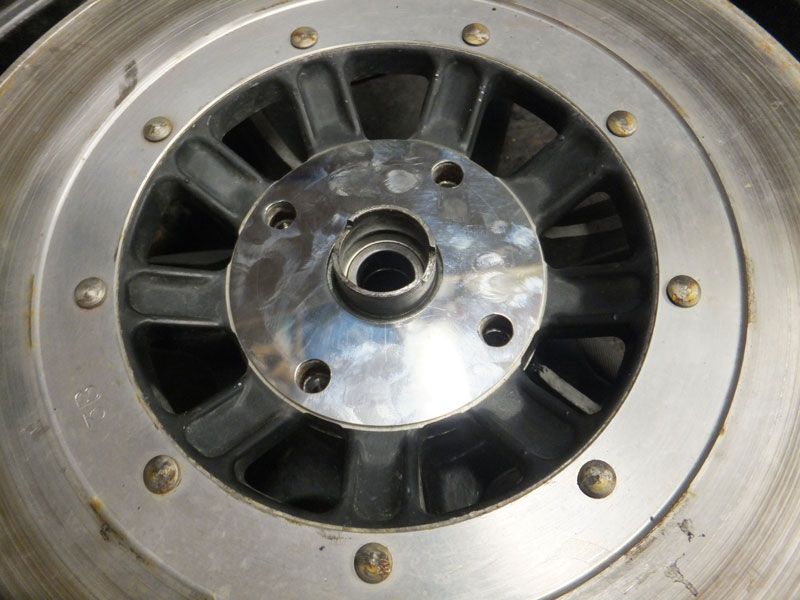
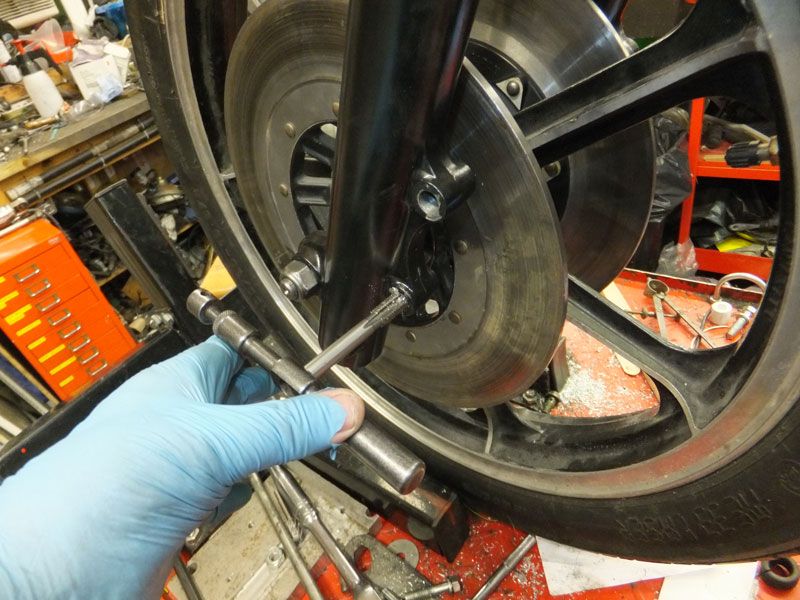
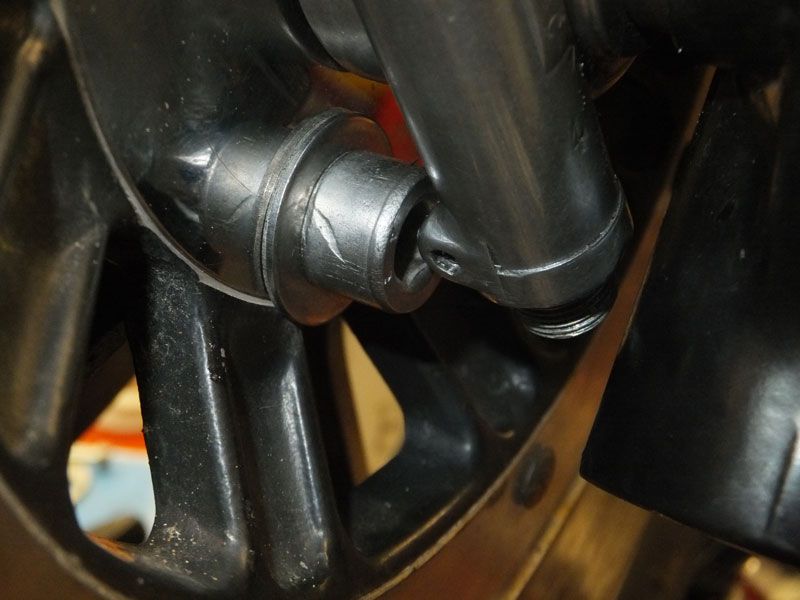
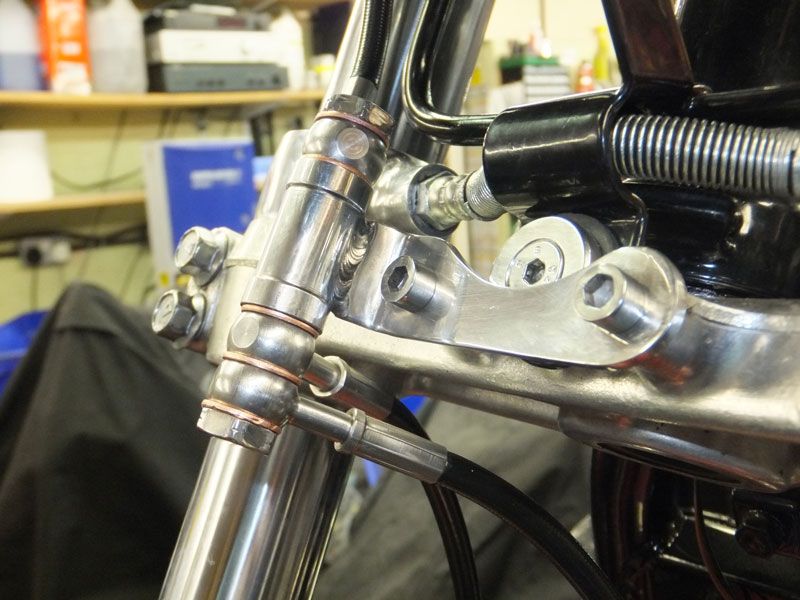
I started putting it together and there are still issues with the speedo drive as you can see in this photo -
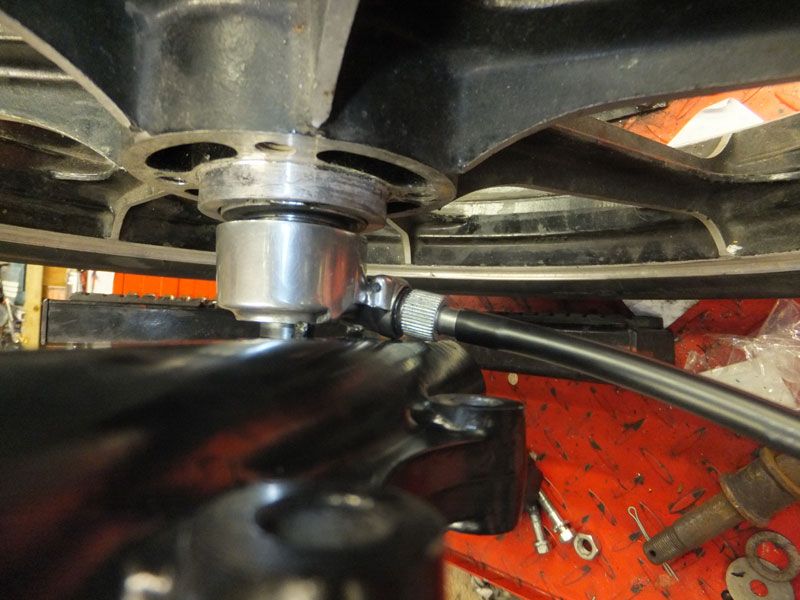
I think I'm going to have to make a shim spacer to bring the drive in from the fork leg; I may file a little bit off the fork leg, but I'll have to be very careful as I have no idea how thick it is; I suspect not very This will leave the wheel not perfectly centred in the forks, but I think I can machine a bit off the inside of the speedo drive and make a thinner dust cover and also trim down the floating bit that actually drives from the wheel. Every little bit helps to get it closer to correct I guess
As I couldn't seem to locate a decent clutch cable adjuster for the handle bar end, I decided to make one in 316 stainless. I was going fine, but as I suspected, the wheels on my cheapo knurling tool weren't making much headway on the hard stainless, but it's near enough and to be fair I didn't want it too sharp anyway. I didn't bother taking pix of that bit as it was pretty straight forward lathe work. What was a bit more challenging was milling the 3/32" slot for the cable. I ran the cutter as fast as the mill would go with lots of Rocal RTD cutting fluid - soz I don't sell it, but it is the donk's for machining stainless .. The secret with stuff like this is very light cuts

When I finished, I de-burred both parts and Micky'd the lock nut
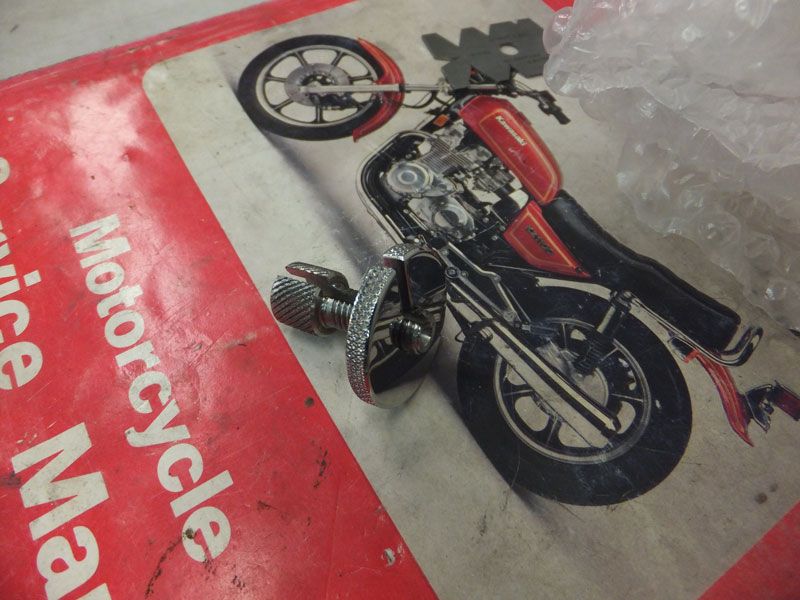
Although it was a disproportionate amount of time and effort to make such a simple and probably cheap part (if you can find one), I enjoyed the challenge and it would have all been worth it had the pattern clutch cable not turned out to be made wrong Whale Oil Beef Hooked The inner has the nipple a good inchto long 
I'm going to the trade expo Sunday week and doubtless Venhill will be there, so I'll actually buy the cable making kit I have been lusting over the last four visits To be fair I can't get a decent throttle cable for it, so I'll need to make one of those anyway 
Now having three speedo drives I thought I would try and make one decent one out of the lot. The worm drive output is held in place with a blind roll pin; how the feck you're supposed to get them out I have no idea. After piss arsing about with various sharp pointy things, wood screws and stud extractors I gave up and drilled a pilot hole through the the middle of the roll pin ...
... and then drilled out from the other side the same diameter as the roll pin so I could drift out the roll pin with a straight pin punch. {sets of Signet straight pin punches are on special offer on Biker's Toolbox this month if you haven't got a set
... then I could drag out the worm drive and the bit the cable screws onto, which has a larger thread on the J series than the other two. When I disassembled the one that came with the bike, the worm drive was fecked as well. The one from the Z250(?) had a slightly different pitch on the drive gear, but at least it wasn't bollocks'd. The Kwaka speedos were never renowned for accuracy so I don't suppose it'll be the end of the earth. I chose the best shell and bored it out in the lath to fit the spindle and Micky'd it.
The spindle I had dug out then needed the attention of my lathe. I got a piece of free cutting mild steel and machined up a sleeve to fit in the pinch bit on the right hand fork leg.
I thought, wrongly it seems, that the best way to attach it was with silver solder so I dragged out the big ciggy lighter
I had to machine off various bits of the spindle which proved to be very tough material, which seemed to vary in hardness; it was a bit like machining cast iron castings that have bits of 'chill' in places. On the other end I had to machine off the thread and re-cut it with M14 x 1.5. As I didn't have a die that size, I thought I'd thread cut it on the lathe, but the bastard chinese piece of shit wasn't having any of it and kept jumping gears on the change wheel drive to the lead screw. I can tell you I was getting plenty pissed off with it and finally had to accept defeat and promised myself that come hell or high water I will get a decent fecking lathe this year
I finally finished the spindle, though I'm still tempted to make another in 316 stainless, just not sure if it's really strong enough - I'll need to research that one I guess.
I started putting it together and there are still issues with the speedo drive as you can see in this photo -
I think I'm going to have to make a shim spacer to bring the drive in from the fork leg; I may file a little bit off the fork leg, but I'll have to be very careful as I have no idea how thick it is; I suspect not very
As I couldn't seem to locate a decent clutch cable adjuster for the handle bar end, I decided to make one in 316 stainless. I was going fine, but as I suspected, the wheels on my cheapo knurling tool weren't making much headway on the hard stainless, but it's near enough and to be fair I didn't want it too sharp anyway. I didn't bother taking pix of that bit as it was pretty straight forward lathe work. What was a bit more challenging was milling the 3/32" slot for the cable. I ran the cutter as fast as the mill would go with lots of Rocal RTD cutting fluid - soz I don't sell it, but it is the donk's for machining stainless
When I finished, I de-burred both parts and Micky'd the lock nut
Although it was a disproportionate amount of time and effort to make such a simple and probably cheap part (if you can find one
I'm going to the trade expo Sunday week and doubtless Venhill will be there, so I'll actually buy the cable making kit I have been lusting over the last four visits
Ralph Ferrand
Z1000A1 (1977), Z1300A5 (1983), Z900A4 (1976) GPZ1100 Unitrak (1983)(project), RD250B (1975)(project), ZRX1200R (2005) DT175MX (1981) YZF R6 (1999)
http://www.bikerstoolbox.co.uk
Z1000A1 (1977), Z1300A5 (1983), Z900A4 (1976) GPZ1100 Unitrak (1983)(project), RD250B (1975)(project), ZRX1200R (2005) DT175MX (1981) YZF R6 (1999)
http://www.bikerstoolbox.co.uk
-
RALPHARAMA
- Area Rep.
- Posts: 3407
- Joined: 19th May 2007
- Location: Pensford, Somerset
- Contact:
Ginger Bear wrote:Still need a wheel Ralph
This one is 2.15 wide.
http://www.ebay.co.uk/itm/Kawasaki-Z650 ... 0560265%26
I won the fecker, but the arseholes at Herpes delivery twats inc haven't deigned to hand it over yet
Ralph Ferrand
Z1000A1 (1977), Z1300A5 (1983), Z900A4 (1976) GPZ1100 Unitrak (1983)(project), RD250B (1975)(project), ZRX1200R (2005) DT175MX (1981) YZF R6 (1999)
http://www.bikerstoolbox.co.uk
Z1000A1 (1977), Z1300A5 (1983), Z900A4 (1976) GPZ1100 Unitrak (1983)(project), RD250B (1975)(project), ZRX1200R (2005) DT175MX (1981) YZF R6 (1999)
http://www.bikerstoolbox.co.uk
-
kev edwards
- Hardcore
- Posts: 1487
- Joined: 3rd Apr 2009
- Location: leverington UK
-
stephen parr

- 100Club

- Posts: 263
- Joined: 19th Oct 2008
- Location: leicestershire
-
RALPHARAMA
- Area Rep.
- Posts: 3407
- Joined: 19th May 2007
- Location: Pensford, Somerset
- Contact:
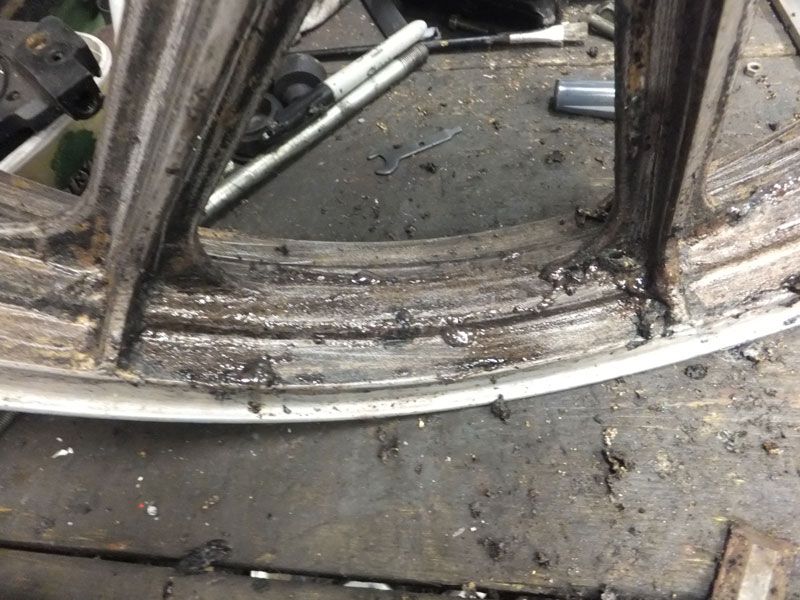
Well the wheel finally arrived and it soon became apparent why the fleabay pic was soooo blurred The vendor also just chucked it in a plastic bag for shipping - tosser.
It was cheap though, and given that unless it was a minter I would have refurbed it anyway, it wasn't the end of the world. I ripped the bearings from it and slathered it in paint stripper ...
... then I polished the rim and masked it up for a long stay in the bead blast cabinet ....
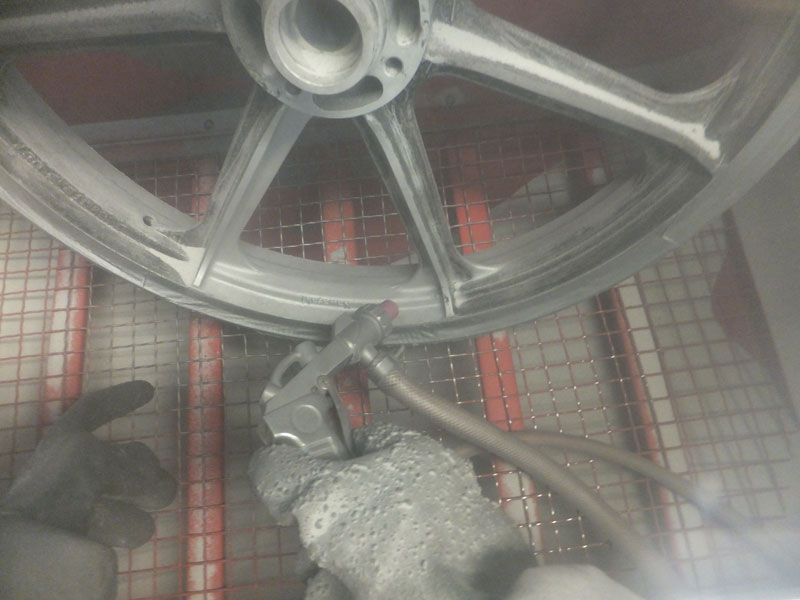
... after two long evenings with the ear plugs in, it finally was clean and ready for masking for paint. I have masked it and the weather has been sooo shite since then, that this was as far as I got.
To continue the project I have been using TLC's wheel. I had to make a thin stainless bearing cover to hold the speedo drive in place. This sounds an easy thing to do, but it wasn't. Making big holes in thin, but hard sheet is never easy Here's the end result, covered in greasy finger prints ...
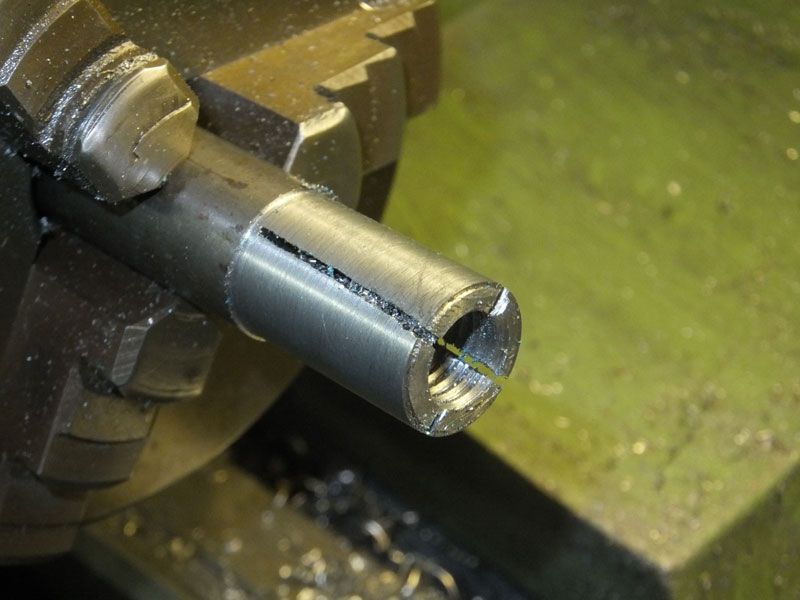
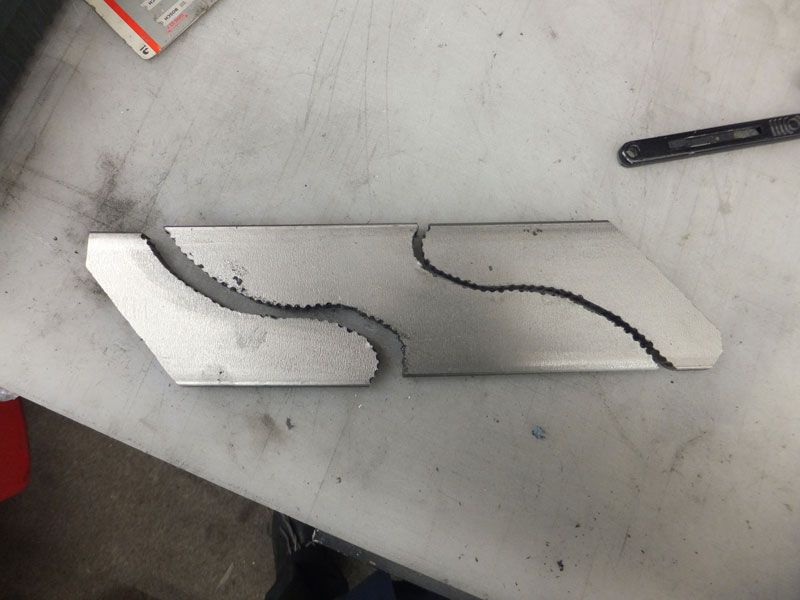
To centralise the wheel as much as I could, I had to make new spacers and machine some land off the speedo drive gearbox centre bit and the drive collar. To accurately machine the gearbox centre, and it needs to be accurate, I machined up a mandrel in the lathe to fit. I cut a partial thread in the centre using a 1st taper tap and then cut rough slots with a hacksaw ...
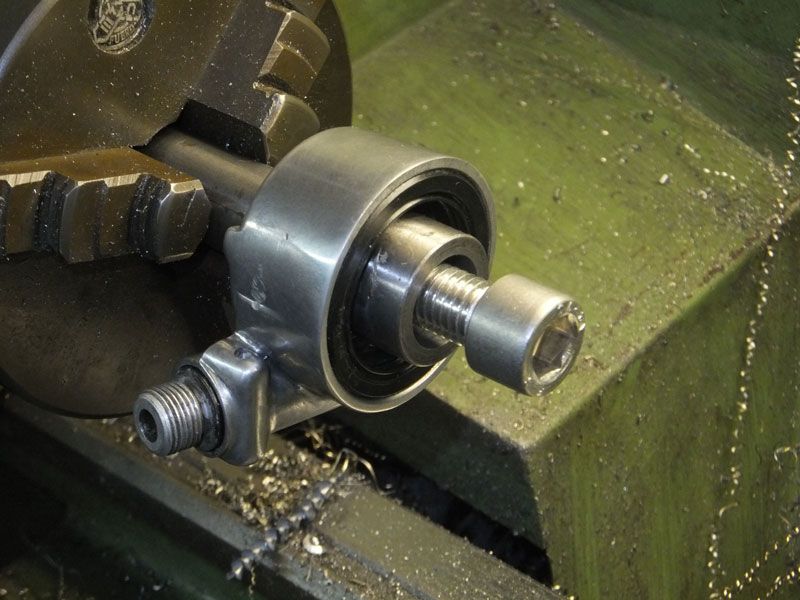
... then I slipped the drive on it and secured it with a bolt to make it tight so I could machine a bit off, but keep it true ...
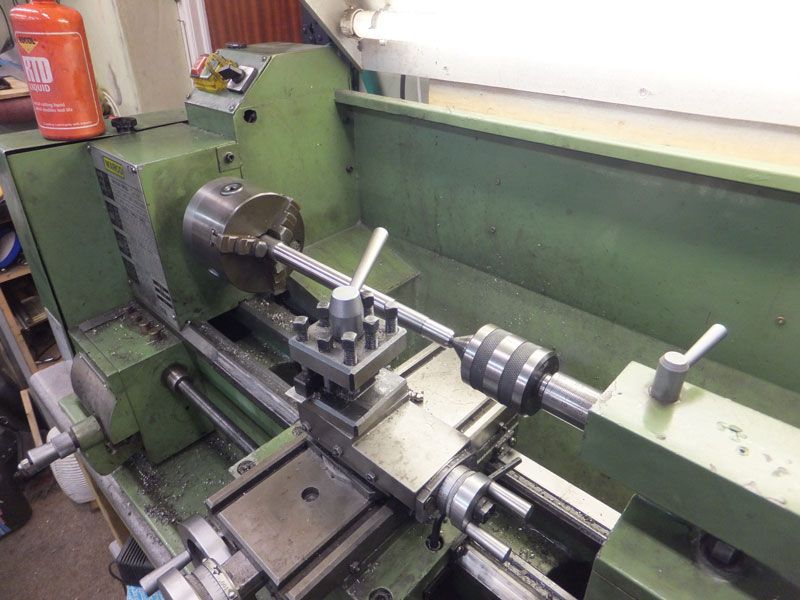
Next job was to make a new spindle from a lump o 20mm 316 stainless ...
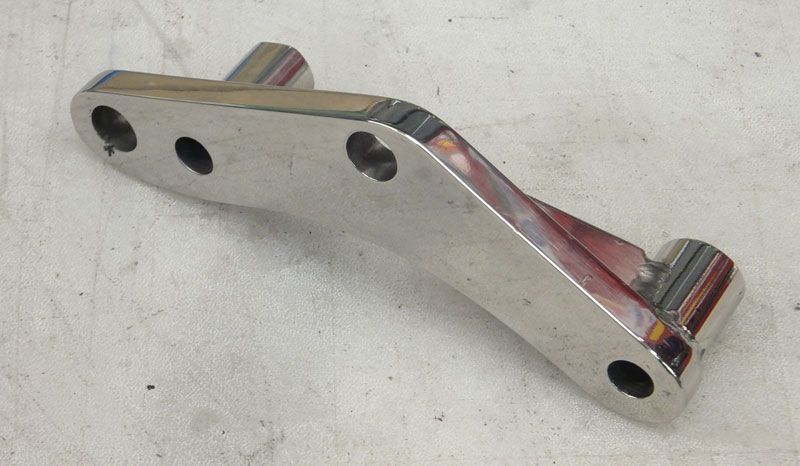
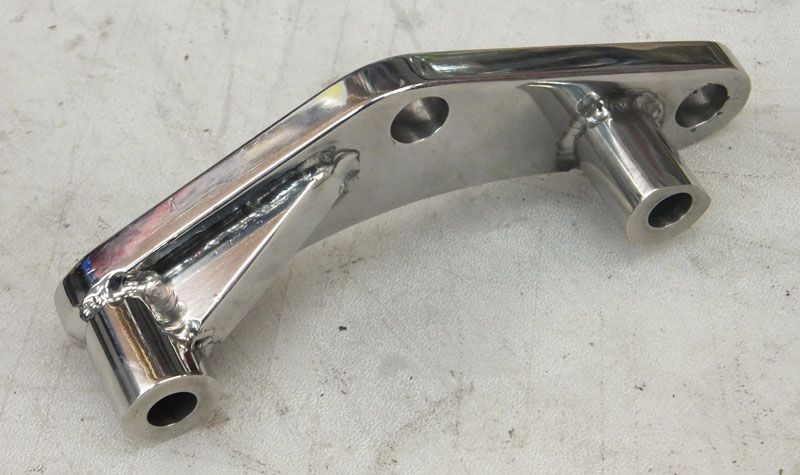
The tough job of making the brackets to secure the calipers to the fork legs had to be started. First I drilled the original caliper mounting holes and cut an M12 fine thread in them ...
I made template from sign makers Dibond, which is an aluminium and plastic laminate. It's easy to cut and form, unlike the 10mm 304 flat bar I had chosen for the bracket. I also made bosses out of pvc, which again are easy to machine accurately. I did consider aluminium alloy, which would have been much easier to machine, but was worried about the strength given the method of construction.
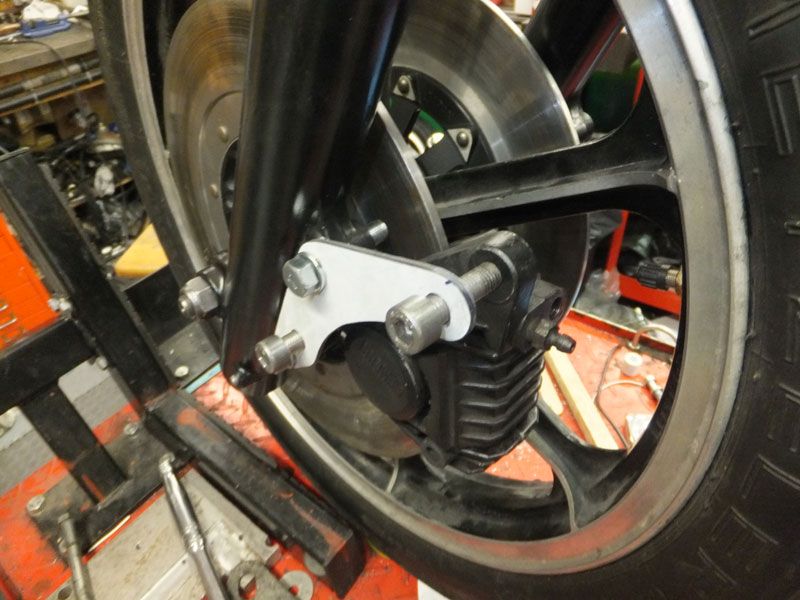
Cutting and shaping was really hard graft. I chain drilled the basic shape and then cut between the holes using my jig saw. I used the belt sander / linisher, files and emery cloth to get the final shape. I pilot drilled the holes 1/8". I clamped the two sides together, then riveted them together using 1/8" diameter nails as solid rivets for final shaping and drilling. to get proper accuracy, I used the milling machine to do the final drilling.
I machined the bosses on the lathe, but the bottom ones had to have some milling done to fit into the fork leg - space was tight I polished all the parts to the best of my ability, but without a serious linisher it's not perfect. (I'll be visiting Mikey soon ) I then glued all the bits together with the TIG welder and polished them again. Stainless is a bugger for distorting during welding, so I had to do some straightening out as well, but they did all fit well.
I had to get Hel Performance to make me up a pair of new lower lines, as the Brembos won't take a banjo bolt more bloody cash gone that I don't have
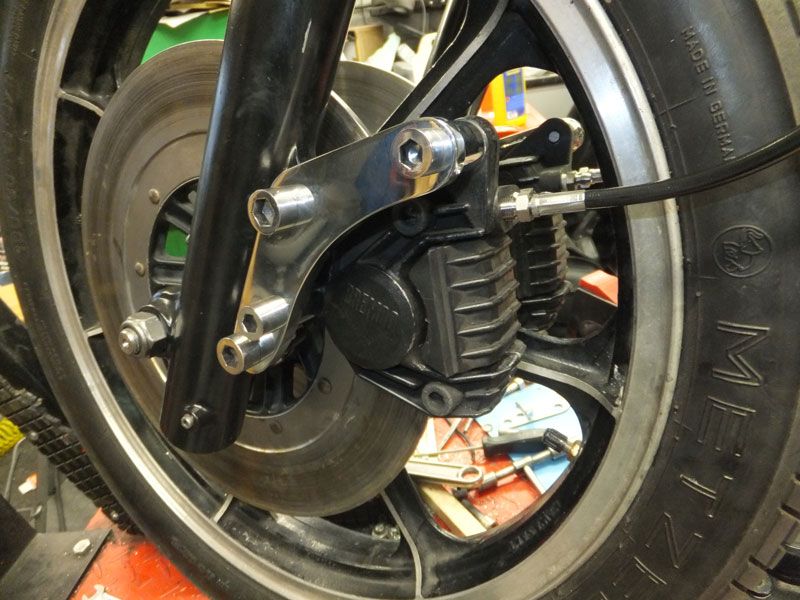
Ironically they still don't bleed up so well. The issue has to be either the master cylinder (brand new pattern) or the splitter. Master plan today is to make up a vertical splitter in stainless. Those standard Kwaka horizontal splitters are a nightmare for holding air pockets, so I'll try my design. If that doesn't cure it I'll try the Triumph master cylinder again and if that doesn't work I guess I'll have to try another master cylinder
The wheel still wouldn't turn as the disc bolts fouled the speedo drive...
... so I turned the heads down ...

... and now all is well. Forecast is still shite, so the wheel will have to wait for painting. Trouble is the masking will be a bloody nightmare to get off the time it will have been on by the time I am able to paint it
It was cheap though, and given that unless it was a minter I would have refurbed it anyway, it wasn't the end of the world. I ripped the bearings from it and slathered it in paint stripper ...
... then I polished the rim and masked it up for a long stay in the bead blast cabinet ....
... after two long evenings with the ear plugs in, it finally was clean and ready for masking for paint. I have masked it and the weather has been sooo shite since then, that this was as far as I got.
To continue the project I have been using TLC's wheel. I had to make a thin stainless bearing cover to hold the speedo drive in place. This sounds an easy thing to do, but it wasn't. Making big holes in thin, but hard sheet is never easy
To centralise the wheel as much as I could, I had to make new spacers and machine some land off the speedo drive gearbox centre bit and the drive collar. To accurately machine the gearbox centre, and it needs to be accurate, I machined up a mandrel in the lathe to fit. I cut a partial thread in the centre using a 1st taper tap and then cut rough slots with a hacksaw ...
... then I slipped the drive on it and secured it with a bolt to make it tight so I could machine a bit off, but keep it true ...
Next job was to make a new spindle from a lump o 20mm 316 stainless ...
The tough job of making the brackets to secure the calipers to the fork legs had to be started. First I drilled the original caliper mounting holes and cut an M12 fine thread in them ...
I made template from sign makers Dibond, which is an aluminium and plastic laminate. It's easy to cut and form, unlike the 10mm 304 flat bar I had chosen for the bracket. I also made bosses out of pvc, which again are easy to machine accurately. I did consider aluminium alloy, which would have been much easier to machine, but was worried about the strength given the method of construction.
Cutting and shaping was really hard graft. I chain drilled the basic shape and then cut between the holes using my jig saw. I used the belt sander / linisher, files and emery cloth to get the final shape. I pilot drilled the holes 1/8". I clamped the two sides together, then riveted them together using 1/8" diameter nails as solid rivets for final shaping and drilling. to get proper accuracy, I used the milling machine to do the final drilling.
I machined the bosses on the lathe, but the bottom ones had to have some milling done to fit into the fork leg - space was tight
I had to get Hel Performance to make me up a pair of new lower lines, as the Brembos won't take a banjo bolt
Ironically they still don't bleed up so well. The issue has to be either the master cylinder (brand new pattern) or the splitter. Master plan today is to make up a vertical splitter in stainless. Those standard Kwaka horizontal splitters are a nightmare for holding air pockets, so I'll try my design. If that doesn't cure it I'll try the Triumph master cylinder again and if that doesn't work I guess I'll have to try another master cylinder
The wheel still wouldn't turn as the disc bolts fouled the speedo drive...
... so I turned the heads down ...
... and now all is well. Forecast is still shite, so the wheel will have to wait for painting. Trouble is the masking will be a bloody nightmare to get off the time it will have been on by the time I am able to paint it
Ralph Ferrand
Z1000A1 (1977), Z1300A5 (1983), Z900A4 (1976) GPZ1100 Unitrak (1983)(project), RD250B (1975)(project), ZRX1200R (2005) DT175MX (1981) YZF R6 (1999)
http://www.bikerstoolbox.co.uk
Z1000A1 (1977), Z1300A5 (1983), Z900A4 (1976) GPZ1100 Unitrak (1983)(project), RD250B (1975)(project), ZRX1200R (2005) DT175MX (1981) YZF R6 (1999)
http://www.bikerstoolbox.co.uk

-
RALPHARAMA
- Area Rep.
- Posts: 3407
- Joined: 19th May 2007
- Location: Pensford, Somerset
- Contact:
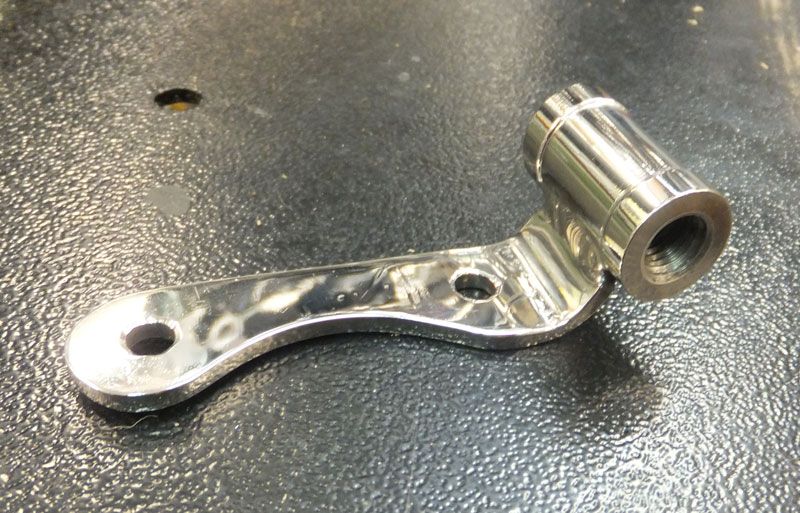
Spent a good few hours today making up a vertical splitter to solve the spongy brake. I machined the main body from some 20mm 316 which I reduced to 16mm and then added a decorative waist. Drilled and threaded it M10 x 1.25 the same as the standard item, though I do have some fine thread stainless banjo bolts as well. I found some 316 plate and made the bracket from that and then glued it on with the good old TIG torch.
Brembo calipers on BMWs bleed very easily; I look after a few old Beemers to help feed my tool habit This is part of the reason I chose these calipers apart from the advantage that they stop the bikes a whole lot better than the crappy standard stoppers on this model.
The brakes still feel a bit spongy, so I think it's fair to state that the brand new pattern master cylinder is at fault and will be going back to HiLevel on Monday! I've left the lever strapped up, but I'm fairly confident that the M/C is fucked. The Beemer M/C won't look right on this bike and probably wouldn't fit in any real way as they are integrated with the switches on R100s etc. Perhaps I might look at early Guzzi or Ducati M/Cs Or maybe even a Kwaka one that works As I have the Triumph one on the shelf I might look at stripping it, with the possibility of fitting a new seal kit for it, but it doesn't really look right.
Brembo calipers on BMWs bleed very easily; I look after a few old Beemers to help feed my tool habit
The brakes still feel a bit spongy, so I think it's fair to state that the brand new pattern master cylinder is at fault and will be going back to HiLevel on Monday! I've left the lever strapped up, but I'm fairly confident that the M/C is fucked. The Beemer M/C won't look right on this bike and probably wouldn't fit in any real way as they are integrated with the switches on R100s etc. Perhaps I might look at early Guzzi or Ducati M/Cs
Ralph Ferrand
Z1000A1 (1977), Z1300A5 (1983), Z900A4 (1976) GPZ1100 Unitrak (1983)(project), RD250B (1975)(project), ZRX1200R (2005) DT175MX (1981) YZF R6 (1999)
http://www.bikerstoolbox.co.uk
Z1000A1 (1977), Z1300A5 (1983), Z900A4 (1976) GPZ1100 Unitrak (1983)(project), RD250B (1975)(project), ZRX1200R (2005) DT175MX (1981) YZF R6 (1999)
http://www.bikerstoolbox.co.uk
Who is online
Users browsing this forum: No registered users and 9 guests