Hello Guest User,

Please feel free to have a look around the forum but be aware that as an unregistered guest you can't see all of it and you can't post.

To access these 'Registered Users Only' areas simply register and login.

Gee Pea Zed Unitrak

Work in Progress

Moderators: KeithZ1R, chrisu, paul doran, Taffus

Message
Author
User avatar
RALPHARAMA
Area Rep.
Area Rep.
Posts: 3407
Joined: 19th May 2007
Location: Pensford, Somerset
Contact:

#16 PostAuthor: RALPHARAMA » Tue Nov 05, 2013 7:19 pm

This evening I have got the frame ready to send off for powder coating. It's the only black bit I'm having powder coated; I'll paint everything else with zinc chromate primer and two pack polyurethane. I hate putting anything out, but the frame won't fit in my blast cabinet and I'm fecked if I'm cleaning it up with wire brush and dettol, your highness. (Very old joke link there :D ) The only job I need to do prior to powder coating is to tidy up the abortion of a welding repair on the bottom frame rail by the side stand mount - I'll grind it back and TIG it up - tidy like :lol:

Image

Image

Image

That link looks interesting Piggy, I'll take a look - Thanx :D
Ralph Ferrand
Z1000A1 (1977), Z1300A5 (1983), Z900A4 (1976) GPZ1100 Unitrak (1983)(project), RD250B (1975)(project), ZRX1200R (2005) DT175MX (1981) YZF R6 (1999)
http://www.bikerstoolbox.co.uk

snotie1965
100Club
100Club
Posts: 389
Joined: 28th Mar 2013
Location: Swindon Wiltshire

#17 PostAuthor: snotie1965 » Fri Nov 08, 2013 7:53 pm

I will be watching this project with great interest ! i have a ut and have done a lot of work on my one ,and now it is a good bike which i use regularly (i do try and avoid the wet )

I have some spares you may be interested in ,b/box ect ,p.m me if you need anything ,and i will try and help out !

Is Vic There
Hardcore
Hardcore
Posts: 1460
Joined: 8th Nov 2011
Location: Brisbane, Australia.

#18 PostAuthor: Is Vic There » Fri Nov 08, 2013 8:10 pm

I'm also a fan of your rebuilds, got some great tips on the last one.
Will be watching with interest :D
Z1000R ELR, Z1100R ELR, GPz900R A1, GPz750 Turbo, Norton F1, Harris Mag 2, Harris Mag 5, Yamaha YZR750SP, Triumph Steve McQueen, Suzuki RGV250 Sheene Rep, Suzuki RG500 Walter Wolf, Suzuki RG250 Walter Wolf, Aprilia RS250, Yamaha YL1, RG500. H**** NS400.

Gyesdad
100Club
100Club
Posts: 160
Joined: 13th Jun 2011
Location: Manchester England

#19 PostAuthor: Gyesdad » Sun Nov 10, 2013 12:22 pm

Having followed your Z1100 rebuild, I'm really looking forward to watching this one take shape. :)

My 1100 Uni is having the carbs removed and put back onto DFI. I'll follow that part of your build with great interest!

User avatar
RALPHARAMA
Area Rep.
Area Rep.
Posts: 3407
Joined: 19th May 2007
Location: Pensford, Somerset
Contact:

#20 PostAuthor: RALPHARAMA » Mon Nov 11, 2013 6:56 pm

I sorted out the bottom of the frame rail as whilst some animal with no welding ability, had blown mild steel bird shit at the side stand bracket they had missed quite a lot of the real problem. Trust me it looks better in this pic as I have already ground a lot of the crap off already :shock:

Image

As you can see from the pic there were some holes underneath and it was well thin. This is where the water collects as a result of Mr Kawasaki's security solution ... Weld a bit of pipe into the frame tube open at the top ... This was supposed to be a place to fit an option wire lock that no one ever bought; What actually happened was that water went down the little pipe and destroyed the lower left hand frame rail :( I 'glued' some sheet mild steel on with the TIG which should make it stronger. I've not bothered too much about grinding back the weld as it's out of site and I feel strength is more crucial here.

Image

Actual work on the bike itself is postponed to a degree as I have decided to make myself an engine stand. I couldn't find one I liked the look of, much less at a price I could afford, though I did find something that was a good starting point on American fleabay. It's not quite what I want, but I downloaded the photo and printed it out on A3 and as it was shown with a zed engine in it's mouth, I was able to scale some dimensions off it.

Image

I have ordered a load of box section from metals4u and have started making the pivot section. From the flea bay pic it's hard to see what bearings were used, but I have plumped for sealed ball races. Cutting the 50mm mild steel bar was fecking hard graft :evil: I then drilled it 3/4" as that's the biggest drill I have and then bored it with my home brewed boring bar. I then machined out the recesses for the bearings.

Image

Image

I then machined up the pivot axle bit. This steel was a long was from being free cutting, but you have to use what you can get :evil: The only big nuts I could find were M12 x 1.25 or wildly huge. Having machined the end to 12mm I then realised I didn't have an M12 x 1.25 die 1.5 or 1.75 only grrr :evil: I then used the lathe to thread cut them. I then machined the washers end plate bits using my posh new parting tool bought at Stafford from the stall opposite our stand :D

Image

I put the coin there, not show my wealth, but to give an idea of scale :D
All ready to glue onto the box section with some sparks when it arrives :)
Ralph Ferrand

Z1000A1 (1977), Z1300A5 (1983), Z900A4 (1976) GPZ1100 Unitrak (1983)(project), RD250B (1975)(project), ZRX1200R (2005) DT175MX (1981) YZF R6 (1999)

http://www.bikerstoolbox.co.uk

User avatar
Mark Stratton
Custard Cream
Custard Cream
Posts: 574
Joined: 16th Feb 2009
Location: Southampton

#21 PostAuthor: Mark Stratton » Mon Nov 11, 2013 9:04 pm

vduk wrote:when they're for me - it's just lust. I am unable to see faults and imperfections :lol:


Unfortunately I'm exactly the same :roll:

I bought a ZRX1200r recently and have only ridden it once since 23rd September as one of the shocks turned out to be f****d :( A lot of wrangling with the dealer hopefully its now sorted.

Looking forward to following this project.

User avatar
RALPHARAMA
Area Rep.
Area Rep.
Posts: 3407
Joined: 19th May 2007
Location: Pensford, Somerset
Contact:

#22 PostAuthor: RALPHARAMA » Thu Nov 14, 2013 6:11 pm

I have been grafting most of the week on the prototype engine stand, and it's now finished, save painting, which will have to wait until I've striped the GPZ lump :twisted: one things for sure - I'm going to forget the idea of manufacturing them for Biker's Toolbox ... Way too much work :shock:

I'm afraid I have been too obsessed with cutting ,filing and welding to take many pix so there's just this one from a day or two back ....

Image

.... And then these I took just now on my phone after some very dangerous shifting on my own trying to get the engine off a work bench onto the project bike bench and then into the stand :shock: believe me there were some scared moments .... But I had to try it ? :twisted:

Image

Image

Image

The engine will turn easily through a full 360 degrees on the costalot bearings, but in my eagerness to try it I discovered that there was still oil willing to come out all over the bench at a 180 turn and after the P in the A clean up I decided to only spin through ninety for the pic :lol:

Image

This should make engine building a lot easier :D

I'm not sure if the heavy duty bearings are really necessary, but it certainly turns very easily :D the biggest problem with construction was getting the 30mm x2.5mm box to slide freely on the 25mm box. Box section isn't exactly made to very fine tolerances so there was a lot of fettling to be done :evil:
Ralph Ferrand

Z1000A1 (1977), Z1300A5 (1983), Z900A4 (1976) GPZ1100 Unitrak (1983)(project), RD250B (1975)(project), ZRX1200R (2005) DT175MX (1981) YZF R6 (1999)

http://www.bikerstoolbox.co.uk

User avatar
paul doran
Area Rep.
Area Rep.
Posts: 15910
Joined: 24th Sep 2004
Location: near Dublin Ireland

#23 PostAuthor: paul doran » Thu Nov 14, 2013 6:19 pm

Ralph My GPZ is waiting its turn on Your bike bench :lol: :lol:
way too many Zeds

User avatar
Big Fluff
Hardcore
Hardcore
Posts: 2708
Joined: 1st Mar 2007
Location: Aston, Cheshire

#24 PostAuthor: Big Fluff » Fri Nov 15, 2013 9:19 am

Z1parR wrote:It's good to see somebody working the way that i do :- ie standing in the middle of a plane crash :wink:
:rir :rir

That is so 'me' too.
At least if you have every tool out on the floor you know it's there somewhere.

This is great Ralph, brilliant work as usual, and I like the fact that you take on the impossible as a challenge.
Kawasaki H2C 750, ZRX1100R, H**** VF1000RG Rothmans, H**** VF500F2F, Suzuki GSXR750F Slabbie

User avatar
RALPHARAMA
Area Rep.
Area Rep.
Posts: 3407
Joined: 19th May 2007
Location: Pensford, Somerset
Contact:

#25 PostAuthor: RALPHARAMA » Fri Nov 15, 2013 7:59 pm

I think that his bike is rapidly showing itself to be almost as big a pile of shite as the shafter :twisted: I did a leak down test before tearing down the motor and discovered that all four bores were leaking past the rings :( No 3 had the head gasket blown in a BIG way :

Image

The head doesn't look too healthy :(

More grim news later no doubt :(
Ralph Ferrand

Z1000A1 (1977), Z1300A5 (1983), Z900A4 (1976) GPZ1100 Unitrak (1983)(project), RD250B (1975)(project), ZRX1200R (2005) DT175MX (1981) YZF R6 (1999)

http://www.bikerstoolbox.co.uk

Padders
Hardcore
Hardcore
Posts: 4875
Joined: 15th Jan 2006
Location: Grimsby Lincolnshire

#26 PostAuthor: Padders » Fri Nov 15, 2013 8:06 pm

You can overcome Ralph if it was easy everyone would be doing it.
PUM 13

User avatar
chrisu
Moderator
Posts: 4367
Joined: 3rd Sep 2005
Location: herts

#27 PostAuthor: chrisu » Fri Nov 15, 2013 9:40 pm

stick with it ralph

i had a z900A4 engine way worse than that............

User avatar
PJ
Hardcore
Hardcore
Posts: 3538
Joined: 2nd Dec 2008
Location: Halesowen, West Mids

#28 PostAuthor: PJ » Sat Nov 16, 2013 8:08 am

Hi Ralph superb as ever,

I also looked at those engine stands from america but way too much money,

How much to buy that one when you have finished with it or can you make me one??

Cheers Pal
WHO NEEDS DRUGS - WHEN YOU HAVE A ZED!!

Padders
Hardcore
Hardcore
Posts: 4875
Joined: 15th Jan 2006
Location: Grimsby Lincolnshire

#29 PostAuthor: Padders » Sat Nov 16, 2013 8:27 am

Ditto that request I would buy one Ralph if you end up making a small batch.
PUM 13

User avatar
RALPHARAMA
Area Rep.
Area Rep.
Posts: 3407
Joined: 19th May 2007
Location: Pensford, Somerset
Contact:

#30 PostAuthor: RALPHARAMA » Sat Nov 16, 2013 10:11 pm

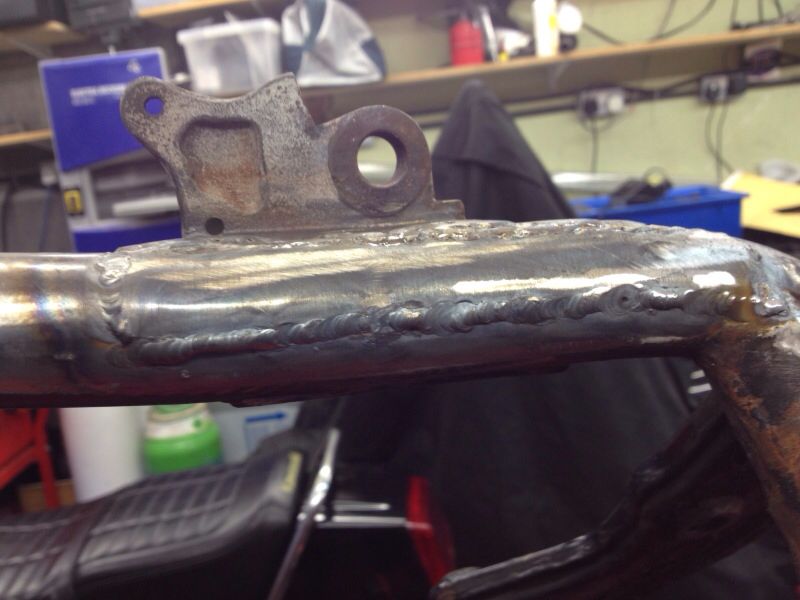
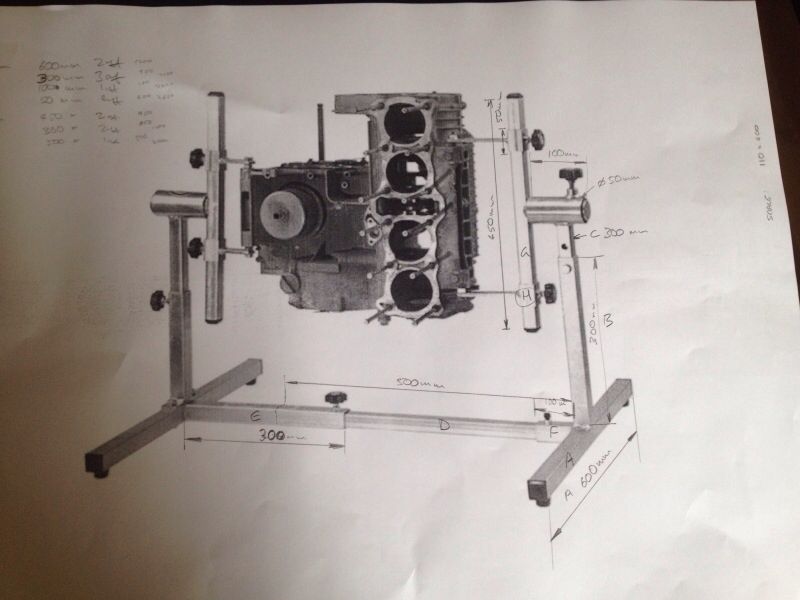
Unless I can figure out a much quicker way to make this stand I couldn't sell it as cheaply as the yanky boyz ! The materials alone set me back well over a hundred quid, ignoring overheads like welding gases, heat light etc. Given it took me the best part of week to make I would be looking for promotion to minimum wage :lol: 
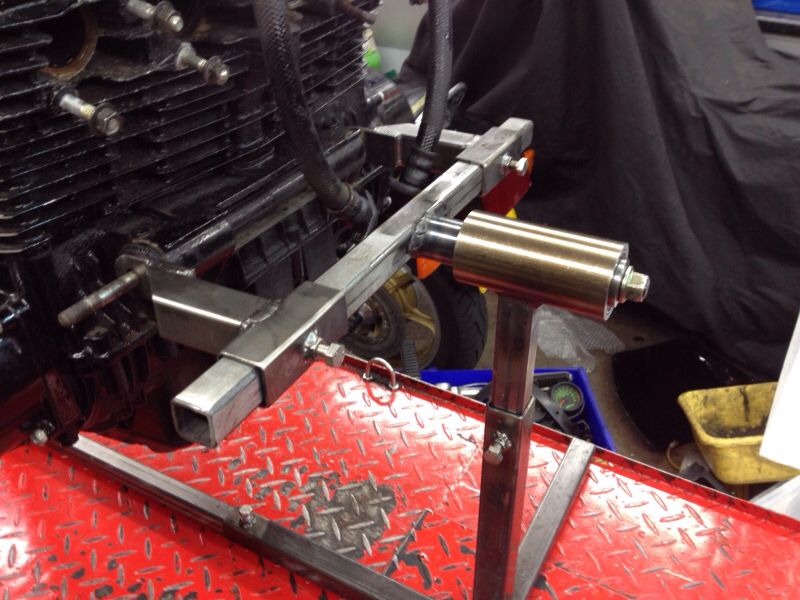
I want to make a new rotational locking mechanism, which will take hours on the rotary table on the mill I expect. With the current design, when the engine is badly unbalanced ie after the top end it removed, the set screw on the axle method isn't enough of a lock. I have a plan though, but it will have to await it's turn :D

This is what faced me when I took the lid off the master cylinder :shock: Niiicccce :lol:

Image

This was the best result of the bores on the compression test :shock:

Image

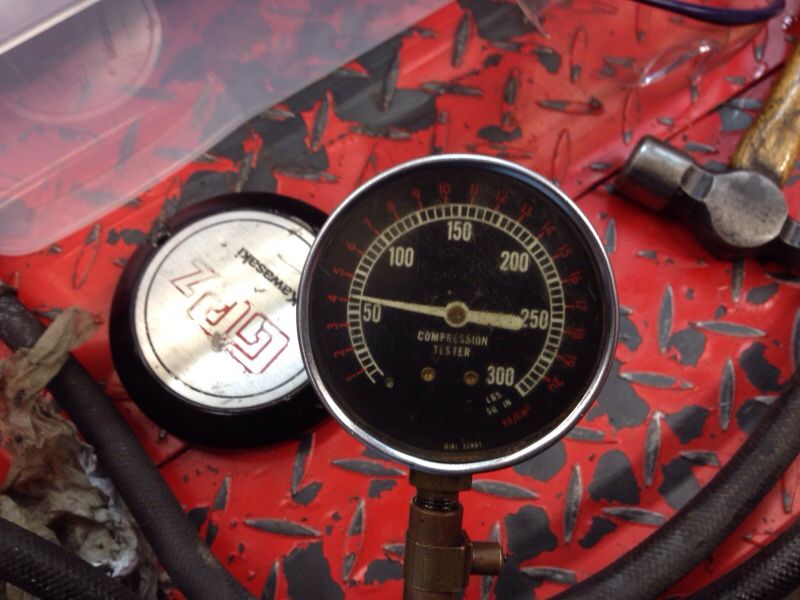
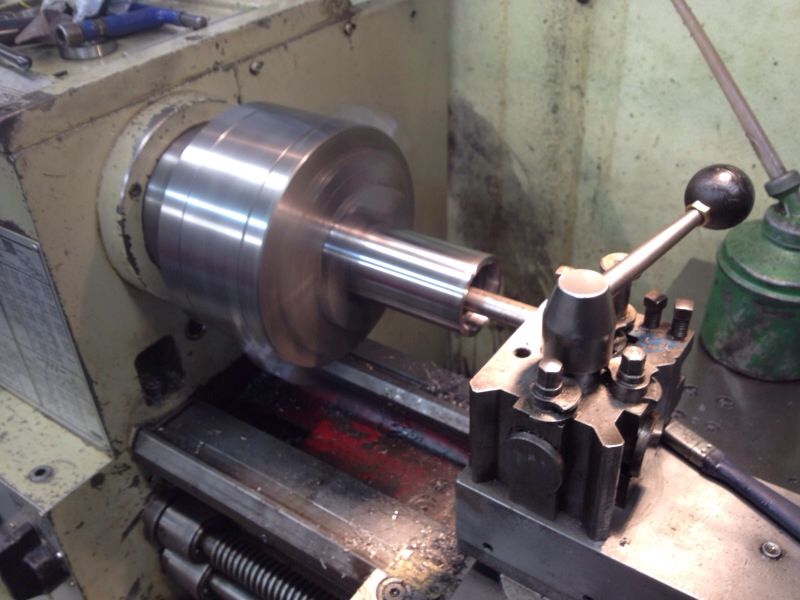
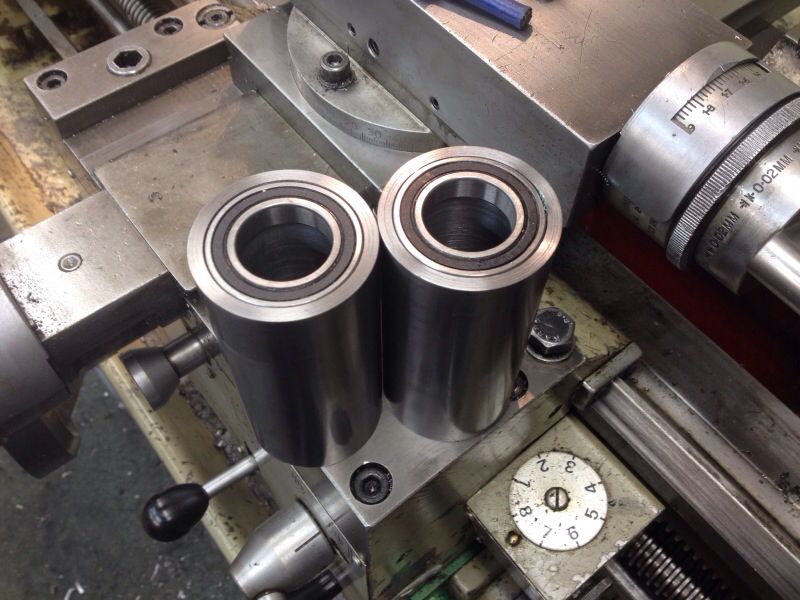
Old skool meets new tech :

Image

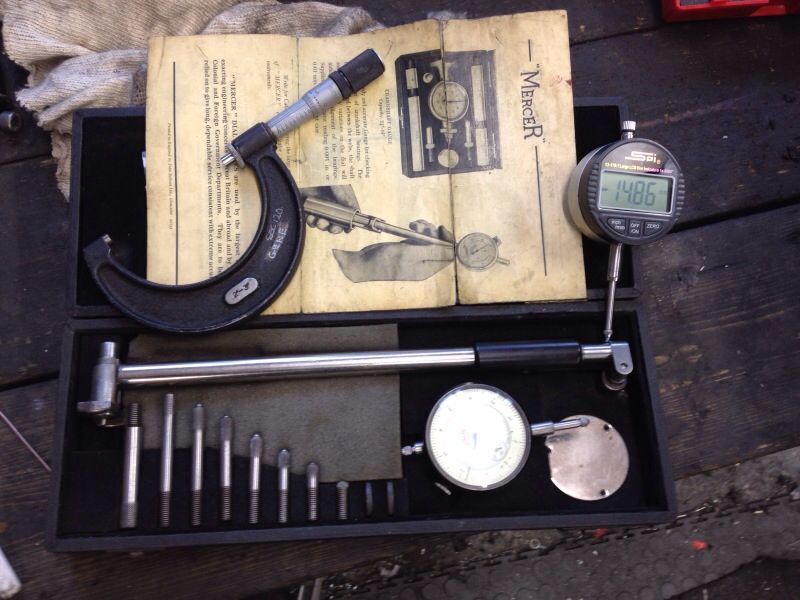
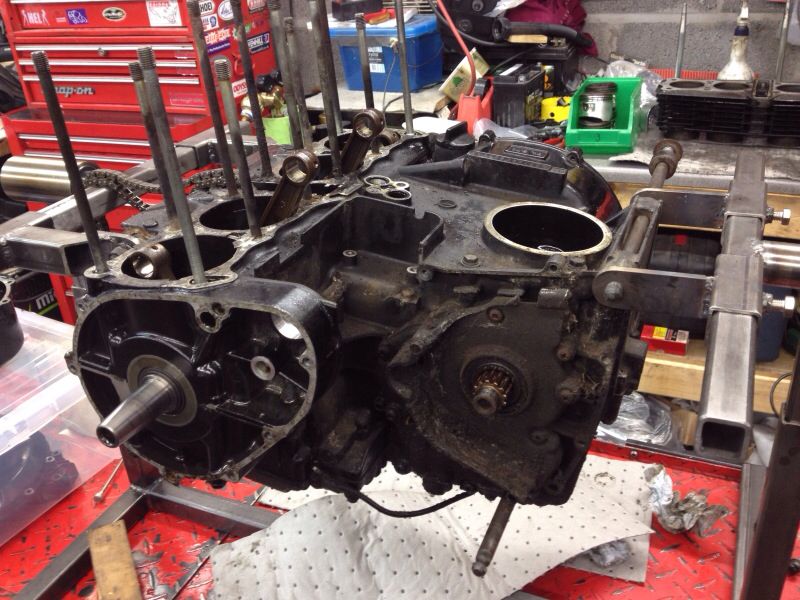
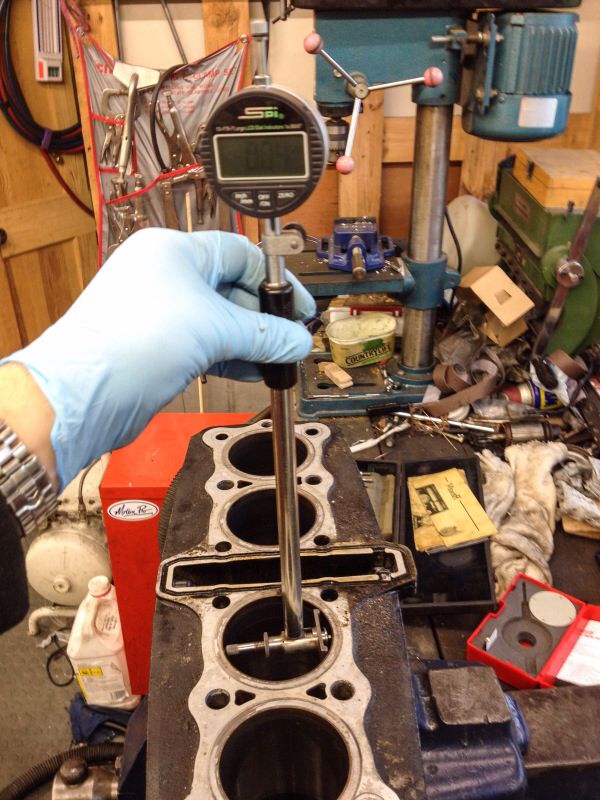
Measuring the bores had a better result than any thing else to date :D Whilst the barrels could do with a light hone, the bores are all standard size and within spec :D

Image

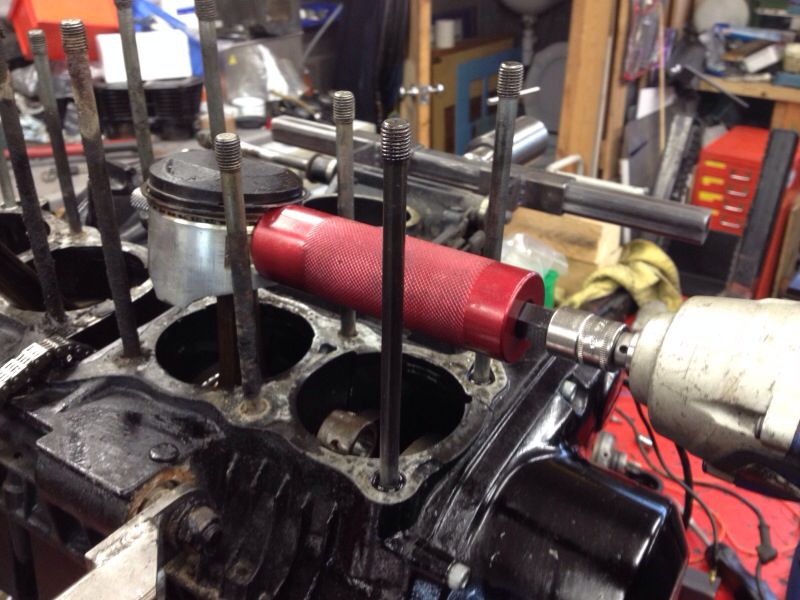
Getting the gudgeon pins out is a whole load easier with a decent controllable impact gun :)

Image

The head is a bit of a mess, mostly as a result of some arsehole with crap tools and no talent who fancied himself as a bit of an engine builder :shock: The shims are all pretty thin and there are shed loads of stripped threads :( 
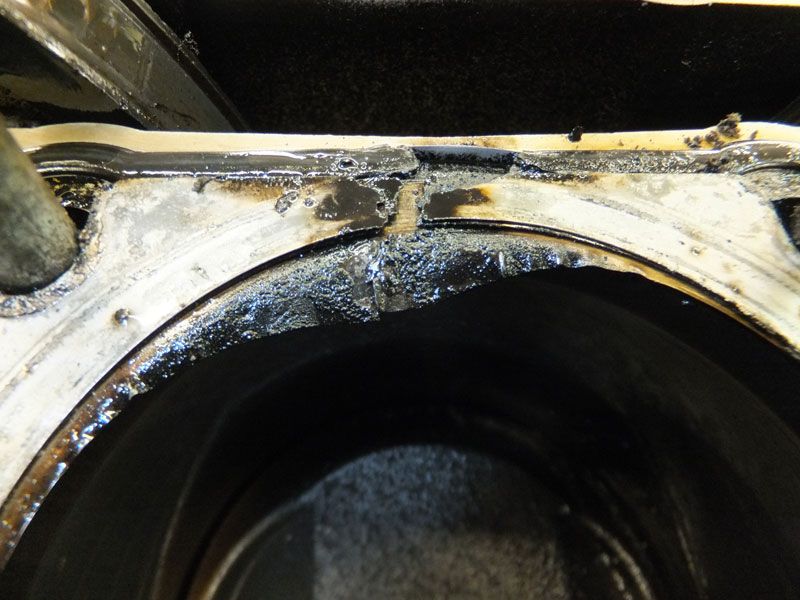
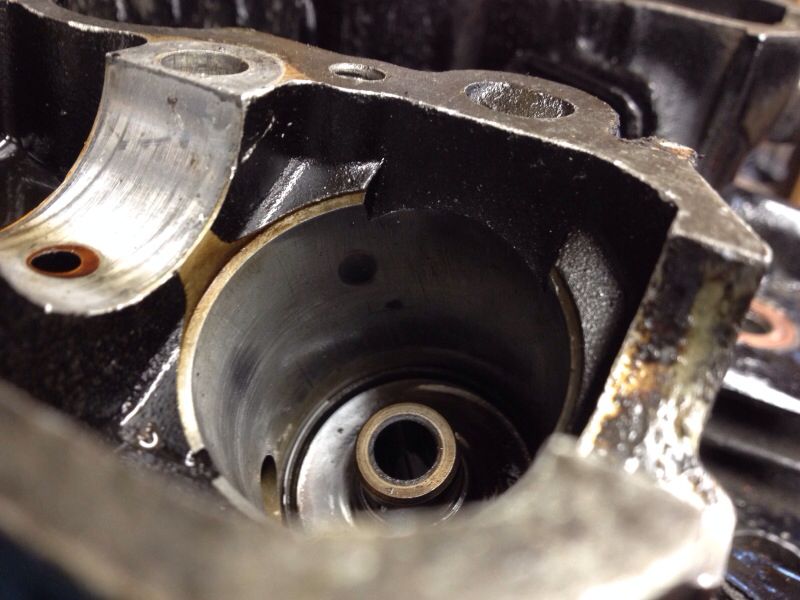
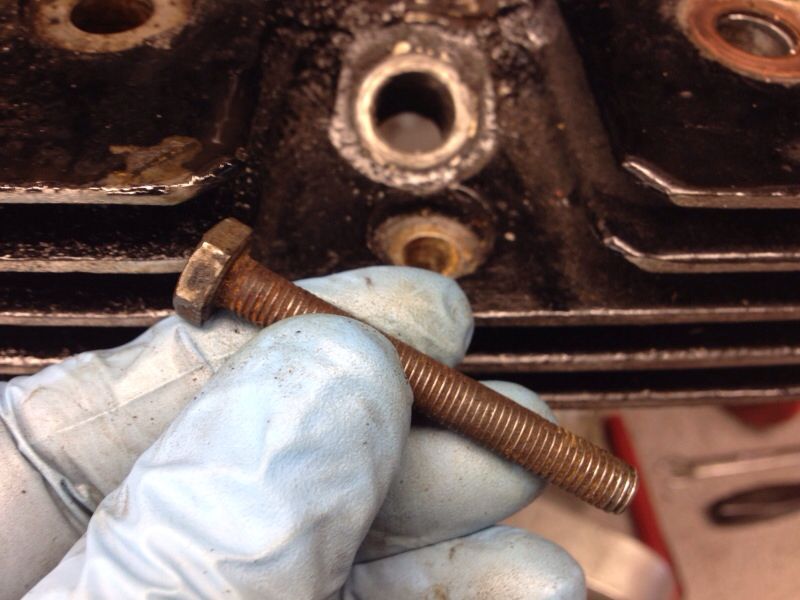
I had a hell's own job getting the last bucket out and ended up heating the shit outta the area with the big Bertha heat gun and tugging it out with a hard disc drive magnet and Vice grips. I'm guessing what happened is that some dumbfuk put too long a bolt in and would it in too hard - seen it before ! See the round tight spot in the pic that corresponds with the bottom of the bolt hole -

Image

Luckily for me I have another head on it's way. The guy who sold me this bike is a proper gent and clearly had no idea what a state this bike is in - (unlike the git who sold it to him) and is going to send me another head - another true zed head and gentleman to boot!

I learned another tip today ... If you strip a 6mm thread somewhere important like the two either side of the head, don't waste good money on helicoils, just grab a couple of 1/4" BSF set screws and force them in :shock:

Image

... Think I might replace them with Helicoils eh?

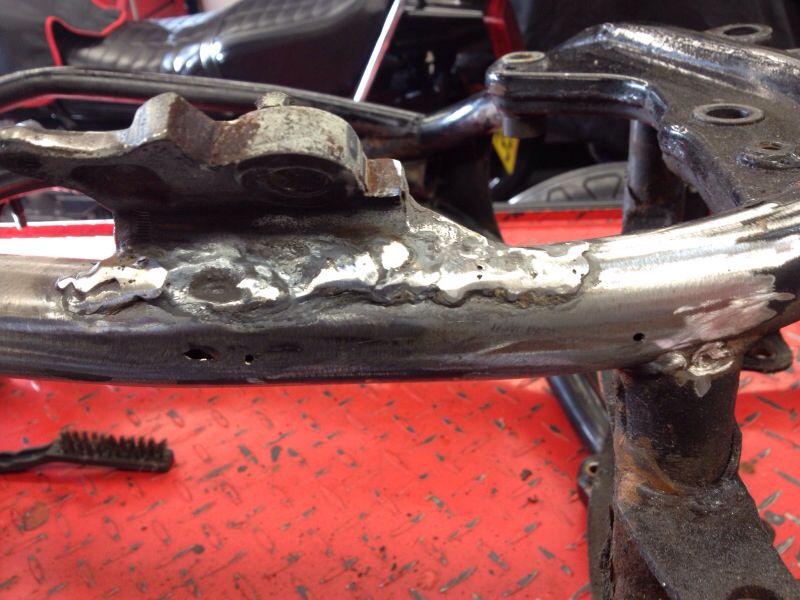
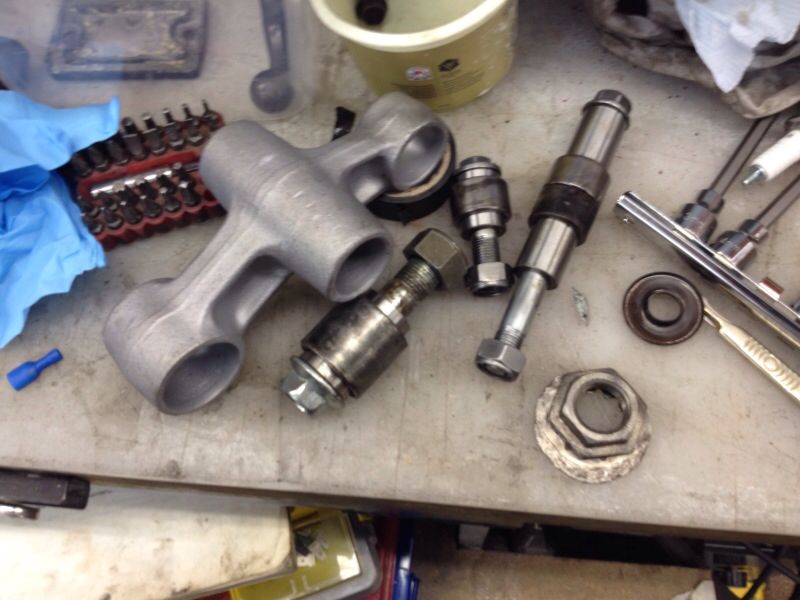
I cleaned up the rear suspension links and think I may zinc plate them before painting with two pack

Image

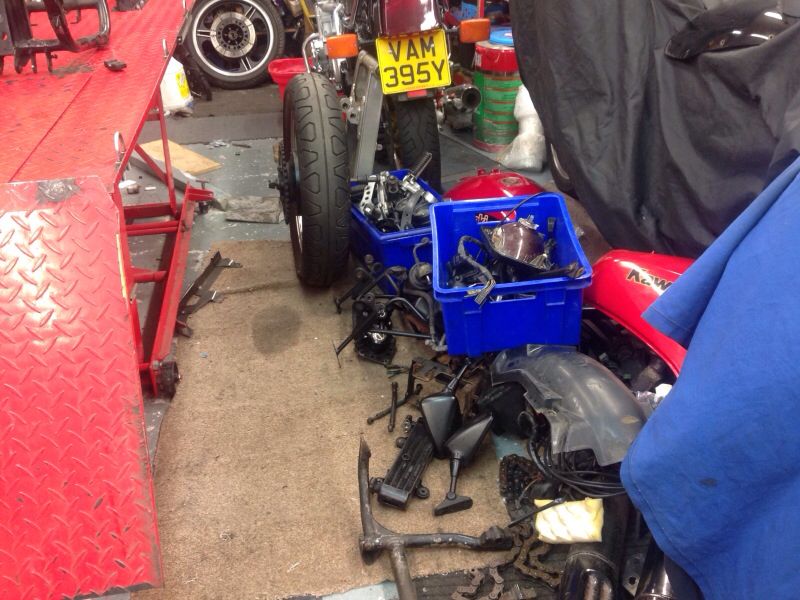
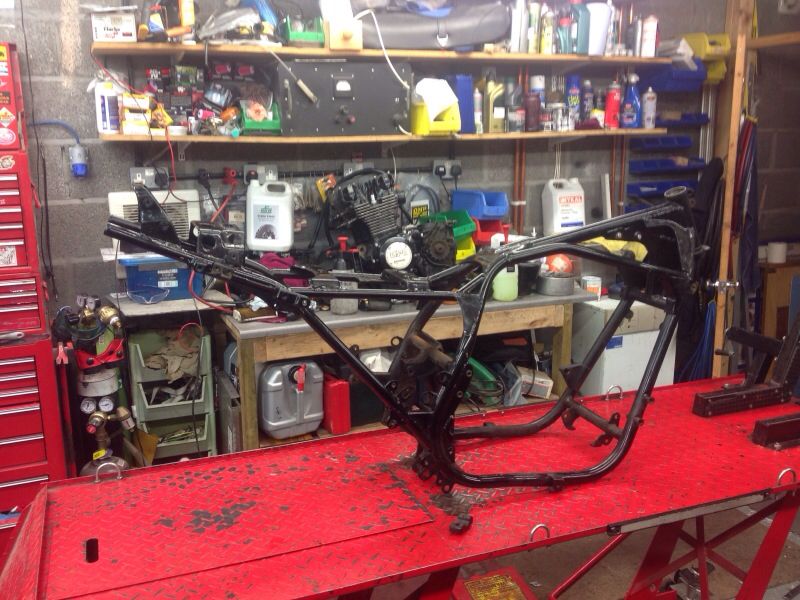
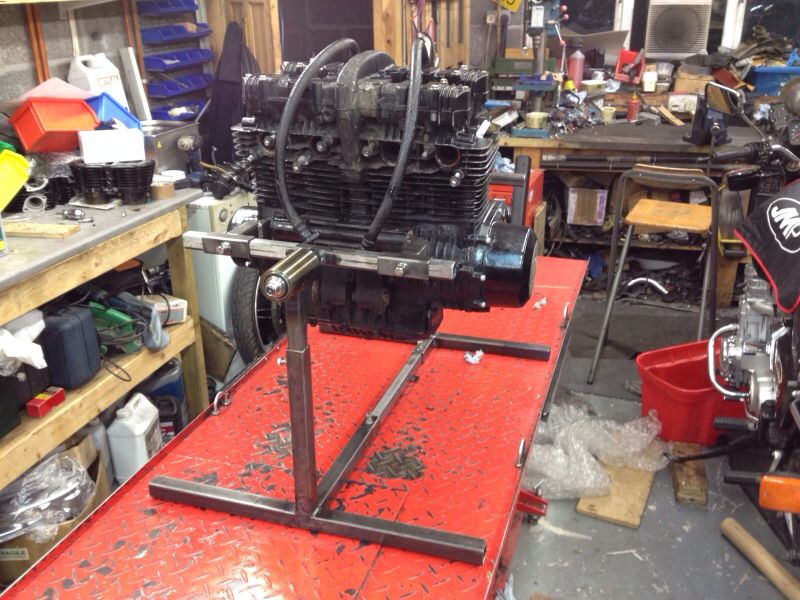
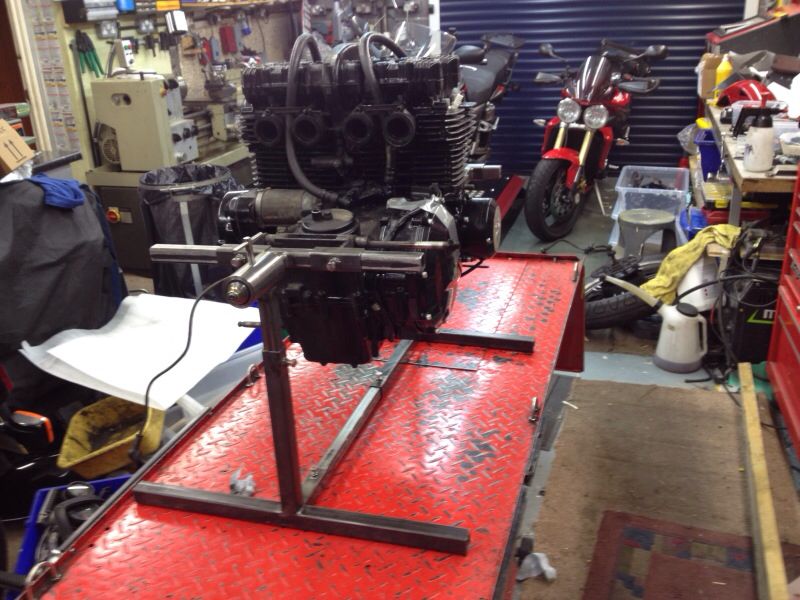
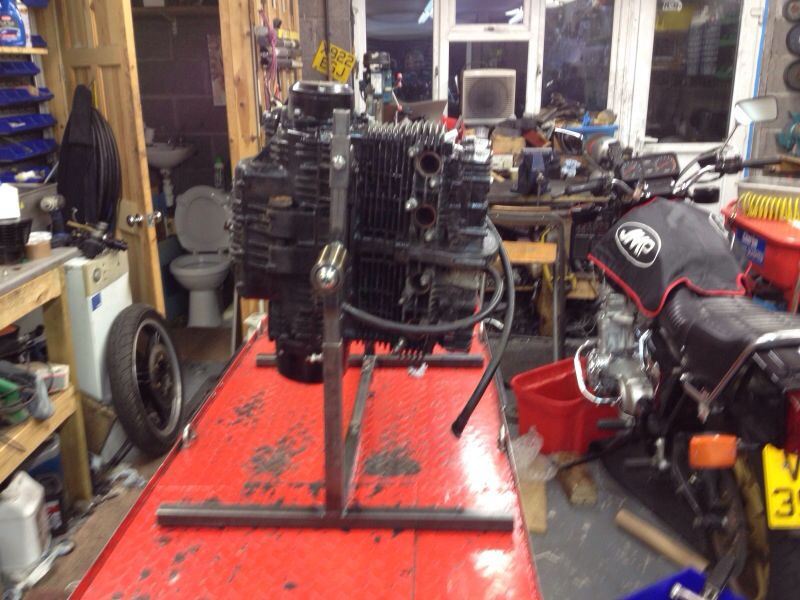
Here's where we are at the end of today

Image

Image
Ralph Ferrand

Z1000A1 (1977), Z1300A5 (1983), Z900A4 (1976) GPZ1100 Unitrak (1983)(project), RD250B (1975)(project), ZRX1200R (2005) DT175MX (1981) YZF R6 (1999)

http://www.bikerstoolbox.co.uk


Return to “Projects”

Who is online

Users browsing this forum: No registered users and 6 guests