Hello Guest User,

Please feel free to have a look around the forum but be aware that as an unregistered guest you can't see all of it and you can't post.

To access these 'Registered Users Only' areas simply register and login.

Project Resto-mod Mk.II

Work in Progress

Moderators: KeithZ1R, chrisu, paul doran, Taffus

Message
Author
Jappen
100Club
100Club
Posts: 412
Joined: 23rd Jun 2008
Location: Norway

#16 PostAuthor: Jappen » Sat Feb 04, 2012 7:24 pm

morten wrote:Looking real good Viktor :rocks

Very nice work and informative pictures. Looking forward to see the progress. Keep them pics coming :beer


Seconded :!:
Like you do this to the right bike Viktor :bla
As you say,more you look at it more you love it :hoo
80-Z1000H
79-Z1000MK2

User avatar
j.b
100Club
100Club
Posts: 326
Joined: 22nd Dec 2009
Location: whitchurch, north shropshire

#17 PostAuthor: j.b » Sun Feb 12, 2012 8:31 pm

fab work as always victor, the astralites look stunning too but i may be a little biast :)

can i ask why you moved the top shock mounts forward as need to do a similar job on one of mine at some point.
straightening the curves and flattening the hills

Viktor Larsson
100Club
100Club
Posts: 158
Joined: 11th Jun 2011
Location: Piteå, Sweden

#18 PostAuthor: Viktor Larsson » Sun Feb 12, 2012 9:29 pm

j.b wrote:fab work as always victor, the astralites look stunning too but i may be a little biast :)

can i ask why you moved the top shock mounts forward as need to do a similar job on one of mine at some point.


Thanks.

As for the shock mounts? They were moved both for aesthetics and for added progressiveness to the shocks. With the mount moved down and forward, the angle of the shock lines up with the frame and side panels much better.

Simple as that. :wink:
There's no replacement for displacement.

Viktor Larsson
100Club
100Club
Posts: 158
Joined: 11th Jun 2011
Location: Piteå, Sweden

#19 PostAuthor: Viktor Larsson » Sun Feb 26, 2012 8:19 pm

Got some work done on the bike today.

While I was out in the garage fiddling with rebuilding the flatslide carbs so the throttle wires didn't hit the tank, my old man went to finish blasting the swingarm.

When he got back we did a quick mock-up. Borrowed some slicks from a friend for the mock-up phase of the build. Looks pretty good me thinks. :D

Image

Note the added bracing on the side of the swingarm.

Image

And here's how the carbs turned out. A bit fiddly to work with carbs I think but it was a relatively easy and straightforward job. Turned out really good too.

Image

Image

Image

Originally, the wires were in between carb #3 and #4 but I moved them to between #2 and #3 so they don't hit the tank.

Next up is getting the swingarm in place and welding the new shock mounts. Should be able to have that finished next weekend.
:)
There's no replacement for displacement.

User avatar
Ginger Bear
Hardcore
Hardcore
Posts: 6850
Joined: 16th Dec 2008
Location: In the Dark.
Contact:

#20 PostAuthor: Ginger Bear » Mon Feb 27, 2012 9:21 am

That's looking 'spot on' Viktor. :up :drool
Image

# 104

Phil Churchett Award Winner 2011 & 2016 :D
Buzzworkz Best Modified Zed 2016

Viktor Larsson
100Club
100Club
Posts: 158
Joined: 11th Jun 2011
Location: Piteå, Sweden

#21 PostAuthor: Viktor Larsson » Wed Feb 29, 2012 10:51 pm

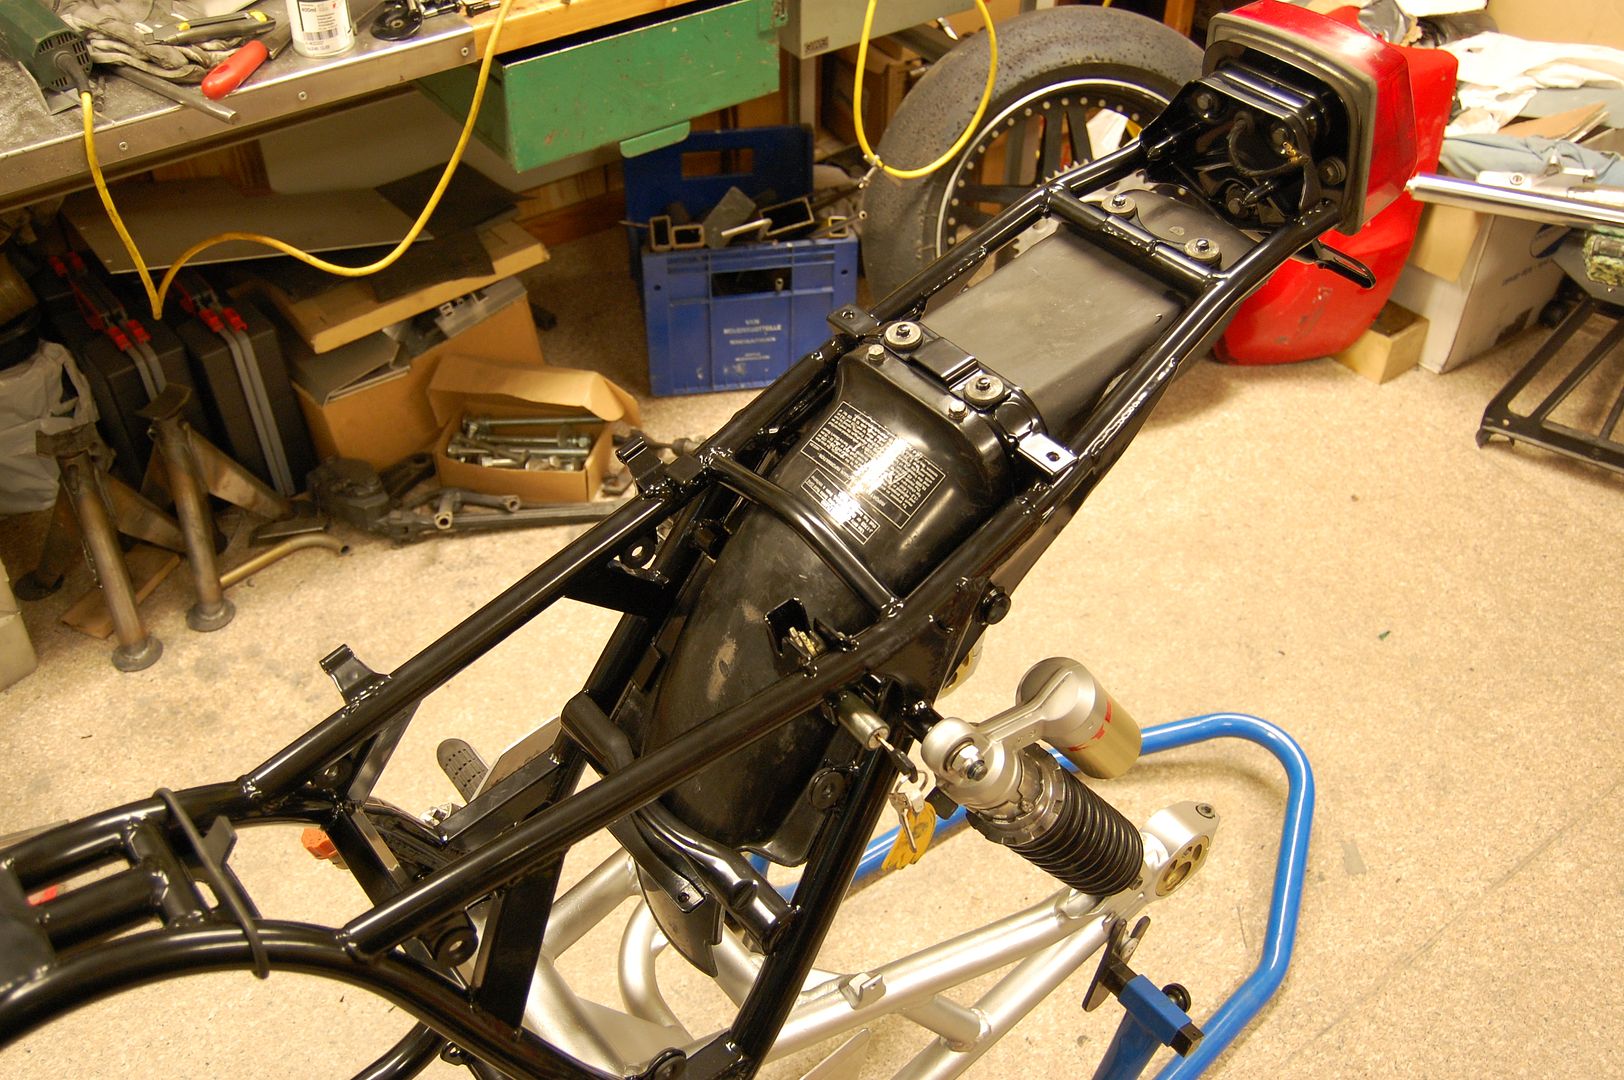
Update on the project and a slight tutorial.

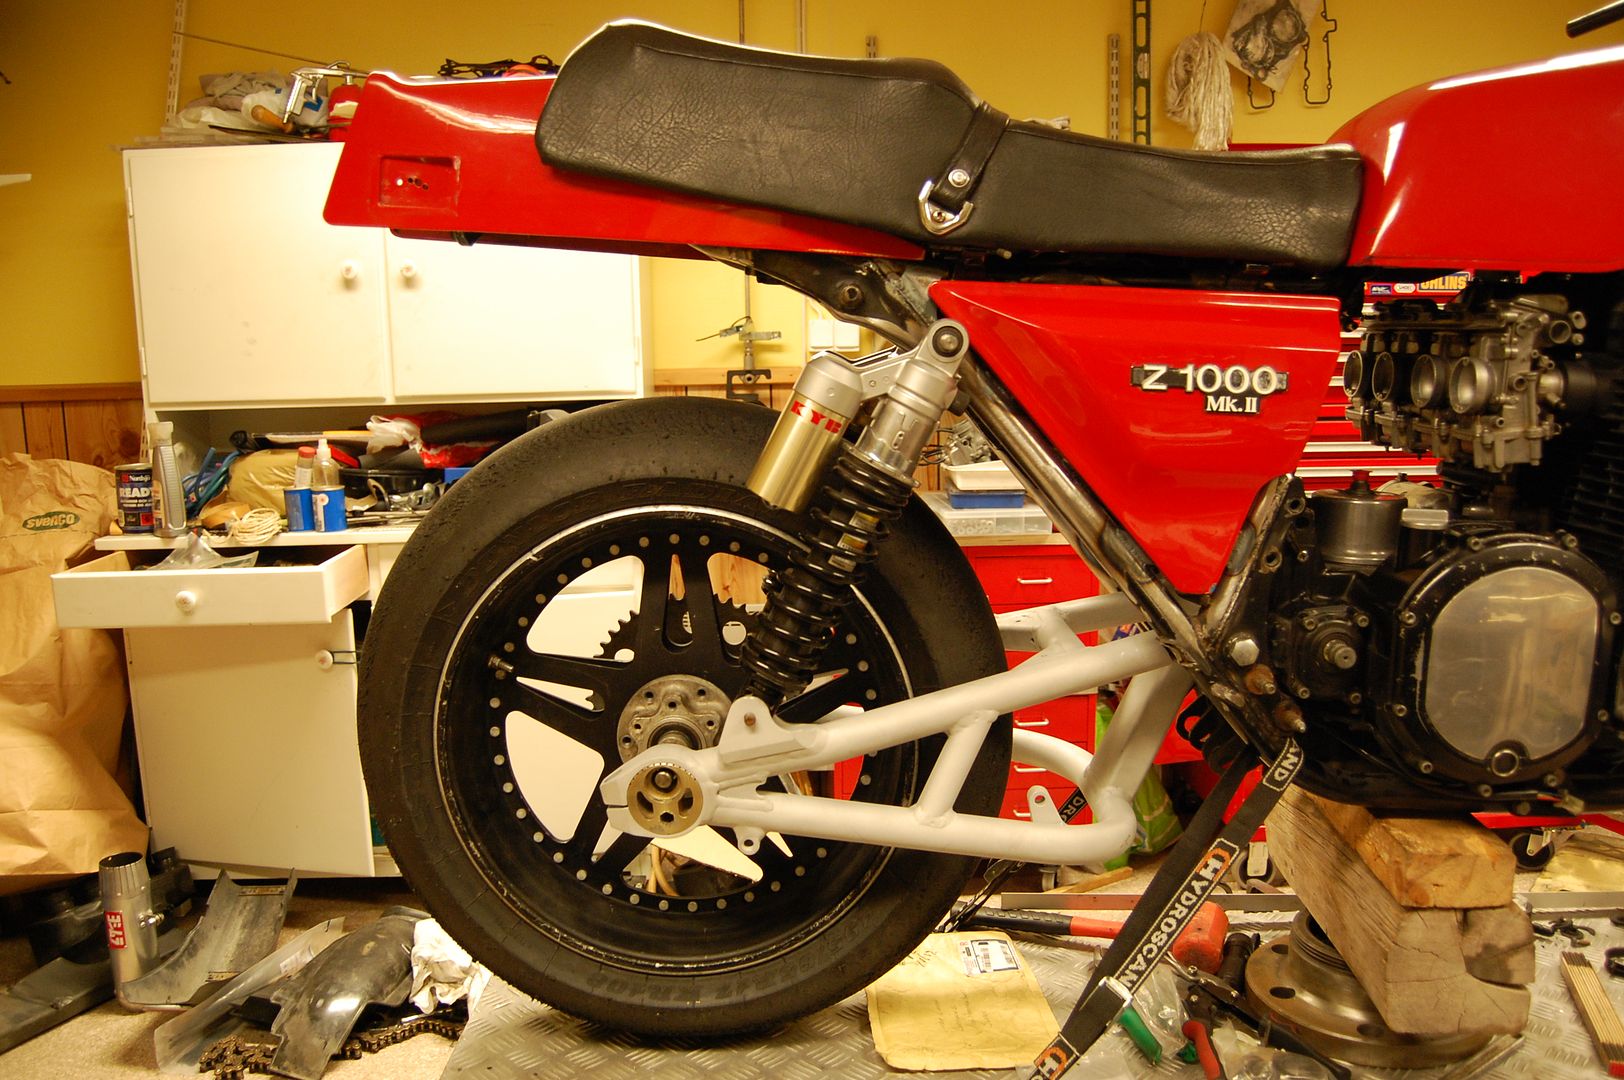
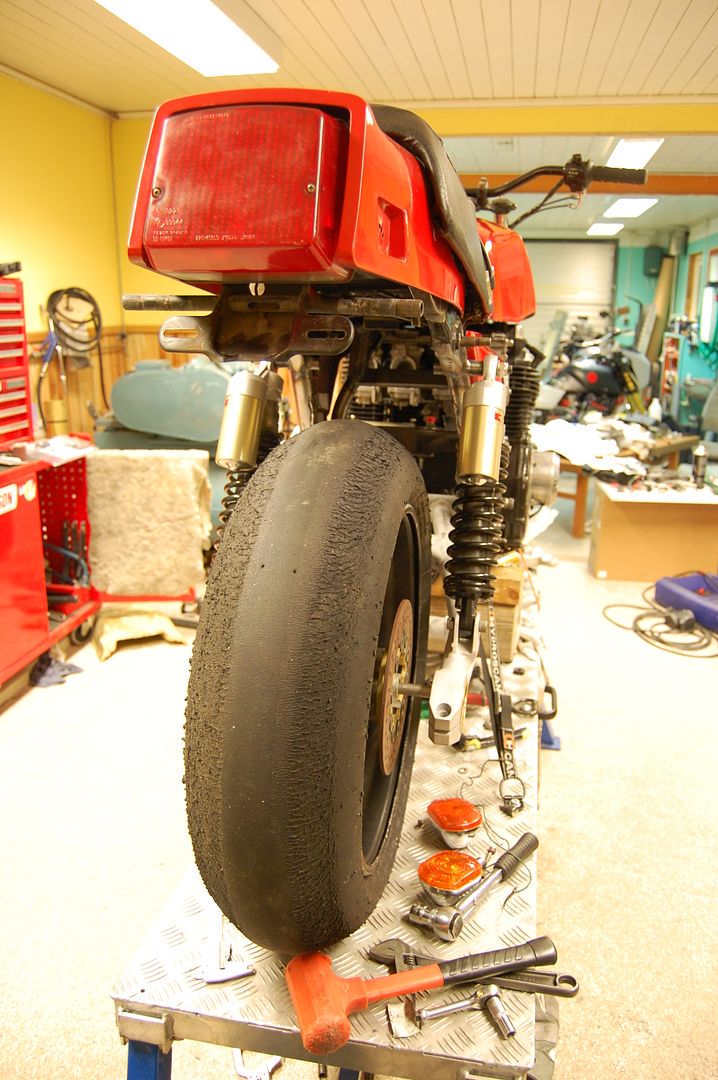
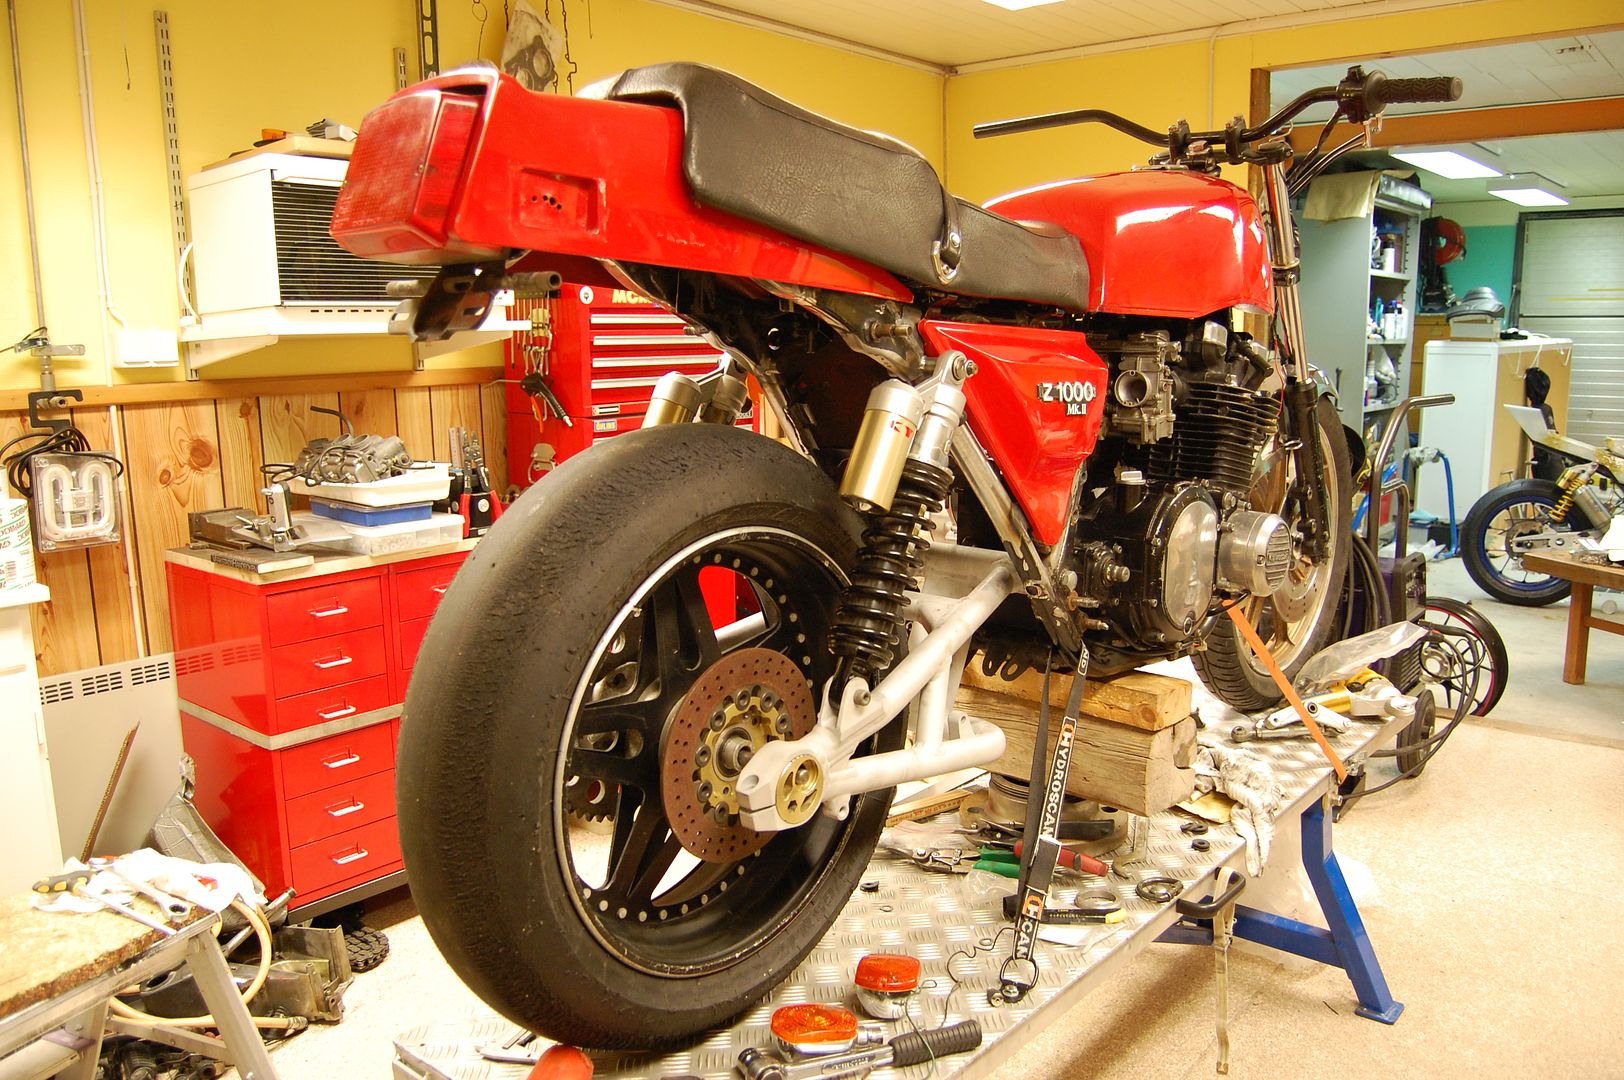
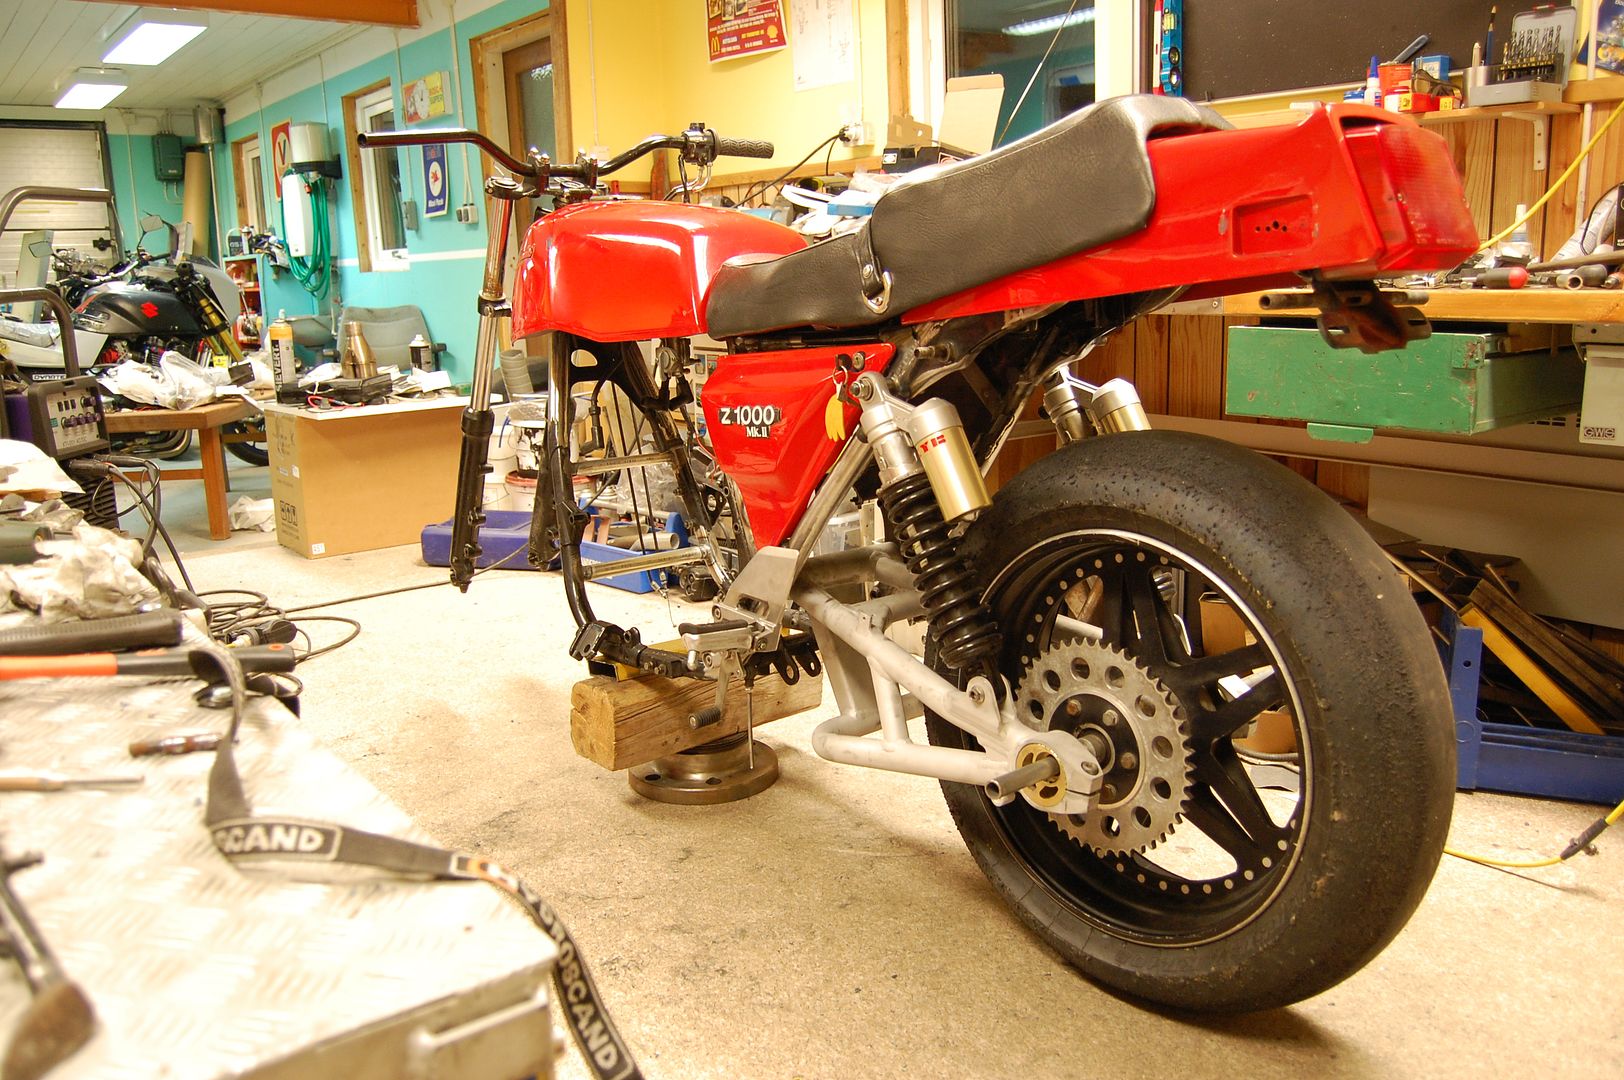
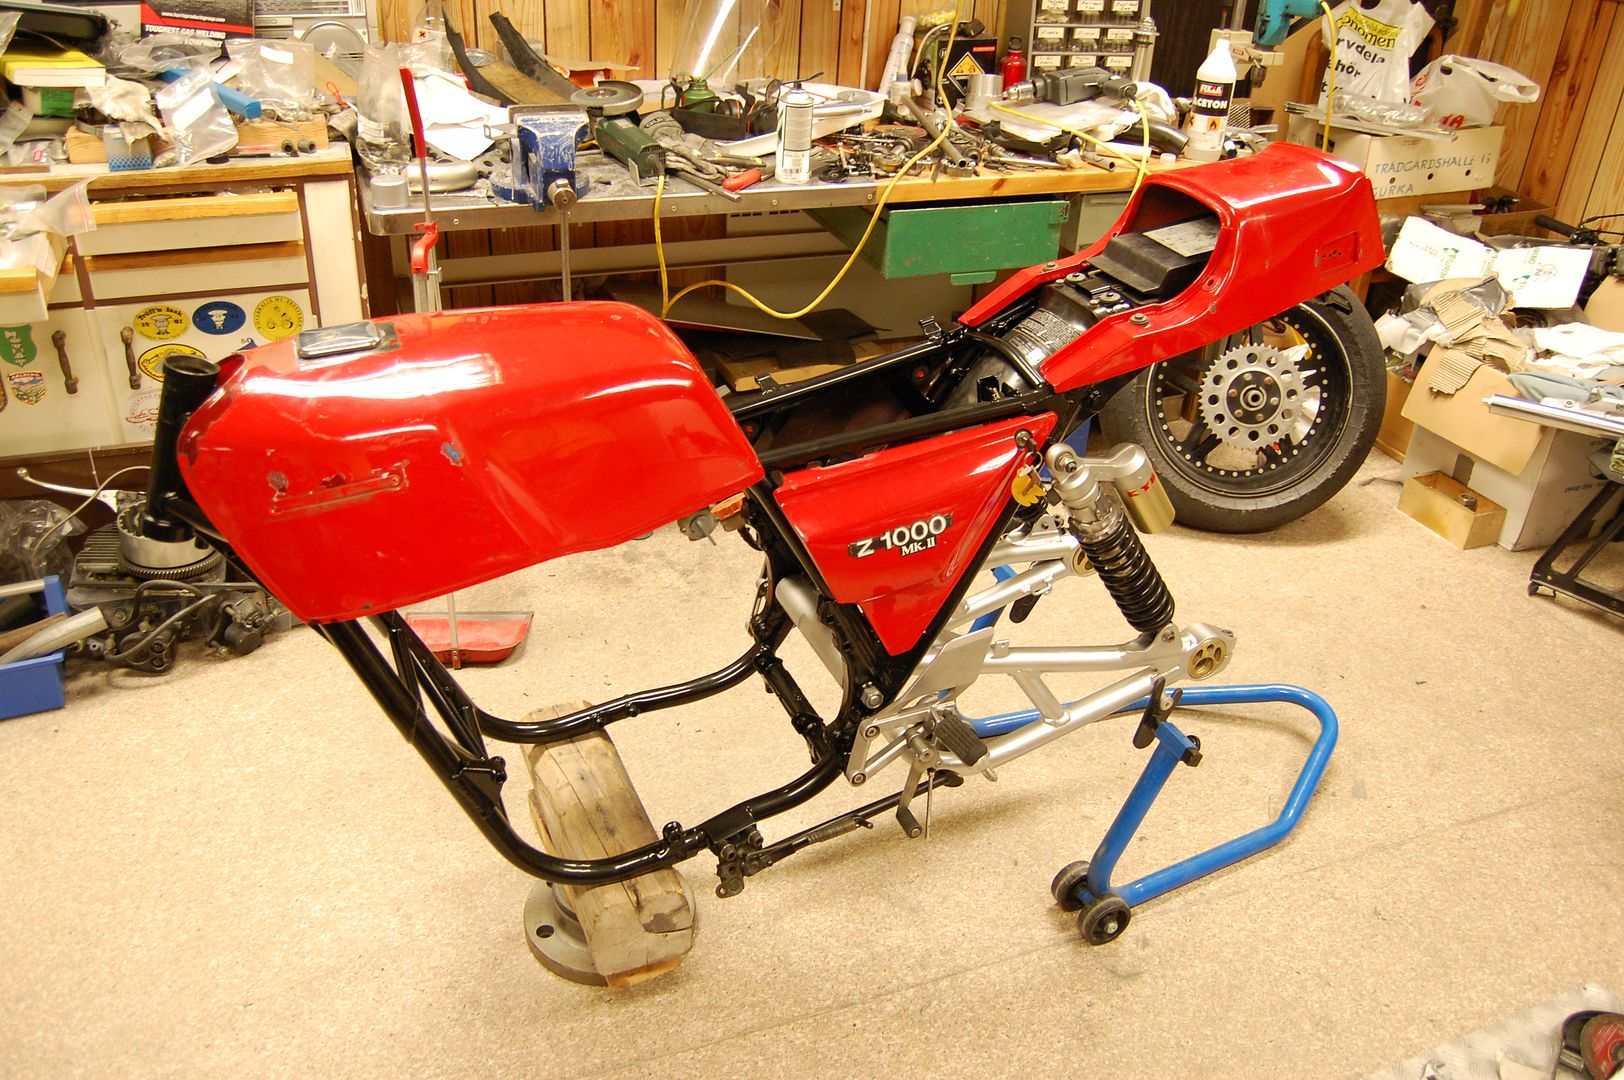
How to fit a ZRX1100 swingarm to your Z1000 Mk.II


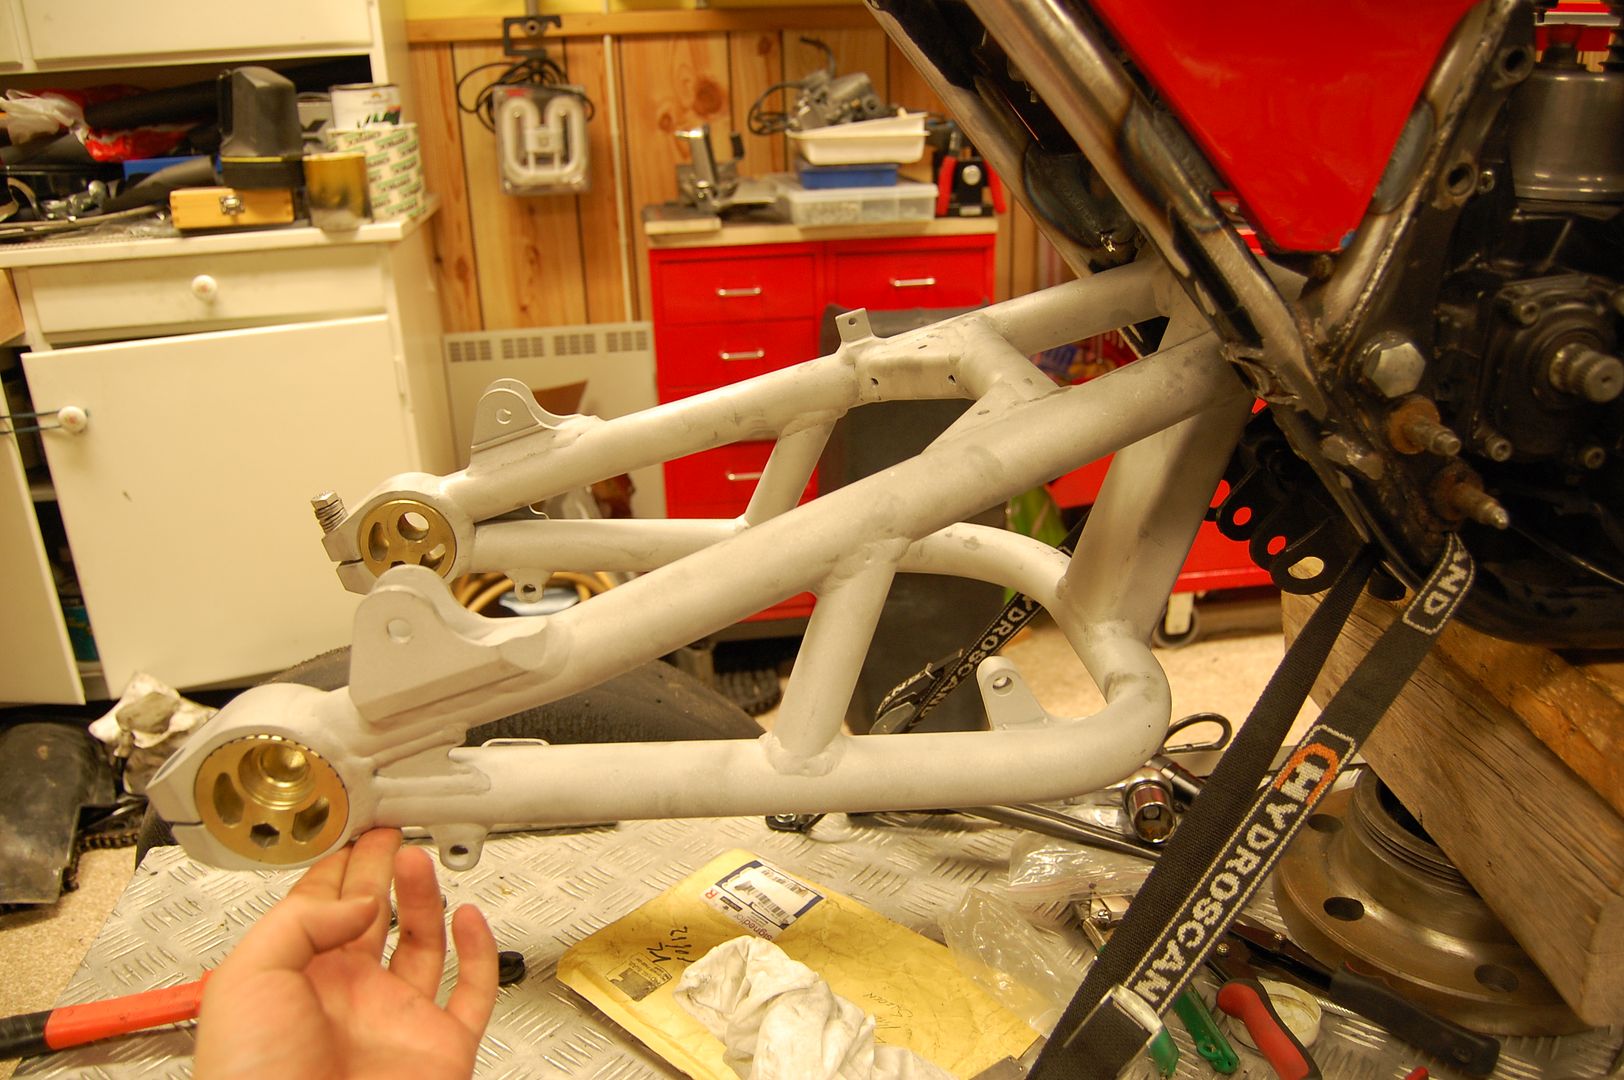
First, remove roughly 2-3mm of material from the right hand side of the swingarm (enough so the swingarm slides into the frame with ease), since you want to keep as much material left as possible on the chain side of the swingarm pivot so you don't have to get a massive offset sprocket.

Once that is done, fit all the bearings in the swingarm. Big needle bearing on the left side, smaller needle bearing + support roller bearing on the right side. Make sure you fit the support roller bearing as deep as it can go.

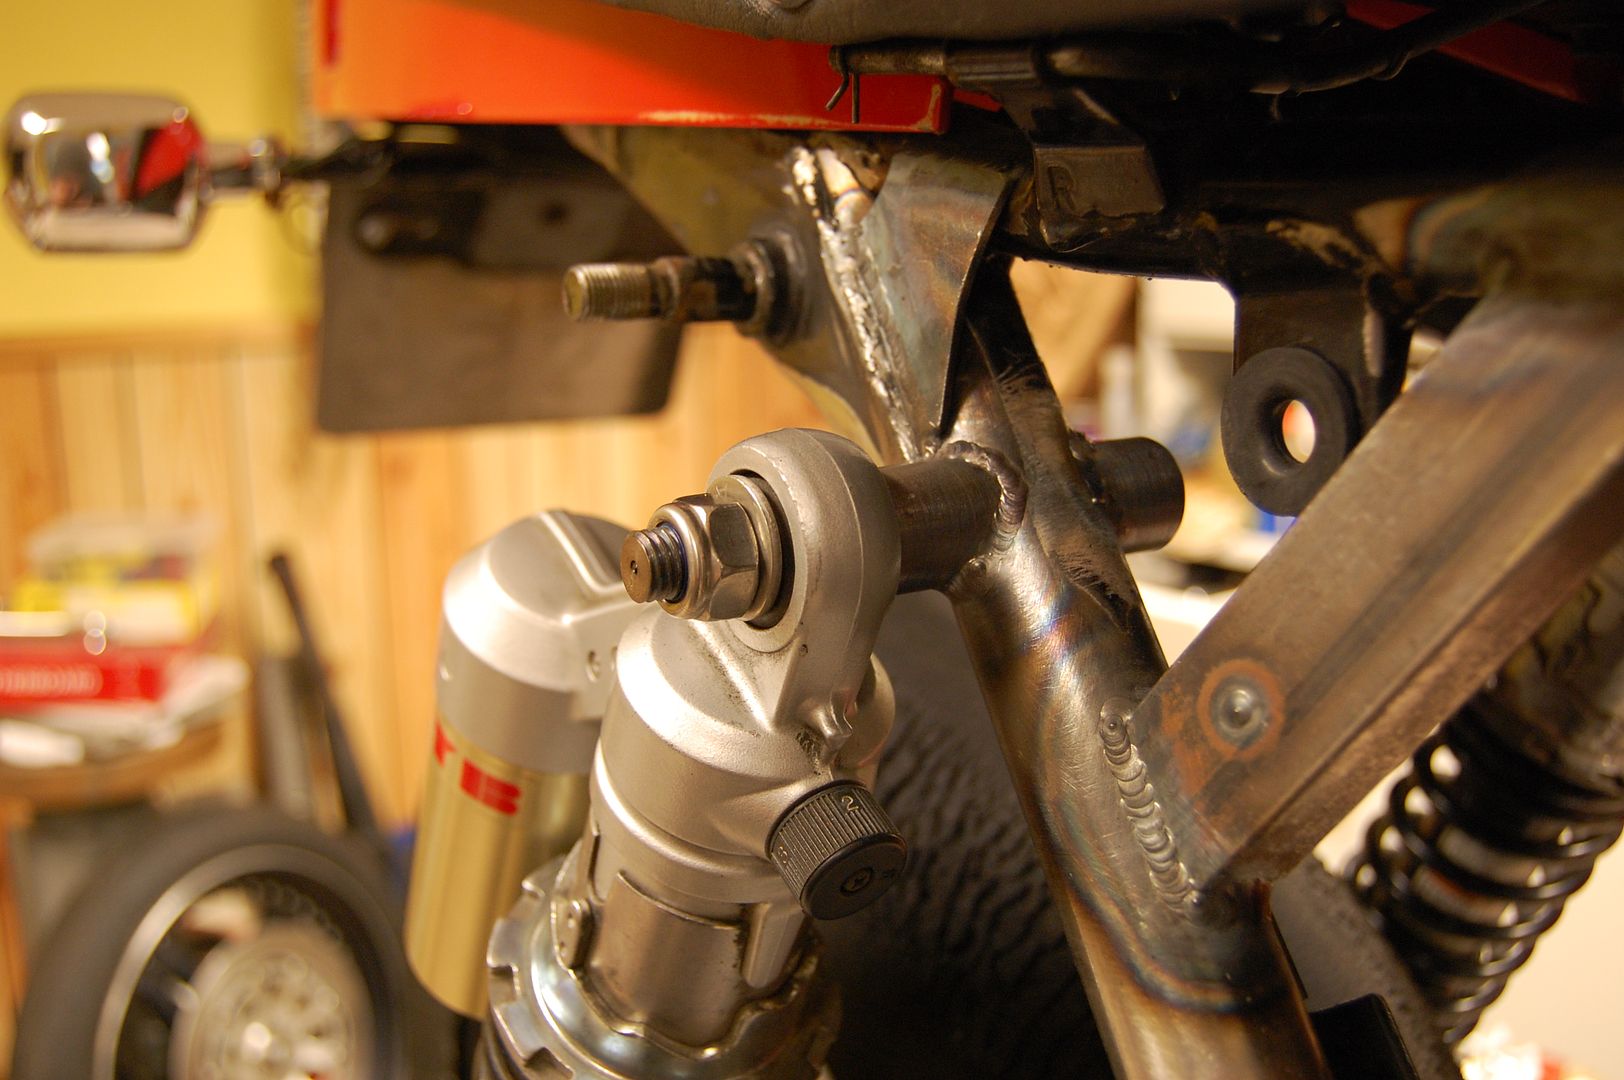
After that, it's a matter of modifying the swingarm pivot tubes. For this we use the ZRX tube and the stock Mk.II tube. The nice thing with this is that you can shave off a bit of material from the Mk.II tube and it will fit inside the ZRX tube, like this.

Image

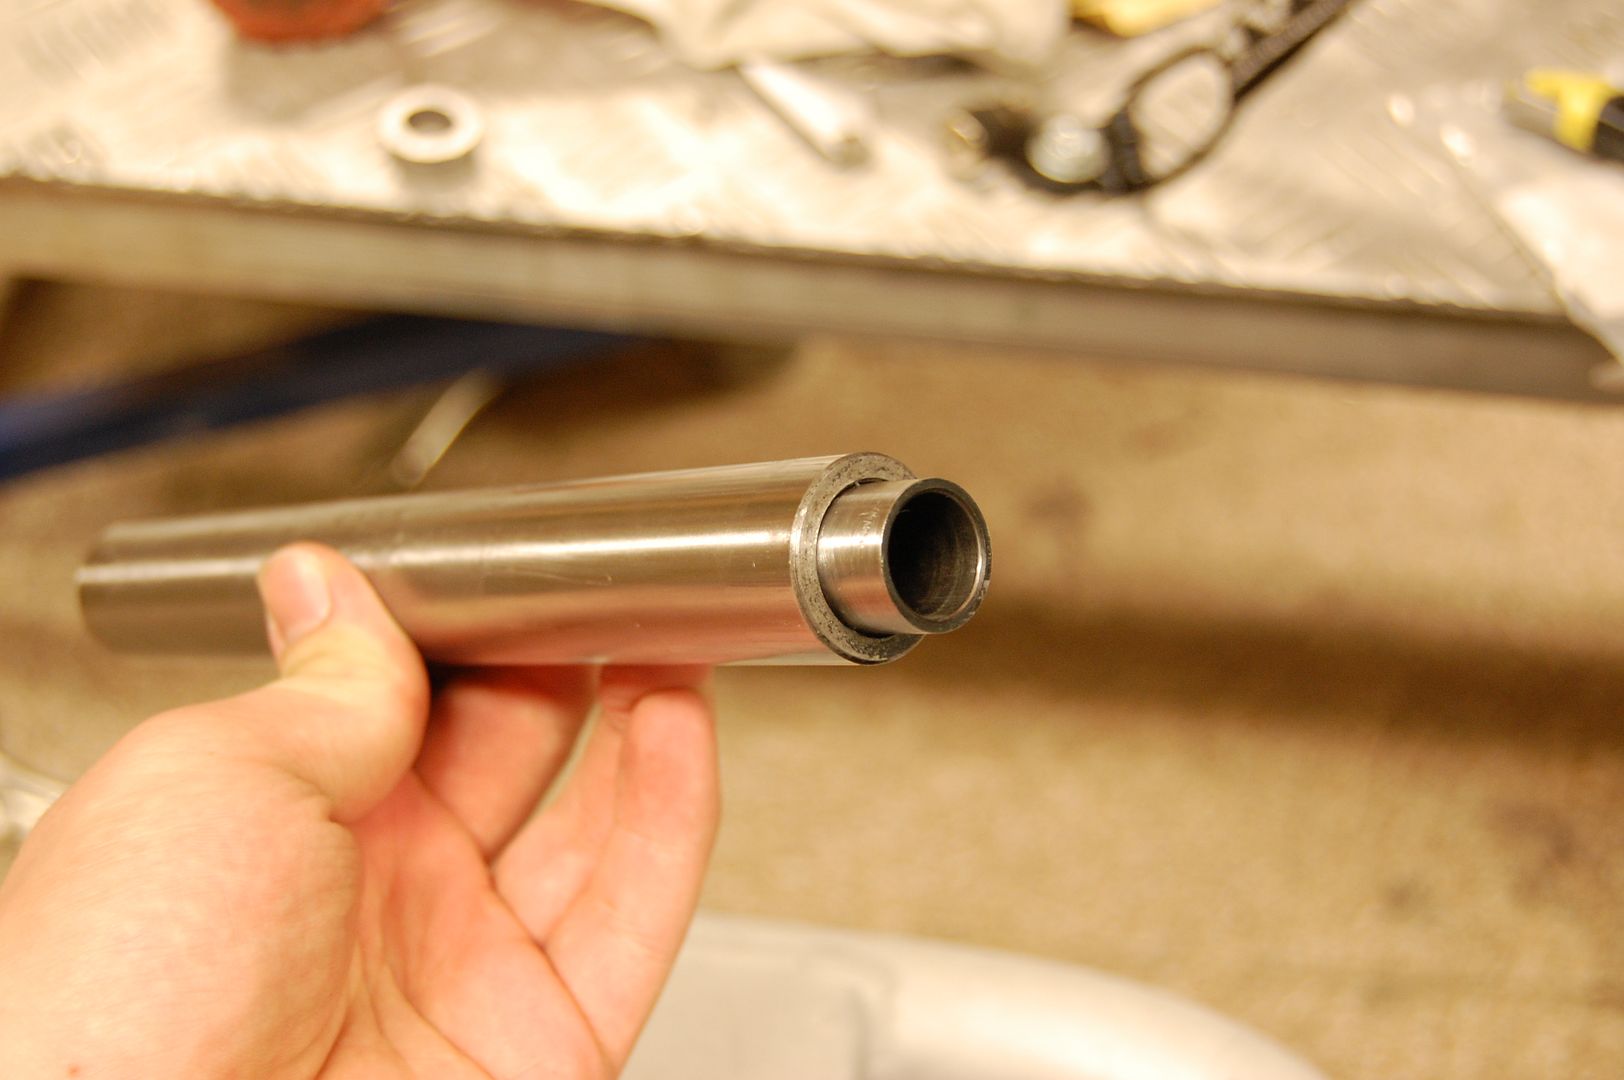
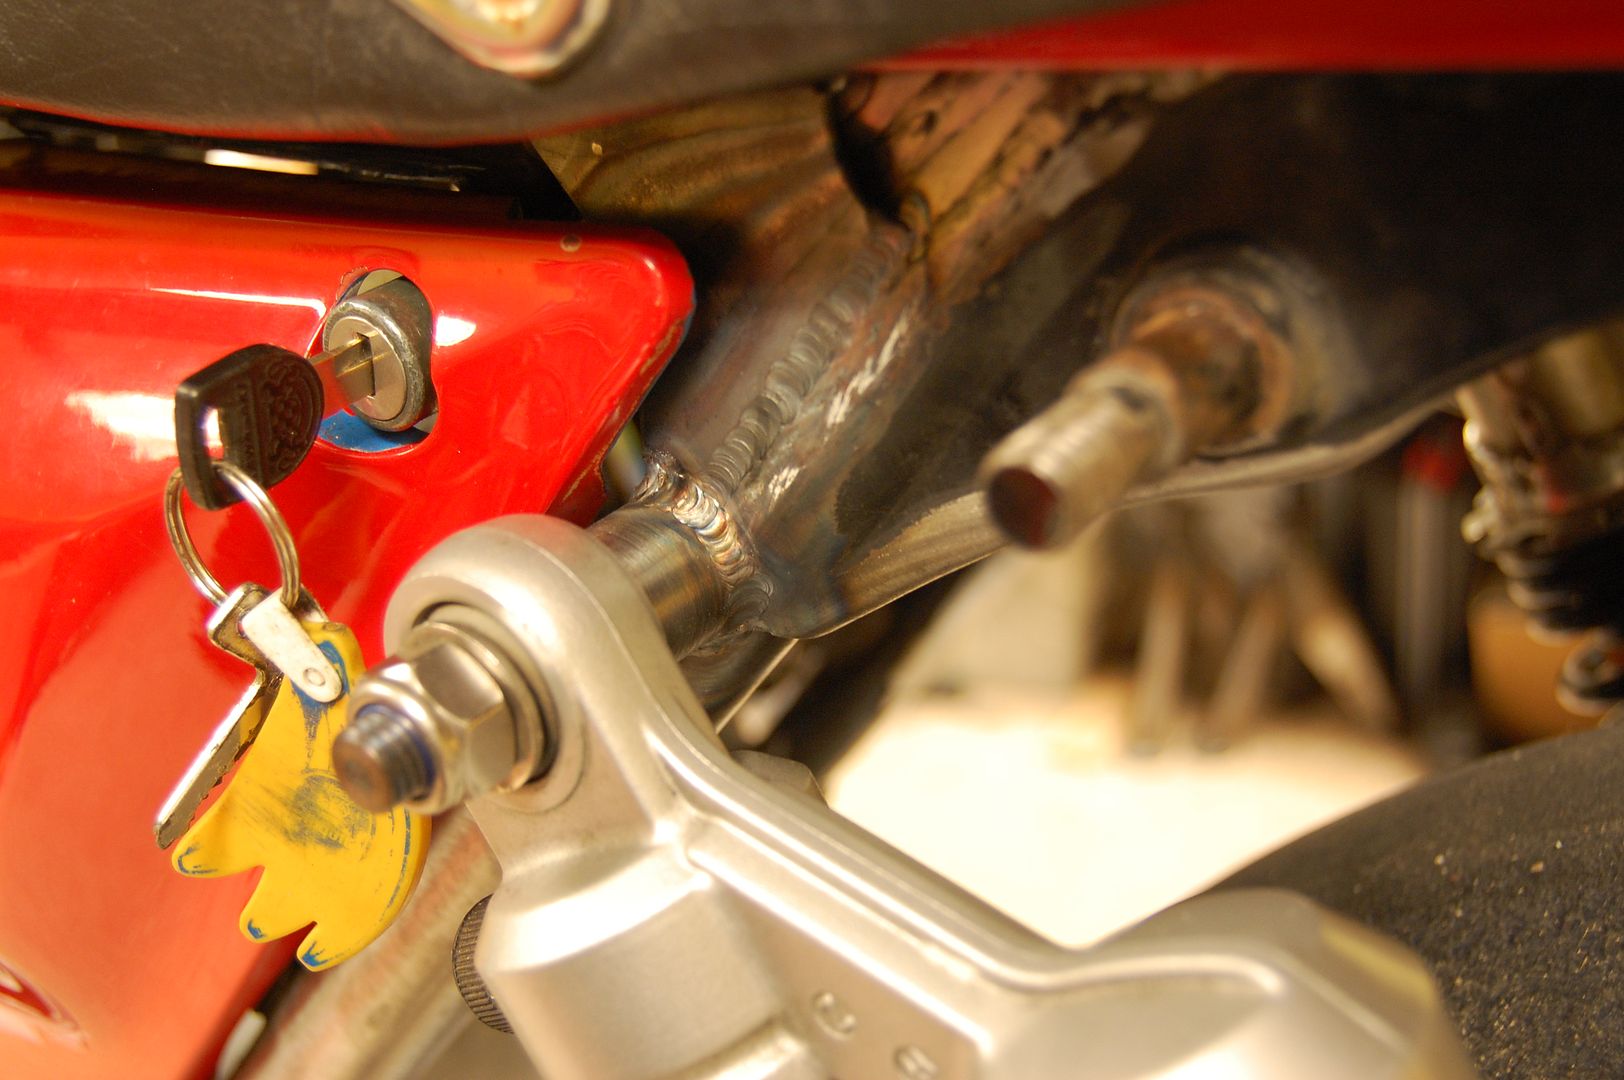
The ZRX tube gets shortened 2mm and the Mk.II tube gets shortened 6.5mm. If you do it like that, the Mk.I tube will slide right into (after you've machined the end of the tube a bit in the lathe) the support roller bearing inside the swingarm, like this.

Image

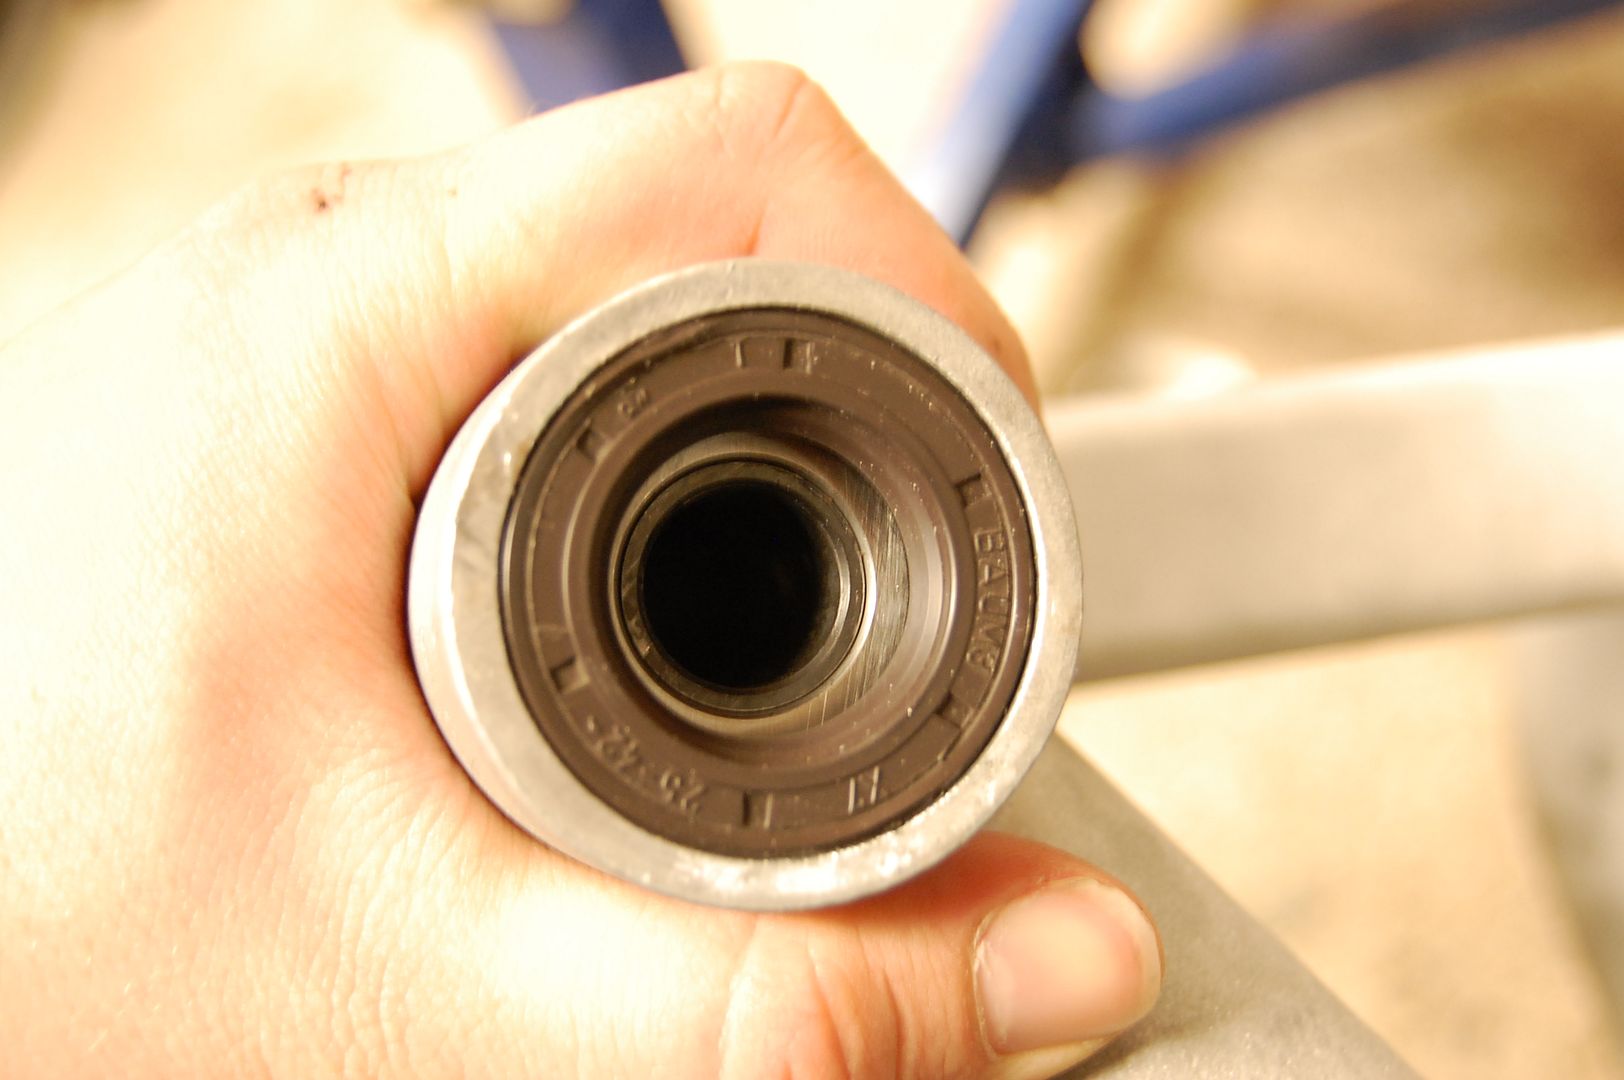
The other side of the tube should now rest flush with the dust seal on the left hand side of the swingarm!

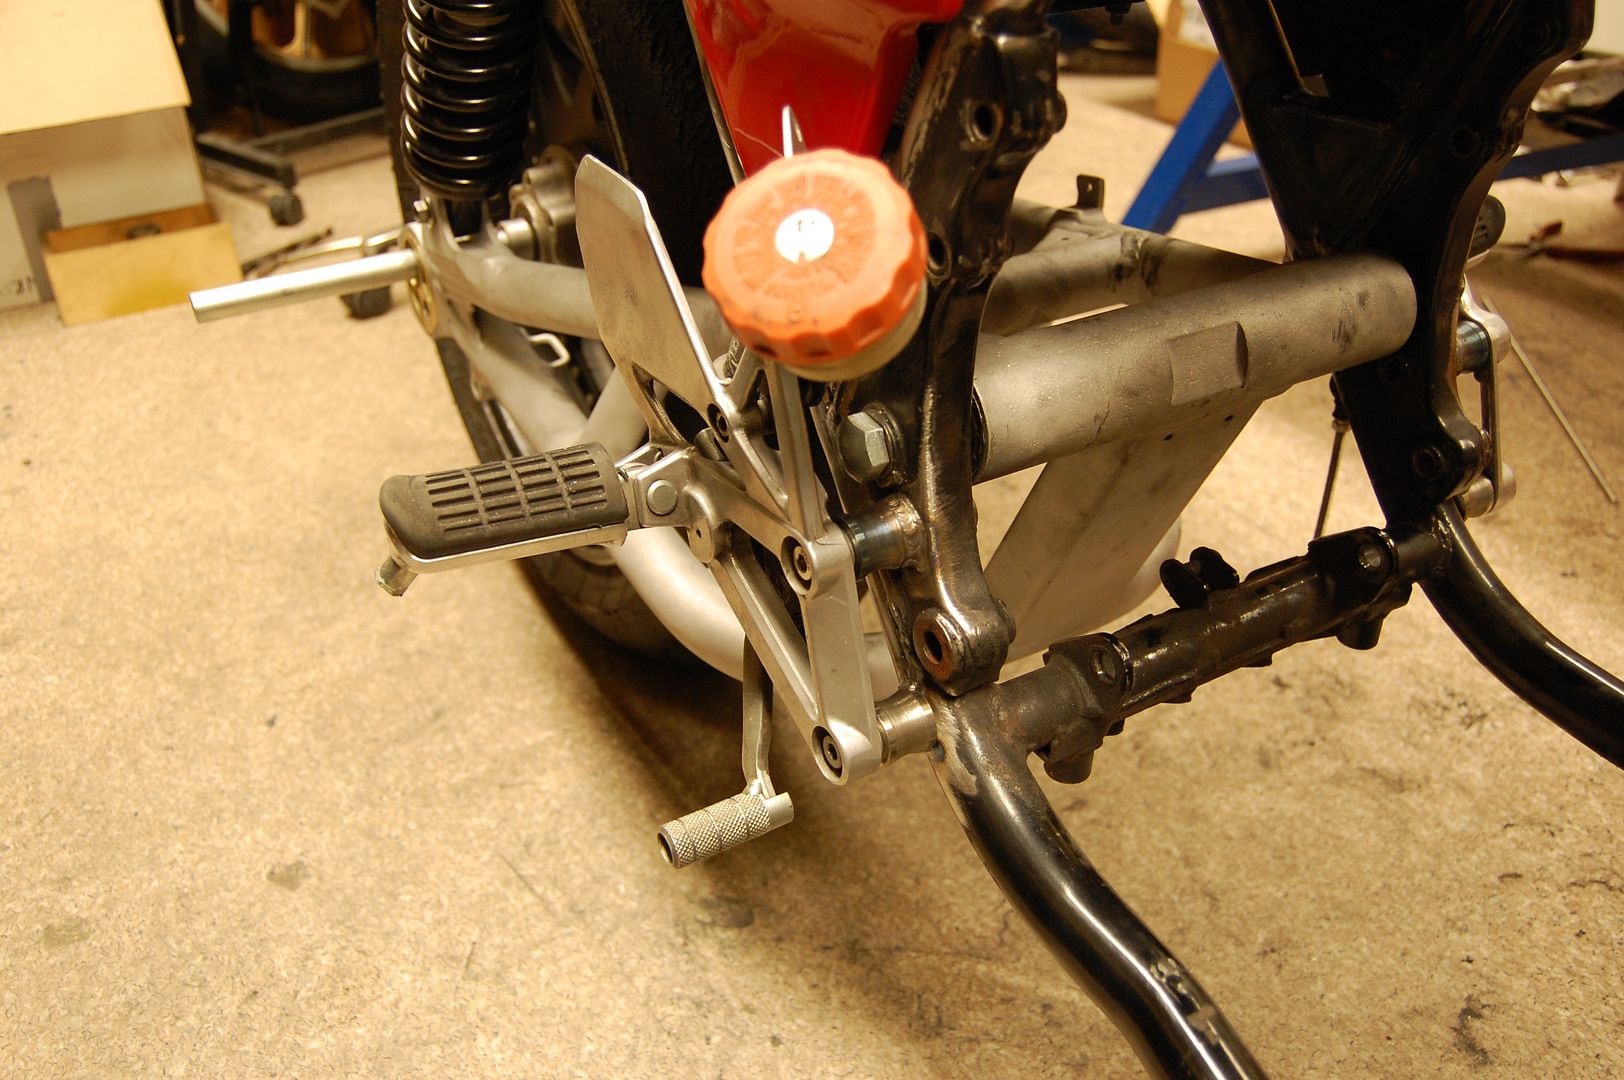
After that it's just a matter of fabricating a small spacer which is 25mm outside diameter, 16mm inside (the swingarm axle diameter) and roughly 10mm wide (give or take a few tenths depending on how snug you want the fit to be).

Image

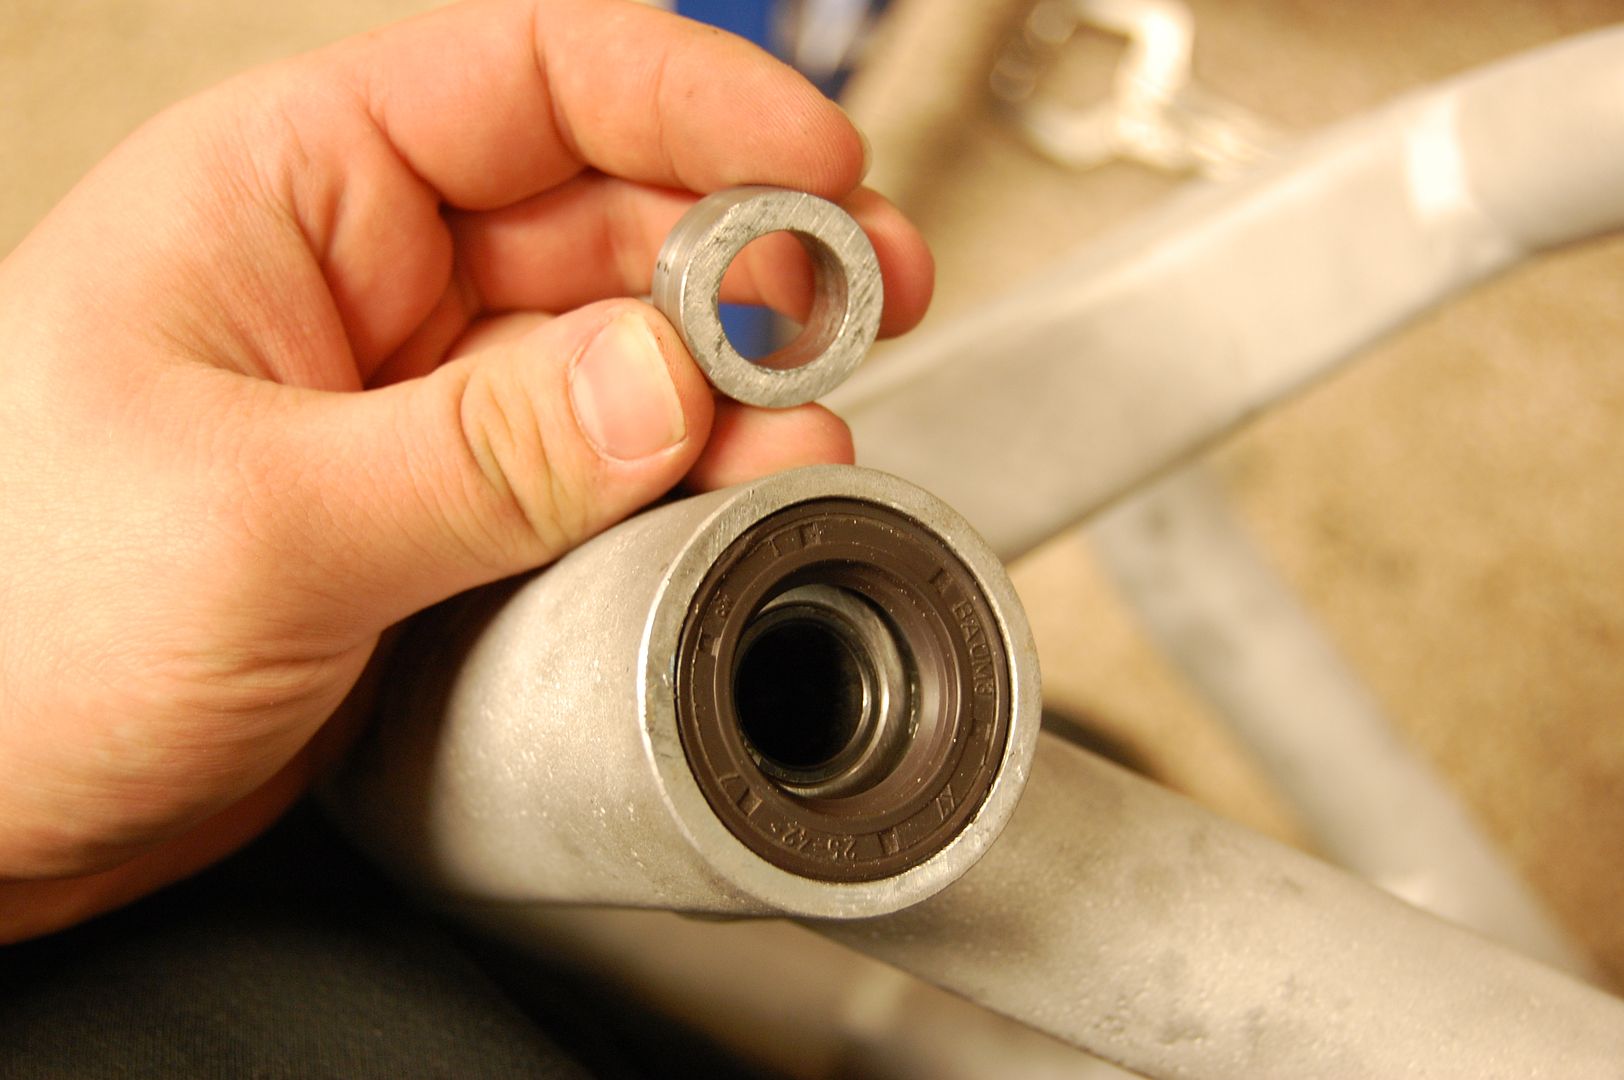
If you need to make any adjustments, all you really have to do is adjust the width of the spacer on the right hand side (the one described above). Fits like a glove in the frame and doesn't move an inch when you tighten up the pivot bolt.

Image

All in all I think it was two hours of work. :)

I'll grab some more precise measurements tomorrow.

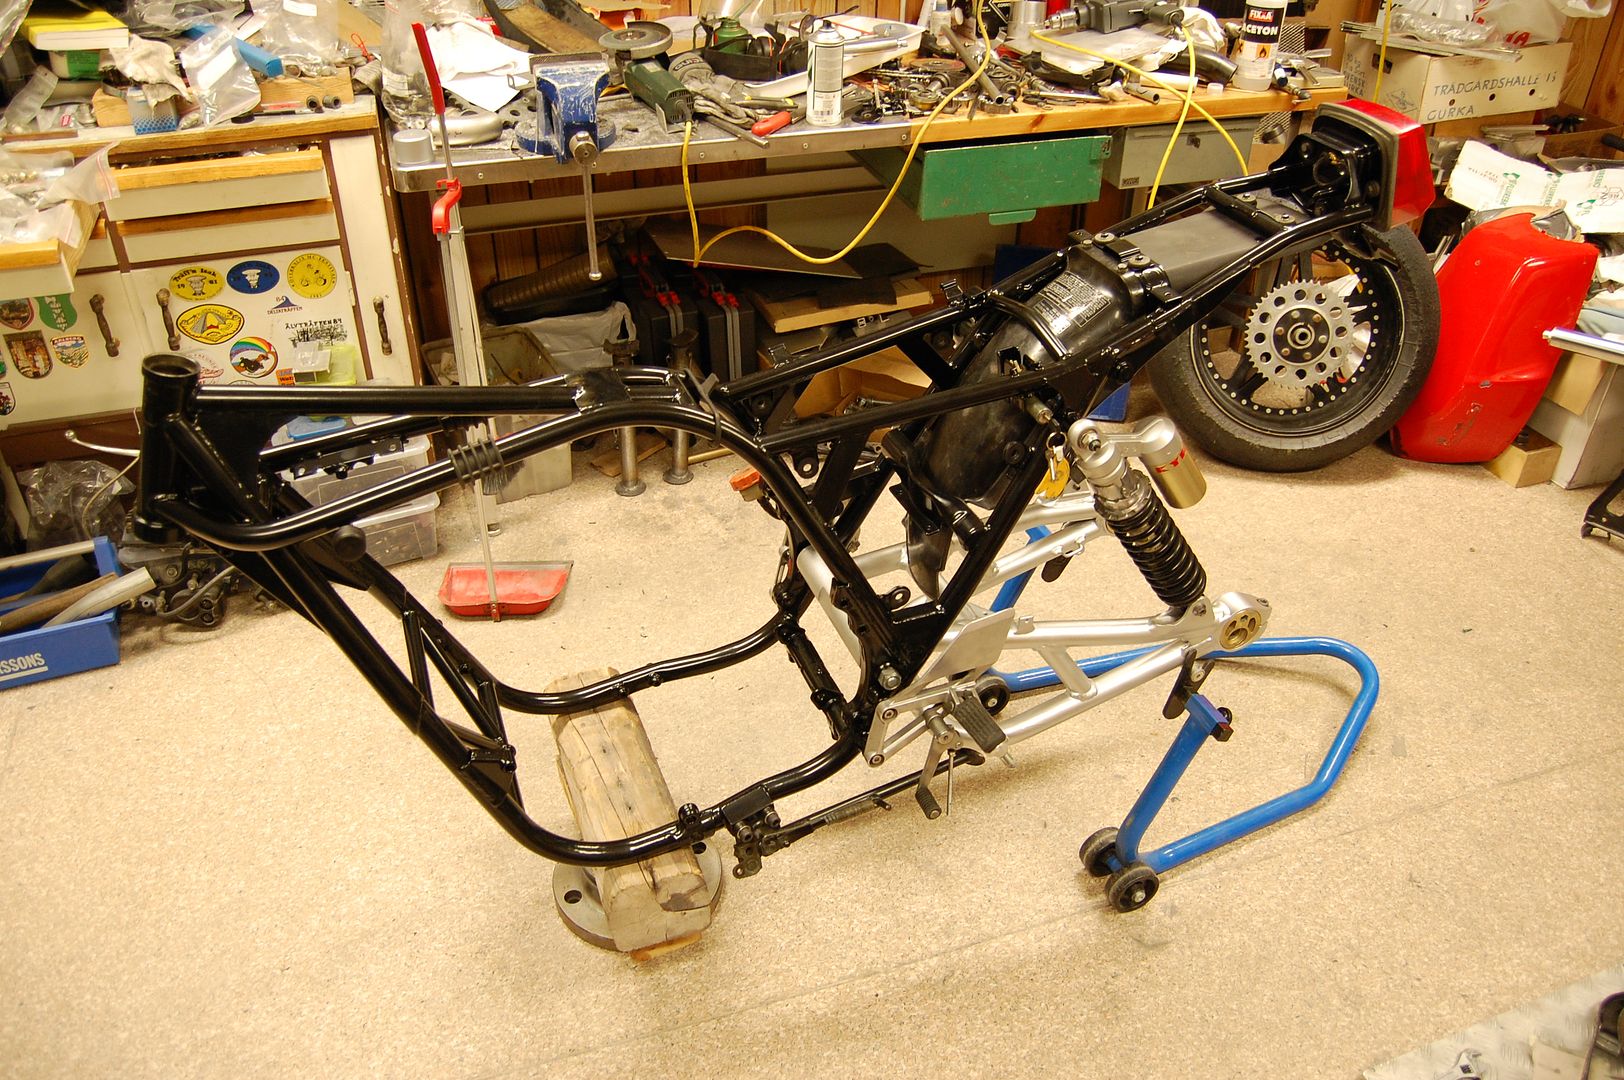
Next up is welding the shockmounts. I'll probably start with that sometime tomorrow.
There's no replacement for displacement.

Viktor Larsson
100Club
100Club
Posts: 158
Joined: 11th Jun 2011
Location: Piteå, Sweden

#22 PostAuthor: Viktor Larsson » Fri Mar 02, 2012 9:22 pm

With the swingarm in place I went ahead and welded the shock mounts earlier this afternoon.

Took some measurements then I tacked everything up and made the final checks to see that everything was in line and level before welding it.

Turned out pretty good I think.

Image

Image

The Mk.II sure has a great looking rear end. Especially with a 195/65 slick tire. :)

Image

Image

Gonna start working on aligning the rear wheel next and make some spacers for it, then I'm gonna start working on the front end. I'll probably start sketching on some new yokes on Sunday.

Till next time. :wink:
There's no replacement for displacement.

Viktor Larsson
100Club
100Club
Posts: 158
Joined: 11th Jun 2011
Location: Piteå, Sweden

#23 PostAuthor: Viktor Larsson » Sat Mar 10, 2012 11:35 pm

Slapped on some new footrests today. Much better position compared to stock.

Image

Also took the bike down on the floor to get a better look at it and to sit on it for the first time. It both feels and looks nice. Really pleased. :D

Image

Will start working on the new yokes soon. Going to cut up some material I have tomorrow. Besides that? Placing an order from Webike in a few days for some goodies, including new gauges (electric speedo / tacho) as well as some emblems and decals.

More to come...
There's no replacement for displacement.

User avatar
MCZ900
100Club
100Club
Posts: 320
Joined: 14th Jun 2011
Location: Derbyshire

#24 PostAuthor: MCZ900 » Sun Mar 11, 2012 12:30 am

looking very good mate
1973 Z1 and 1976 Z900

Viktor Larsson
100Club
100Club
Posts: 158
Joined: 11th Jun 2011
Location: Piteå, Sweden

#25 PostAuthor: Viktor Larsson » Mon Mar 12, 2012 3:22 pm

MCZ900 wrote:looking very good mate


Thanks mate. :D
There's no replacement for displacement.

User avatar
ADRIAN H
Hardcore
Hardcore
Posts: 4174
Joined: 21st Mar 2009
Location: The Brunswick, Charminster. Bmth

#26 PostAuthor: ADRIAN H » Mon Mar 12, 2012 6:44 pm

It is really taking shape, looks lovely.
👀 👀 👀
email - adrianhorsfield@live.co.uk

Pan
Regular Poster
Posts: 46
Joined: 18th Mar 2012

#27 PostAuthor: Pan » Thu Mar 29, 2012 9:10 am

Looking good, I will be watching this with interest!!

Mark

Viktor Larsson
100Club
100Club
Posts: 158
Joined: 11th Jun 2011
Location: Piteå, Sweden

#28 PostAuthor: Viktor Larsson » Sat Mar 31, 2012 2:41 pm

Frame finished now so it will get dropped of for shot blasting on Monday morning and then off to the powdercoaters. Shouldn't take more than a day or two. :D

Here's what was holding the bike back. Finally found a nice and cheap sidestand on eBay which arrived yesterday. Fabricated a mount and welded it on today. Turned out really good.

Image
There's no replacement for displacement.

Viktor Larsson
100Club
100Club
Posts: 158
Joined: 11th Jun 2011
Location: Piteå, Sweden

#29 PostAuthor: Viktor Larsson » Mon Apr 02, 2012 8:13 pm

Wow! Turned out to be a busy day.

Dropped off the fram to the blasters around 9:40 this morning. While he was blasting the frame I sat down with todays newspaper. 25 minutes later the frame was done and looked super nice. Shook off some metal beads that were left and threw the frame in the back of the car and then it was off to the powdercoaters.

At the powdercoaters a good friend of mine turned out to be working extra there (he does that sometimes) and they just happened to be painting gloss black and a zinc based primer. Suddenly my frame was priority #1. Around six this afternoon I got a call from my friend saying the frame was ready so I jumped in the car to pick it up.

So how did it turn out? Better than I could have hoped for! Frame looks fantastic. Here's a taste of the finish.

Image

Then it was just a matter of putting things together again.

Image

Image

Had to see what the bodywork would look like next to the freshly painted frame. Even this shoddy paintjob looks good now.

Image

More to come towards the weekend. Gonna clean the engine up then and paint it. After that it's a matter of sorting out new yokes and all that stuff. :wink:
There's no replacement for displacement.

User avatar
HARRY4448
100Club
100Club
Posts: 370
Joined: 24th Jun 2007
Location: Wokingham

Project Resto-mod Mk.II

#30 PostAuthor: HARRY4448 » Tue Apr 03, 2012 5:26 pm

Blimey.
You don't mess around do you? :brav
We normally wait months for people to simply answer the phone.

Can't wait to see it all come together.


Love the MK11's


Return to “Projects”

Who is online

Users browsing this forum: No registered users and 12 guests