Hey Ralph, I hope the rebuild on your ST1100 is going OK! I am following with great intrest as I an working on my newly aquires SEPTIC! Keep the pics coming. Thanks.
Tim
Hello Guest User,
Please feel free to have a look around the forum but be aware that as an unregistered guest you can't see all of it and you can't post.
To access these 'Registered Users Only' areas simply register and login.
Please feel free to have a look around the forum but be aware that as an unregistered guest you can't see all of it and you can't post.
To access these 'Registered Users Only' areas simply register and login.
Z1100ST Resto +
Moderators: KeithZ1R, chrisu, paul doran, Taffus
-
Timothy Comerford

- Regular Poster
- Posts: 71
- Joined: 26th Jun 2011
- Location: Dublin Ireland
-
paul doran

- Area Rep.

- Posts: 15910
- Joined: 24th Sep 2004
- Location: near Dublin Ireland
-
RALPHARAMA

- Area Rep.
- Posts: 3407
- Joined: 19th May 2007
- Location: Pensford, Somerset
- Contact:
I have been battling on with paint stripper and lots and lots of bead blasting and the allied masking for powder coat.

The green masking tape costs a bloody mint; not sure what I'm going to use on the crank cases yet. The green tape is too dear to cover the crankcases in
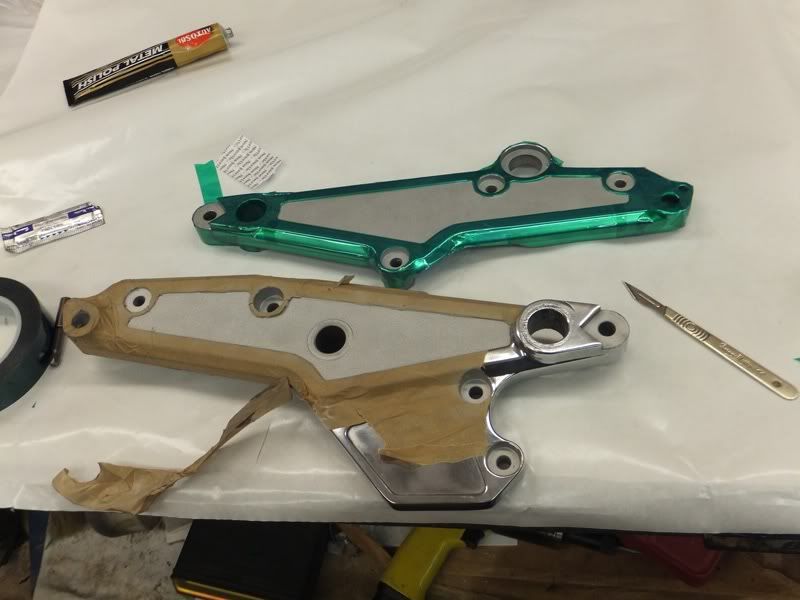
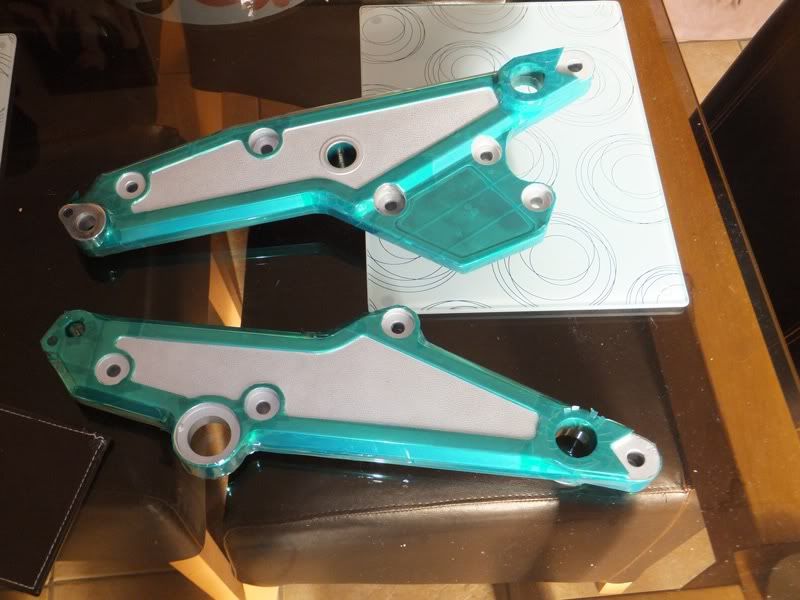
I wanted the rear hangers to have a bit of bling, so I decided to polish the ally finish bits and powder coat the remainder. As they were sooo shitty, I bead blasted the whole lot. Then polished the polished bits and then masked off the polished bits for more blasting; had to get the polish and allied crap out of the 'grain' texture bit. Then I had to remove the blasting masking and re-mask with the green stuff. It's not easy to use as it doesn't 'give' very much.
I started stripping the rear bevel box last night, which was quite interesting
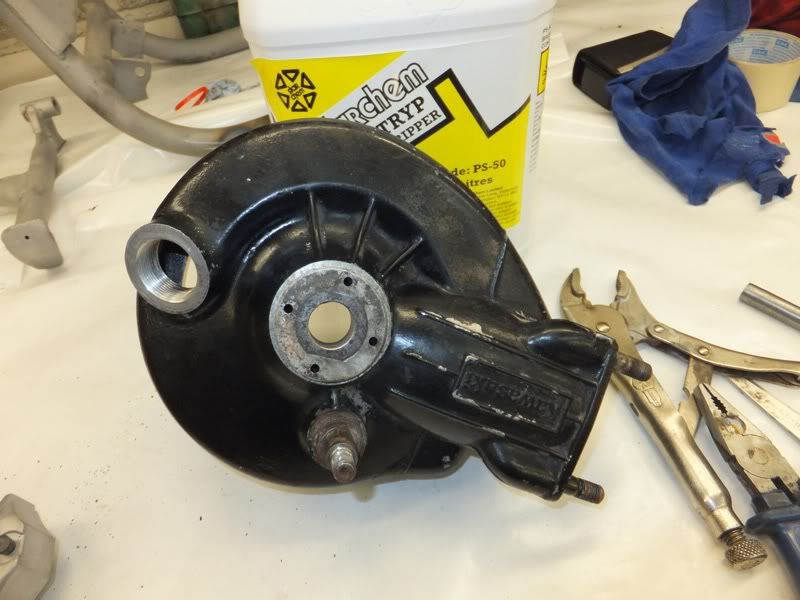
I have to heat the whole unit up to 100°C to remove the outer taper bearing race for the output. There are four holes on the out side and having heated it up you're supposed to drift the bearing outer using a special tool. I'm hoping that gently, gently with a pin punch might work, as I doubt such a tool is currently available and even if it is, it'll probably cost several vital organs and a leg
There is a caged bearing on the input side. It appears that one needs to draw out a roll pin to remove that, but attempts so far have been fruitless.
It mayn't be necessary, it all depends on whether the oil seals will be OK a at powder coat oven temperatures. I will voice this question else where on the forum.
When the frame came back from grit blasting, there were a few holes in it, which I have tig'd up. Sadly some areshole with more enthusiasm than skill has attacked the frame with a welder, and I can't send it off for coating until I can figure out what else needs sorting on it, or someone offers me a better, unadulterated frame very cheap. I need to get a seat base that hasn't rotted out completely and then suffered similar indignities to the frame. I understand that the 'J' motor limited is very similar so I'm on the hunt for one of those if my success in sourcing an eleven hundred seat continues so badly
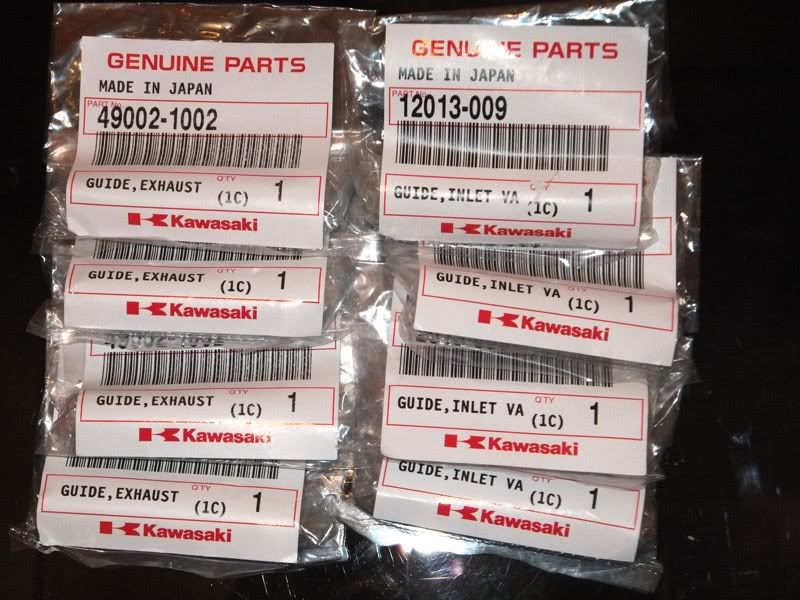
Barrels are off being bored and the head's having new valve guides fitted. I am replacing all the inlet valves, as three of the four had undersize stems and they all had pitting on the stems.
The green masking tape costs a bloody mint; not sure what I'm going to use on the crank cases yet. The green tape is too dear to cover the crankcases in
I wanted the rear hangers to have a bit of bling, so I decided to polish the ally finish bits and powder coat the remainder. As they were sooo shitty, I bead blasted the whole lot. Then polished the polished bits and then masked off the polished bits for more blasting; had to get the polish and allied crap out of the 'grain' texture bit. Then I had to remove the blasting masking and re-mask with the green stuff. It's not easy to use as it doesn't 'give' very much.
I started stripping the rear bevel box last night, which was quite interesting
I have to heat the whole unit up to 100°C to remove the outer taper bearing race for the output. There are four holes on the out side and having heated it up you're supposed to drift the bearing outer using a special tool. I'm hoping that gently, gently with a pin punch might work, as I doubt such a tool is currently available and even if it is, it'll probably cost several vital organs and a leg
There is a caged bearing on the input side. It appears that one needs to draw out a roll pin to remove that, but attempts so far have been fruitless.
It mayn't be necessary, it all depends on whether the oil seals will be OK a at powder coat oven temperatures. I will voice this question else where on the forum.
When the frame came back from grit blasting, there were a few holes in it, which I have tig'd up. Sadly some areshole with more enthusiasm than skill has attacked the frame with a welder, and I can't send it off for coating until I can figure out what else needs sorting on it, or someone offers me a better, unadulterated frame very cheap. I need to get a seat base that hasn't rotted out completely and then suffered similar indignities to the frame. I understand that the 'J' motor limited is very similar so I'm on the hunt for one of those if my success in sourcing an eleven hundred seat continues so badly
Barrels are off being bored and the head's having new valve guides fitted. I am replacing all the inlet valves, as three of the four had undersize stems and they all had pitting on the stems.
Ralph Ferrand
Z1000A1 (1977), Z1300A5 (1983), Z900A4 (1976) GPZ1100 Unitrak (1983)(project), RD250B (1975)(project), ZRX1200R (2005) DT175MX (1981) YZF R6 (1999)
http://www.bikerstoolbox.co.uk
Z1000A1 (1977), Z1300A5 (1983), Z900A4 (1976) GPZ1100 Unitrak (1983)(project), RD250B (1975)(project), ZRX1200R (2005) DT175MX (1981) YZF R6 (1999)
http://www.bikerstoolbox.co.uk
-
RALPHARAMA
- Area Rep.
- Posts: 3407
- Joined: 19th May 2007
- Location: Pensford, Somerset
- Contact:
First job tonight was removing paint from the bevel box, which I did with some super-duper industrial paint stripper which I got from my local car paint factors. Worked a treat, if anything better than the old Nitromors - you remember that the stuff - it used to remove paint unlike new improved recipe that doesn't remove paint but is much safer to use !
Took the bull by the horns last night and heated the bevel box up to 100°C in CB's oven and removed the back bearing for the output which came out quite easily when drifted from behind.
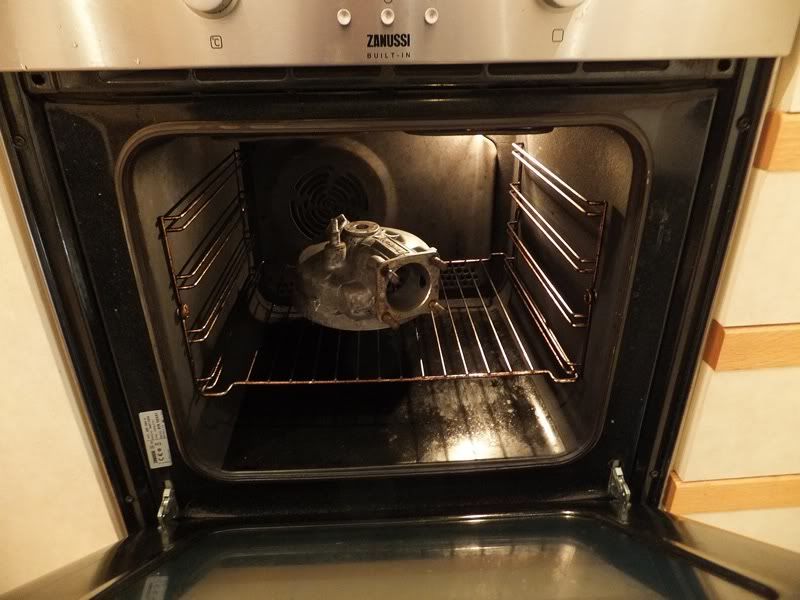
The back bearing for the pinion had a roll pin securing it which wouldn't shift. I then struck upon the idea of using the tool I have for making up air lines to crimp the clips! They are a bit like a set of old fashioned pincers but smaller and not so sharp, but with a better ratio effort, and they pulled the roll pin out a treat
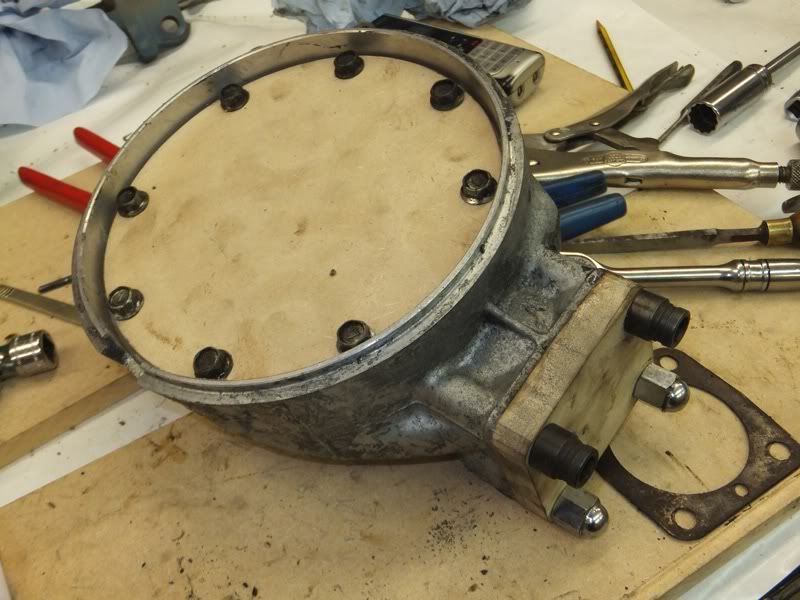
As there are lots of nooks and crannies in the box where blasting media could lurk, I have decided to do a pucka mask job, and made some 6mm MDF masks up. I gave them a bead of bathroom silicone and lightly bolted them up ready for a visit to my blast cabinet. I'll tighten them up a bit more when I blast them, hopefully tonight
Here's an pic showing some of the butchery wrought against the frame
Still not sure what to do with it

Took the bull by the horns last night and heated the bevel box up to 100°C in CB's oven and removed the back bearing for the output which came out quite easily when drifted from behind.
The back bearing for the pinion had a roll pin securing it which wouldn't shift. I then struck upon the idea of using the tool I have for making up air lines to crimp the clips! They are a bit like a set of old fashioned pincers but smaller and not so sharp, but with a better ratio effort, and they pulled the roll pin out a treat
As there are lots of nooks and crannies in the box where blasting media could lurk, I have decided to do a pucka mask job, and made some 6mm MDF masks up. I gave them a bead of bathroom silicone and lightly bolted them up ready for a visit to my blast cabinet. I'll tighten them up a bit more when I blast them, hopefully tonight
Here's an pic showing some of the butchery wrought against the frame
Still not sure what to do with it
Ralph Ferrand
Z1000A1 (1977), Z1300A5 (1983), Z900A4 (1976) GPZ1100 Unitrak (1983)(project), RD250B (1975)(project), ZRX1200R (2005) DT175MX (1981) YZF R6 (1999)
http://www.bikerstoolbox.co.uk
Z1000A1 (1977), Z1300A5 (1983), Z900A4 (1976) GPZ1100 Unitrak (1983)(project), RD250B (1975)(project), ZRX1200R (2005) DT175MX (1981) YZF R6 (1999)
http://www.bikerstoolbox.co.uk
-
RALPHARAMA
- Area Rep.
- Posts: 3407
- Joined: 19th May 2007
- Location: Pensford, Somerset
- Contact:
I've been cracking on - mostly prep.
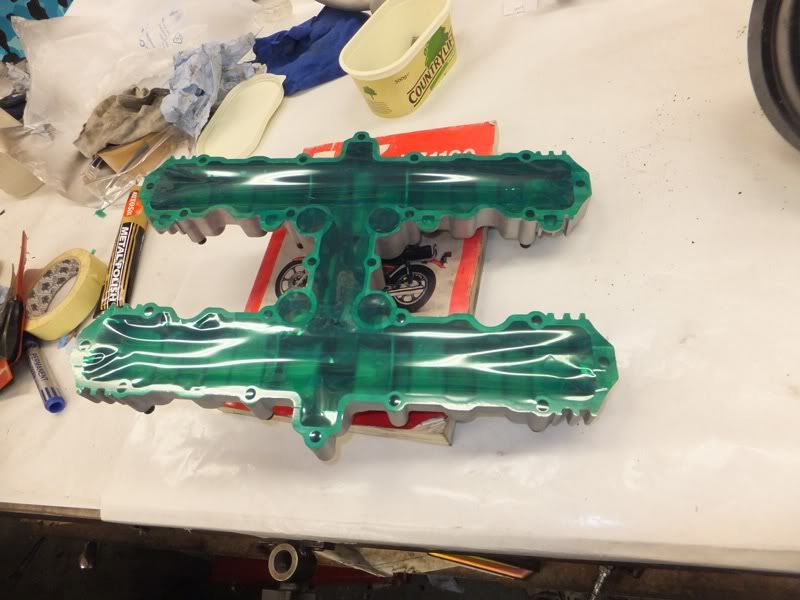
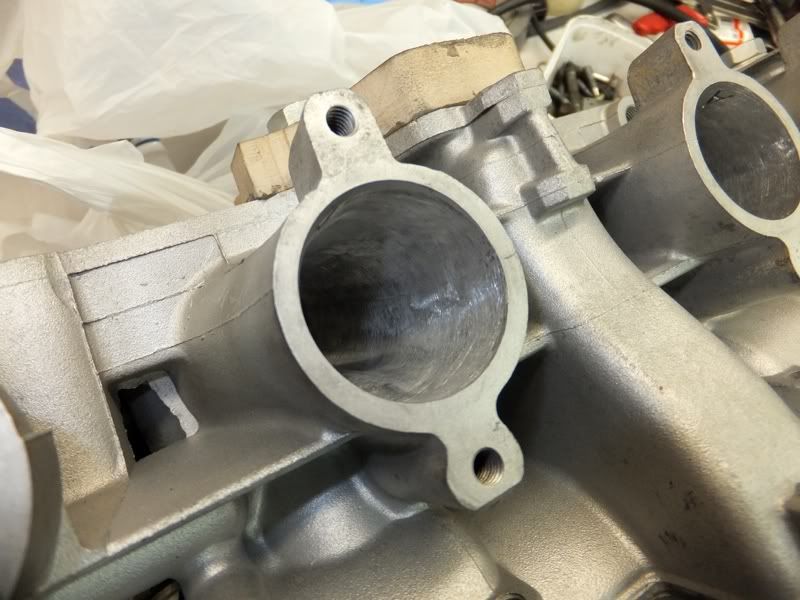
The barrels are back from boring and the heads had new guides fitted. I bolted up the valve guides and made some serious masking and have now bead blasted the lot ready for whatever paint I decide to use. I have.
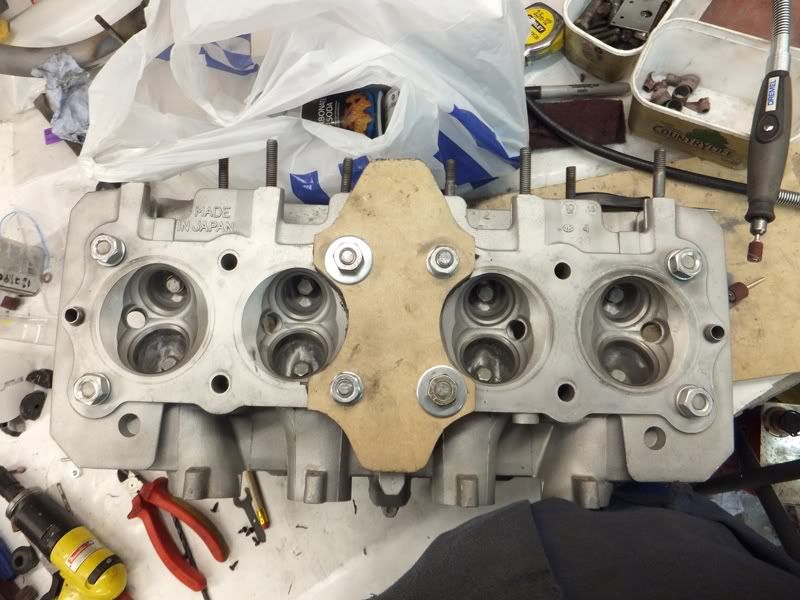
I have cleaned out the ports with the dremel, to let flavour floood oot
The barrels are back from boring and the heads had new guides fitted. I bolted up the valve guides and made some serious masking and have now bead blasted the lot ready for whatever paint I decide to use. I have.
I have cleaned out the ports with the dremel, to let flavour floood oot
Ralph Ferrand
Z1000A1 (1977), Z1300A5 (1983), Z900A4 (1976) GPZ1100 Unitrak (1983)(project), RD250B (1975)(project), ZRX1200R (2005) DT175MX (1981) YZF R6 (1999)
http://www.bikerstoolbox.co.uk
Z1000A1 (1977), Z1300A5 (1983), Z900A4 (1976) GPZ1100 Unitrak (1983)(project), RD250B (1975)(project), ZRX1200R (2005) DT175MX (1981) YZF R6 (1999)
http://www.bikerstoolbox.co.uk

That head looks alittle like a unitrak one. You say youve rebored so what pistons are you using? Next oversize standard types or Wiseco's or something similar?
If they are raised comp some care will be needed here.
I take it that the masking off of the head was done as pictured but you had the cam cover bolted on when you blasted it with the old 'D' rubbers in place as well. No grit got into the top side of the head at all i take it or are you removing and replacing the ally plugs on the ends of the blind galleries?
On the subject of shim sizes; do you know if the valves have been tipped? It may help to bring them back to within the useable range.
P.S. a couple of those exhaust studs look a bit iffy, might just be the camera angle though
AL
1981 J1
-
paul doran
- Area Rep.
- Posts: 15910
- Joined: 24th Sep 2004
- Location: near Dublin Ireland


-
RALPHARAMA
- Area Rep.
- Posts: 3407
- Joined: 19th May 2007
- Location: Pensford, Somerset
- Contact:
Thanx for the kind comments.
Al, I 'glued' the lid on with bath sealant including all around the cam end rubbers, so I hope there's no blast media inside - if there is then I will have a challenging time removing it. As it's dry media it's easier to get out than vapour blast which injects a slurry that gets in the ends of the oil galleries and then is reluctant to come back out!. I believe that the head is off a shaft, but I can't be sure. I'm using MCP 10.5:1 pistons I got from the US. Steve Debben seemed to think that Zeds run OK at 10.5:1.
On all the ports there's a letter 'A' stamped. I don't know what the significance of this is. Any one know ?
Ralph Ferrand
Z1000A1 (1977), Z1300A5 (1983), Z900A4 (1976) GPZ1100 Unitrak (1983)(project), RD250B (1975)(project), ZRX1200R (2005) DT175MX (1981) YZF R6 (1999)
http://www.bikerstoolbox.co.uk
Z1000A1 (1977), Z1300A5 (1983), Z900A4 (1976) GPZ1100 Unitrak (1983)(project), RD250B (1975)(project), ZRX1200R (2005) DT175MX (1981) YZF R6 (1999)
http://www.bikerstoolbox.co.uk
-
RALPHARAMA
- Area Rep.
- Posts: 3407
- Joined: 19th May 2007
- Location: Pensford, Somerset
- Contact:
A great wailing and knashing of teeth It turns out that the head I have been working on is from a Uni-Trak, so will give me compression ratio problems grrr
I have just been and bought another set of guides!!!
I have another hemi head on it's way on Saturday, so I'll start cleaning that up over the weekend and then pop it up to Gary Bowden, business permitting, on Monday.
Had some zinc plating back from the platers, so that will allow me to build up the calipers.

I'm struggling to find a seat for it; trouble is until I can at least get a good base I still can't get going with the frame I've even started looking worldwide on flea-bay, but I'm beginning to thing that these bike were sold without seats 
I have just been and bought another set of guides!!!
I have another hemi head on it's way on Saturday, so I'll start cleaning that up over the weekend and then pop it up to Gary Bowden, business permitting, on Monday.
Had some zinc plating back from the platers, so that will allow me to build up the calipers.
I'm struggling to find a seat for it; trouble is until I can at least get a good base I still can't get going with the frame
Ralph Ferrand
Z1000A1 (1977), Z1300A5 (1983), Z900A4 (1976) GPZ1100 Unitrak (1983)(project), RD250B (1975)(project), ZRX1200R (2005) DT175MX (1981) YZF R6 (1999)
http://www.bikerstoolbox.co.uk
Z1000A1 (1977), Z1300A5 (1983), Z900A4 (1976) GPZ1100 Unitrak (1983)(project), RD250B (1975)(project), ZRX1200R (2005) DT175MX (1981) YZF R6 (1999)
http://www.bikerstoolbox.co.uk
-
Iain marshall
- Area Rep.
- Posts: 1769
- Joined: 16th Sep 2004
-
RALPHARAMA
- Area Rep.
- Posts: 3407
- Joined: 19th May 2007
- Location: Pensford, Somerset
- Contact:
I have e-mailed a Yankie breaker via fleabay, but haven't heard anything yet
This bike just keeps giving:
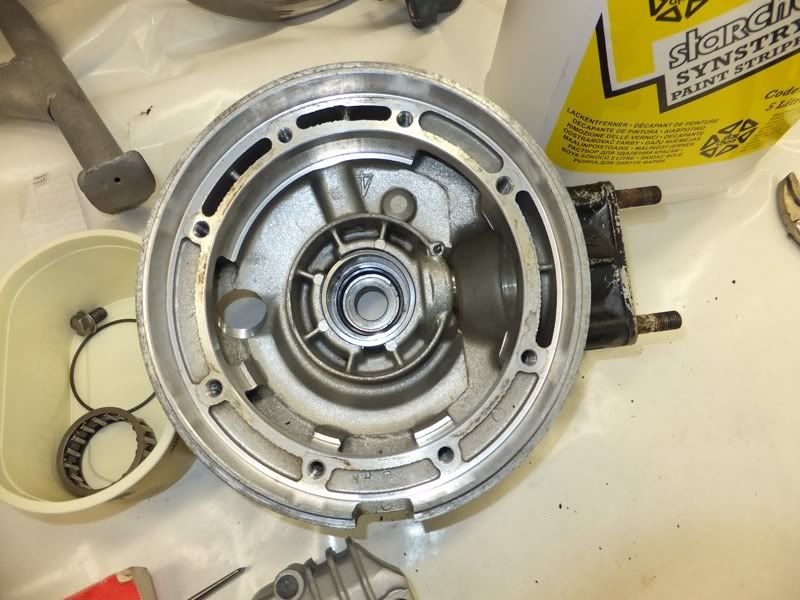
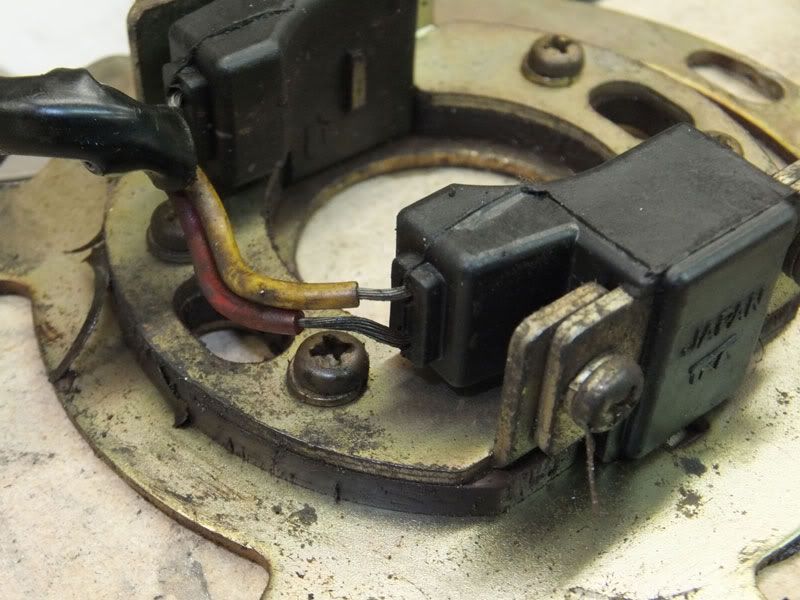
Decided to start stripping the main lump tonight First of were the pistons - I already knew they were shagged. Then the ignition cover:-
Then the pick ups:-
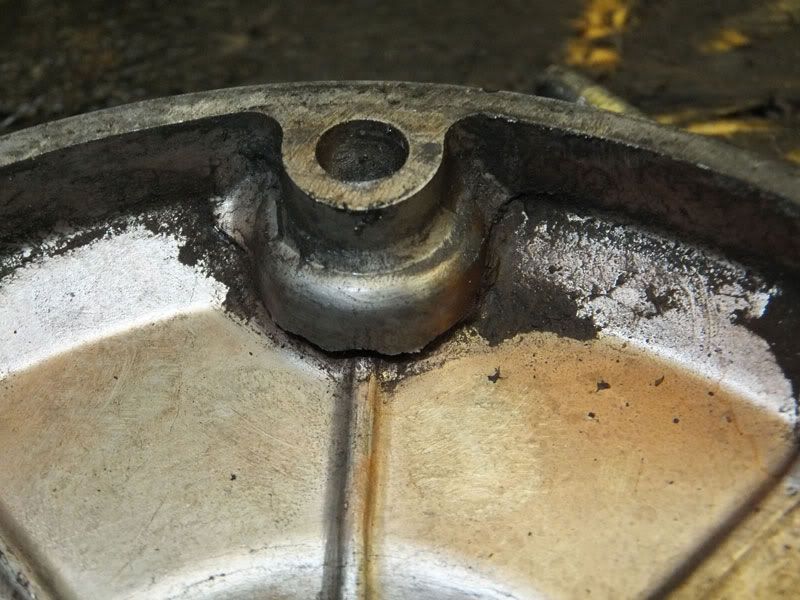
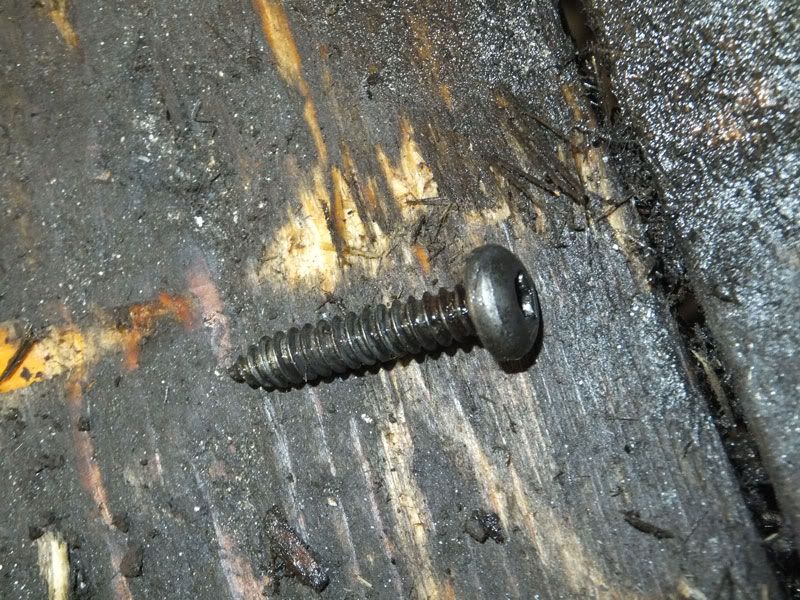
Then off with the alternator cover:-
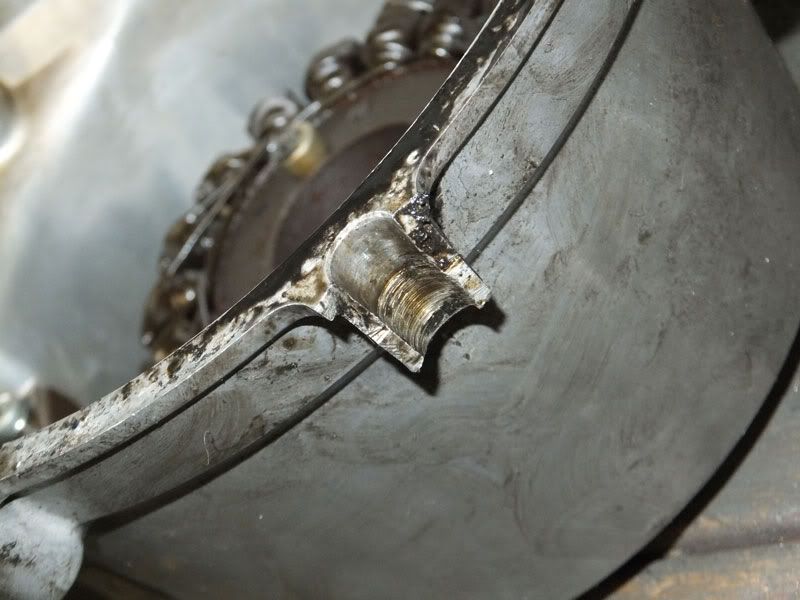
Which was partially held on with this rather than a 6mm cap screw
Which didn't do much for the location dowel:-

I feel a bit cheesed off now; can't think why
This bike just keeps giving:
Decided to start stripping the main lump tonight First of were the pistons - I already knew they were shagged. Then the ignition cover:-
Then the pick ups:-
Then off with the alternator cover:-
Which was partially held on with this rather than a 6mm cap screw
Which didn't do much for the location dowel:-
I feel a bit cheesed off now; can't think why
Ralph Ferrand
Z1000A1 (1977), Z1300A5 (1983), Z900A4 (1976) GPZ1100 Unitrak (1983)(project), RD250B (1975)(project), ZRX1200R (2005) DT175MX (1981) YZF R6 (1999)
http://www.bikerstoolbox.co.uk
Z1000A1 (1977), Z1300A5 (1983), Z900A4 (1976) GPZ1100 Unitrak (1983)(project), RD250B (1975)(project), ZRX1200R (2005) DT175MX (1981) YZF R6 (1999)
http://www.bikerstoolbox.co.uk

Who is online
Users browsing this forum: No registered users and 12 guests