Hello Guest User,

Please feel free to have a look around the forum but be aware that as an unregistered guest you can't see all of it and you can't post.

To access these 'Registered Users Only' areas simply register and login.

Z1100ST Resto +

Work in Progress

Moderators: KeithZ1R, chrisu, paul doran, Taffus

Message
Author
User avatar
RALPHARAMA
Area Rep.
Area Rep.
Posts: 3407
Joined: 19th May 2007
Location: Pensford, Somerset
Contact:

#106 PostAuthor: RALPHARAMA » Tue Mar 06, 2012 10:11 pm

Put the black on the wheels ...

Image

Image

I have since removed the masking, but haven't taken the pix yet..

The next job was to clean up the fork top that I managed to damage trying to get it off. I first blew some sparks at it with the TIG -

Image

I then popped it in the rotary table on the mill. The trickiest bit is clocking it in with the DTI.

Image

Because it's a right nause to get the hex lined up perfectly with the zero degree mark I just cheated and stuck a bit of trimmed insulating tape as an arrow once I had aligned the hex with the perpendicular.

Image

Once that was done it was plain sailing

Image

once the flat were machined I just faced the top off again and gave it a bit of a polish

Image


I have finished the carbs
Image

Image

I finally got my Big Serts from the US and repaired the last of the threads for the cam caps. I was just about to fit the Viton valve stems seals and had a brainwave; what I needed was a special valve stem seal fitting tool. After a few minutes on the lathe I came up with this

Image

Worked a treat :D
Ralph Ferrand
Z1000A1 (1977), Z1300A5 (1983), Z900A4 (1976) GPZ1100 Unitrak (1983)(project), RD250B (1975)(project), ZRX1200R (2005) DT175MX (1981) YZF R6 (1999)
http://www.bikerstoolbox.co.uk

User avatar
GUYZED
Area Rep.
Area Rep.
Posts: 2107
Joined: 9th Aug 2008
Location: READING - BERKSHIRE

#107 PostAuthor: GUYZED » Wed Mar 07, 2012 1:26 am

Looking good there Ralph :up but wouldn't it have been quicker to buy a new fork top :lol:
OLD ZED'S NEVER DIE THEY JUST GO FASTER...
#449
Z1000A2 Z650B1

User avatar
RALPHARAMA
Area Rep.
Area Rep.
Posts: 3407
Joined: 19th May 2007
Location: Pensford, Somerset
Contact:

#108 PostAuthor: RALPHARAMA » Wed Mar 07, 2012 8:50 am

GUYZED wrote:Looking good there Ralph :up but wouldn't it have been quicker to buy a new fork top :lol:


Anyone can buy stuff :D
Ralph Ferrand

Z1000A1 (1977), Z1300A5 (1983), Z900A4 (1976) GPZ1100 Unitrak (1983)(project), RD250B (1975)(project), ZRX1200R (2005) DT175MX (1981) YZF R6 (1999)

http://www.bikerstoolbox.co.uk

User avatar
RALPHARAMA
Area Rep.
Area Rep.
Posts: 3407
Joined: 19th May 2007
Location: Pensford, Somerset
Contact:

#109 PostAuthor: RALPHARAMA » Wed Mar 07, 2012 10:12 am

At the weekend I decided to play with my new chemistry set :shock:

At minor injury to my personal wealth I invested in a Zinc Plating kit from Gateros plating. I was aware before I started that it wasn't going to be worth it from financial saving, but I do love a new toy and I get a real kick out of doing stuff most people can't.

I have to say that when I started reading the ingredients of some of the bottles and bags I was quite shocked. Now I'm no chemist, and I am not well known for my rigid adherence to matters health and safety, but even I know that some of these chemicals are properly nasty. Oddly the passivates seems to contain the worst 'nasties' Nitric Acid, Sulphuric Acid, Chromium Trioxide and Hydrofluoric Acid. I had heard of most of these, but Hydrofluoric is a mega poisonous one. I remember someone on a sailing forum suggesting it's use for something or other and a chap with some proper knowledge of chemistry was horrified explaining to us that it was mamouthly poisonous and should only be handled by people who really understand the dangers. I decided to do the passivating bit outside :lol: In the data sheet it actually says"Absorption through the skin may be fatal" :shock:

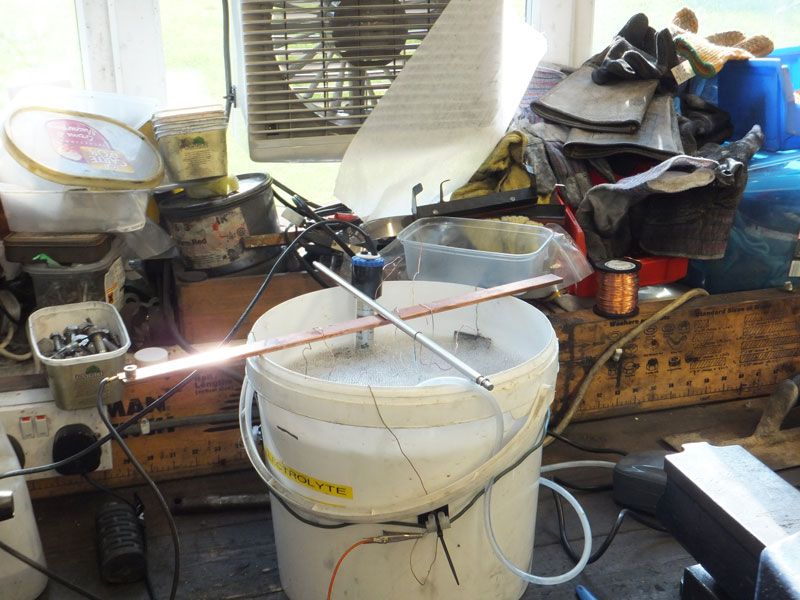
Even though I bought the deluxe kit, it still was missing a few bit eg Caustic Soda and distilled water for the electrolyte; but neither were expensive and were readily available. I used a slightly larger bucket for the electrolyte because I had to make room for the tank heater and the bubbler. I used one of the buckets that the glass beads come in from Machine Mart. I used my big rooster power supply that my friend gave me. The kit comes with some resistance wire from which your supposed the make a primitive current controller using a car battery or battery charger as a DC power source. I did buy a posh , very controllable DC power supply on flea-bay but it hasn't arrived after a few weeks, so I guess I'll be trying to get my money back on that one :( 
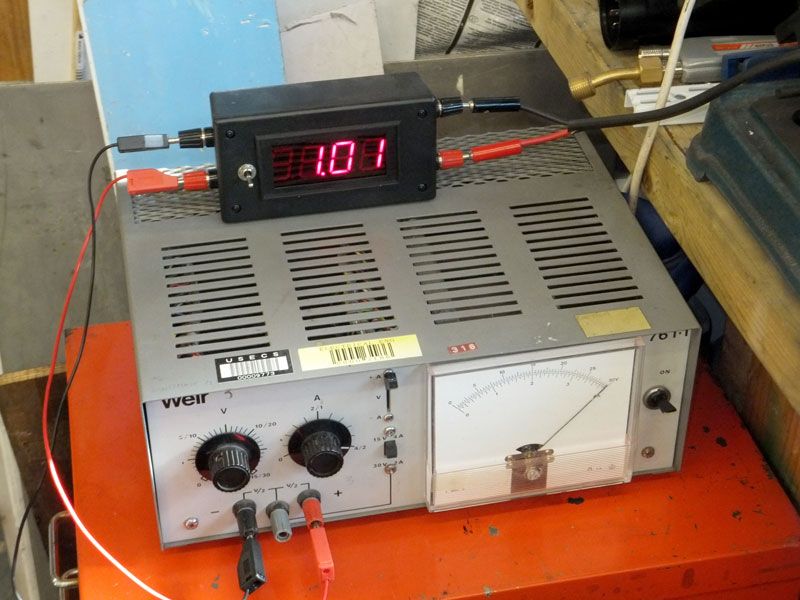
Here's the set up, using my multi meter to monitor the voltage; there is an ammeter built into the power supply.

Image

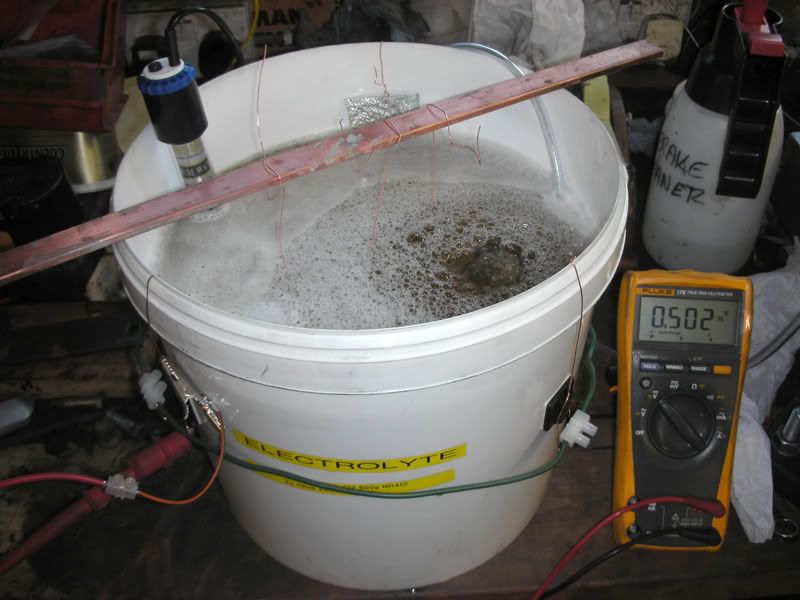
The kit takes up a fair bit of space, but is quite fun to use (no comments about me needing to get out more, thanks :D )

You can't do many bits at a time, and given the time it takes, it's not cost effective, but there are three main advantages a) you can lose your own bits in your own workshop, you don't have to pay others to lose them in theirs D: b) If you need something in a hurry you can do it when you want it with no waiting nor driving c) when some one is admiring your bike, it's another bit you can claim you did yourself :D

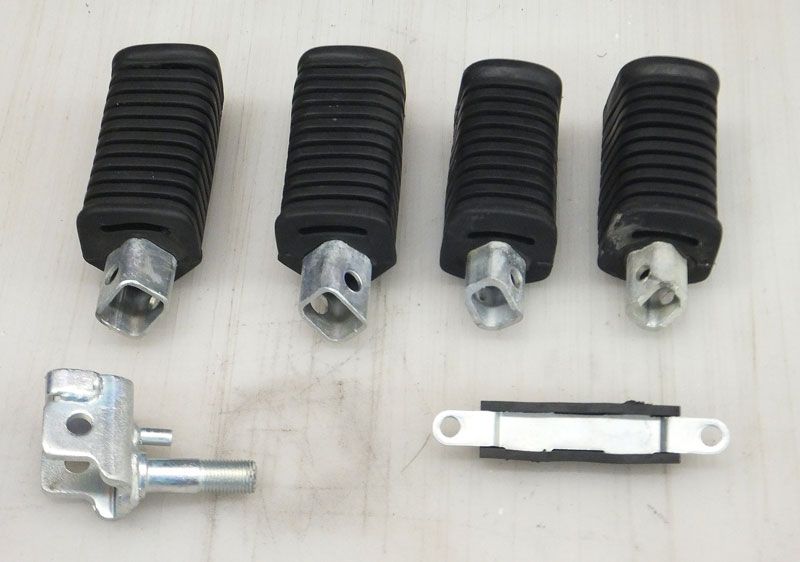
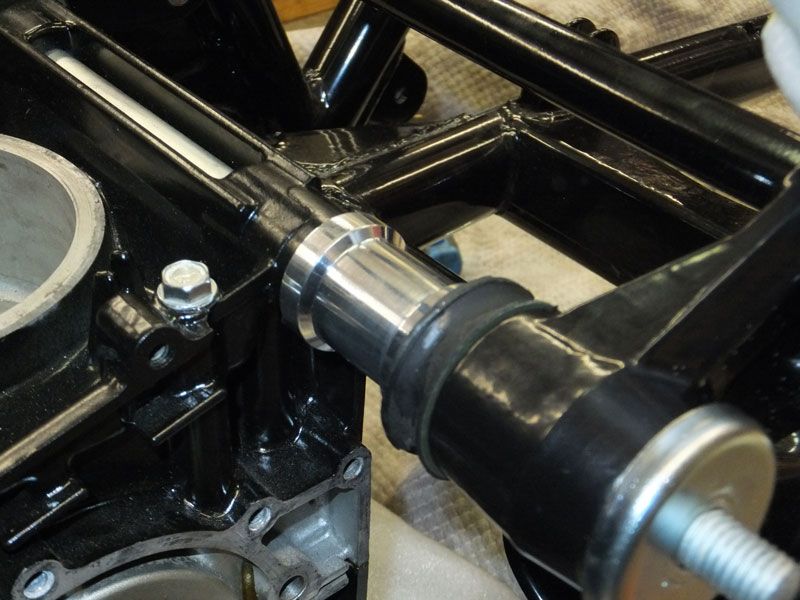
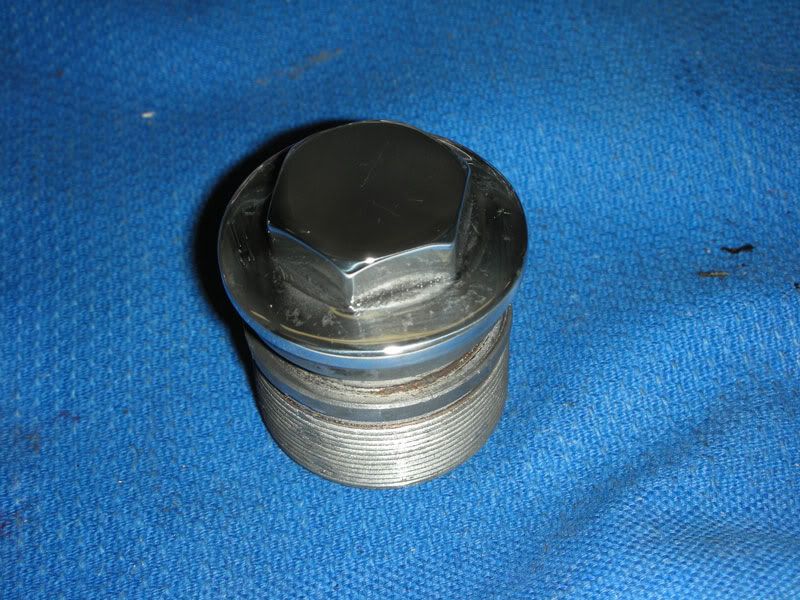
Here's a shiny bright clear/blue passivated bit, without passivating it's a more yellow silver.

Image

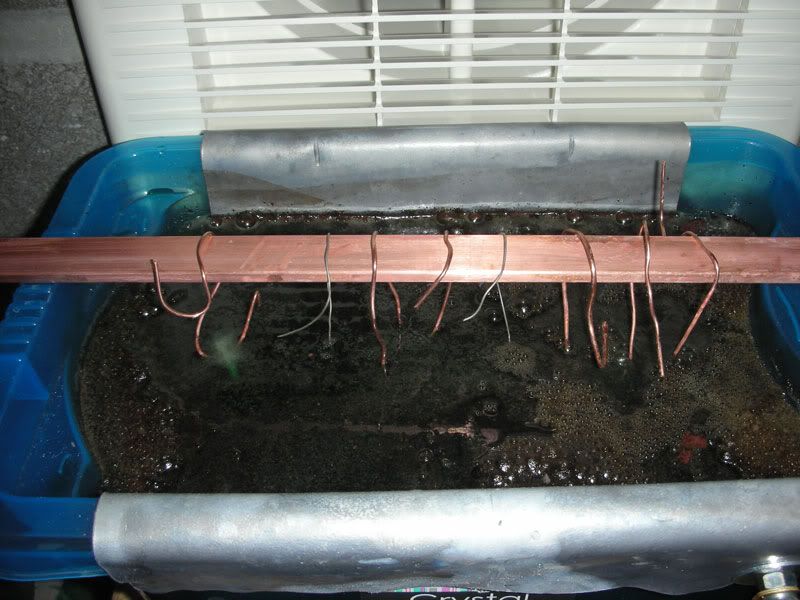
Here's a couple of bits I dipped in the olive drab passivate. At first they looked really crap, but then darkened down leaving a pleasing finish

Image


I have found the fumes coming for my mini striping bath are too much for my asthmatic lungs to deal with so I have installed a fan in my workshop wall.

Image

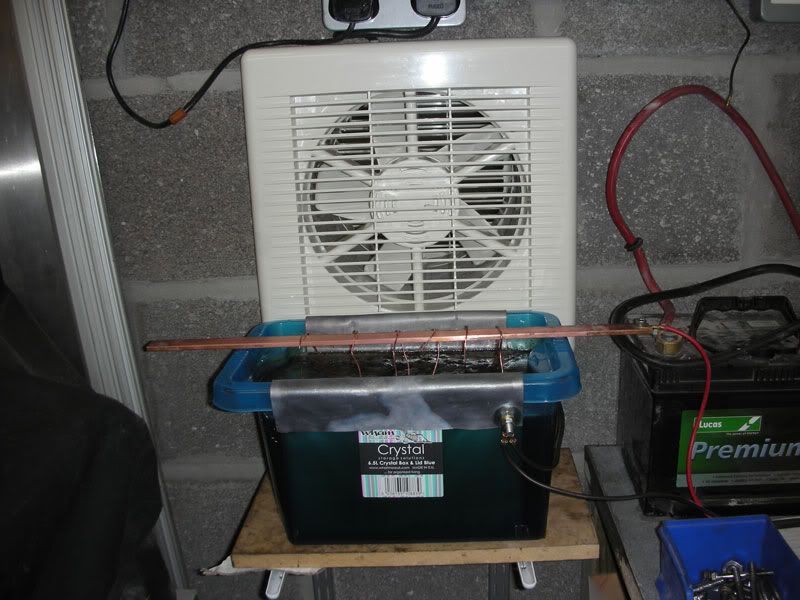
Now I can strip with impunity :lol:

Image

I've also got one for the welding bench window, should be picking up the new pane of glass with the 'ole in it today :D


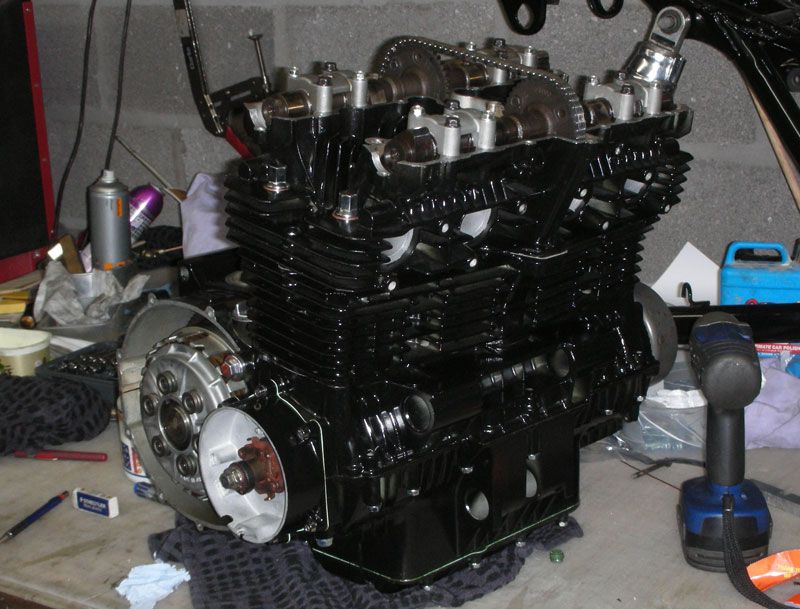
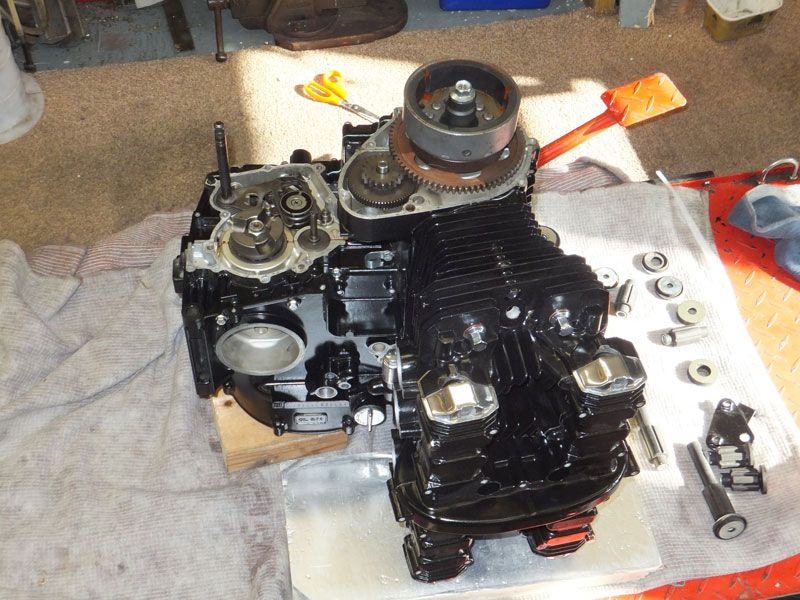
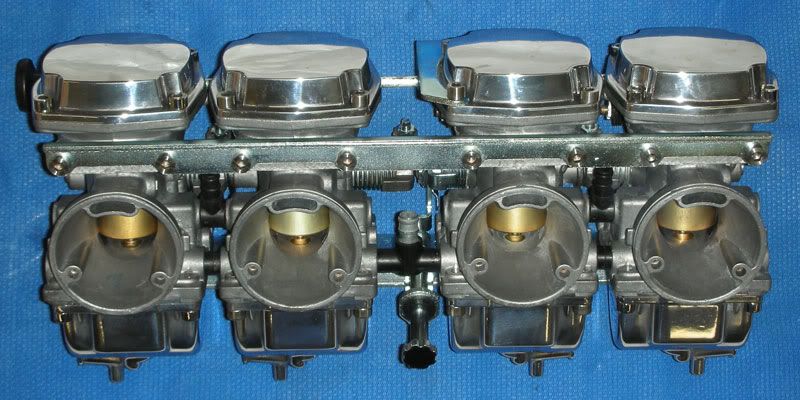
The head on this bike has been a bloody nightmare, as those of you following the whole thread will have noted, but the latest issue was an interesting one and should be noted by all playing with these heads.

Image

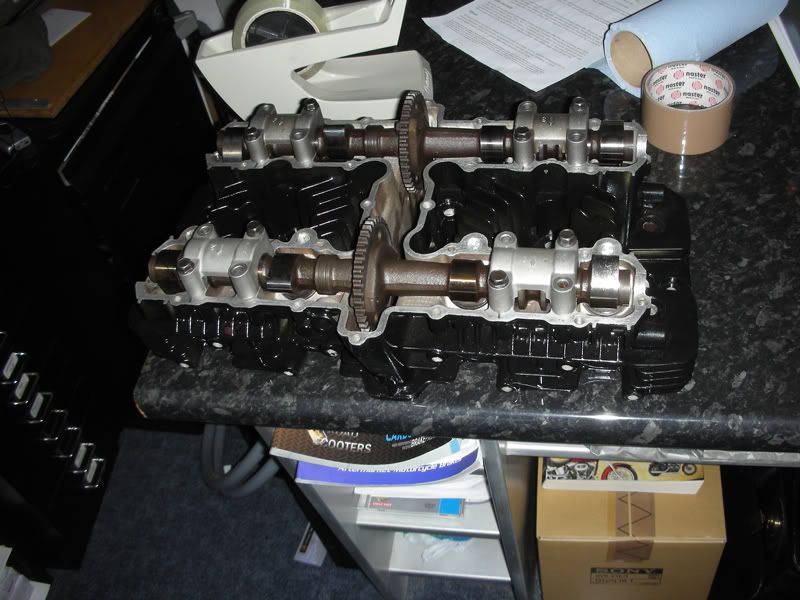
The observant amongst you will notice that only half the cam cap bolts are installed. That it is because all the bolts I have had with this bike are 45mm. These are OK for the bolts with the dowels, but are too long for the other holes. I picked this up having had soooo much grief from these components. I noticed that in the parts book they should be 43mm. The plain portion of the 45mm bolts goes further than the cap itself. This might explain why the threads had all been chewed up and badly helicoiled, by some muppet who just increased the pressure when they wouldn't do up! The correct bolts are available by special order and the part number is 92002-1881 . They're not especially cheap, and despite having a pretty impressive bolt collection I couldn't find any. Yes, I could have cut the threads a bit further and nipped 2mm off the end, but they are rolled threads and I don't want to compromise the safety of the engine for the sake of a few quid :evil:

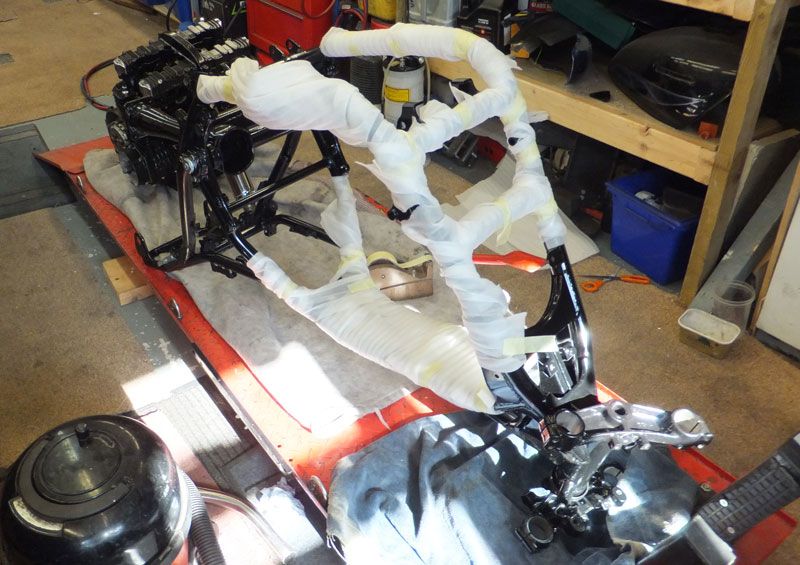
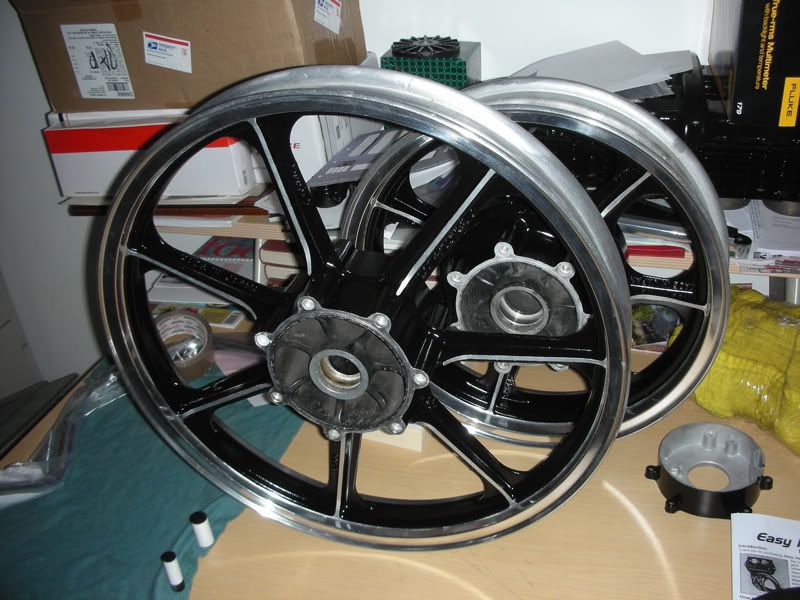
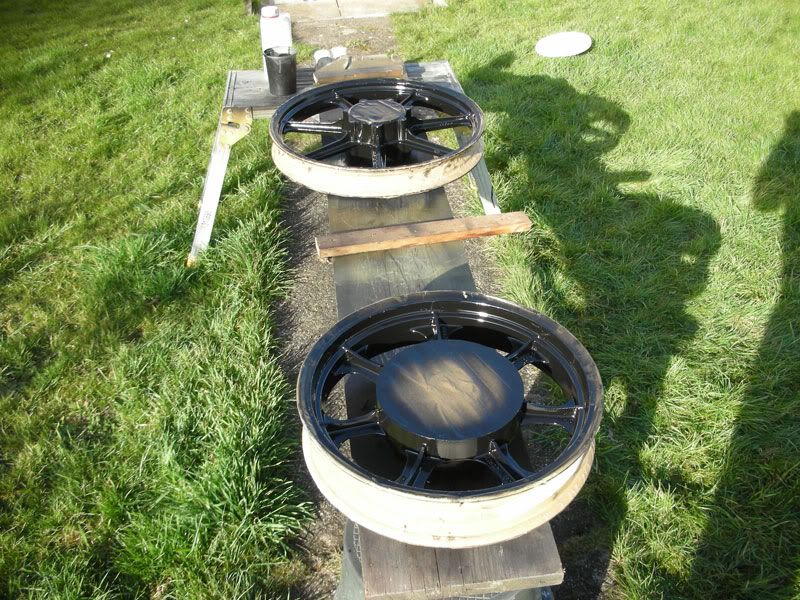
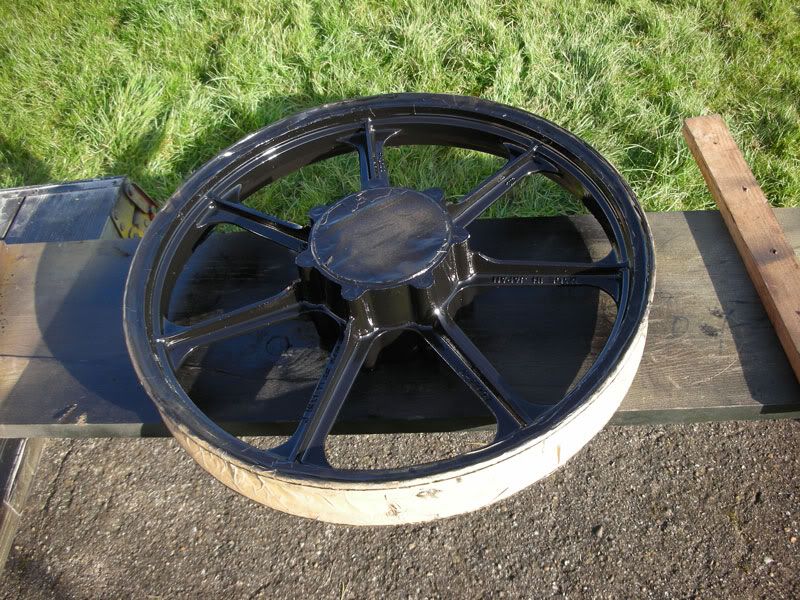
I dropped a bollock with my wheels - I masked up the centres, for some reason not thinking that they could be seen :oops: :oops: :evil: :evil: Not sure what I'm going to do about that one yet.

Image
Ralph Ferrand

Z1000A1 (1977), Z1300A5 (1983), Z900A4 (1976) GPZ1100 Unitrak (1983)(project), RD250B (1975)(project), ZRX1200R (2005) DT175MX (1981) YZF R6 (1999)

http://www.bikerstoolbox.co.uk

User avatar
Richard L
100Club
100Club
Posts: 177
Joined: 19th Jan 2012
Location: Heidelberg, Germany

#110 PostAuthor: Richard L » Wed Mar 07, 2012 12:08 pm

Unbelievable patience you have there !
This bike has had almost every problem in existence.I liked the fork top repair , just shows what is possible with the correct tools and skills. My wife was looking over my shoulder as I read it and it led me to try and explain what is so interesting about other peoples rebuilds.
Anyway I painted my B2 wheels with a brush to save masking ( it certainly did not save time ) but the results were ok. I too forgot the centres were visible but I had the advantage that the red was in a better state than the black on yours and with them fitted most people cannot see the difference.
Keep up the good work
Richard

User avatar
andyb1962
Hardcore
Hardcore
Posts: 1777
Joined: 23rd Sep 2011
Location: Sheffield/Rotherham South yorks

#111 PostAuthor: andyb1962 » Wed Mar 07, 2012 12:18 pm

Word of warning on the HF (hydroflouric acid) it is exceptionally dangerous
we use it at work to clean/ attack high nickel grades of stainless steel. it is the only acid that will do this.
I can only advice you 'max out' on PPE and ensure you have some anti dote cream on hand in case of a splash.
best way is stick to safer acids . :shock: :shock: :shock:
Andy :wink:


"The greatest trick the devil ever pulled was convincing the world he didnt exist"

User avatar
Mark Stratton
Custard Cream
Custard Cream
Posts: 574
Joined: 16th Feb 2009
Location: Southampton

#112 PostAuthor: Mark Stratton » Thu Mar 08, 2012 8:56 am

This one seems to be fighting you all the way. Fantastic work.

If you require a power supply I have a couple of 240v to 24 volt dc 10amp units kicking around that I have removed from old lift controllers. Your welcome to have one of these if you want one, just pm me your address and I'll put one in the post.

User avatar
RALPHARAMA
Area Rep.
Area Rep.
Posts: 3407
Joined: 19th May 2007
Location: Pensford, Somerset
Contact:

#113 PostAuthor: RALPHARAMA » Tue Aug 14, 2012 7:48 am

I've been involved with too many bikes that aren't mine and this project has been gathering dust. For reasons not connected with the project, I actually got round to putting the top end on recently which has re-ignited my passion for this bike. I have designed and made a few prototypes for a tool for holding the centre pistons firmly at TDC, which makes dropping the barrels on easy. I have also discovered a great set of ring clamps that also help. I am at present getting quotations for CNC machining to make the tools on a production basis to sell on my new website. More about that later :D

Got the head and barrels on and started to 'do' the shims only to find that the engineers had taken too much off one of the valve stems, so even a 3.15 shims was a sloppy as pigmy in a 70 year old ho :evil: I ordered another valve and whipped the head of last night. I had resigned myself to having to buy another 'costalot' Cometic head gasket from Mr Debben, but as luck would have it the Wellseal I had buttered it with saved the day. It also gave me the opportunity to repair the 6mm threads either end of the barrel block that I only discovered were shagged when I had the head on :evil:

I didn't want to risk trying to remove the viton stem seal, so I carefully lapped the valve in with the seal in place with plenty of lube in the guide. For the first time ever I used a set of head stands I had bought for the new web site. They were ace and I will never do head work without again. They're not expensive, so I can't imagine why I have never bought a set before :shock:

I randomly grabbed a thin looking shim out of my shim box and as luck would have it 2.35 was exactly the right size. :D For the first time on the is resto, nothing went wrong last night. Well apart from not being able to find the RTV tube that is!

Image
Ralph Ferrand

Z1000A1 (1977), Z1300A5 (1983), Z900A4 (1976) GPZ1100 Unitrak (1983)(project), RD250B (1975)(project), ZRX1200R (2005) DT175MX (1981) YZF R6 (1999)

http://www.bikerstoolbox.co.uk

User avatar
steve bowdler
Area Rep.
Area Rep.
Posts: 1793
Joined: 20th Apr 2005
Location: swansea s.wales

#114 PostAuthor: steve bowdler » Tue Aug 14, 2012 8:55 am

Looking good Ralph, and on target for 2021 rally ,,40 years of z1100 :D

User avatar
Z1parR
Hardcore
Hardcore
Posts: 4901
Joined: 11th Oct 2009
Location: Chorley Lancs

#115 PostAuthor: Z1parR » Tue Aug 14, 2012 5:11 pm

Patience is a virtue Ralph :clap
0172 . Geoff Parr

Padders
Hardcore
Hardcore
Posts: 4875
Joined: 15th Jan 2006
Location: Grimsby Lincolnshire

#116 PostAuthor: Padders » Tue Aug 14, 2012 5:34 pm

Excellent work Ralph

User avatar
GUYZED
Area Rep.
Area Rep.
Posts: 2107
Joined: 9th Aug 2008
Location: READING - BERKSHIRE

#117 PostAuthor: GUYZED » Tue Aug 14, 2012 8:51 pm

Coming along there Ralph...keep us up to date with it's progress.
OLD ZED'S NEVER DIE THEY JUST GO FASTER...

#449

Z1000A2 Z650B1

kiwi kdx
Regular Poster
Posts: 59
Joined: 31st May 2012

#118 PostAuthor: kiwi kdx » Fri Aug 31, 2012 12:13 am

love the work your putting into this, well done mate!

User avatar
paul doran
Area Rep.
Area Rep.
Posts: 15910
Joined: 24th Sep 2004
Location: near Dublin Ireland

#119 PostAuthor: paul doran » Thu Sep 06, 2012 3:55 pm

looking good Ralph
keep at it
I have one or two here You could restore for Me
no time anymore too much work on :( :( :(
way too many Zeds

User avatar
RALPHARAMA
Area Rep.
Area Rep.
Posts: 3407
Joined: 19th May 2007
Location: Pensford, Somerset
Contact:

#120 PostAuthor: RALPHARAMA » Mon Oct 15, 2012 7:21 pm

I have the same time issues Paul!

Anyway I have finally got rid of that poxy Hardly Goesalong chop from my project bench so the old shafter is back again!

Sunday was MY day so I started by protecting the frame with Jiffy wrap -

Image

Then I remembered that I had forgotten to plate the engine mounts so I dragged out the chemistry set

Image

Image

Image


Here's some of the bits after I finished. To be fair the quality of the plating isn't as good as the pro place I use, but it's much quicker and there's no risk of any precious parts getting lost!

Image

CB and myself lumped the motor onto it's side in position.

Image

We then carefully lifted the frame over the lump.

Image

Then I discovered that the rear engine mount spacer had vanished; I have a feeling it went for powder coating :evil: GRR

I packed everything into place and then measured the remaining hole and got busy with a bit o ally and the old lathe.

Image

Here it is in situ

Image

... then I remembered that I had to drill out the lower front engine mounting bolt :evil: :evil: I'll have to order a bit o 10mm stainless and get busy with the TIG and a 10mm die! I also need two more of the flanged washers that go over the rubber mounts. But at last the project back on :D Perhaps I'll be able to ride to next years Ace :lol:
Ralph Ferrand

Z1000A1 (1977), Z1300A5 (1983), Z900A4 (1976) GPZ1100 Unitrak (1983)(project), RD250B (1975)(project), ZRX1200R (2005) DT175MX (1981) YZF R6 (1999)

http://www.bikerstoolbox.co.uk


Return to “Projects”

Who is online

Users browsing this forum: No registered users and 8 guests