Hello Guest User,
Please feel free to have a look around the forum but be aware that as an unregistered guest you can't see all of it and you can't post.
To access these 'Registered Users Only' areas simply register and login.
Please feel free to have a look around the forum but be aware that as an unregistered guest you can't see all of it and you can't post.
To access these 'Registered Users Only' areas simply register and login.
new member with Z900 project
Moderators: KeithZ1R, chrisu, paul doran, Taffus

-
Ginger Bear

- Hardcore

- Posts: 6850
- Joined: 16th Dec 2008
- Location: In the Dark.
- Contact:

LondonZ1 wrote:Jason
Where were you when I needed you? That looks like a good solution but it's too late for my project. I really wanted white dial faces so I'm not unhappy with my solution. I also wanted a very simple modern style. In a perfect world motogadget would do a simple tacho or Stack would do a simple speedo.
Maybe for the next project.....
Yeah sorry a bit a slow on that one only discovered them the day before. They sell some interesting bits like hydraulic rear drum to fit wider wheel.
This thread is great im liking those LED indicators that is neat


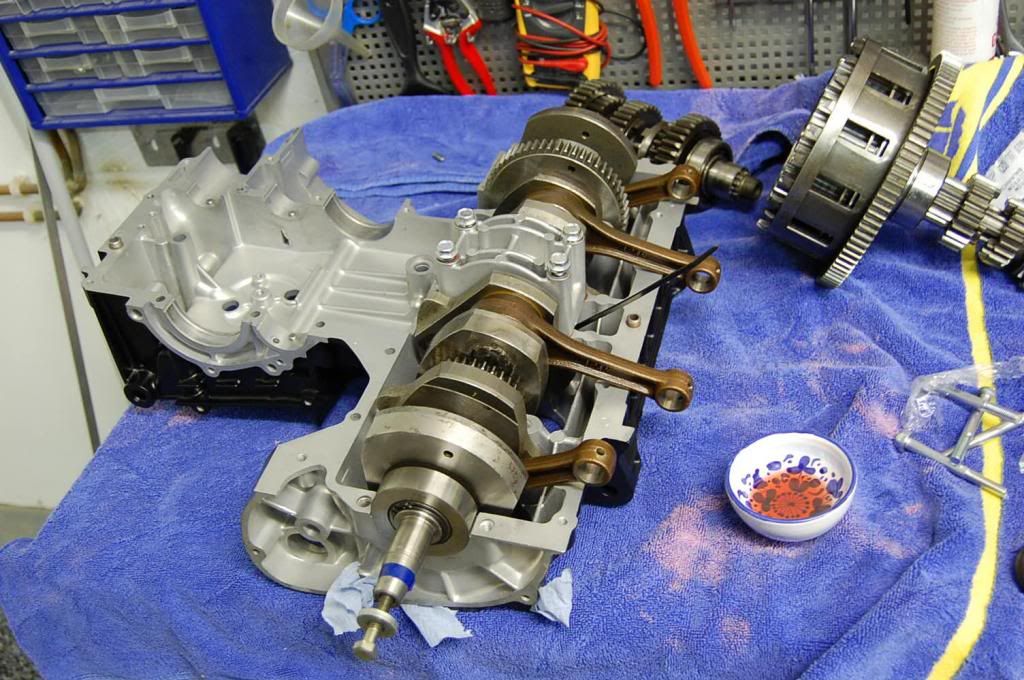
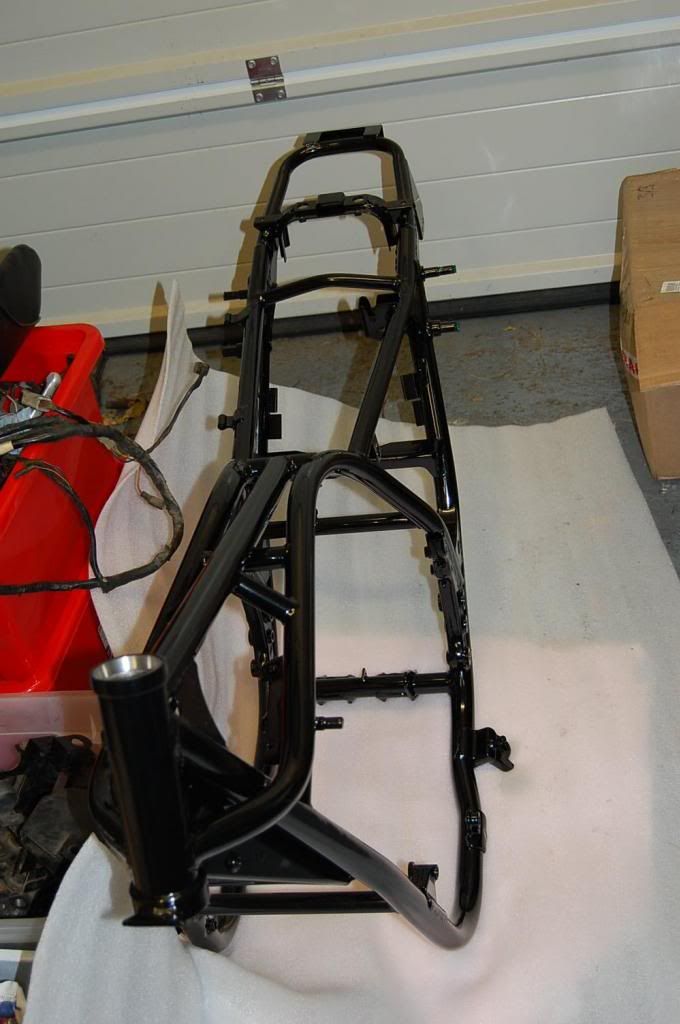
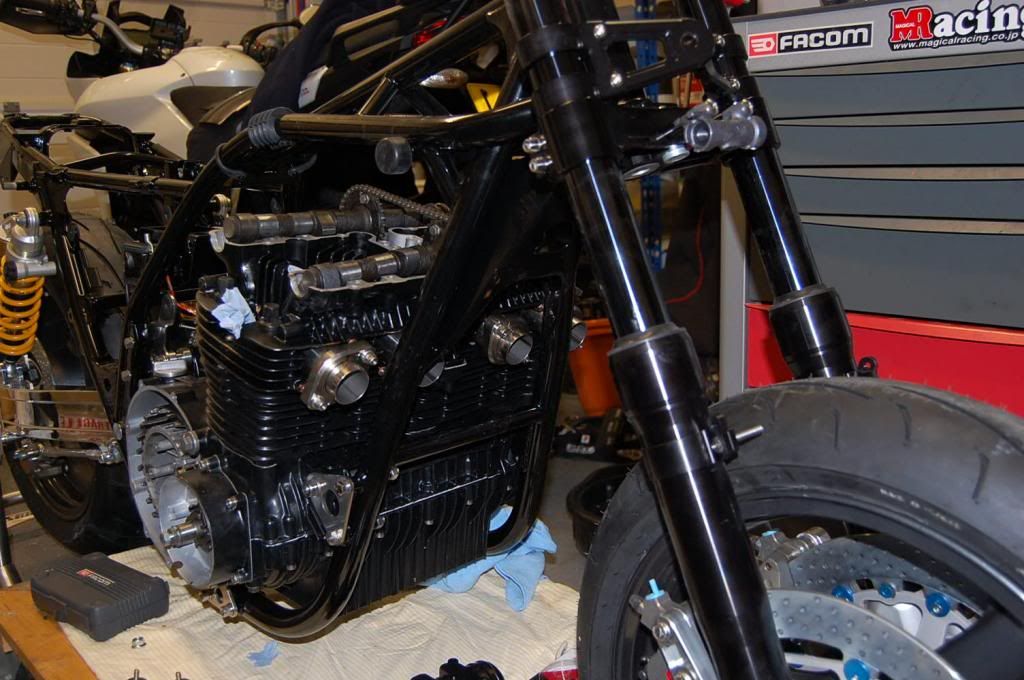
Collected the frame from Harris on Thursday. They got a local firm to powder coat it and the finish is really good, very deep and glossy. I've started building the engine and have finished the bottom end. Well, almost, I have lost the oil pump dowels so that will have to go in later.
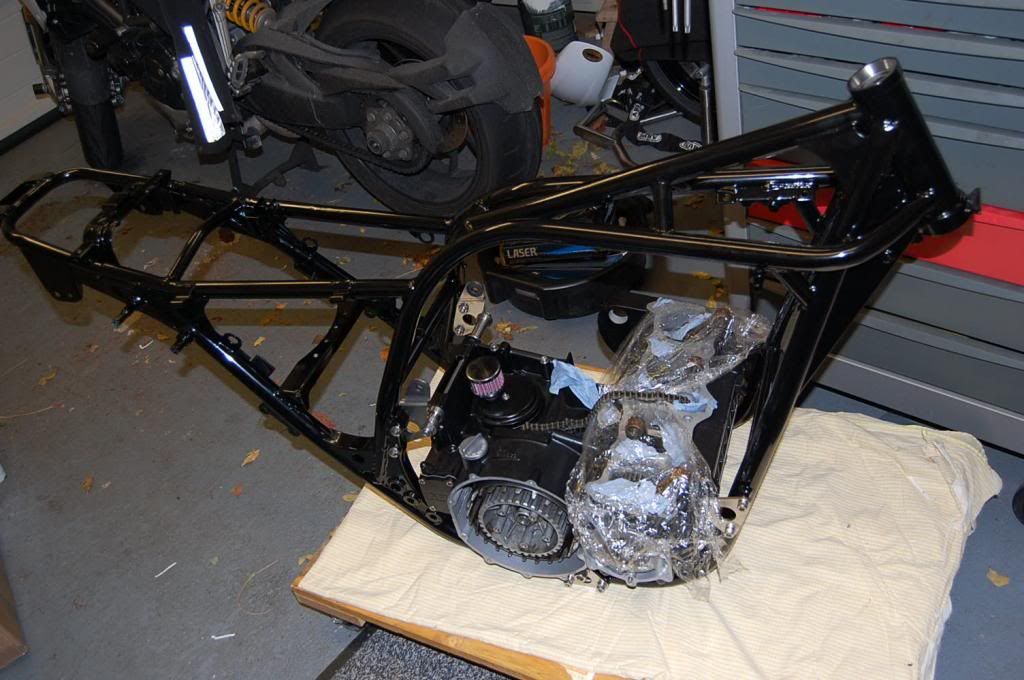
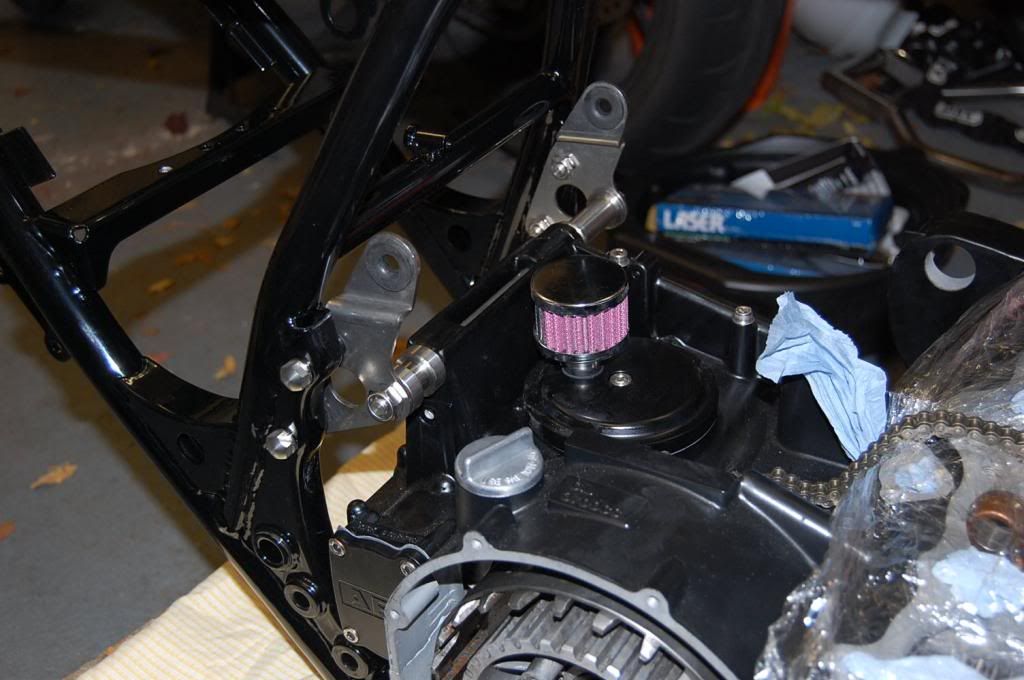
I managed to get it in the frame without damaging either. The engine is now properly in the frame with PMC stainless fasteners and mounts. I imported an APE low profile breather cover from the US. It had a weird thread for the breather filer but I managed to find a stainless threaded tube intended for a jet wash which fitted perfectly. It all looks a bit dirty but its just grease and fingerprints.
Next job is to finish the engine, get the forks and swingarm fitted so I can get it up on its wheels.
-
Ginger Bear
- Hardcore
- Posts: 6850
- Joined: 16th Dec 2008
- Location: In the Dark.
- Contact:
Can't wait to see this come together, but I thought I should share my experience of a low profile breather with a K&N sat on top............

Amoco Cadiz springs to mind!
It was fine for 'gentle' use, but once you'd given it 'the beans' oil would blow back through the filter. Engine was freshly built 1105cc.
Raising the filter with a length of hose solved the problem for me.
Amoco Cadiz springs to mind!
It was fine for 'gentle' use, but once you'd given it 'the beans' oil would blow back through the filter. Engine was freshly built 1105cc.
Raising the filter with a length of hose solved the problem for me.

# 104
Phil Churchett Award Winner 2011 & 2016
Buzzworkz Best Modified Zed 2016

neilbarrett wrote:im building a bit of a modified 900 and what seems to crop up is some parts you fit never seem to be right as your always coparing them to the original look,some one once said a modified 900 should have the standard bodywork clocks and headlight which iagree with,but mine dosnt but i seem to be drifting that way,yours has the roots of being a very nice bike to me, kawasaki hit the nail on the head when they designed the 900 and its a look that carnt seem to be beeton
looking nice also, some more pics to show us?
and... the Sanctuary Jap style is great!
 checking every day for updates...

Ginger Bear wrote:Can't wait to see this come together, but I thought I should share my experience of a low profile breather with a K&N sat on top............
Amoco Cadiz springs to mind!
It was fine for 'gentle' use, but once you'd given it 'the beans' oil would blow back through the filter. Engine was freshly built 1105cc.
Raising the filter with a length of hose solved the problem for me.
I've never had that problem with my Z1000 Steve...mine being a 1105cc motor aswell.
OLD ZED'S NEVER DIE THEY JUST GO FASTER...
#449
Z1000A2 Z650B1
#449
Z1000A2 Z650B1
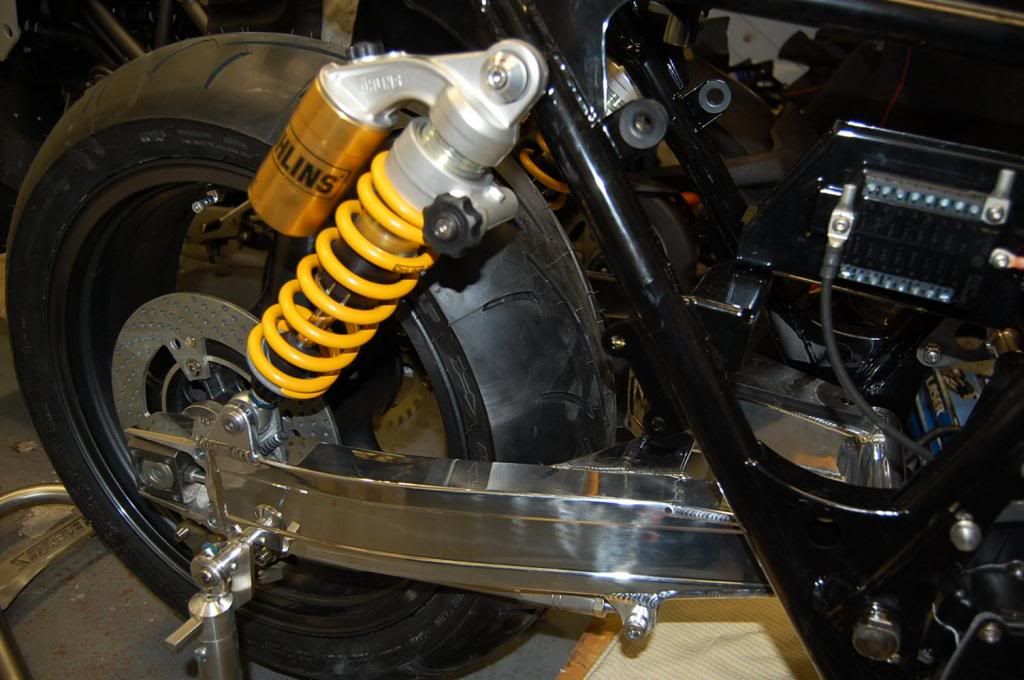
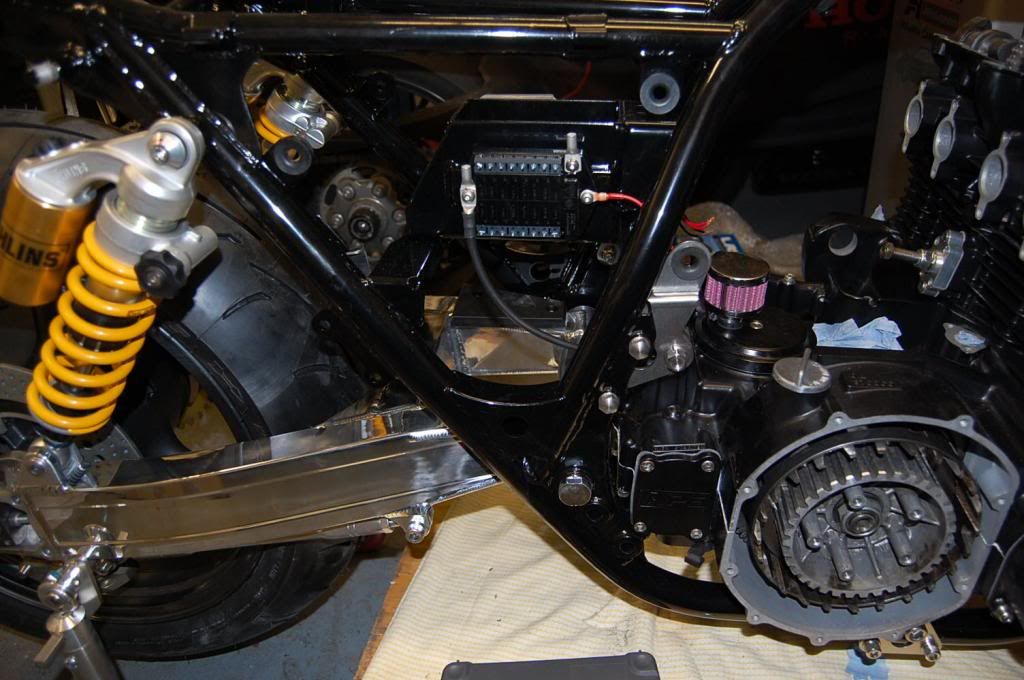
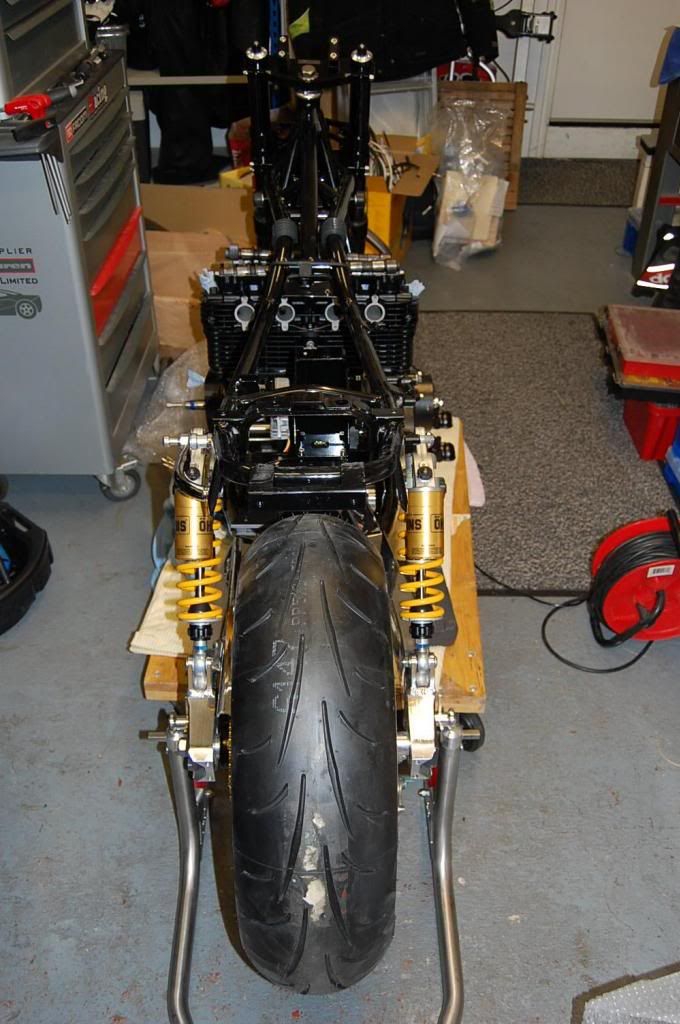
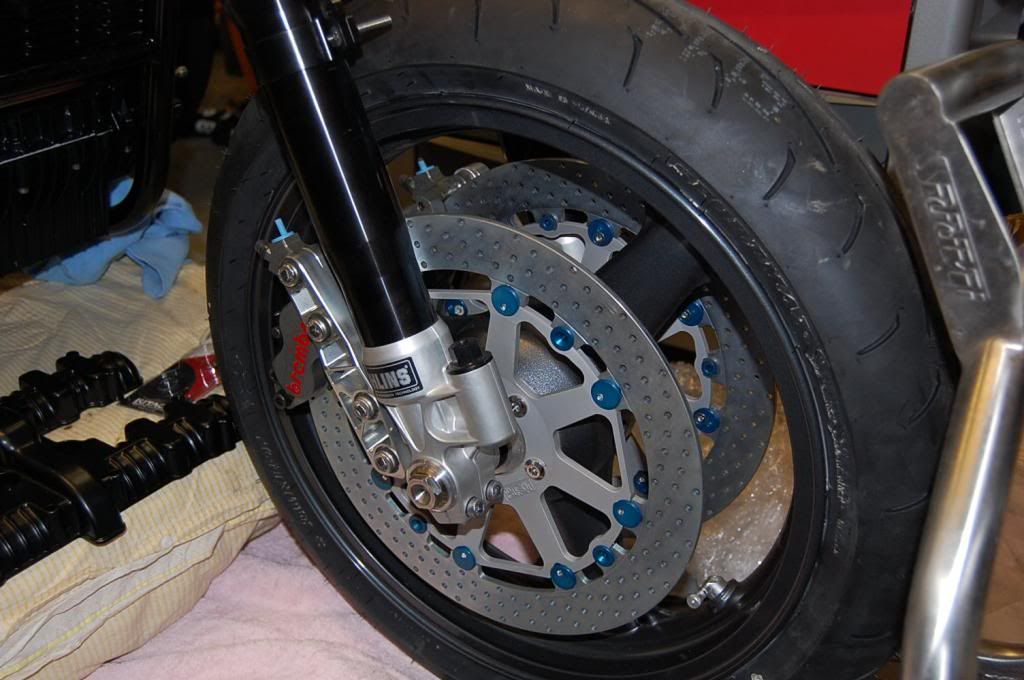
This is starting to look like a bike. Sorry about the quality of the pics, it's a small garage. The engine is 75% built. Still have to do the cam timing, ignition, clutch plates and generator. I have got the swingarm installed complete with shocks and rear brake. The forks are also in as are the front brakes. No major disasters so far but one minor problems. The new copper washers I had bought for the engine studs were too small. As the gasket sealant was going to go off, I found some stainless washers and used those instead. I hope that using stainless rather than copper won't be a problem.
Everything seems to fit OK and the front disc/caliper alignment is perfect. The great benefit of using Harris is that all the really tricky things, like the rear shock/swingarm/footpegs have been professionally sorted.
The engine took longer to assemble than I expected, and I am already feeling nervous about what happens when I press the starter for the first time. If the weather improves, I'll put the tank on and wheel it out for some proper photos.

-
Ginger Bear
- Hardcore
- Posts: 6850
- Joined: 16th Dec 2008
- Location: In the Dark.
- Contact:
You only need copper on the four outer studs as the others don't carry any oil. You should be fine to change 'em before you start the thing up.
These are very close to original spec;
http://www.z-fever.de/ShopNeu/shop/show ... mvp7o9aif4
Don't be tempted by a lot of the stuff you see on ebay, the o.d. will be too small + some will be just copper plated.
These are very close to original spec;
http://www.z-fever.de/ShopNeu/shop/show ... mvp7o9aif4
Don't be tempted by a lot of the stuff you see on ebay, the o.d. will be too small + some will be just copper plated.
# 104
Phil Churchett Award Winner 2011 & 2016
Buzzworkz Best Modified Zed 2016
-
Flying Tiger

- Ted's Biatch
- Posts: 238
- Joined: 11th Jun 2011
- Location: Bury St Edmunds
Oh my 
Flying Tiger Paintwork - www.facebook.com/FlyingTigerPaintwork - flyingtigerpaintwork@hotmail.co.uk - 07796693751
Thanks for the link GB. I'll buy some proper copper washers and replace the outer four. I guess it should be OK just to remove the the nuts, change the washers and re-torque. Your observation is spot on, I bought them on ebay and the inner diameter is too small. I have fitted sanctuary high tensile studs and nuts but the thread diameter must be the same as std studs. Not impressed.
The other problem I forgot to mention is that the exhaust studs are too short. I measured it all very carefully but forgot to allow for the copper crush gasket. I now need new longer studs but at least they aren't too expensive. I hope to finish the engine tomorrow and then I can start on the electrics. I've designed a one-off wiring loom and I've got all the bits but it will take time.
Next job will be to sell/get rid of a large pile of Z900 parts. All that's left of the donor bike is the frame, tank, tail piece and some of the engine. The rest will have to go.
Who is online
Users browsing this forum: No registered users and 7 guests